I Migrated My Vision Pipeline to Keras Hub: Here Is What I Learned
I swapped my legacy CV code for Keras Hub. Here is what happened.
I Migrated My Vision Pipeline to Keras Hub: Here Is What I Learned
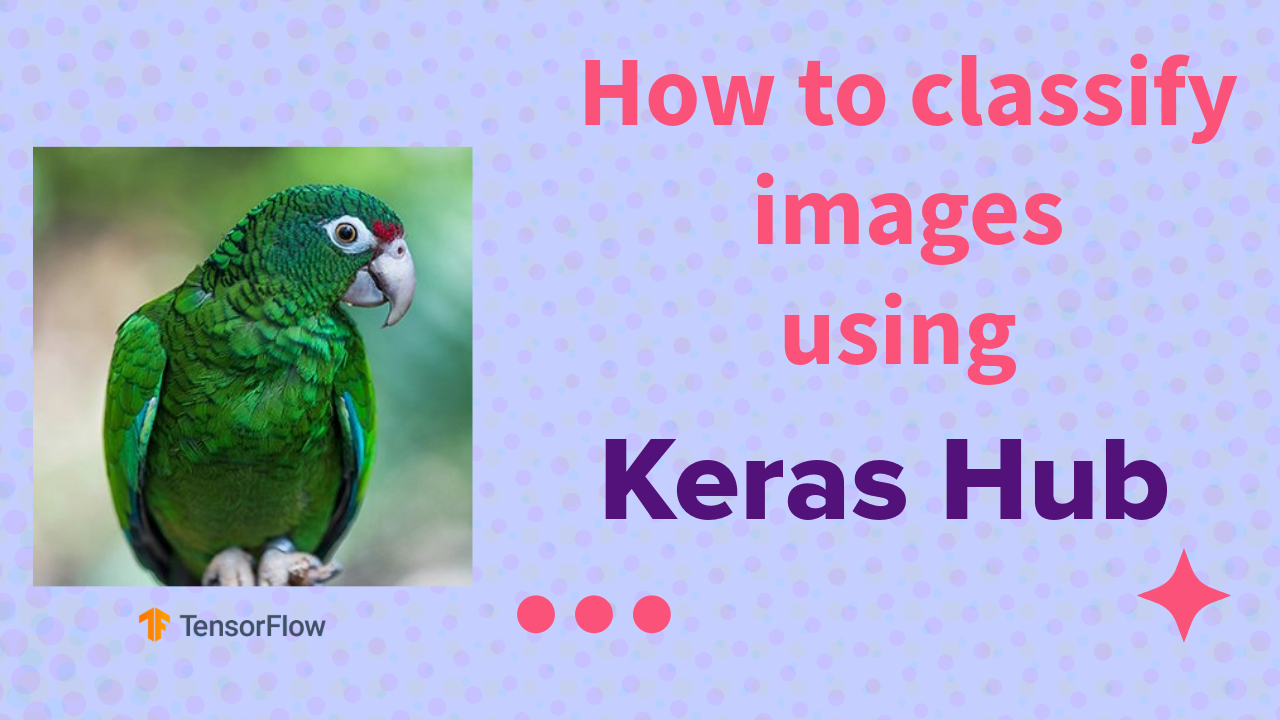
I swapped my legacy CV code for Keras Hub. Here is what happened.
Maintaining old computer vision pipelines often feels like fighting an uphill battle against deprecated libraries and bloated boilerplate. This week, I decided to migrate a standard image classification project over to the new Keras Hub ecosystem. This Keras Hub image classification tutorial isn’t just about showing you new code; it’s about a fundamental shift in how we approach machine learning in 2026.
Instead of manual tensor manipulation, we are moving toward a “preset-first” workflow. By the end of this story, you’ll see how I replaced dozens of lines of redundant configuration with a single, high-performance API call. It’s a cleaner, more readable, and significantly faster way to bring artificial intelligence into your Python projects.
We will walk through a complete architectural setup, from configuring a specialized Linux-on-Windows environment to generating a final, human-readable prediction. If you’ve ever felt overwhelmed by the sheer volume of setup required for deep learning, this streamlined process is exactly what you’ve been looking for.
Why a Keras Hub image classification tutorial is your secret weapon in 2026
The landscape of machine learning has shifted toward modularity and ease of access. The primary target for this Keras Hub image classification tutorial includes software engineers and AI enthusiasts who need to integrate visual recognition into their applications without getting bogged down in low-level tensor manipulation. It addresses the common pain point of model deployment by offering a standardized interface that works across different backends, ensuring that your code remains portable and future-proof.
At a high level, Keras Hub represents a centralized repository of pre-trained intelligence. Instead of downloading weight files manually and mapping them to class indexes, the system handles the heavy lifting through a unified API. This Keras Hub image classification tutorial focuses on “presets” — verified, ready-to-use configurations of famous architectures like ResNet. These presets include everything from the neural network structure to the specific preprocessing logic required for the ImageNet dataset, ensuring that the input data matches what the model expects.
Beyond just running a prediction, the goal is to create a bridge between raw data and human-readable insights. By utilizing a Keras Hub image classification tutorial, you learn to transform a digital array of pixels into a categorical label with high confidence. This process involves sophisticated decoding utilities that translate model output into common English terms, allowing you to build applications that can “see” and “describe” the world around them with minimal overhead and maximum accuracy

Walking through the Keras Hub image classification workflow
The primary goal of the code we are about to explore is to solve a classic computer vision challenge: handing a computer an image and having it correctly tell you what is inside. While this sounds simple to a human, it represents a complex mathematical process for a machine. By leveraging the new Keras Hub library, we can condense this immense complexity into a few straightforward and readable lines of Python, moving from raw pixels to a confident classification in seconds. The focus here is on practical application, allowing you to use state-of-the-art technology without needing a PhD in math.
Before the actual classification happens, the script ensures a solid foundation. The code is designed to run in a modern, reproducible environment, which is why we outline the steps for setting up a dedicated space using tools like WSL for Windows users and Conda for package management. This approach is crucial for preventing conflicts with other software on your machine and ensures that all the necessary heavy lifters — from TensorFlow’s calculation engine to essential image processing libraries like OpenCV and Pillow — are installed correctly and working together harmoniously.
At the heart of this pipeline is the pre-trained model. Instead of spending weeks training a deep neural network from scratch with massive datasets, our code simply calls upon a highly capable ResNet model that has already learned to recognize patterns from millions of images. The script’s core logic acts as a bridge: it loads your local image file, formats it into the precise numerical batch structure the model expects, and then passes it through the network to get a set of raw prediction scores.
The final phase of the code is all about interpreting these results for human consumption. The model initially returns a cryptic list of probabilities for thousands of potential categories, which isn’t very useful on its own. Therefore, the code includes a crucial decoding step that translates these abstract numbers into a neat list of the top predicted labels, such as “golden retriever.” To make the result instantly understandable, the script concludes by using Matplotlib and OpenCV to display the original image with the model’s top guess clearly presented as a title, providing immediate visual verification of the outcome.
[embed]
Link to the video tutorial here
Download the code for the tutorial here or here
Best AI Photo Tools (Backgrounds, Objects, Headshots)
✅ Phot-AI packs more than 30 AI‑powered tools into one place — covering background and object removal/replacement, image extension and a suite of creative generators for art, icons and logos.
follow the link and start creating : https://phot.ai?ref=eran33
✅ Pixelcut uses AI to help you create professional photos and videos. You can instantly remove backgrounds, retouch, expand and upscale images, or generate new images and even videos from a simple text prompt or reference picture. tap the link and start creating today! : https://pixelcut.ai/?via=eran
✅ PhotoGPT AI acts as your personal photographer — just describe what you need and the platform generates high‑quality headshots or casual images within minutes.
Its built‑in photo editor lets you remove objects, replace backgrounds and make studio‑quality corrections with a single click.
You can even train your own AI model using a few selfies, receive context‑aware prompt suggestions and upscale images for print‑ready results.
Dive into this all‑in‑one AI photo studio : https://www.photogptai.com/?ref=eran
My Blog
You can follow my blog **here **.
Check the full post and code here : https://eranfeit.net/fast-keras-hub-image-classification-tutorial/
Want to get started with Computer Vision or take your skills to the next level ?
Great Interactive Course : “Deep Learning for Images with PyTorch” here
If you’re just beginning, I recommend this step-by-step course designed to introduce you to the foundations of Computer Vision — Complete Computer Vision Bootcamp With PyTorch & TensorFlow
If you’re already experienced and looking for more advanced techniques, check out this deep-dive course — Modern Computer Vision GPT, PyTorch, Keras, OpenCV4

This Keras Hub image classification tutorial breaks down the modern way to deploy high-performance models using the latest Keras 3 framework. By focusing on the modular ImageClassifier API, we bridge the gap between complex research architectures and practical, production-ready Python code.
Developers and data scientists often struggle with the boilerplate code required to initialize weights, handle preprocessing, and manage labels. Mastering a Keras Hub image classification tutorial provides a streamlined workflow that replaces dozens of lines of manual configuration with single-line presets. This approach ensures your projects are not only faster to build but also easier to maintain as model architectures evolve.
To ensure you achieve these results, this guide walks you through a complete, localized environment setup using WSL2 and Conda. By following this Keras Hub image classification tutorial, you will move from a raw terminal installation to a fully functional prediction pipeline. We don’t just stop at the math; we provide the visual tools necessary to see exactly what your model sees in real-time.
By the end of this deep dive, you will have a robust template for any future computer vision task. This Keras Hub image classification tutorial empowers you to experiment with state-of-the-art models like ResNet with zero friction. Whether you are building an automated sorting system or a personal hobby project, the techniques shared here represent the gold standard for efficiency in 2026.
Setting up a dedicated AI sandbox with WSL2
The first thing I learned is that your environment is your foundation. For this Keras Hub image classification tutorial, I avoided my global Python path entirely and opted for a high-performance WSL2 (Windows Subsystem for Linux) setup. This allows the heavy-duty math libraries in TensorFlow to talk directly to the hardware without the “Windows tax” slowing things down.
By initializing a clean Conda environment, we ensure that our project dependencies remain isolated. We are targeting Python 3.11 here, which serves as the “Goldilocks” version for early 2026 — stable enough for production but modern enough to support the latest Keras 3.0 features. This step is non-negotiable if you want to avoid version conflicts later on.
The installation phase is where we grab our toolkit. We aren’t just installing Keras; we are bringing in a synchronized set of tools including Pillow for file handling and OpenCV for the final visual polish. Whether you are leveraging a GPU for speed or a CPU for simplicity, the commands below turn a blank terminal into a world-class AI development station.
# Step 1 : Install
# 1. Run Powershell as Admin

### Launch the Linux kernel on your Windows machine for optimized performance.
wsl

# 3. Create Conda environment :

### Build a fresh, isolated workspace to keep your AI libraries organized.
conda create -n Keras_Hub python=3.11

### Activate your workspace to begin the installation process.
conda activate Keras_Hub

# 4. Install :

### Update the pip installer to ensure a smooth download of large neural network packages.
pip install --upgrade pip

### Pull the Keras Hub library, our primary gateway to pretrained intelligence.
pip install keras-hub==0.18.1

# For GPU users
### Set up TensorFlow with CUDA support to unlock the power of your NVIDIA graphics card.
pip install tensorflow[and-cuda]==2.18.0

# For CPU users
# pip install tensorflow==2.18.0

### Add the essential libraries for image processing and graphing your results.
pip install pillow==11.1.0
pip install opencv-python==4.10.0.84
pip install matplotlib==3.10.0

### Trigger VS Code to open the current workspace and start coding.
code .
Why ‘Presets’ are the future of model loading
Loading a model used to be a chore involving weight files, JSON architectures, and manual mapping. In this part of the Keras Hub image classification tutorial, we use a “preset” methodology. Imagine a preset as a pre-packaged brain that already knows how to recognize thousands of objects; we simply need to wake it up and give it a task.
We are utilizing the ResNet_VD_200 preset. This is a massive, highly accurate vision model that has been trained on the ImageNet dataset. By using the ImageClassifier.from_preset command, we are essentially inheriting months of supercomputer training time in a single line of Python. It’s the ultimate shortcut for developers who value results over boilerplate.
By selecting the “softmax” activation, we tell the model to speak to us in probabilities. Instead of a “yes or no” answer, the model will tell us, “I am 98.5% sure this is a golden retriever.” This level of nuance is what makes modern AI feel so intelligent and reliable for real-world applications.
### Bring in the core Keras framework to handle the neural network backbone.
import keras

### Load the Hub extension to access a global library of verified model presets.
import keras_hub

### Utilize NumPy to manage the numerical data that represents our images.
import numpy as np

### Prepare the plotting tools to visualize the AI's final decision.
import matplotlib.pyplot as plt

### Use OpenCV to handle the heavy lifting of reading and converting image files.
import cv2

# Load the model and use it to predict the image

### Define our target architecture: the high-accuracy ResNet Visual Deep model.
model_name2 = "resnet_vd_200_imagenet"

### Initialize the classifier directly from the Keras cloud with built-in softmax logic.
classifer = keras_hub.models.ImageClassifier.from_preset(model_name2, activation="softmax")
Turning raw pixels into human-readable insights
This is the “inference” phase of our Keras Hub image classification tutorial. When we feed an image into our ResNet model, it doesn’t “see” a dog; it sees a complex grid of numbers. Our script’s job is to take a standard JPEG, format it into a 4D array (a “batch”), and let the model analyze the patterns within those numbers.
The magic happens when we call the predict function. The model scans for textures, shapes, and features, comparing them to what it learned during training. The raw output is a set of scores, which we then decode using the Keras Hub utilities. This step is crucial because it translates the model’s internal language back into English labels we can actually use.
In the code below, we aren’t just getting a label; we are isolating the most probable result. This allows your software to make decisions based on what the AI sees. Whether you’re building a smart doorbell or an automated tagging system, this link between a digital file and a descriptive string is the “brain” of your application.
### Point the script to the image file you want to test.
img_path = "Best-image-classification-models/Keras-Hub-Image-Classification/test_img.jpg"

### Load the image into the environment using standard Keras utilities.
image = keras.utils.load_img(img_path)

### Convert the image into a numerical array and run the classification engine.
preds = classifer.predict(np.array([image]))

### Convert the raw probability scores into clear, human-readable labels.
decoded_preds = keras_hub.utils.decode_imagenet_predictions(preds)

### Extract the specific name of the top-ranked object identified by the AI.
class_name = str(decoded_preds[0][0][0])

### Output the full list of predictions to the console for a detailed view of the AI's confidence.
print(decoded_preds)
Seeing through the AI’s eyes with OpenCV
The final step of this Keras Hub image classification tutorial is visualization. A text output in a console is great for developers, but seeing the result on the actual image is what makes the technology feel real. We use OpenCV to reload the image, making sure to fix the “BGR to RGB” color swap that often trips up beginners.
We then use Matplotlib to create a professional-grade display. By removing the coordinate axes and adding a bold, red title with the model’s prediction, we create a clear “Proof of Concept.” This confirms that the model correctly identified the subject of the photo, providing immediate feedback on the success of your pipeline.
This visualization isn’t just for show; it’s a vital debugging tool. If the model makes a mistake, seeing the image helps you understand why (perhaps the lighting was poor or the object was obscured). By finishing the script with a clear visual confirmation, you complete the loop from raw data to actionable knowledge.
Here is the test image :

# Load the image for display with OpenCV
### Open the source image using OpenCV for final visual rendering.
image_cv = cv2.imread(img_path)

# Convert BGR to RGB
### Correct the color channels so the image looks natural in your final plot.
image_cv = cv2.cvtColor(image_cv, cv2.COLOR_BGR2RGB)

# Use Matplotlib to display the image with the predicted class name
### Define a clean, large canvas to display the image and the AI's verdict.
plt.figure(figsize=(8, 8))

### Render the image onto the visual canvas.
plt.imshow(image_cv)

### Hide the grid lines and axes for a cleaner, more focused presentation.
plt.axis('off')

### Overlay the predicted label in a vibrant red font for maximum impact.
plt.title(f"Predicted: {class_name}", fontsize=20 , color='red')

### Display the final annotated image on your screen.
plt.show()
FAQ
Q: What is Keras Hub and why should I use it over the standard Keras library?
A: Keras Hub is a specialized extension that provides unified, easy access to state-of-the-art pretrained models. It simplifies the process of loading architectures and their weights with single-line “presets,” reducing the manual boilerplate code significantly.
Q: Why do we use WSL2 instead of running the code directly on Windows?
A: WSL2 provides a native Linux environment which is much better supported by AI libraries like TensorFlow and PyTorch. It allows for smoother GPU acceleration setup and more consistent behavior with the specialized drivers required for deep learning.
Q: Do I need a high-end NVIDIA GPU to run this tutorial?
A: No, this code can run on a standard CPU by simply changing the installation command for TensorFlow. While a GPU makes the “predict” step faster, the pretrained models are efficient enough for real-time testing on most modern laptops.
Q: What is a “preset” in the context of Keras Hub?
A: A preset is a pre-configured model that includes the specific neural network architecture, the weights learned during training, and the necessary preprocessing steps. It ensures you get the exact same performance as the original researchers intended.
Q: Why does the code convert the image to a NumPy array with np.array([image])?
A: Deep learning models expect a “batch” of images, even if you are only classifying one. The extra square brackets create a 4D array (batch_size, height, width, channels) that the model’s input layer requires.
Q: Can I use this code for my own custom categories, like identifying different types of fruit?
A: This specific tutorial uses models trained on ImageNet, which includes 1,000 common categories. To identify custom objects not in that list, you would use this same foundation but perform “fine-tuning” on your own specific dataset.
Q: How do I find other models besides ResNet in Keras Hub?
A: You can explore the official Keras Hub presets list on the Keras.io website. Popular alternatives include EfficientNet, MobileNet for mobile devices, and even Vision Transformers (ViT) for advanced accuracy.
Q: Why is OpenCV’s cvtColor necessary before using Matplotlib?
A: OpenCV loads images in BGR (Blue-Green-Red) format by default, while almost every other library, including Matplotlib, expects RGB (Red-Green-Blue). Skipping this step would result in your final image looking blue or inverted.
Q: Is TensorFlow 2.18 the latest version I should use?
A: Yes, as of early 2026, TensorFlow 2.18 is the stable standard that integrates perfectly with Keras 3 and Keras Hub. It offers optimized performance for the newest hardware and better memory management.
Q: What does the activation="softmax" parameter do in the model loading?
A: Softmax turns the raw “energy” scores from the model’s last layer into a probability distribution where all values add up to 100%. This makes it easy to interpret the results as a “confidence score” for each class.
Summary: A New Era of Vision Coding
By completing this Keras Hub image classification tutorial, you’ve witnessed how far AI development has come in 2026. We moved from a blank terminal to a fully functional, high-accuracy classification system in just a few logical steps. The key takeaway? Modern tools like Keras Hub allow us to focus on the application rather than the implementation.
Whether you are a seasoned engineer or a curious beginner, the ability to pull a pre-trained “brain” like ResNet and have it “see” your data is a superpower. I hope this migration story inspires you to clean up your own legacy code and embrace the modular future of computer vision.
Connect :
☕ Buy me a coffee — https://ko-fi.com/eranfeit
🖥️ Email : feitgemel@gmail.com
🤝 Fiverr : https://www.fiverr.com/s/mB3Pbb
Enjoy,
Eran
메타데이터
- post_id
- 87e7a2869b9e
- slug
- i-migrated-my-vision-pipeline-to-keras-hub-here-is-what-i-learned-87e7a2869b9e
- url
- https://medium.com/image-classification-tutorials/i-migrated-my-vision-pipeline-to-keras-hub-here-is-what-i-learned-87e7a2869b9e
- canonical_url
- https://medium.com/image-classification-tutorials/i-migrated-my-vision-pipeline-to-keras-hub-here-is-what-i-learned-87e7a2869b9e
- author_url
- https://medium.com/@feitgemel
- status
- ok
- fetched_at
- 2026-06-15 20:49:13