Adding Post Processing Profiles in Unity
If you’ve been following along, then you’ve created a new Universal Rendering Pipeline project and imported your scene. This is a…
Adding Post Processing Profiles in Unity
If you’ve been following along, then you’ve created a new Universal Rendering Pipeline project and imported your scene. This is a continuation of a previous tutorial.
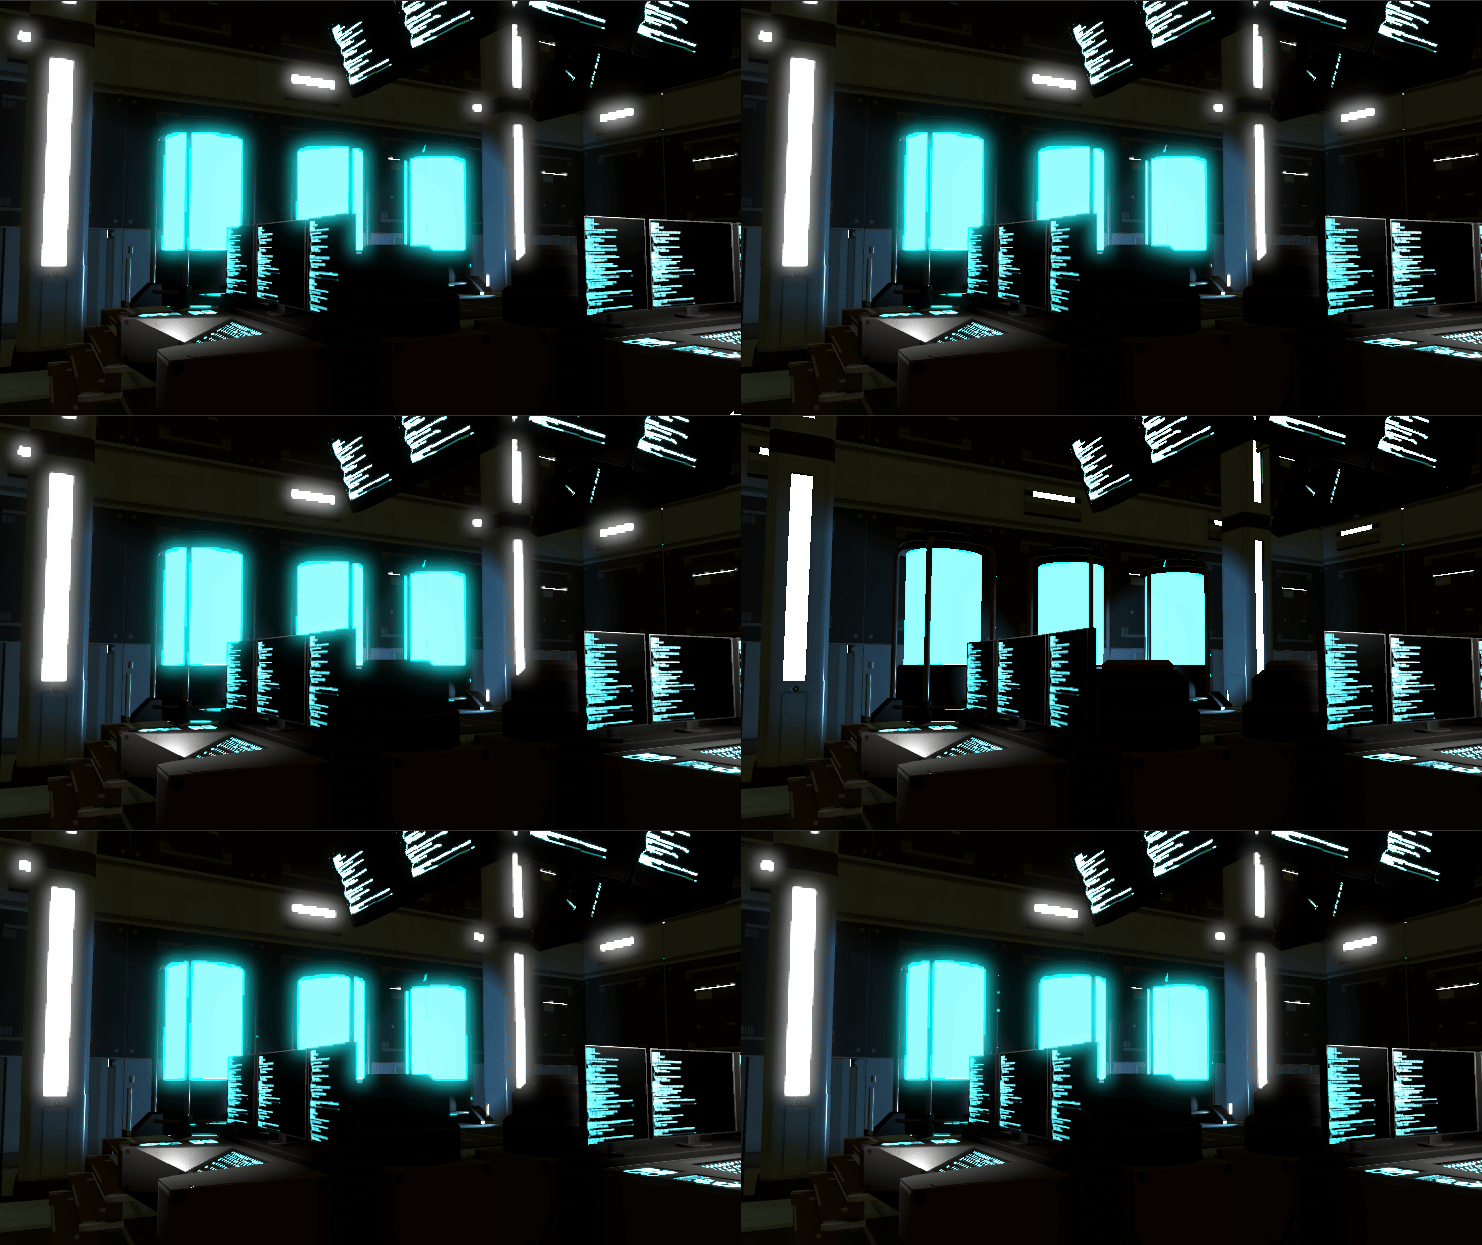
The difference between Post Processing and not.
At this stage, we are ready for post processing. First thing we want to do is add a post processing volume:
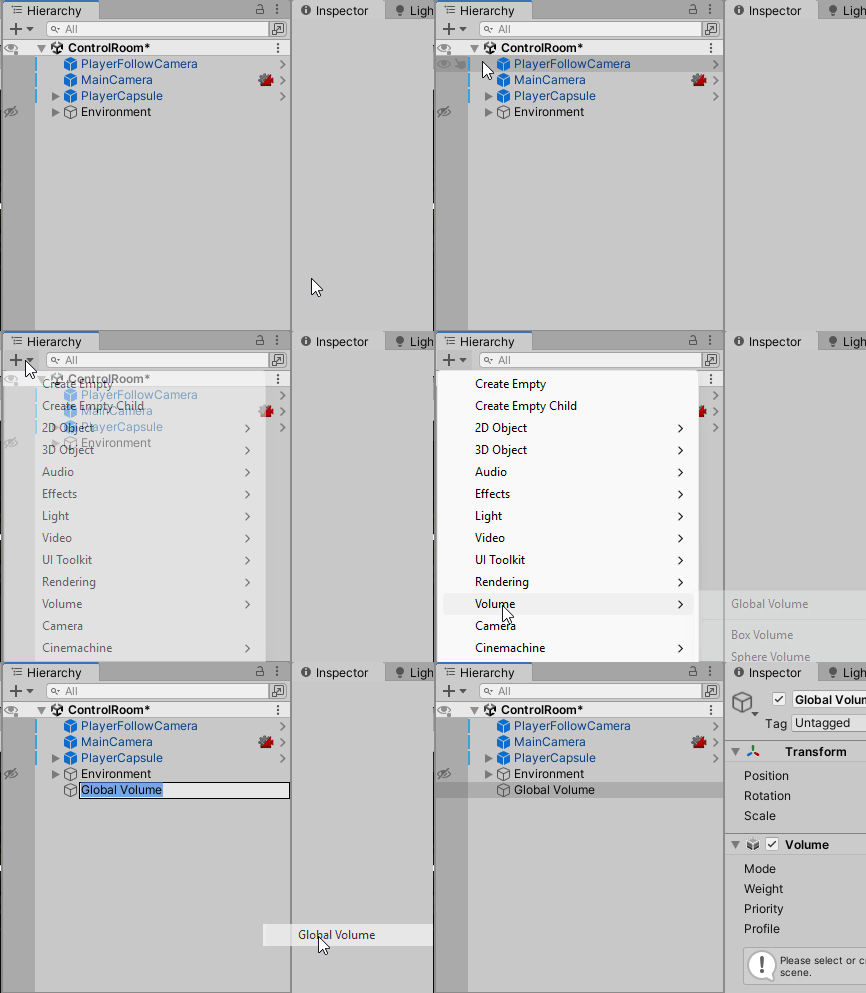
Adding a Global Volume.
With the URP installed, it’s simple. Use the Plus symbol within the Hierarchy window to add a new Global Volume.
Then, select the main camera in the Project view…
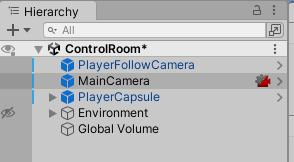
Select Main Camera to get access to the properties in the Inspector window.
Turn your attention to the Inspector window. Here, in the Rendering tab, we will turn on Post Processing. Let’s turn on anti-aliasing as well (if you desire).
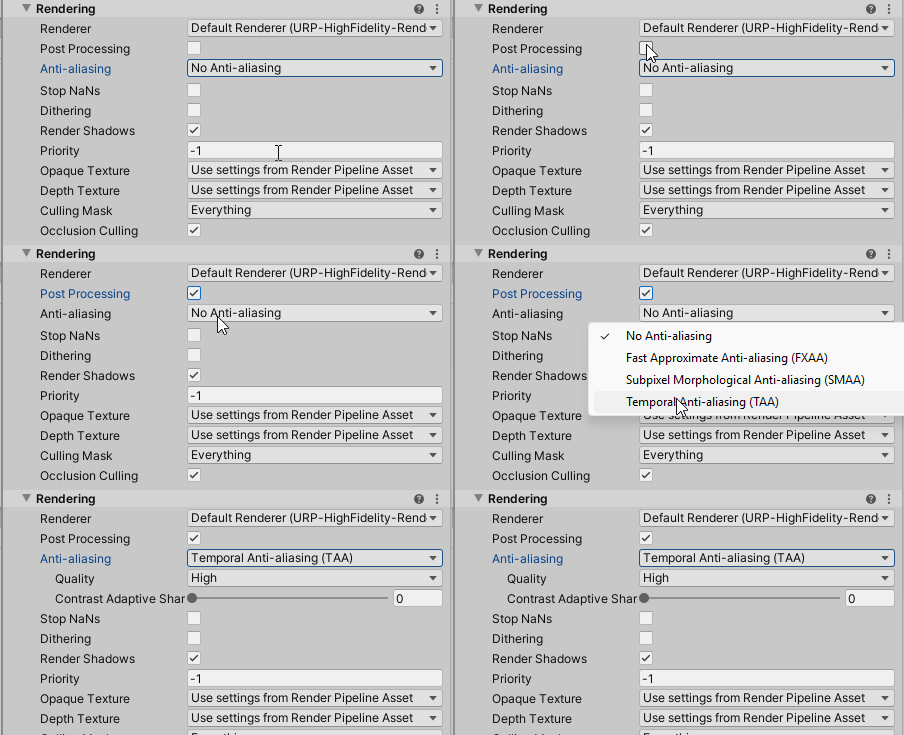
Turn on Post Processing in the Rendering tab.
Click on the Global Volume that was added to the Hierarchy. In the Inspector, in the Volume tab, we want to create a new Global Processing Volume:
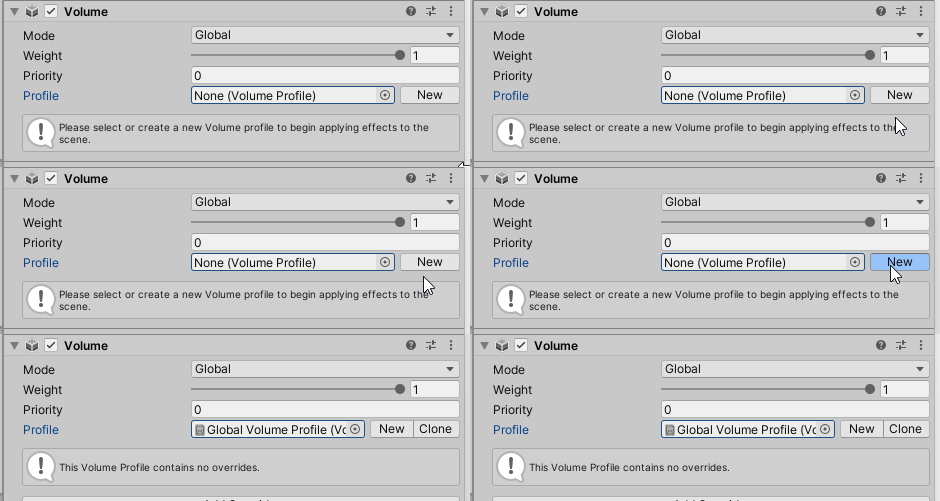
Creating a New Global Volume Profile
This profile is stored in a folder within the Scenes folder in the Project window.
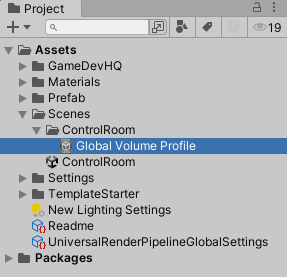
Where to find the Global Volume Profile.
A Global profile will affect the entire scene uniformly, whereas other profiles can be made to only affect certain layers.
Let’s add an override to our Global Volume. Click on the Global Volume in the Hierarchy window and then select Add Override. We are going to add Bloom.
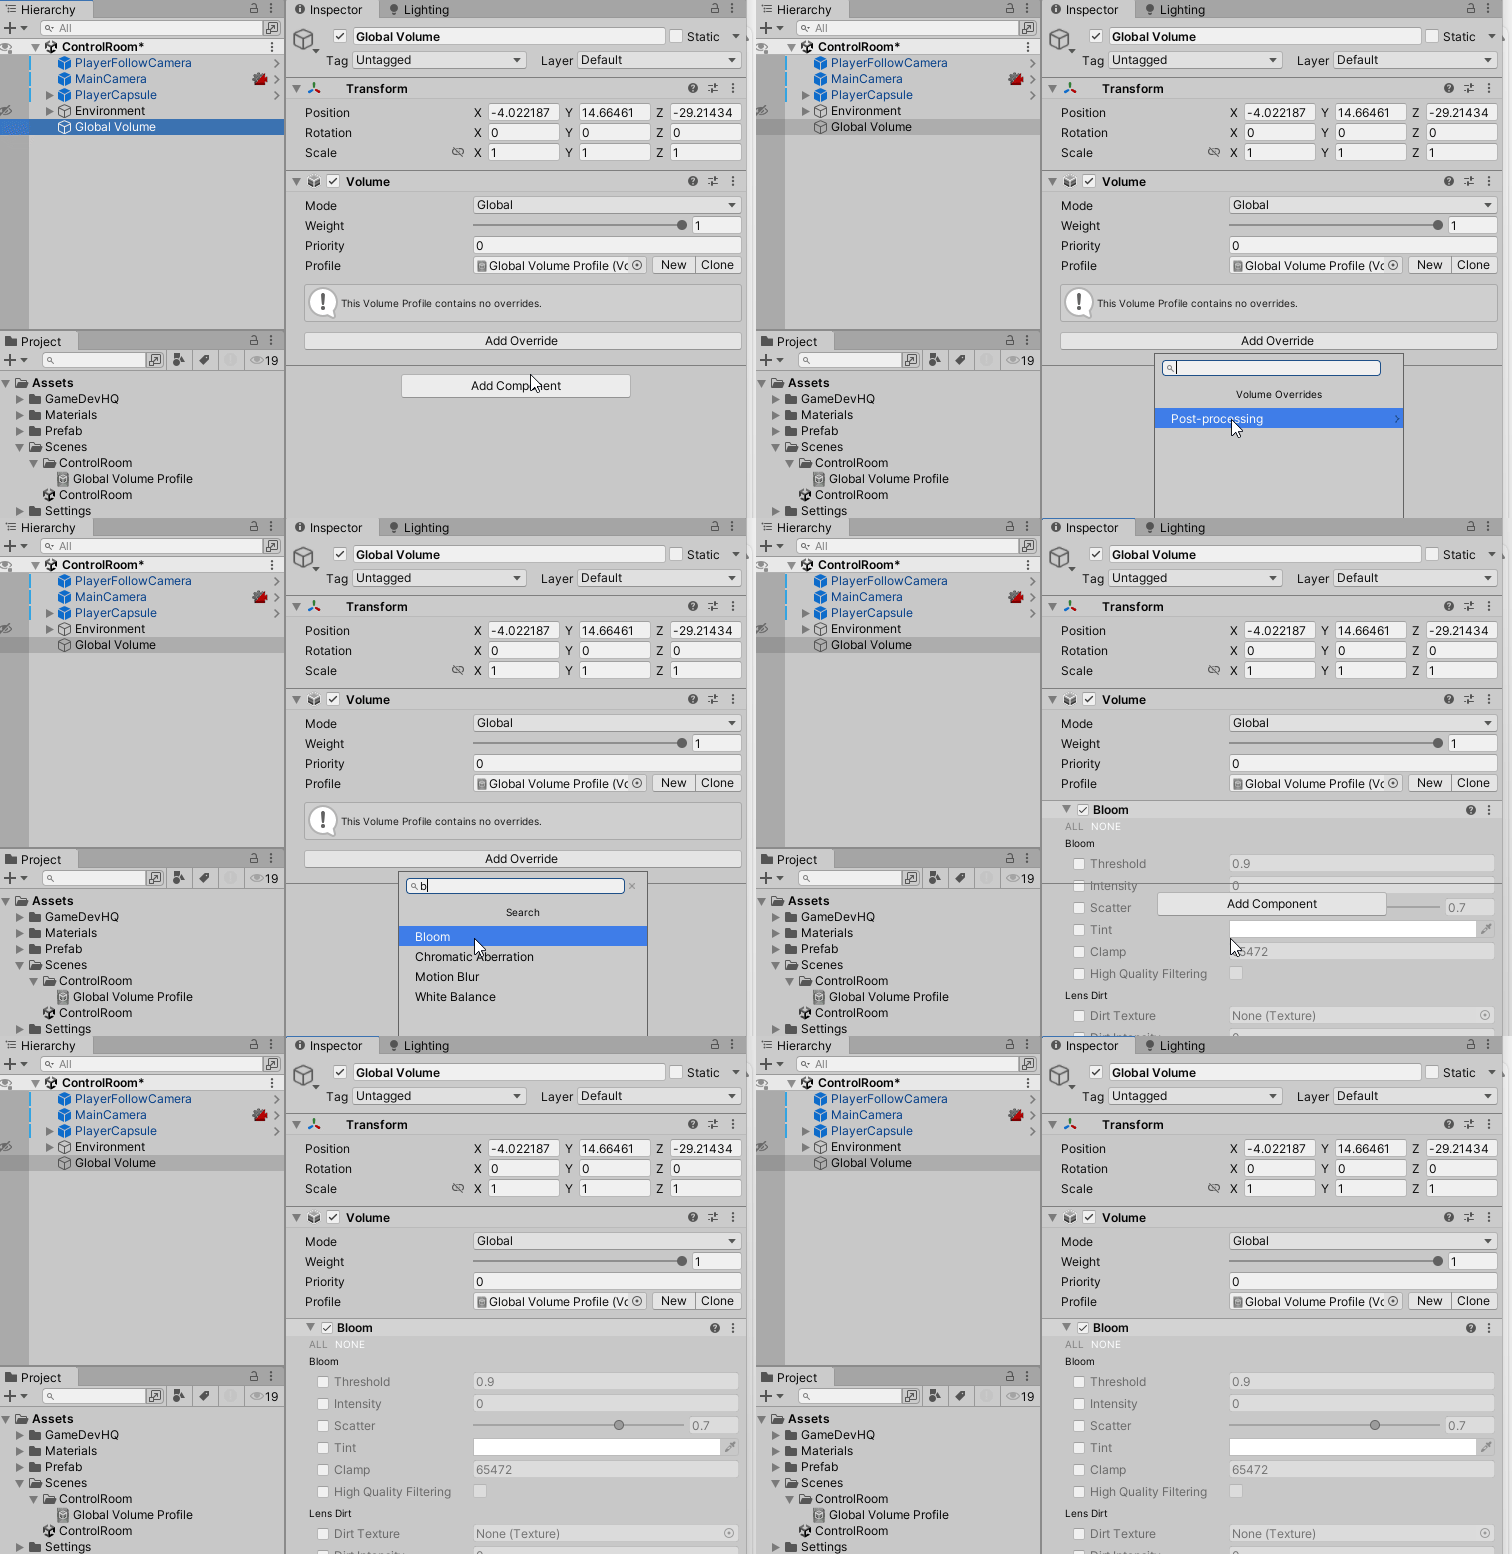
Adding a Bloom Override to the Global Volume.
Using Bloom, we can really cause our Test tube emissions to POP! by adding Intensity (the brightness of the light) and Scatter (how diffused is the light).
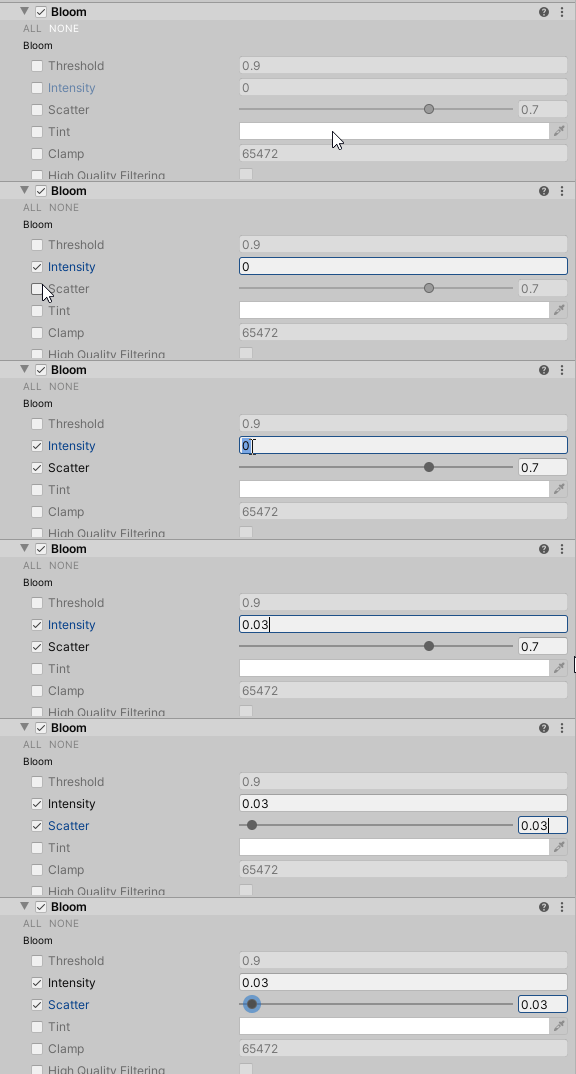
Changing the values of Intensity and Scatter.
What how it livens up the scene:
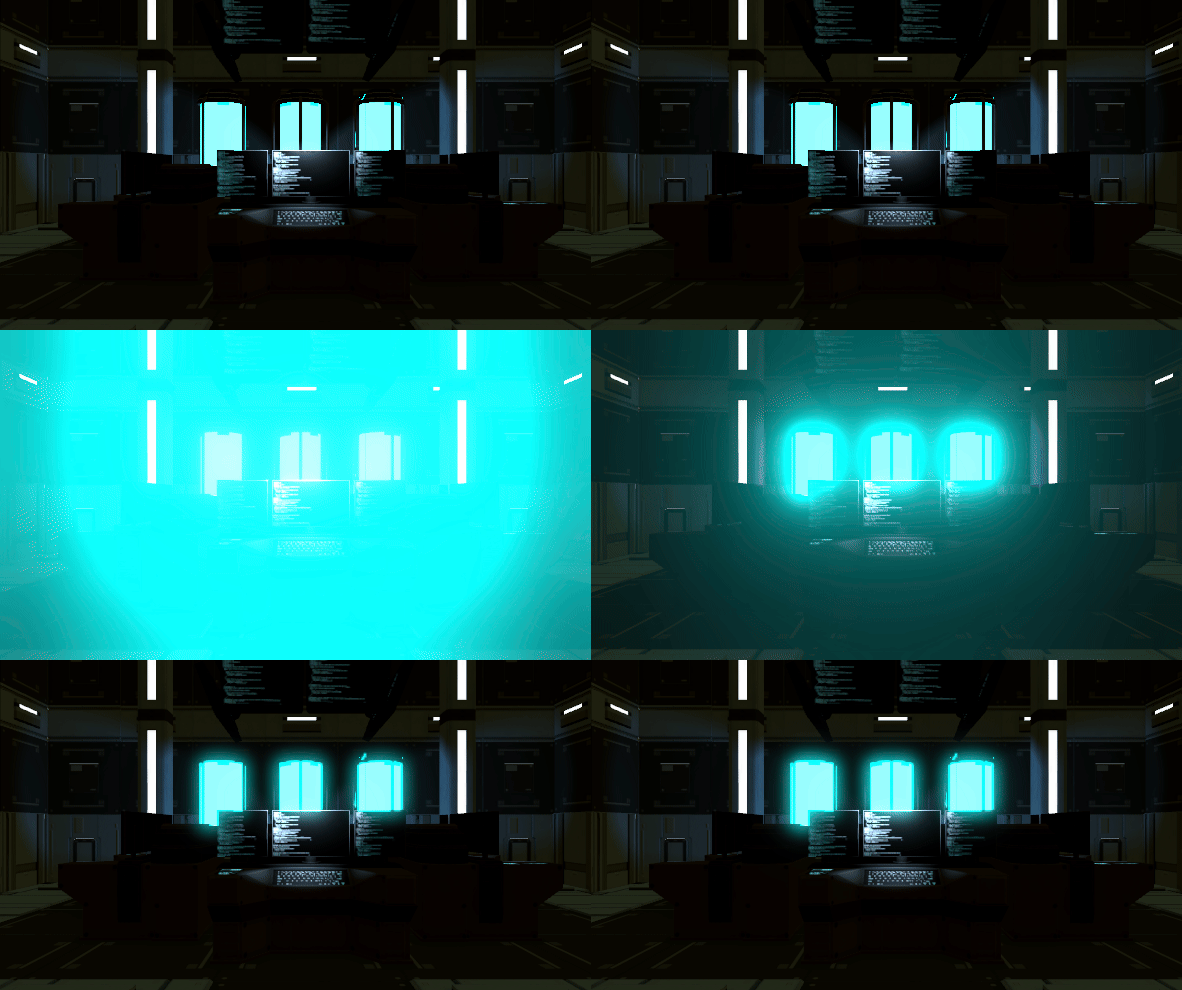
The Intensity was turned down to 0.03 as well as the diffused light setting, Scatter.
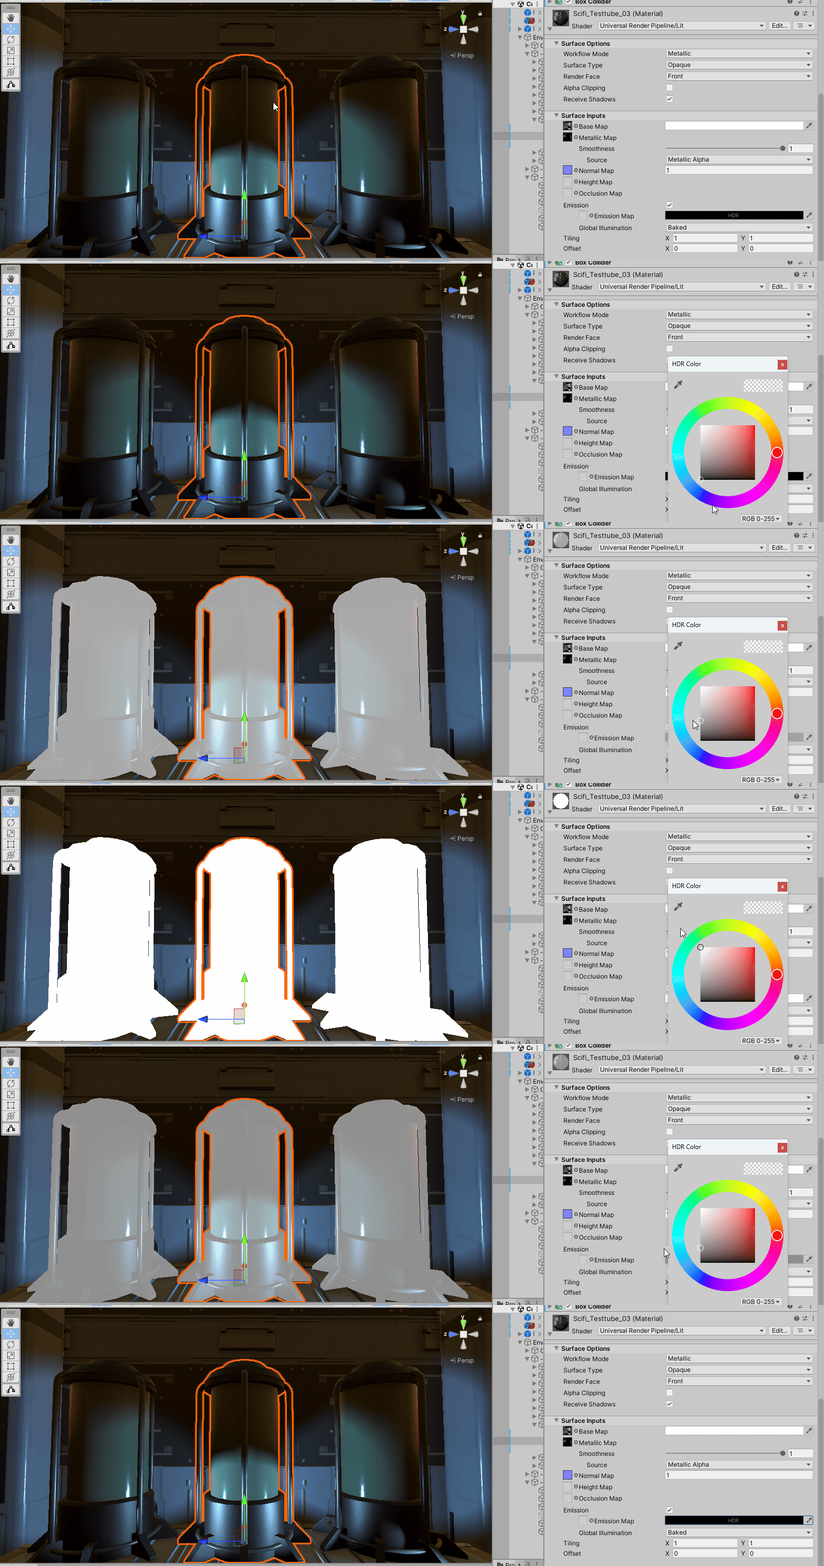
For our sci-fi floors and columns, let’s go into the Inspector for properties. We’re going to adjust the HDR to make the white highlights really stand out.
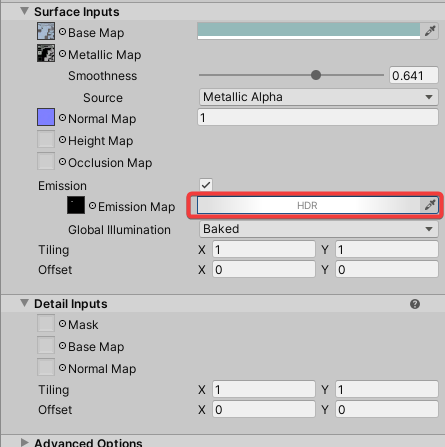
Look for the HDR option near the Emission toggle.
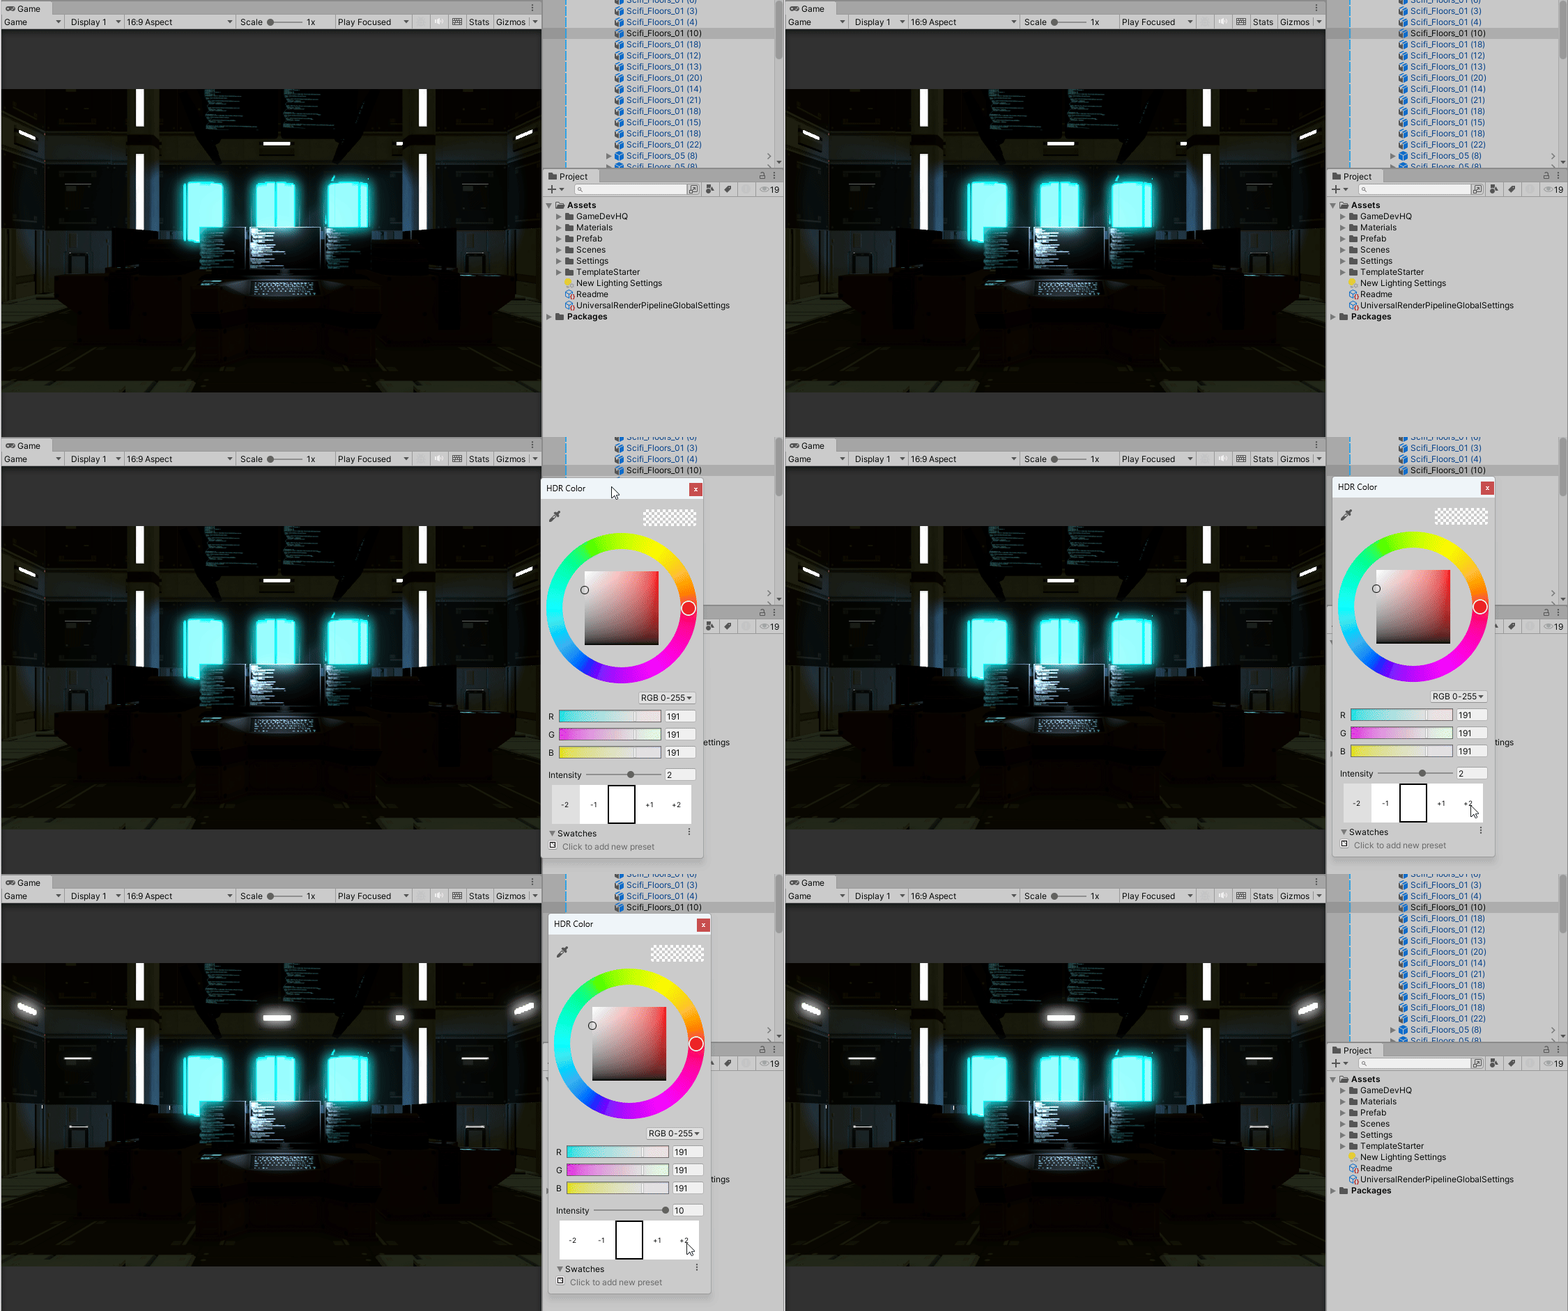
We will repeat this for the column highlights. Select a column in the Hierarchy window. Look to the Emissions property in the Inspector. Click on HDR to open the color wheel and adjust the Intensity of the highlight.
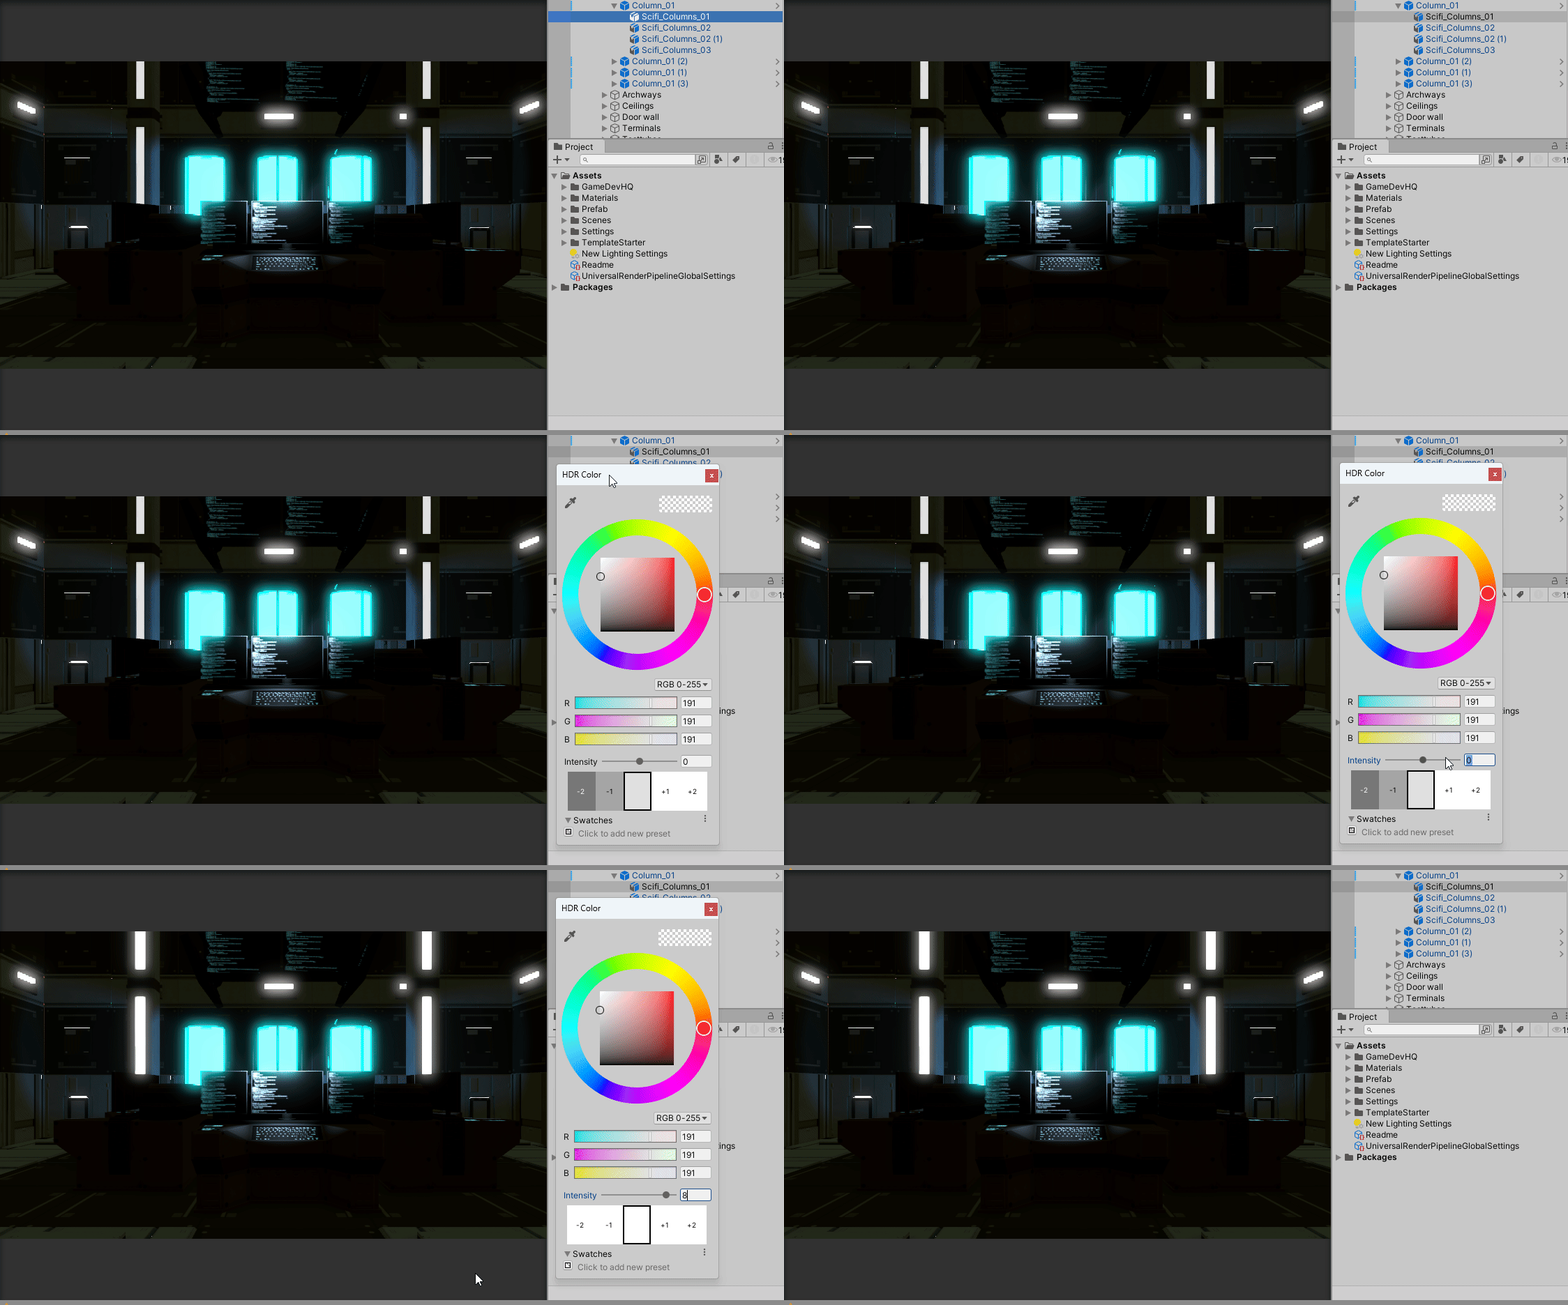
Adjusting the Intensity of the accent lighting on the columns.
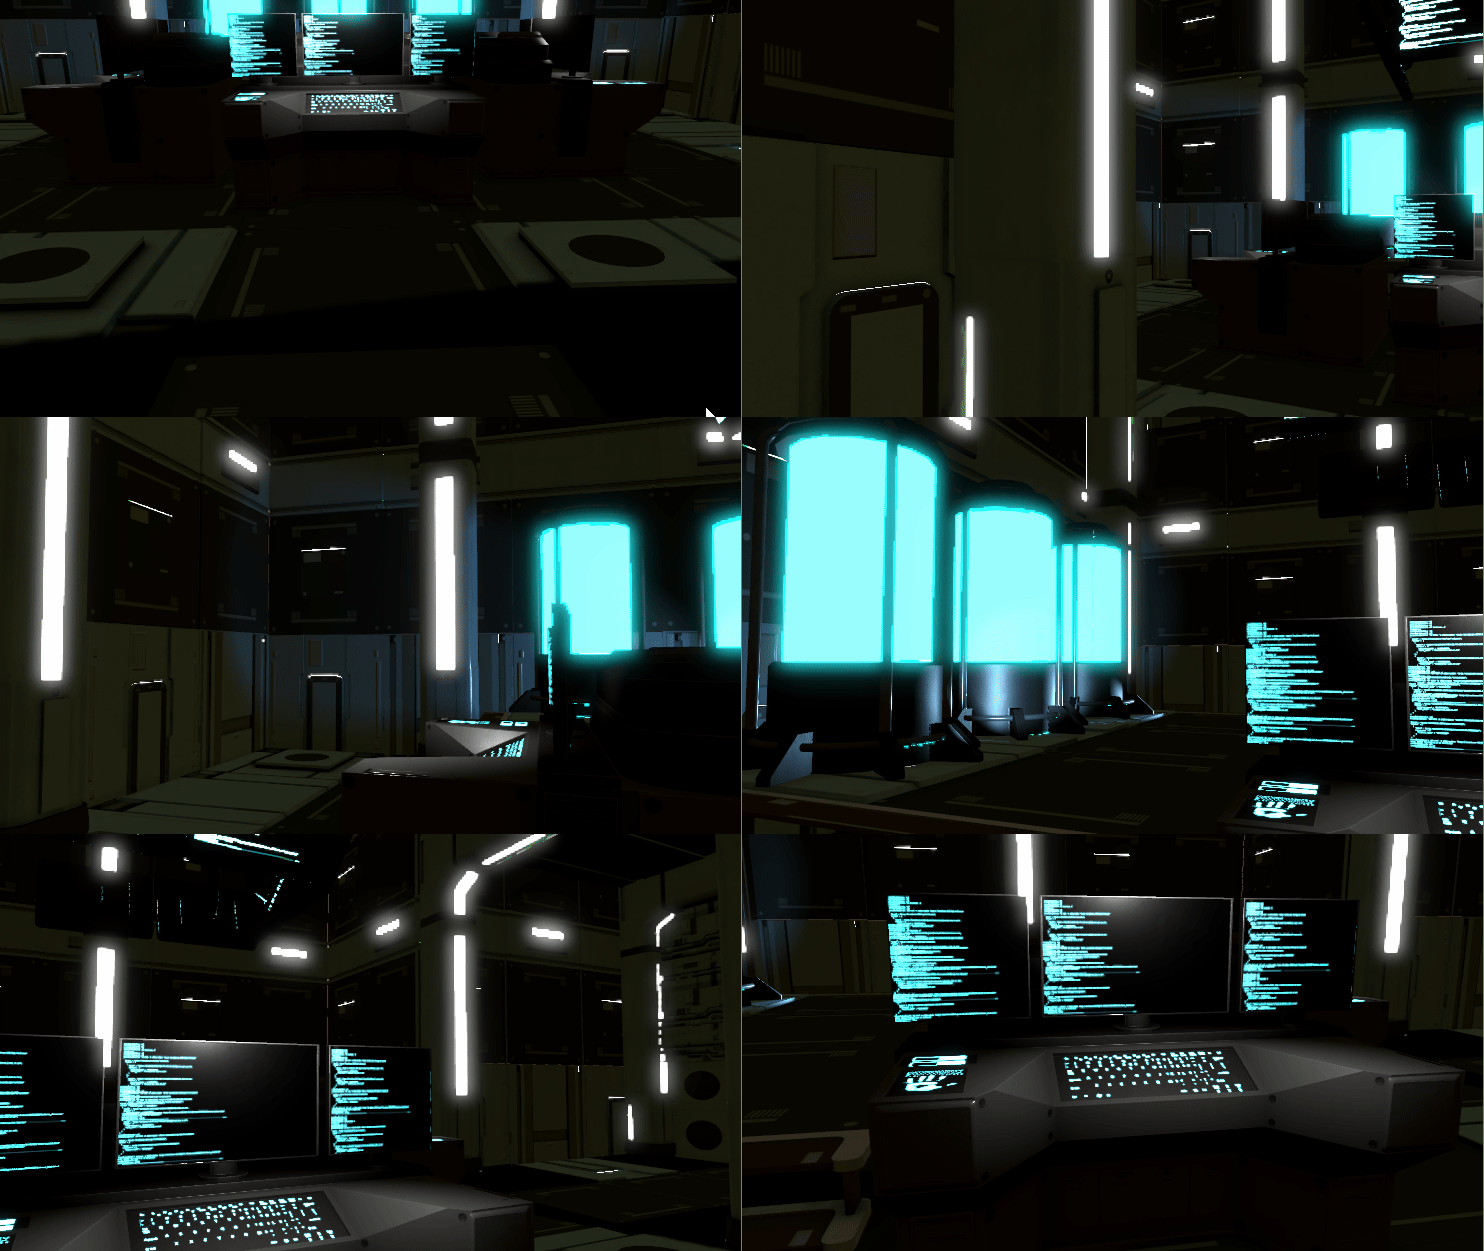
Our Scene so far.
That’s not all.
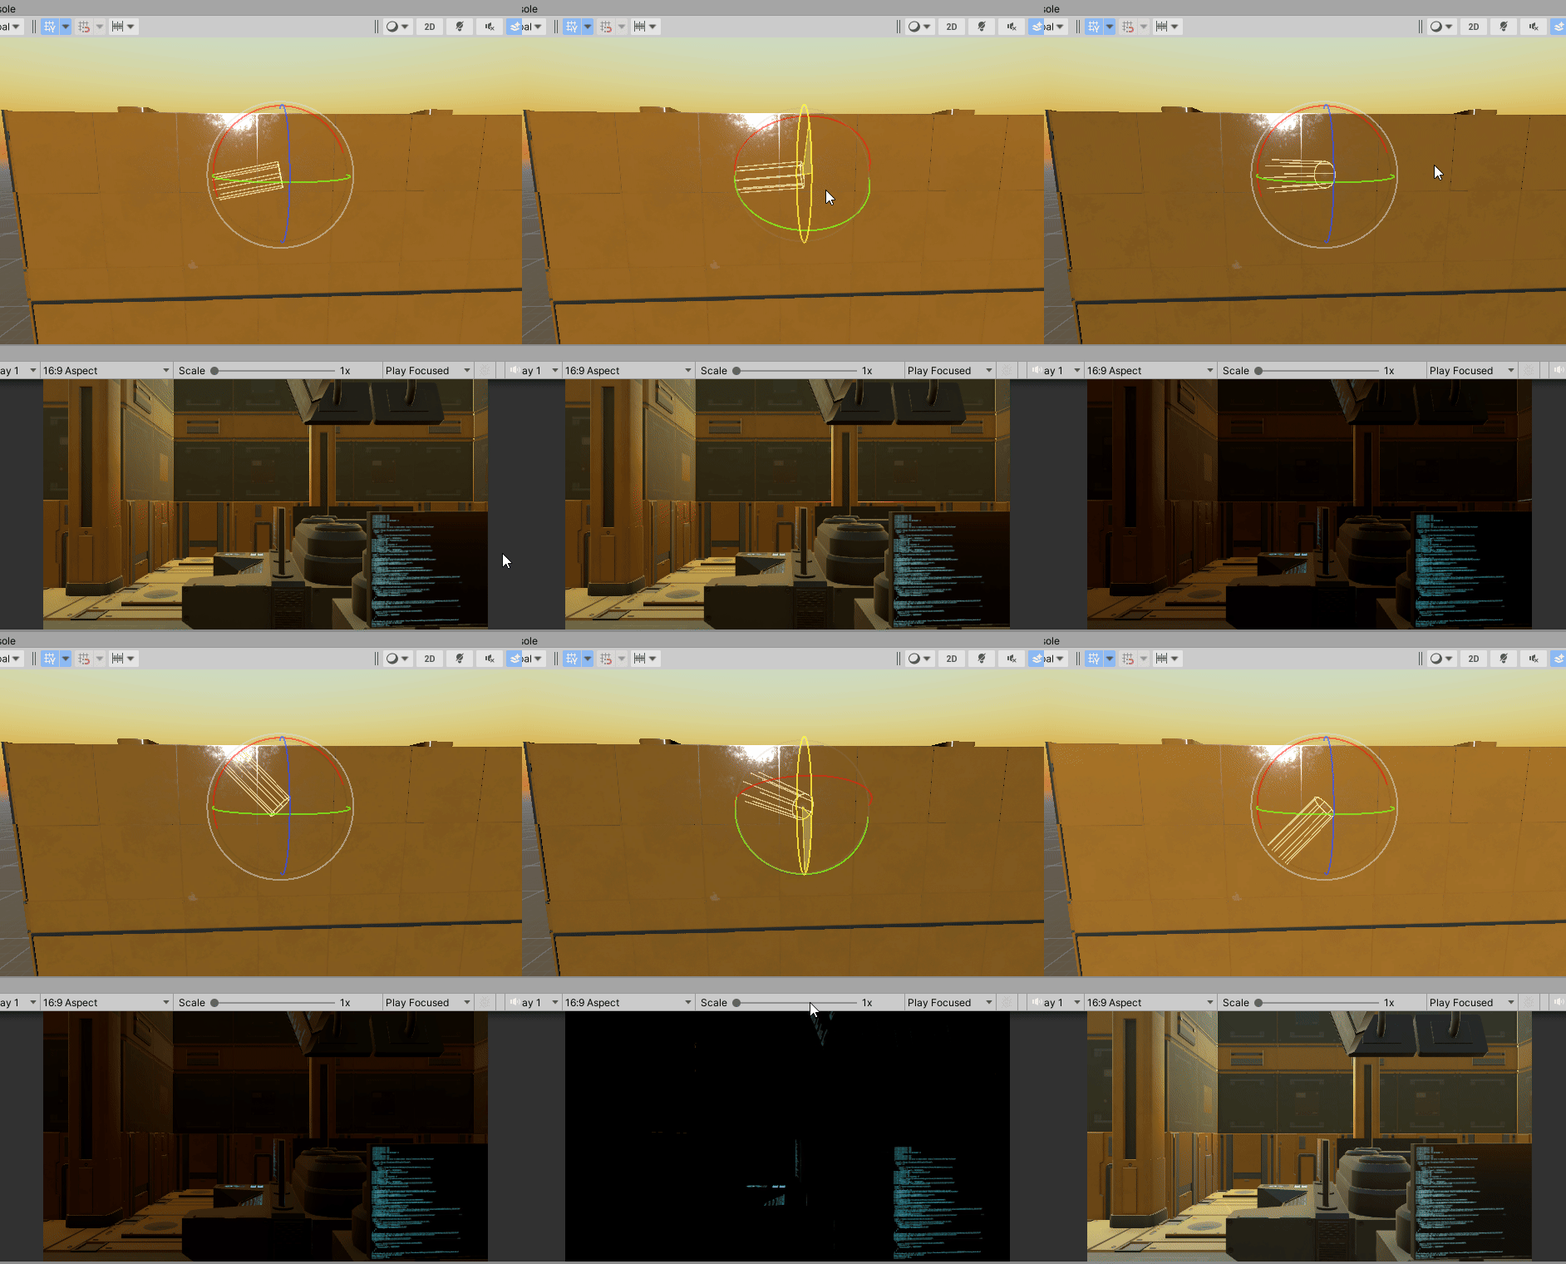
We can add another override for Color Adjustments.
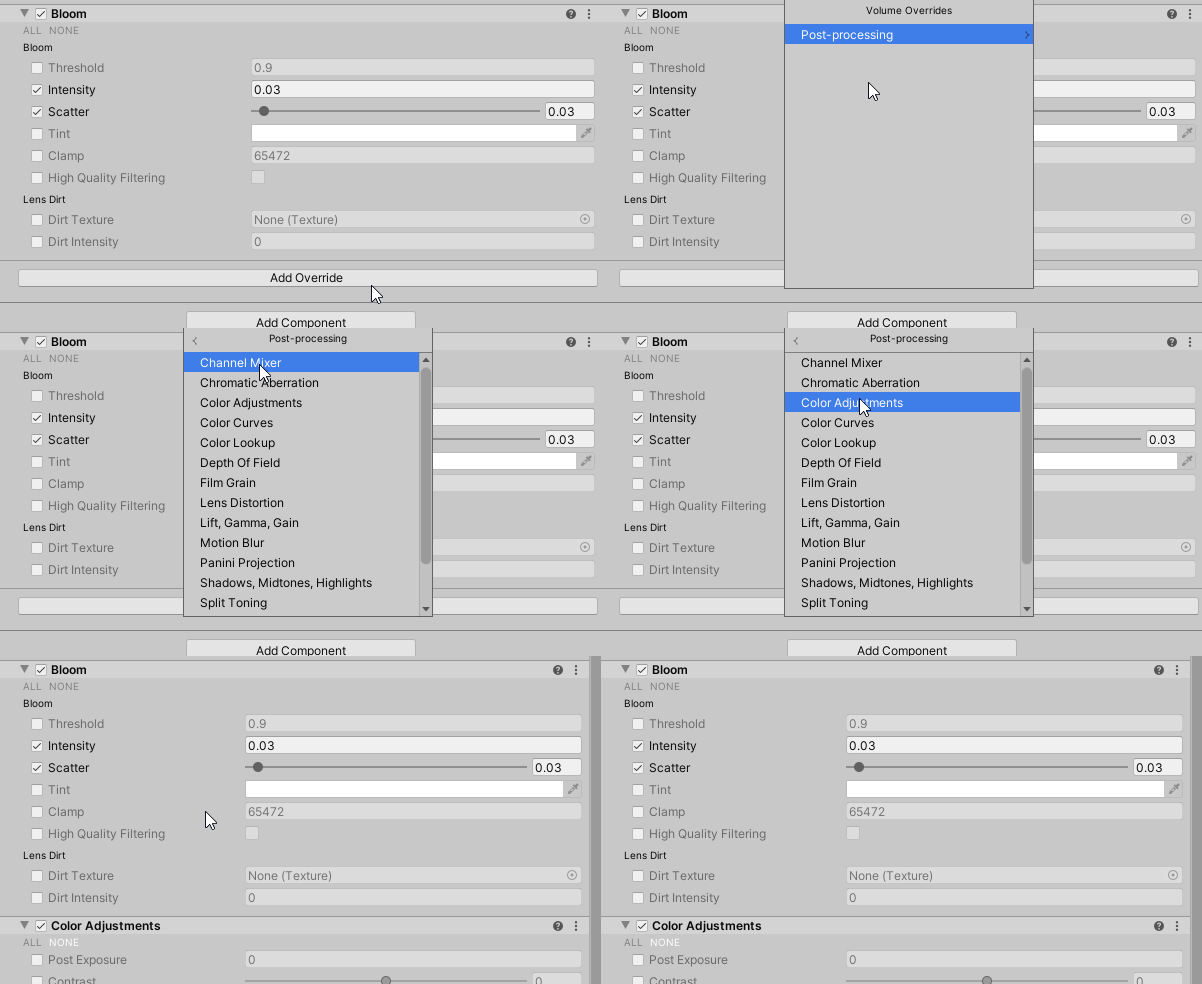
Adding a Color Adjustment Override.
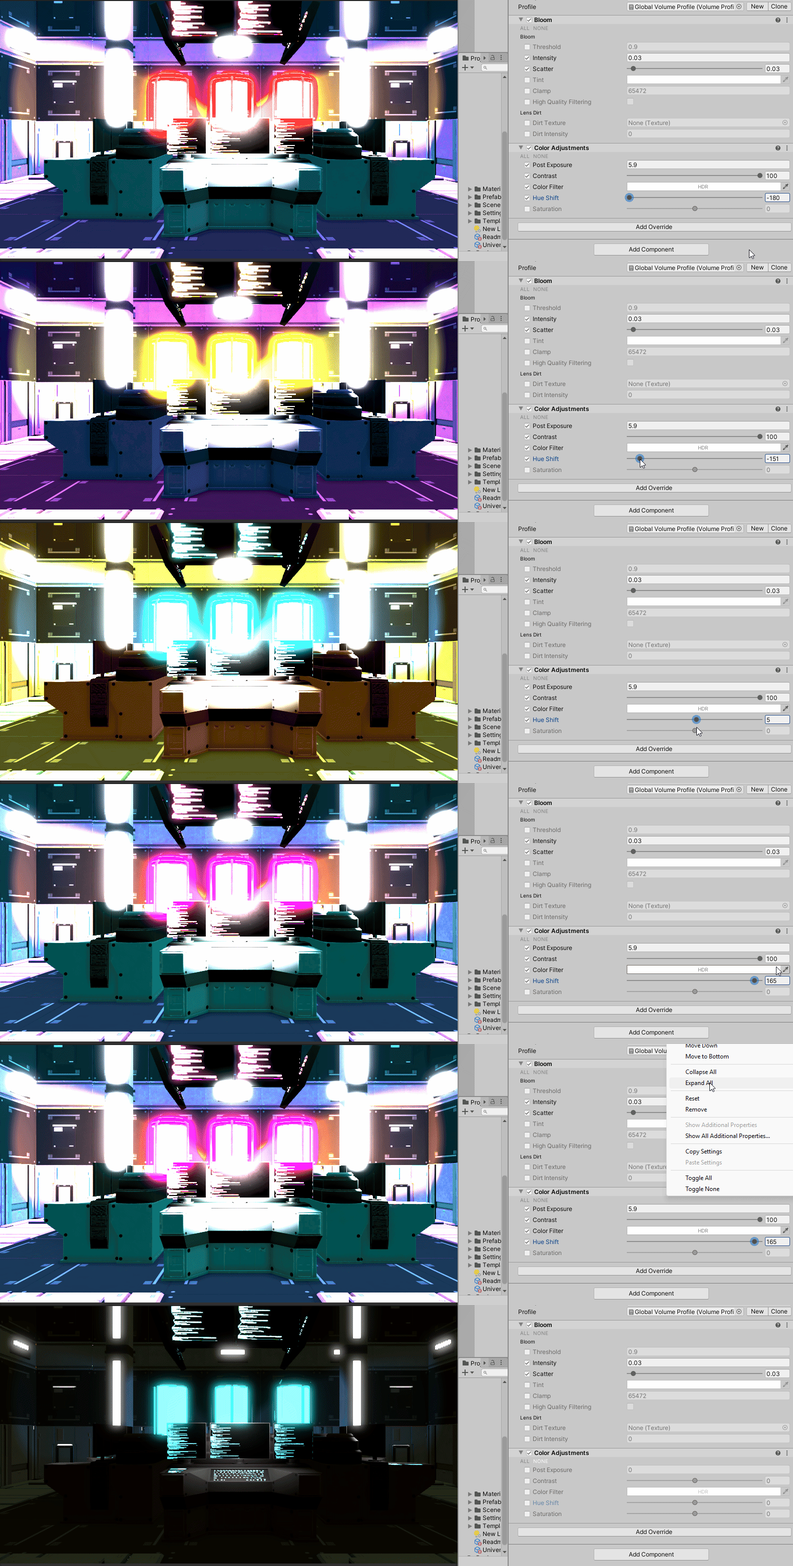
Exploring with the color adjustment override.
This concludes the tutorial on Adding Post Processing Profiles in Unity.
Thanks for Stopping By.
메타데이터
- post_id
- 8b2b7997d8a2
- slug
- adding-post-processing-profiles-in-unity-8b2b7997d8a2
- url
- https://medium.com/@alexandrmayor/adding-post-processing-profiles-in-unity-8b2b7997d8a2
- canonical_url
- https://medium.com/@alexandrmayor/adding-post-processing-profiles-in-unity-8b2b7997d8a2
- author_url
- https://medium.com/@alexandrmayor
- status
- ok
- fetched_at
- 2026-06-28 04:42:08