How We Engineered an Interactive Game for a Holographic Display
An engineering deep dive into creating interactive experiences for next-gen holographic screens
How We Engineered an Interactive Game for a Holographic Display
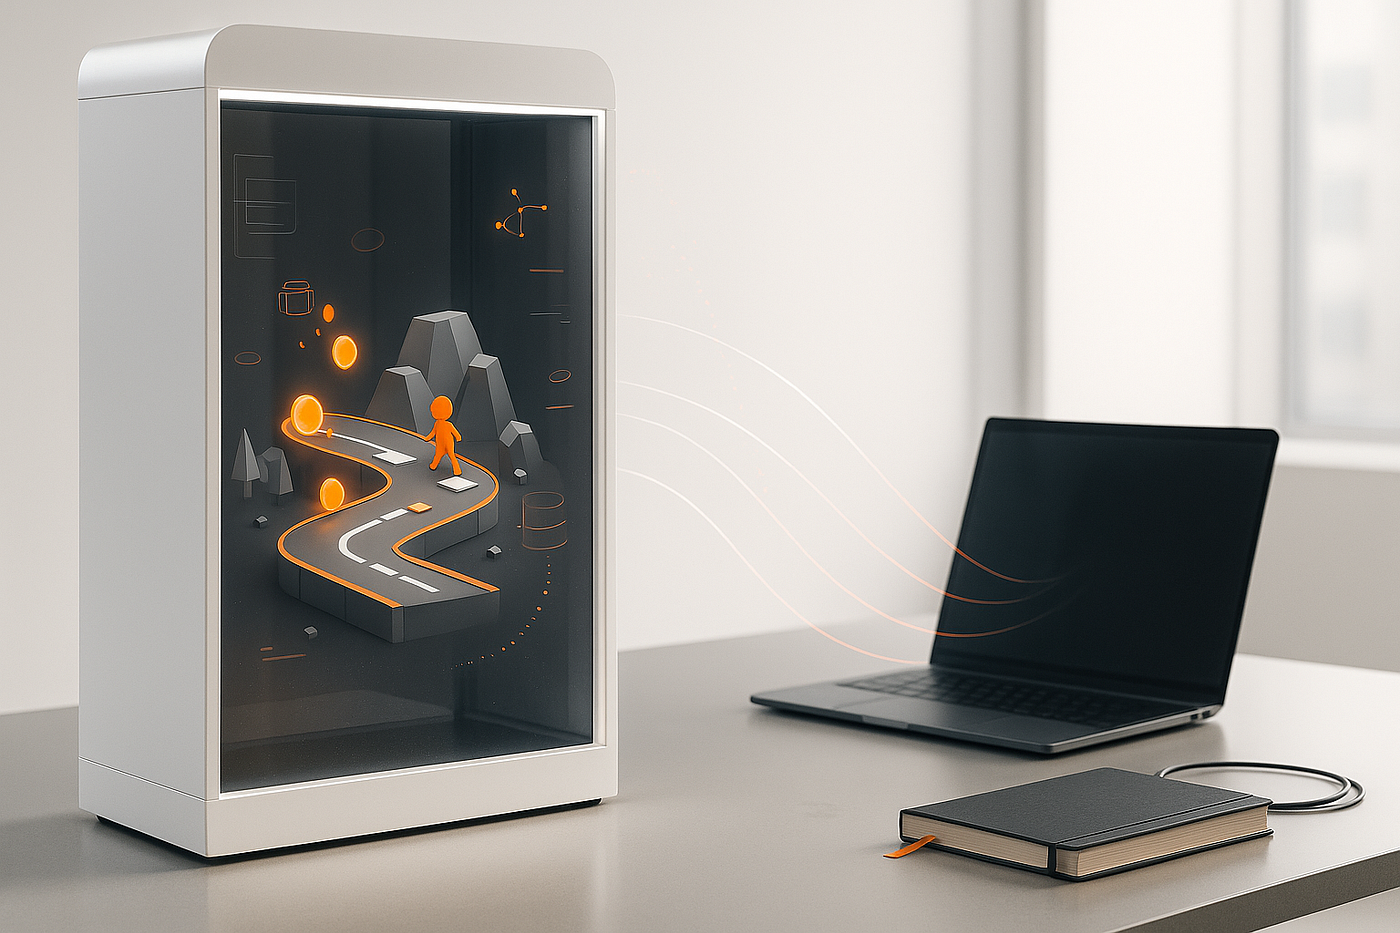
Unexpected encounter with Proto
Hello! My name is Igor Babushkin, and it’s time to share the task brought to me by our product manager Olga Ilchenko and CTO Aleksei Sychev.
Our office received the Proto Epic — an impressive device the size of a touchscreen kiosk turned out to be a holographic display that literally brings content to life. Remember how sci-fi characters calmly interact with a hologram floating in the air? Get ready to join them — instantly, the moment you see Proto in action.
What is the Proto Epic?
Proto Epic isn’t just a screen — it’s a holographic display with a resolution of 2160×3840 pixels and a 9:16 aspect ratio. Under the hood: a modified Android OS and a built-in Chromium engine responsible for rendering. Also included:
– Two cameras and a mic for capturing video and audio;
– A touch-sensitive layer over the hologram — tap and scroll freely;
– An HDMI port for direct content output.

The device is intended for use at forums and conferences, with internet access provided via a WiFi module. Keeping in mind the potential instability of the connection in such environments, I implemented a caching strategy to ensure uninterrupted operation even during temporary network outages.
The Task: Urgently develop an interactive web game
I had two months to come up with and launch a web-based game. The scenario was simple:
-
A guest scans a QR code on the Proto screen and opens the game on a smartphone;
-
The mobile client communicates with the server via a REST API;
-
Proto displays video, 3D graphics, or animations in response to the player’s actions.
The main challenge was minimal delays and zero lags — even with a poor internet connection.
Developing an app for Proto: Technical specifics
– Pure web: no native SDK — everything runs in Chromium;
– Exact resolution: layout was built directly for 2160×3840 using Chrome DevTools;
– Caching using IndexedDB: videos and textures are preloaded to prevent flickering of the hologram in case of unstable network connection.
Project architecture
- Backend (Node.js + Express + MongoDB)
– REST API for session registration and game event sharing;
– MongoDB used as data storage, indexed by sessionId to ensure performance under heavy load.
- Proto Frontend (Vanilla JavaScript)
– No frameworks: direct <video> control, WebSocket interactions, and IndexedDB-based caching;
– Minimal dependencies to avoid loading or build-time troubles.
- Mobile Client (React + TypeScript)
– React 18 enables flexible component structure, and TypeScript catches bugs before launching;
– React Router 7 — for routing inside the SPA;
- Admin panel (Vanilla JavaScript)
– Simple interface for managing promo codes, viewing logs, and handling sessions;
– Modular structure with ES modules and dynamic imports.
User client (React/TypeScript): Stack highlights
– React 18.3: a reliable, well-known tool with long-term relevance ensured by the latest version;
– TypeScript 5.6: strong typing, autocomplete, and inline documentation;
– React Router 7: one more proven and stable solution, ideal for long-term projects;
– Jotai for atomic state management — simple atoms instead of complex reducers;
In addition:
– Feature-Sliced Design: clear separation by features and layers;
– Adaptive animations: resource-heavy effects are disabled on weaker GPUs;
– Persistent storage for critical data.
Feature-Sliced Design: scalability ensured by architectural approach
For the user client, I implemented the Feature-Sliced Design (FSD) architecture — a perfect solution for projects with well-defined business requirements.
client-user/src/
  ├── 1-app/       // App configuration
  ├── 2-pages/     // Pages
  ├── 4-widgets/   // Composite components
  ├── 5-feature/   // Business features
  ├── 7-shared/    // Reusable components
The FSD approach brought several key advantages:
-
Feature isolation: Each business feature is self-contained and independent, making testing and refactoring easier.
-
Clear responsibility boundaries: Each layer has a well-defined purpose
-
No circular dependencies: Layers follow one-directional dependency rules
-
Parallel development: Independent parts of the system can be worked on at the same time
FSD made it easy to scale the application quickly, adding new features without changing the existing code.
Proto сlient
For the Proto client, I chose Vanilla JavaScript due to rather simple requirements — mainly displaying video and communicating with the server.
The architecture of the Proto web app includes simple but effective components:
client-proto/
  ├── scripts/
  │   ├── cacheManager.js     // Cache management
  │   ├── indexedDB_API.js    // IndexedDB handling
  │   ├── videoPlayer.js      // Video player
  │   ├── wsClient.js         // WebSocket client
  │   └── initializeApp.js    // Initialization
Typing and data modeling
Game state model
The core of the game logic is a state system implemented with TypeScript:
// Basic game state types
export type TGameState = 'idle' | 'ready' | 'playing' | 'finished';
// Description of the video content
export type TVideo = {
  name: string;  // File name
  loop: boolean; // Looping flag
}
// Configuration for a video state set
export type TGameStateVideos = {
  videos: TVideo[];        // Array of videos
  pointer: number;         // Pointer to the current item
  playLimit?: number;      // Playback time limit
  nextState?: TGameState;  // Next state when the limit is reached
}
// Video payload sent to the Proto client
export type TCurrentVideo = {
  videos: TVideo[];           // Array of videos for sequential playback
  notifyOnComplete?: boolean; // Notify when the sequence ends
  showQR?: boolean;           // Show QR code for connection
}
// Complete game state schema
export type TGameStateSchema = {
  idle: TGameStateVideos;       // Waiting state
  ready: TGameStateVideos;      // Ready to play
  playing: TGameStateVideos;    // Active game
  finished: null;               // Game over (no automatic video)
  currentState: TGameState;     // Current state
  currentVideo: TCurrentVideo;  // Currently playing video
  ownerToken: string | null;    // Session owner token
  tokenExpiresAt: number;       // Token expiration time
};
This type system describes all possible game states and the associated content. Each state can have its own video or a set of videos, along with rules for automatically transitioning to the next state. This type system describes all possible game states and the associated content. Each state can have its own video or a set of videos, along with rules for automatically transitioning to the next state.
Game result model
To handle and keep game results safe, I designed this type system:
// Game result types
export type TGameResult = 'win' | 'lose';
// Response structure with the result
export type TGameResultResponse = {
  result: number;       // Numeric result (number of taps)
  kind: TGameResult;    // Result type (win/lose)
};
// Result ranges for different categories
export type TGameResultsRange = {
  min: number;          // Minimum value of the range
  max: number;          // Maximum value of the range
  range: string;        // String representation of the range
  videos: string[];     // List of videos for this range
  pointer: number;      // Pointer to the current video in the rotation
};
// Complete results schema
export type TGameResultsSchema = {
  First: TGameResultsRange;    // Lowest range (loss)
  Second: TGameResultsRange;   // Medium range
  Third: TGameResultsRange;    // Good range
  Fourth: TGameResultsRange;   // Very good range
  Best: TGameResultsRange;     // Best range
};
This structure allows flexible customization of result ranges and linked videos, providing players with personalized feedback based on their achievements.
Technical challenges and solutions
Operating under unstable network conditions
Since we planned to showcase the results at tech exhibitions — where internet quality is often far from reliable — it was important to ensure that the app would continue working smoothly even with network problems. As a starting point, I chose video as the main interactive element.
The high resolution of the Proto Epic (2160x3840) entailed serious requirements on video quality, which in turn led to larger file sizes. The standard browser cache for HTTP requests wasn’t suitable for storing such large arrays of data, so I implemented a caching system based on IndexedDB.
The architecture of the cache manager was outlined like this:
/ Creating the cache manager
export const createCacheManager = async (baseUrl) => {
  // Initializing the database and a Map to track downloads
  const db = await createDB(CACHE_CONFIG.DB_NAME, VIDEO_CACHE_VERSION);
  const currentDownloads = new Map();
  // Caching function with request deduplication
  const cacheVideo = async (videoName, onProgress) => {
    // Checking current downloads and existing cache
    // Streaming download with progress tracking
    // Saving to IndexedDB
  };
  // Retrieving video from the cache
  const getVideo = (videoName) => getFromStore(db, CACHE_CONFIG.STORE_NAME, videoName);
  // Clearing outdated cache
  const clearOldCache = async (maxAgeMs, cacheVersion) => {
    // Version check and removal of outdated entries
  };
  return { cacheVideo, getVideo, clearOldCache };
};
Key features of the caching system:
-
Deduplication of parallel requests — when different parts of the app request the same video simultaneously, the video is actually downloaded only once
-
Cache version tracking — the entire cache is cleared when the app is updated
-
Automatic cleanup of old entries — to prevent storage overflow
-
Progress visualization — the user sees that the system is actively preparing for operation
These solutions ensured stable video playback even in case of connection loss and helped optimize device resource usage.
Seamless video playback framework
I achieved seamless video playback using a double buffering system with two <video> elements.
Double buffering pattern:
// Switching between two video elements
const swapPlayers = () => {
  // Identify the active and inactive elements
  // Hide the active one, show the inactive
  // Release resources of the active element
  // Change the index of the active element
};
// Playing the next video
const playVideoFromSrc = async (videoData) => {
  // Use the inactive element
  // Load the new video from cache or via URL
  // Set up event listeners
  // Start playback
  // Perform a smooth transition
};
// Pre-caching all videos in the queue
const prefetchVideos = (videos) => {
  // Launch parallel caching of videos from the queue
};
This method allows loading the next video in the queue in the background while the current one is playing. During the switch, an instant opacity transition between elements creates a smooth crossfade effect with no visible delay.
Adaptive animations based on device capability
It was an interesting challenge to ensure smooth animations on devices with varying performance levels. To deal with it, I developed an adaptive animation system that adjusts visual complexity according to the device’s capabilities:
// Device performance levels
export enum PerformanceLevel {
  HIGH = 'high',
  MEDIUM = 'medium',
  LOW = 'low',
  VERY_LOW = 'very_low',
}
// Animation settings based on performance
const getAnimationSettings = (performanceLevel: PerformanceLevel) => {
  switch (performanceLevel) {
    case PerformanceLevel.HIGH:
      return {
        particleCount: 50,
        interval: 250,
        // Full settings for high-performance devices
      };
    case PerformanceLevel.MEDIUM:
      return {
        // Reduced settings for mid-range devices
      };
    case PerformanceLevel.LOW:
      return {
        // Minimal settings for low-end devices
      };
    case PerformanceLevel.VERY_LOW:
      return {
        // Basic settings for very low-end devices
      };
  }
};
// Hook for detecting device performance
export const usePerformanceCheck = (): PerformanceLevel => {
  // User-Agent detection for known low-end devices
  // FPS measurement for dynamic performance evaluation
  // Returns the appropriate performance level
};
This solution offers several key advantages:
-
Automatic adaptation: the system determines the performance level on its own
-
Smooth degradation: instead of turning off effects completely, we reduce their intensity
-
Individual control over each parameter: Every aspect of the animation can be precisely configured
-
Resource saving: on low-end devices, CPU/GPU load is reduced
This approach made it possible to build an application that runs equally well on both flagship devices and less powerful smartphones.
Component-based approach to animations
To ensure consistency and reusability of animations, I developed specialized components:
// Component for fade-in/fade-out effect
export const Fade = ({ kind, children, className, duration = 0.3 }: TFadeProps) => {
  // Declarative animation definition using “motion”
};
// Component for slide effect
export const Slide = ({ children, className, kind, duration = 0.5, onAnimationComplete }: TSlideInProps) => {
  // Declarative slide animation
};
// Component for fireworks
export const FireWorks = ({ children, disabled = false }: FireWorksProps) => {
  useFireWorks({ disabled });
  return children;
};
Advantages of the approach:
-
Unified visual language: All transitions look consistent
-
Separation of animation logic from business logic: Components handle only animations
-
Declarative style: Animations are defined as component properties
-
Reusability: The same component can be used across different parts of the application
Reactive interaction via WebSocket
To enable instant communication between the user’s client, the server, and the Proto Epic, I implemented a WebSocket-based communication system:
// WebSocket message interface
export type TWSMessage = {
  videos: TVideo[];           // Video to play
  notifyOnComplete?: boolean; // Notify on completion
  showQR?: boolean;           // Show QR code
};
// Server
export function initWs(server) {
  // WebSocket server initialization
  // Handling client connections
  // Sending the current state upon connection
}
// Broadcast function
export async function broadcastGameStateVideo(newState: TGameState) {
  // Determining the video for the current state
  // Sending a message to all connected clients
}
// Client
function setupWebSocket({ WS_URL, config, onMessage, onClose }) {
  // WebSocket connection setup
  // Message handling
  // Automatic reconnection in case of disconnect
}
As a result, the holographic device responds instantly to the user’s actions on the smartphone, creating the feeling of a seamless interactive system.
Circular buffer for content
To ensure that videos are played in the correct order, I implemented a circular buffer pattern:
// Function for retrieving the next item from a circular buffer
export function getNextItemPointer<T>(items: T[], pointer: number): { item: T; newPointer: number } {
  // Calculating the current index
  const index = pointer % items.length;
  // Retrieving the item
  const item = items[index];
  // Calculating the next index with wrapping
  const newPointer = (pointer + 1) % items.length;
  return { item, newPointer };
}
This simple yet effective solution ensures fair content distribution and prevents the same videos from playing back-to-back.
Authorization system via promo codes
To simplify authorization, I implemented a one-time promo code system with collision protection:
// Promo code interface
export interface IPromoCode {
  _id: string;      // MongoDB ID
  code: string;     // Promo code value
  used: boolean;    // Usage flag
  createdAt: Date;  // Creation date
}
// Promo code generation with collision handling
export async function generatePromoCodes(count: number): Promise<string[]> {
  // Generation of unique codes
  // Saving to the database with duplicate handling
  // Returning successfully created codes
}
// Checking promo code validity
export async function isPromoCodeValid(code: string): Promise<boolean> {
  // Searching the database for an unused promo code
  // Returning the validation result
}
// Marking the promo code as used
export async function markPromoCodeUsed(code: string) {
  // Updating the database record
}
The user enters the promo code on the smartphone and gains access to the game. After the session ends, the code is automatically deactivated. This makes the usage cycle simple and secure.
Effective state management with Jotai
For the user client, I chose the Jotai library instead of Redux or the Context API, which brought many advantages:
// Defining atoms for key states
export const gameStateAtom = atom<TGameState>('idle');
export const gameResultAtom = atom<number>(0);
export const gameResultResponseAtom = atom<TGameResultResponse | null>(null);
export const isLoadingAtom = atom<boolean>(false);
// Persistent storage with atomWithStorage
const timerDeadlineAtom = atomWithStorage('timerDeadline', 0);
// Usage in components
export function Router() {
  const [gameState] = useAtom(gameStateAtom);
  return (
    <Routes>
      <Route path={MAIN_ROUTE} element={<MainApp />} />
      {gameState === 'finished' && <Route path={FINAL_ROUTE} element={<Final />} />}
      {/* Other routes */}
    </Routes>
  );
}
Advantages of Jotai:
-
Atomic updating: Components re-render only when the specific atoms they use change
-
No boilerplate: Minimal code needed to define state
-
Type safety: Full TypeScript support
-
React integration: Using React hooks
-
Lightweight: Much smaller bundle size compared to Redux
Persistent timer with state recovery
To ensure the timer keeps working reliably even after the app is unexpectedly closed, I implemented a persistent timer that stores the deadline:
// Constants for the timer
const STORAGE_KEY = 'timerDeadline';
const INITIAL_DEADLINE = 0;
const INTERVAL_MS = 1000;
// Atom for storing the deadline in localStorage
const timerDeadlineAtom = atomWithStorage(STORAGE_KEY, INITIAL_DEADLINE);
// Hook for persistent timer
export function usePersistentTimer(onTimerEnd: () => void) {
  const [deadline, setDeadline] = useAtom(timerDeadlineAtom);
  const [timeLeft, setTimeLeft] = useState<number>(0);
  // Timer start logic
  const start = useCallback(/* ... */);
  // Timer stop logic
  const stop = useCallback(/* ... */);
  // State restoration on mount
  useEffect(/* ... */);
  // Resource cleanup on unmount
  useEffect(() => () => clearTimer(), [clearTimer]);
  return { timeLeft, start, stop };
}
This approach ensures uninterrupted gameplay and prevents any attempts to tamper with the timer.
Results and conclusions
Developing the app for Proto became an exciting challenge that combined a familiar web stack with the unique demands of a holographic display. Despite tight deadlines and inconsistent network quality, we achieved a stable system that performs reliably even in unstable conditions.
Key success factors:
-
Effective video caching using IndexedDB;
-
Double buffering for smooth video playback without black screens;
-
WebSocket communication for real-time event exchange (latency < 50 ms);
-
Clear state management system with predictable transitions;
-
Feature-Sliced Design architecture for scalable development;
-
Adaptive animations, that adjust to the GPU’s capabilities;
-
Atomic state management using Jotai;
-
Persistent storage of critical data.
All of these solutions proved reliable even during early prototype testing — when smoothness, responsiveness, and minimal delays under unstable network conditions were especially important.
The project clearly demonstrated that modern web technologies are ready to go beyond flat screens and deliver immersive wow effects through interfaces that “come alive”. The right architectural choices and battle-tested tools are key to success — even under the pressure of tight deadlines.
It’s important to note that this project is only an MVP — a way to “touch” the technology and outline a path for its future use. I already have plenty of ideas for improving the product if it performs well at launch — and those improvements will definitely be worth another article.
메타데이터
- post_id
- 8caad04593d0
- slug
- how-we-engineered-an-interactive-game-for-a-holographic-display-8caad04593d0
- url
- https://medium.com/@sportsoft/how-we-engineered-an-interactive-game-for-a-holographic-display-8caad04593d0
- canonical_url
- https://medium.com/@sportsoft/how-we-engineered-an-interactive-game-for-a-holographic-display-8caad04593d0
- author_url
- https://medium.com/@sportsoft
- status
- ok
- fetched_at
- 2026-07-17 21:46:37