Onlyoffice Desktop Editor-AI Powered Writing (Multi language, Re-Writing, Summarisation, Checking…
Learn to Install Ollama/GPT4ALL/LM Studio/Jan AI+Text Generation UI+llamafile Models+OnlyOffice Desktop Editor and Integrate…
Onlyoffice Desktop Editor-AI Powered Writing (Multi language, Re-Writing, Summarisation, Checking, Document Translation with Ollama+GPT4ALL+LMStudio +Jan AI+HuggingFace +llamafile Models on Windows/Mac/Linux.
Learn to Install Ollama/GPT4ALL/LM Studio/Jan AI+Text Generation UI+llamafile Models+OnlyOffice Desktop Editor and Integrate Ollama+GPT4ALL+ LM Studio/Jan AI+Text Generation UI+llamafile Models Desktop Editor, You can Also Integrate with OpenAI/Anthropic/Google Gemini, Deep Seek, Together AI, Groq, Mistral & xAI (You can fill detail yourself in your system while configuration).
Kindly note this Article going to be long and will be updated soon, Kindly expect little delay due to time shortage.
A Gradio web UI for Large Language Models with support for multiple inference backends.
Features
- Supports multiple text generation backends in one UI/API, including Transformers, llama.cpp, and ExLlamaV2. TensorRT-LLM is supported via its own Dockerfile, and the Transformers loader is compatible with libraries like AutoGPTQ, AutoAWQ, HQQ, and AQLM, but they must be installed manually.
- OpenAI-compatible API with Chat and Completions endpoints — see examples.
- Automatic prompt formatting using Jinja2 templates.
- Three chat modes: instruct, chat-instruct, and chat, with automatic prompt templates in chat-instruct.
- “Past chats” menu to quickly switch between conversations.
- Free-form text generation in the Default/Notebook tabs without being limited to chat turns. You can send formatted conversations from the Chat tab to these.
- Multiple sampling parameters and generation options for sophisticated text generation control.
- Switch between different models easily in the UI without restarting.
- Simple LoRA fine-tuning tool.
- Requirements installed in a self-contained installer_files directory that doesn’t interfere with the system environment.
• • Extension support, with numerous built-in and user-contributed extensions available. See the wiki and extensions directory for details.
GPT4All: Run Local LLMs on Any Device. Open-source and available for commercial use.
llamafile lets you distribute and run LLMs with a single file, You can file llamafile available models on huggingface.
Get up and running with Llama 3.3, DeepSeek-R1, Phi-4, Gemma 2, and other large language models.
[embed]Ollama Get up and running with large language models.ollama.com
Your local AI toolkit.
Download and run Llama, DeepSeek, Mistral, Phi on your computer.
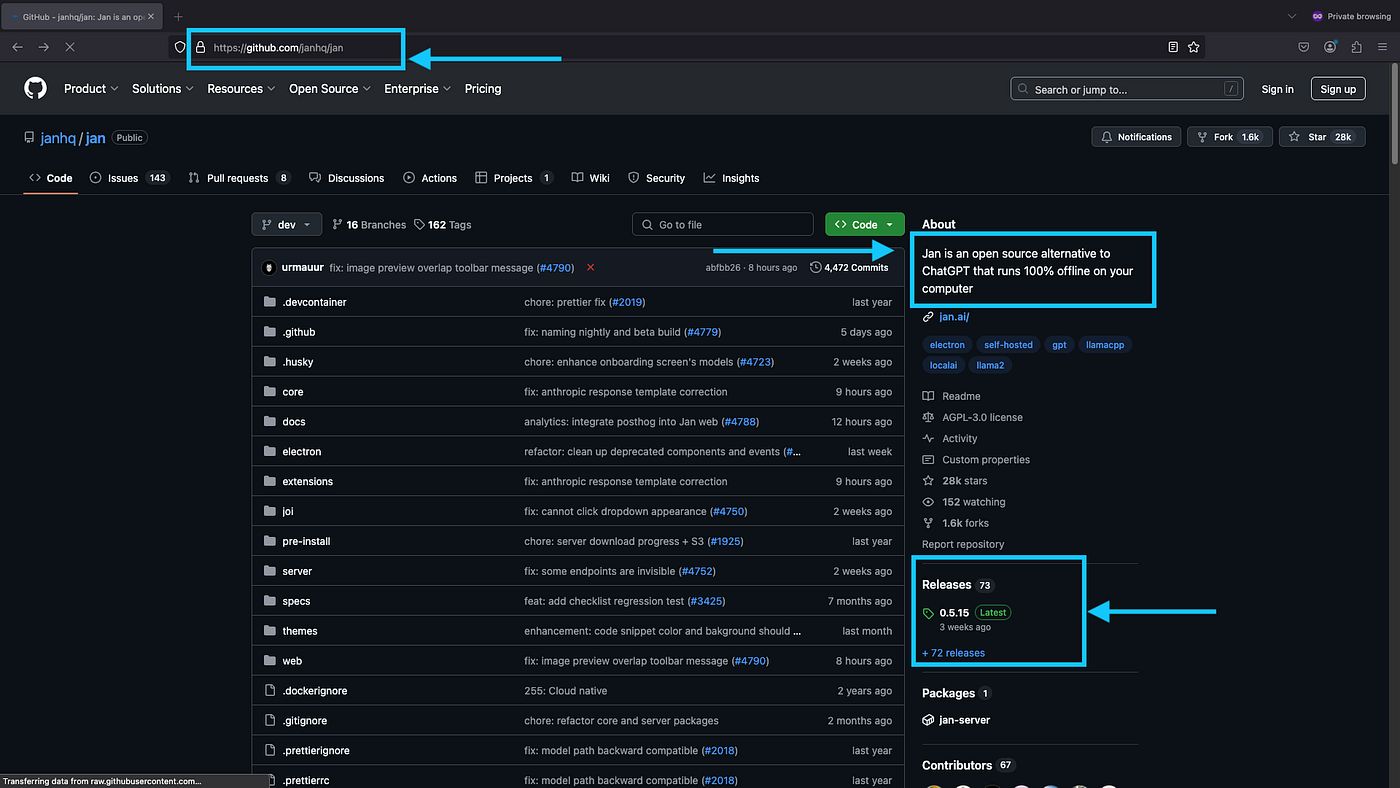
Jan is an open source alternative to ChatGPT that runs 100% offline on your computer
An office suite that combines text, spreadsheet and presentation editors allowing to create, view and edit local documents
Let’s Get started with the Installations.
Text GenerationUI Installation on MacOS:
Step 01: Now clone the repository with below command.
git clone https://github.com/oobabooga/text-generation-webui.git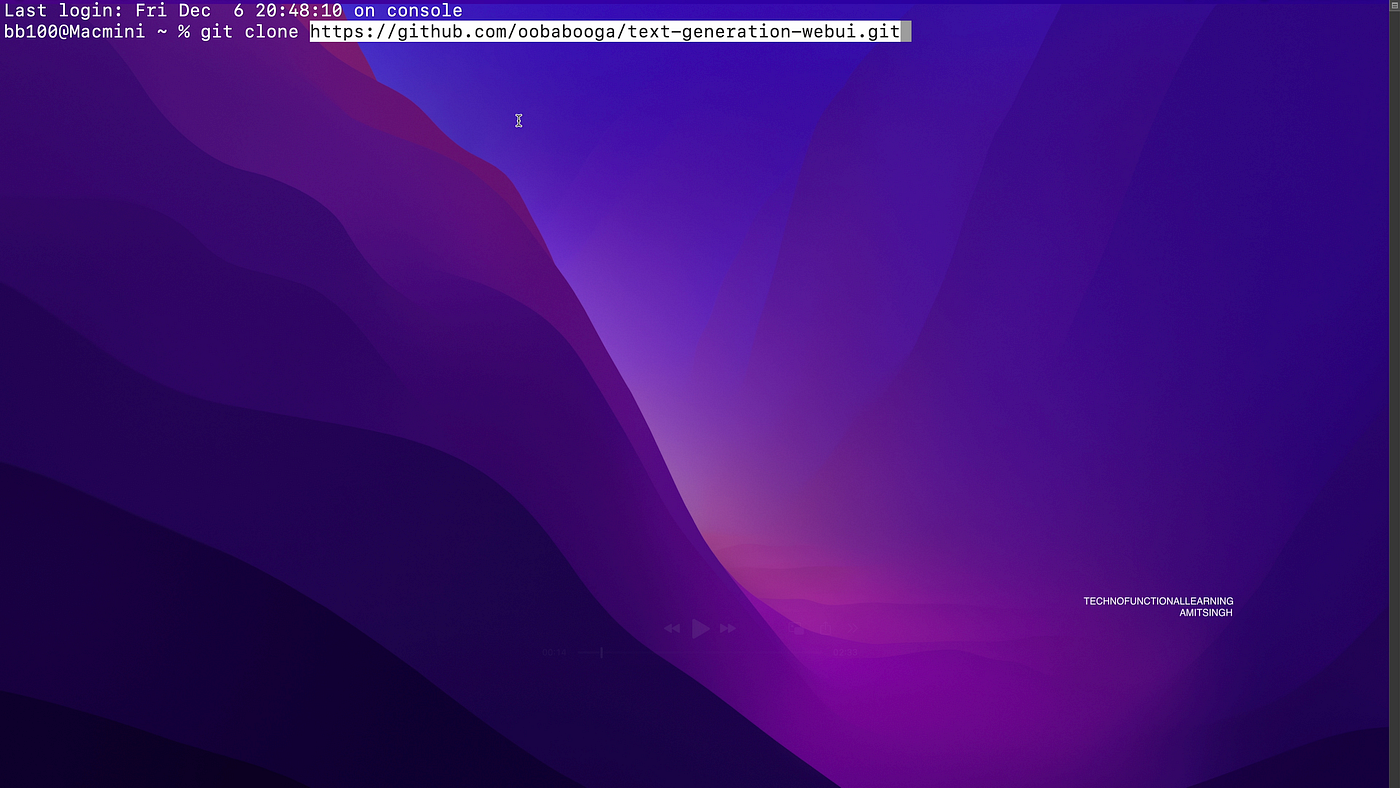
Step 2: Now get into Text generation UI and run below command for Linux or /Mac, system will download relevant dependencies and provide WebUI on http://localhost:7860 along with OpenAI-compatible API URL:
./start_linux.sh --api
./start_macos. sh --api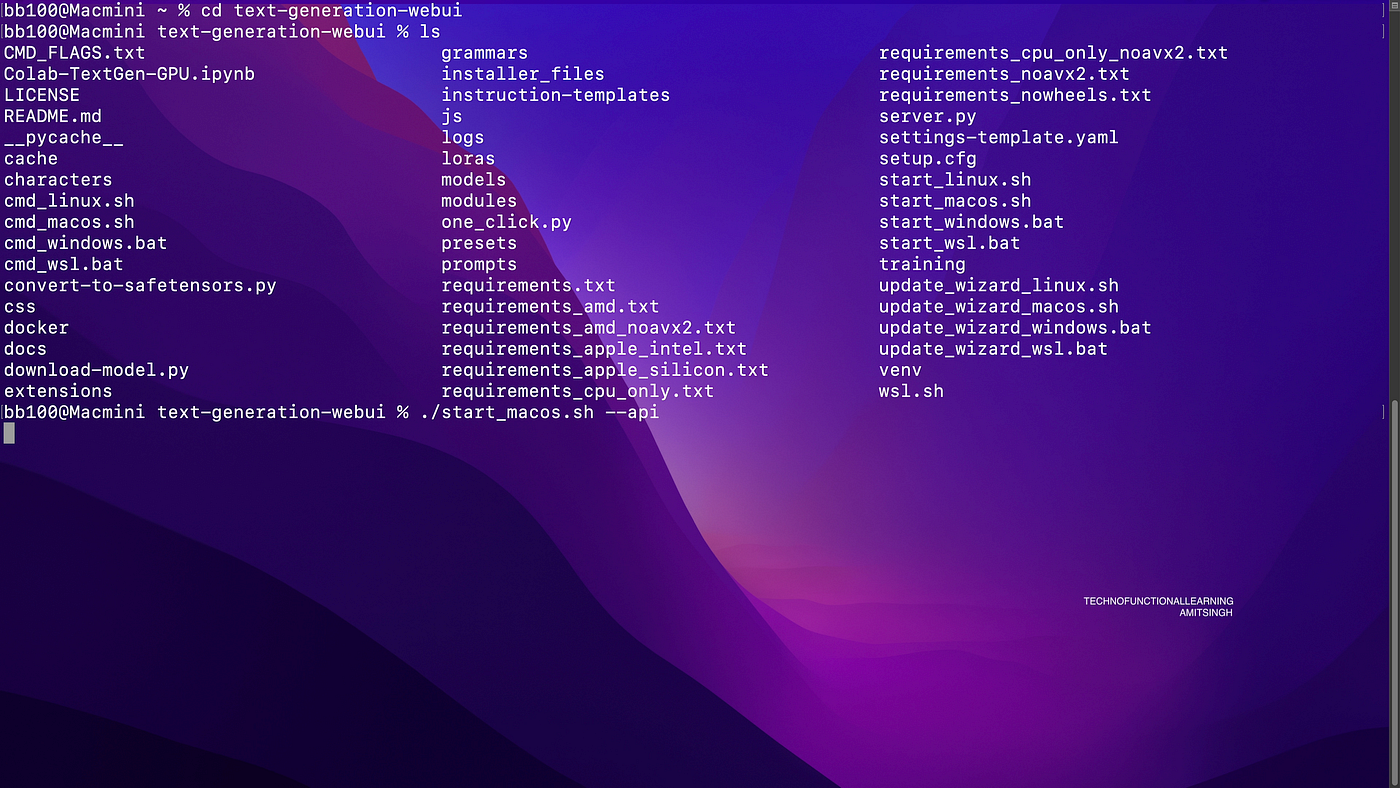
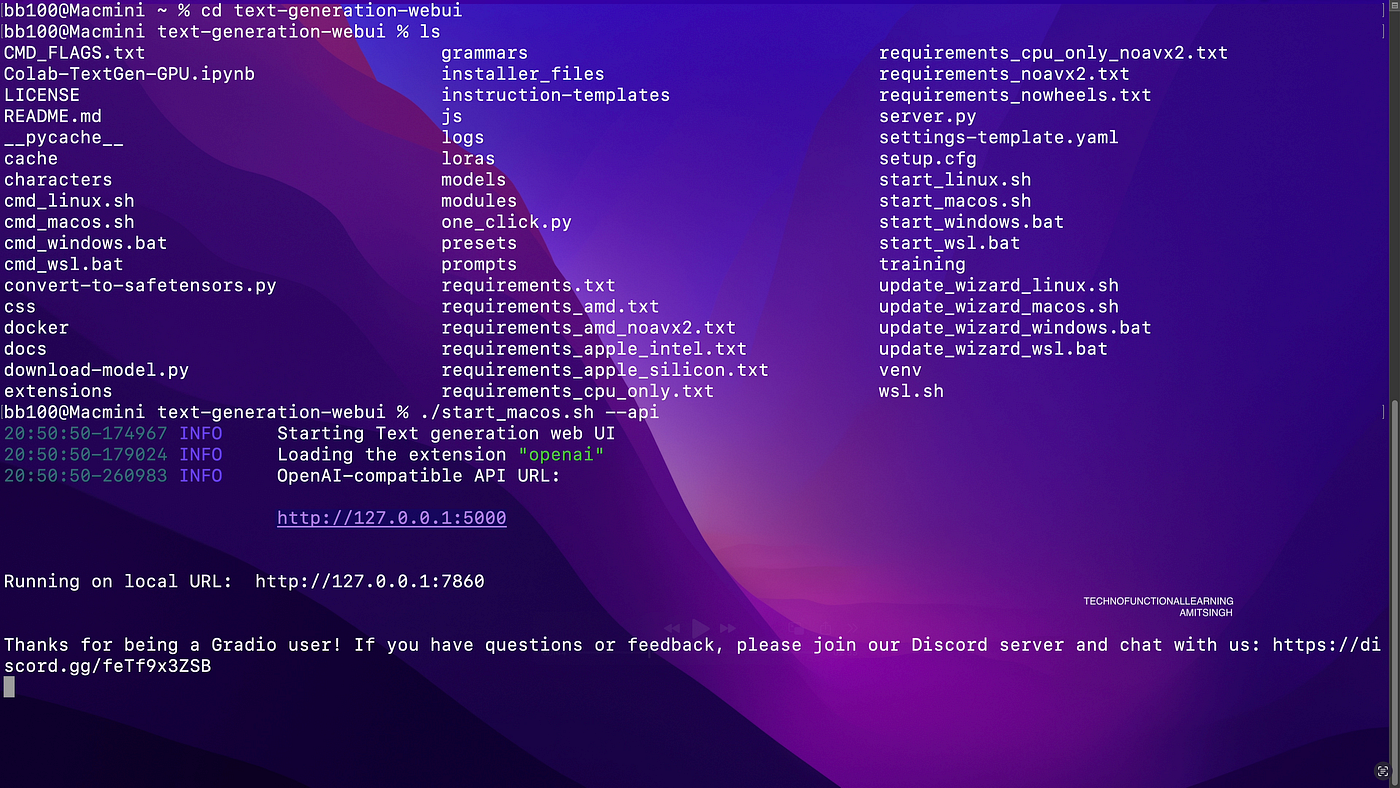
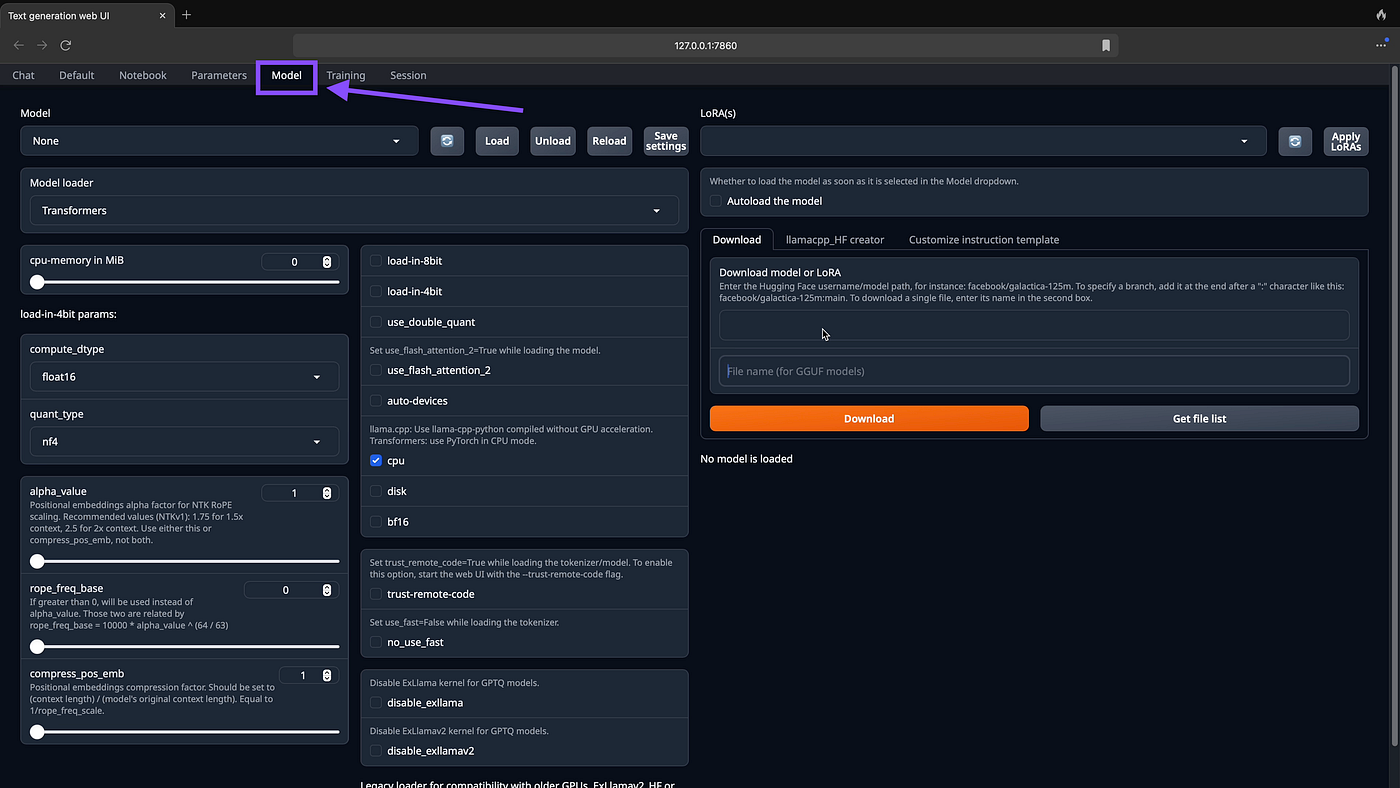
Step 03: Now go to localhost:7860 and click on models as shown in below screenshot.
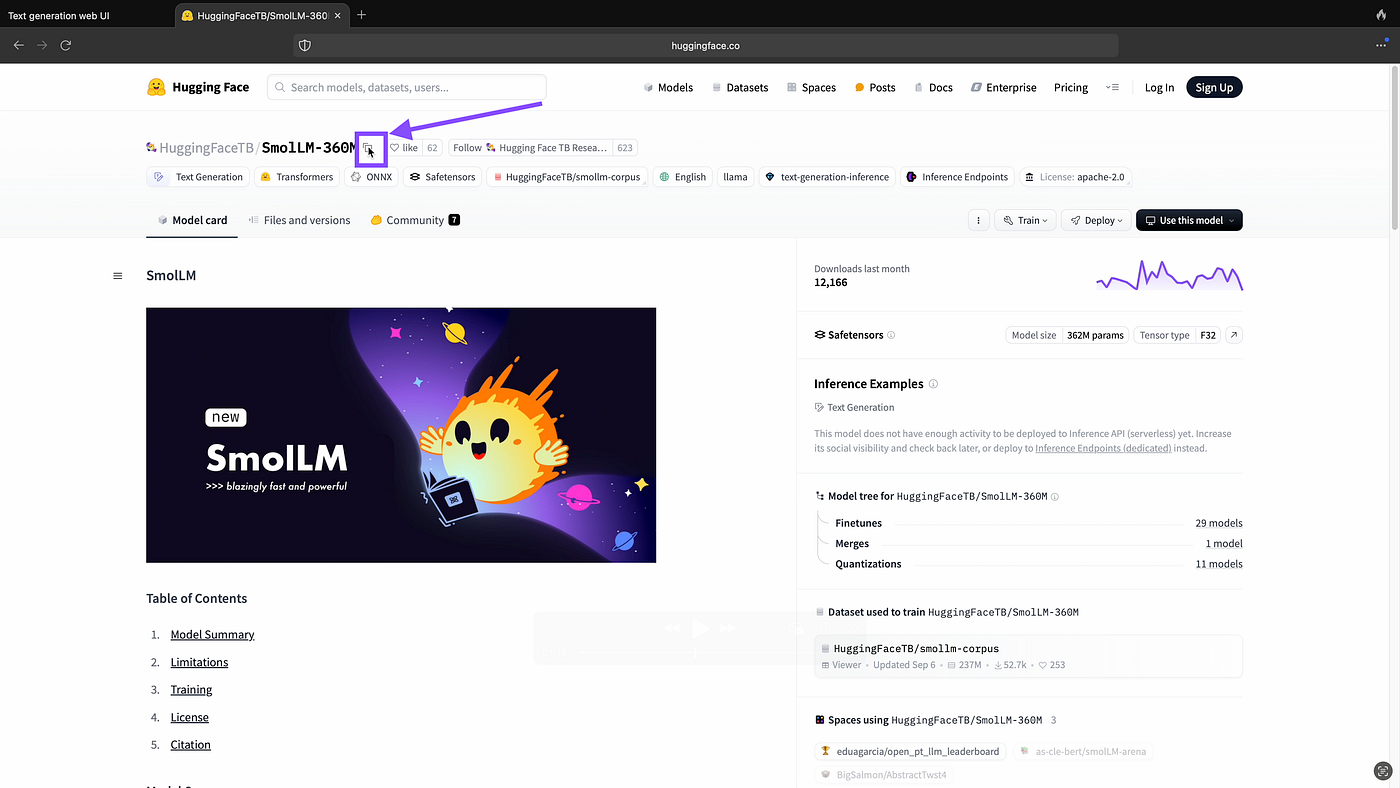
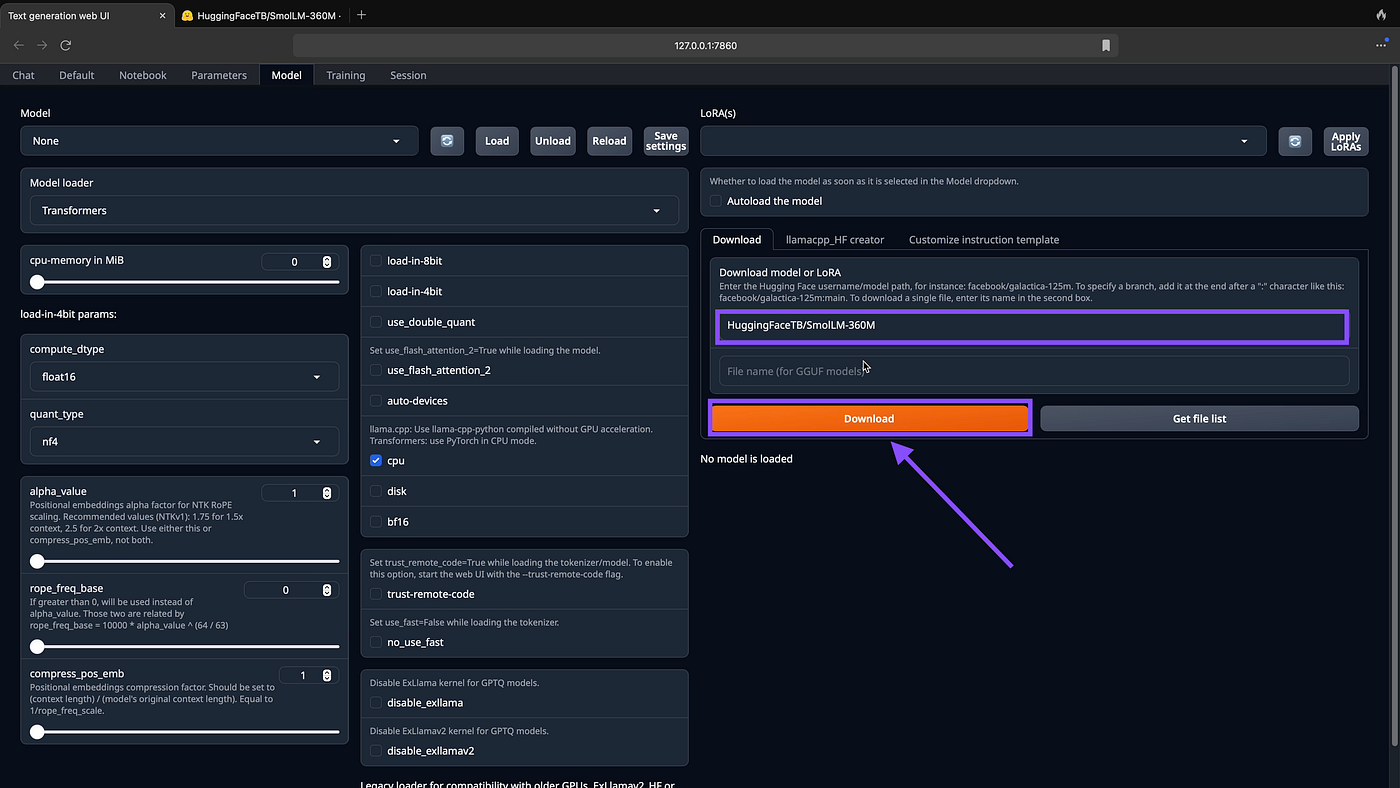
Step 04: Now get the URL of your Favourite Huggingface LLM model and paste in Download Model space as shown in below screenshots.
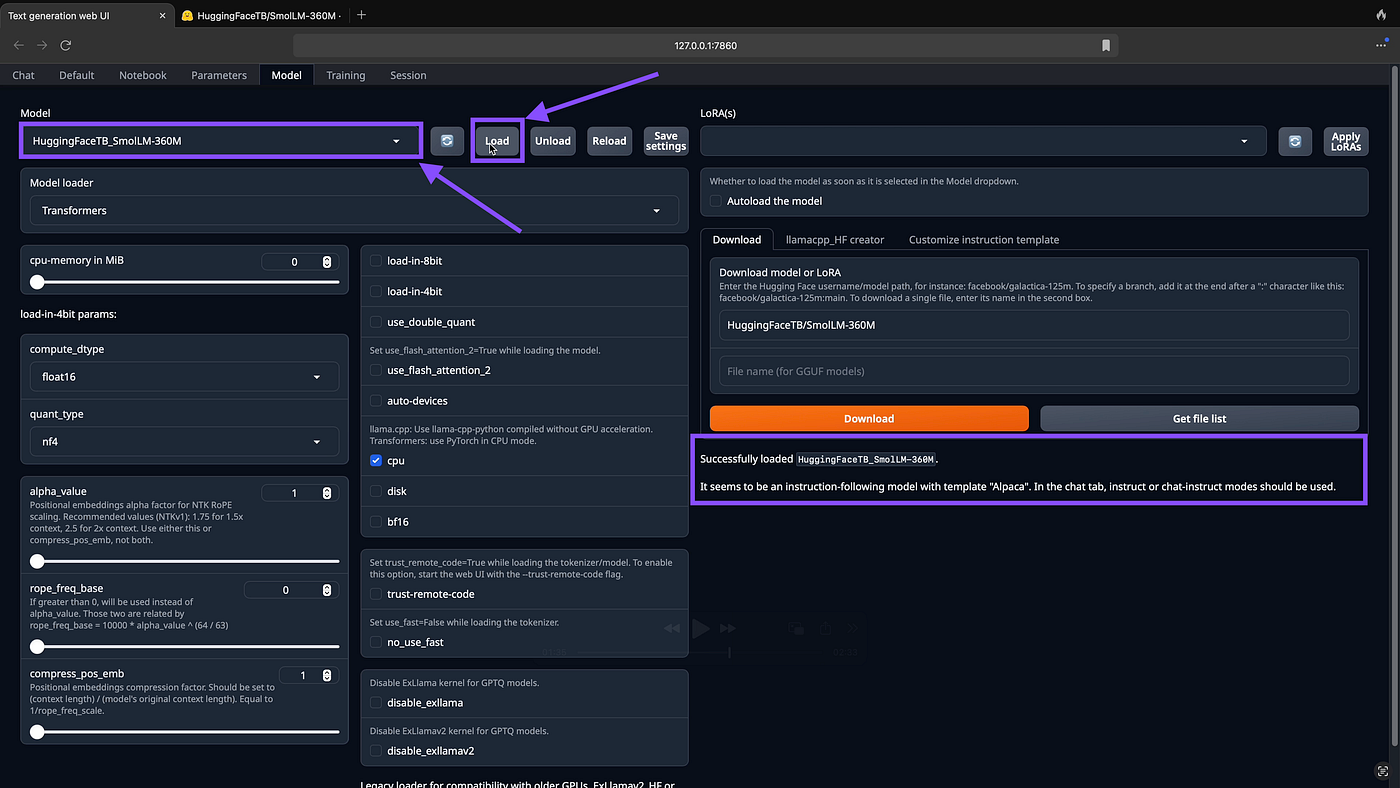
Step 05: Once the Model is Downloaded, Choose the Model from Dropdown and Click on Load as shown in Below screenshot.
GPT4All Installation on MacOS
Step 06: You can visit GPT4ALL GitHub repository by typing website address as shown in Point 1 of screenshot. You can read quick summary about GPT4ALL in Point 2 and to download GPT4ALL for macOS, Linux and Windows. You can click on releases as shown in Point 3 of screenshot.
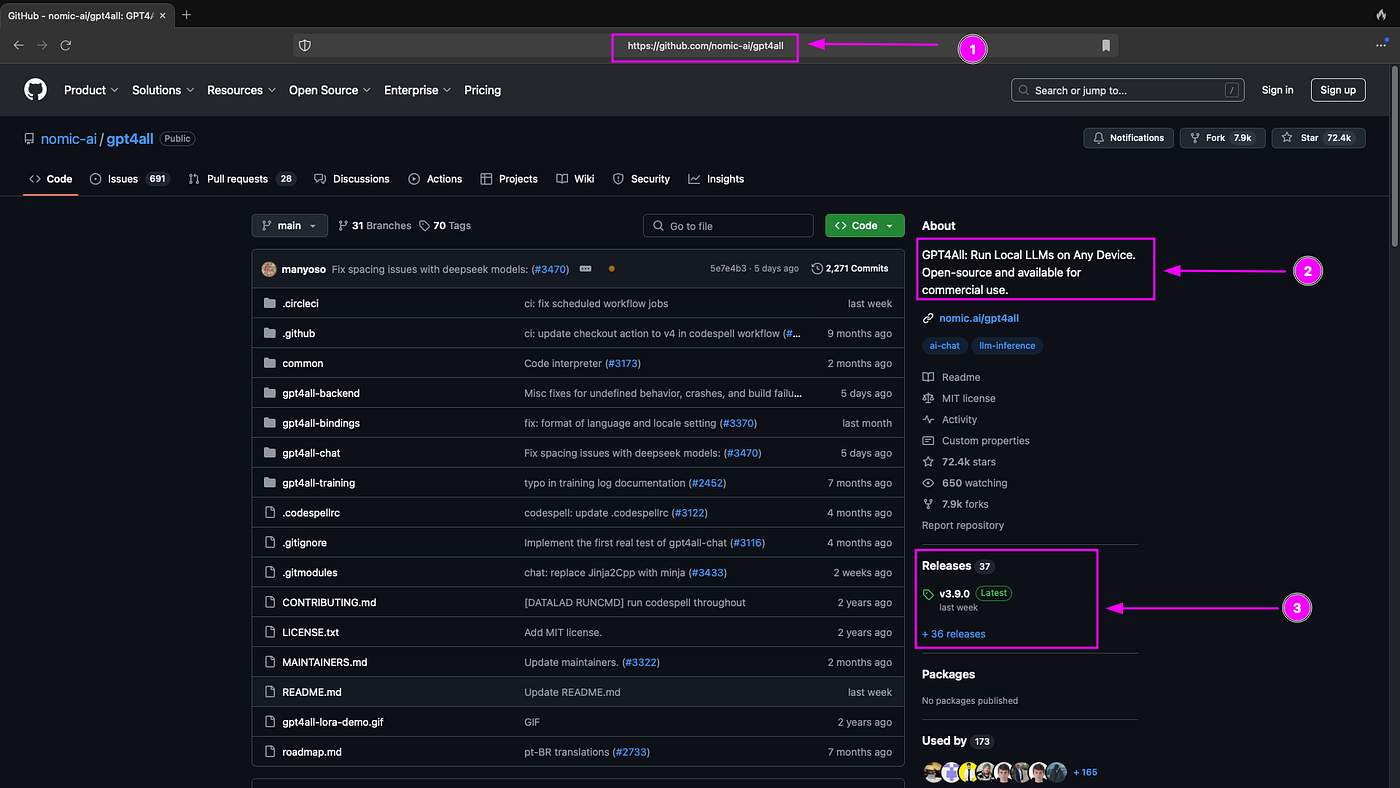
Step 7: Now you can download the GPT4ALL installer for macOS as highlighted in Point 4 in the screenshot.

Step 8: Once you download the installer, just double-click the installer and follow the installation instruction.
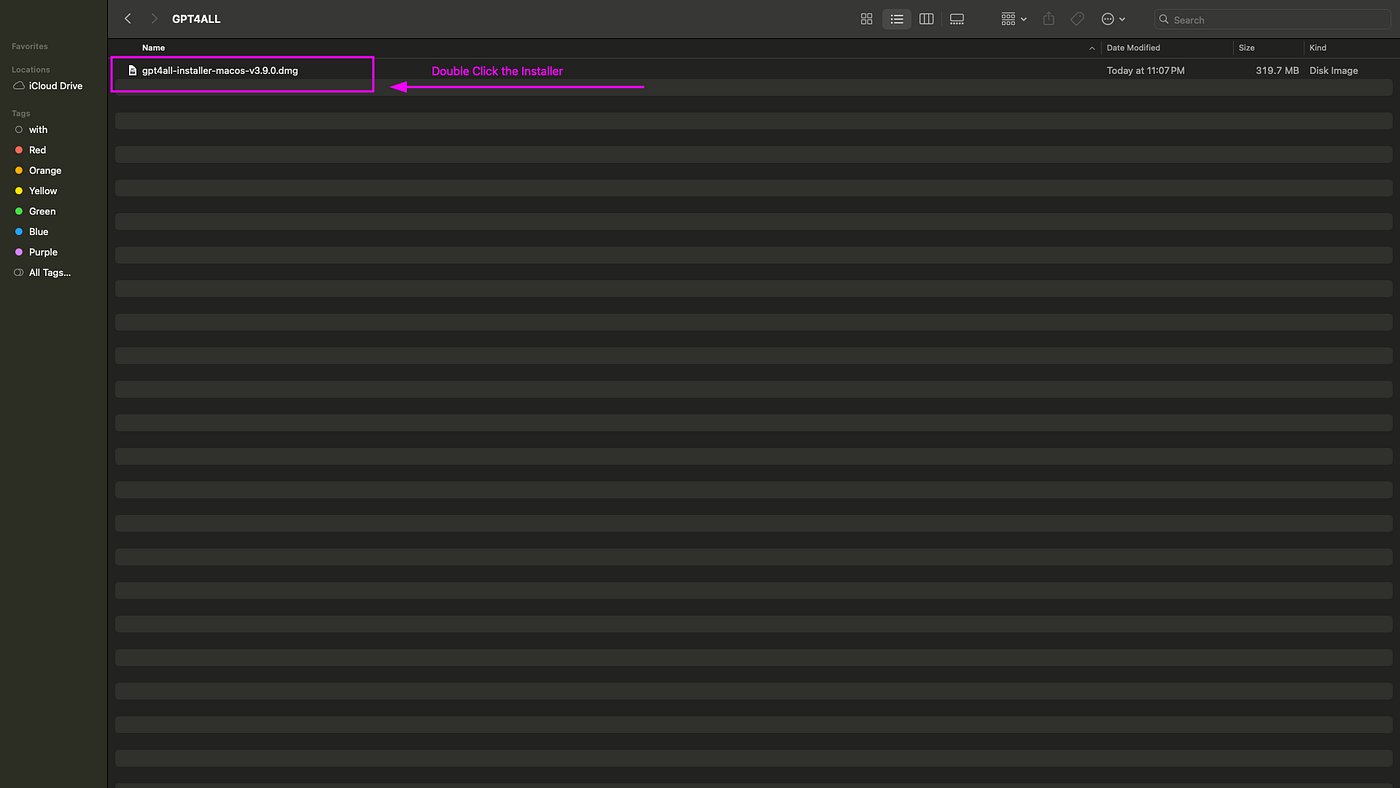
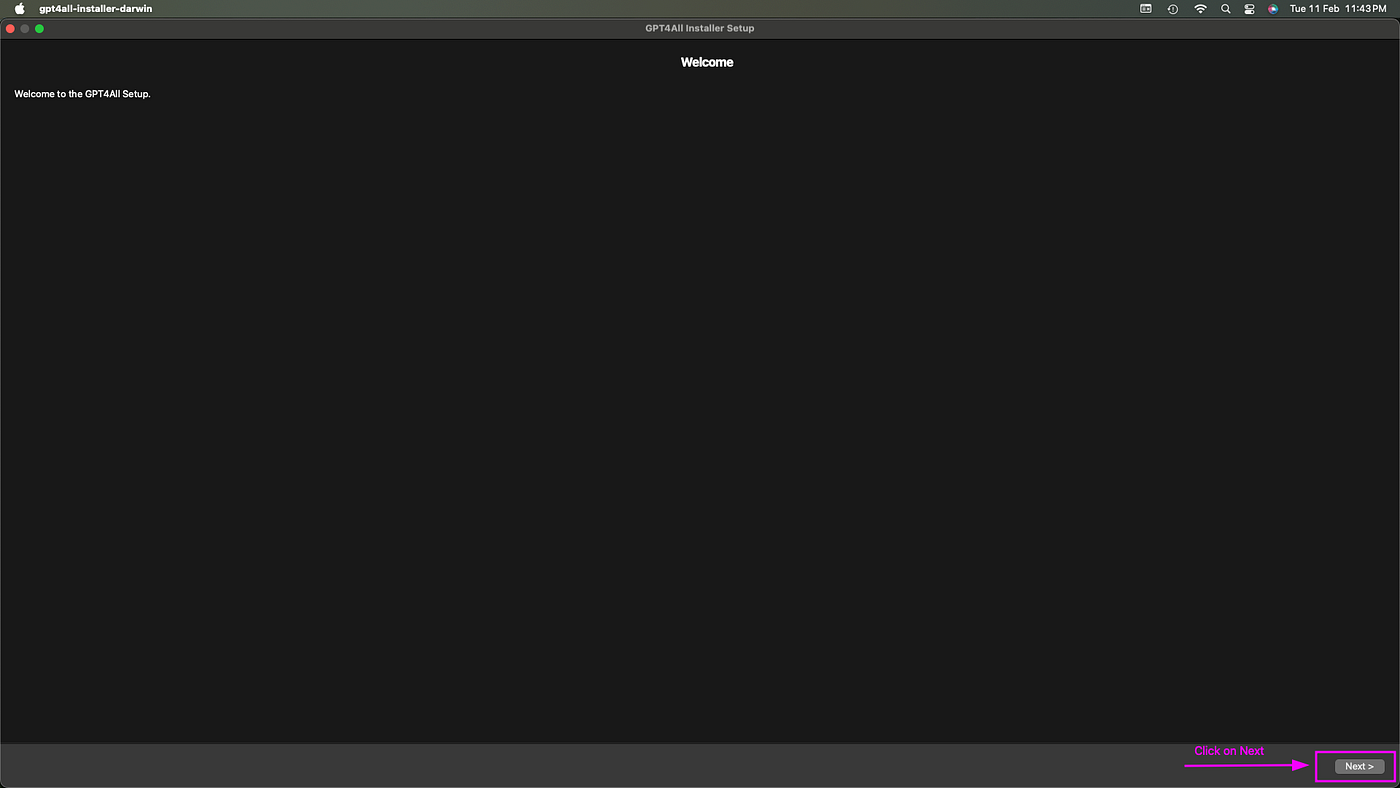
Step 9: Now click on next button to proceed further.
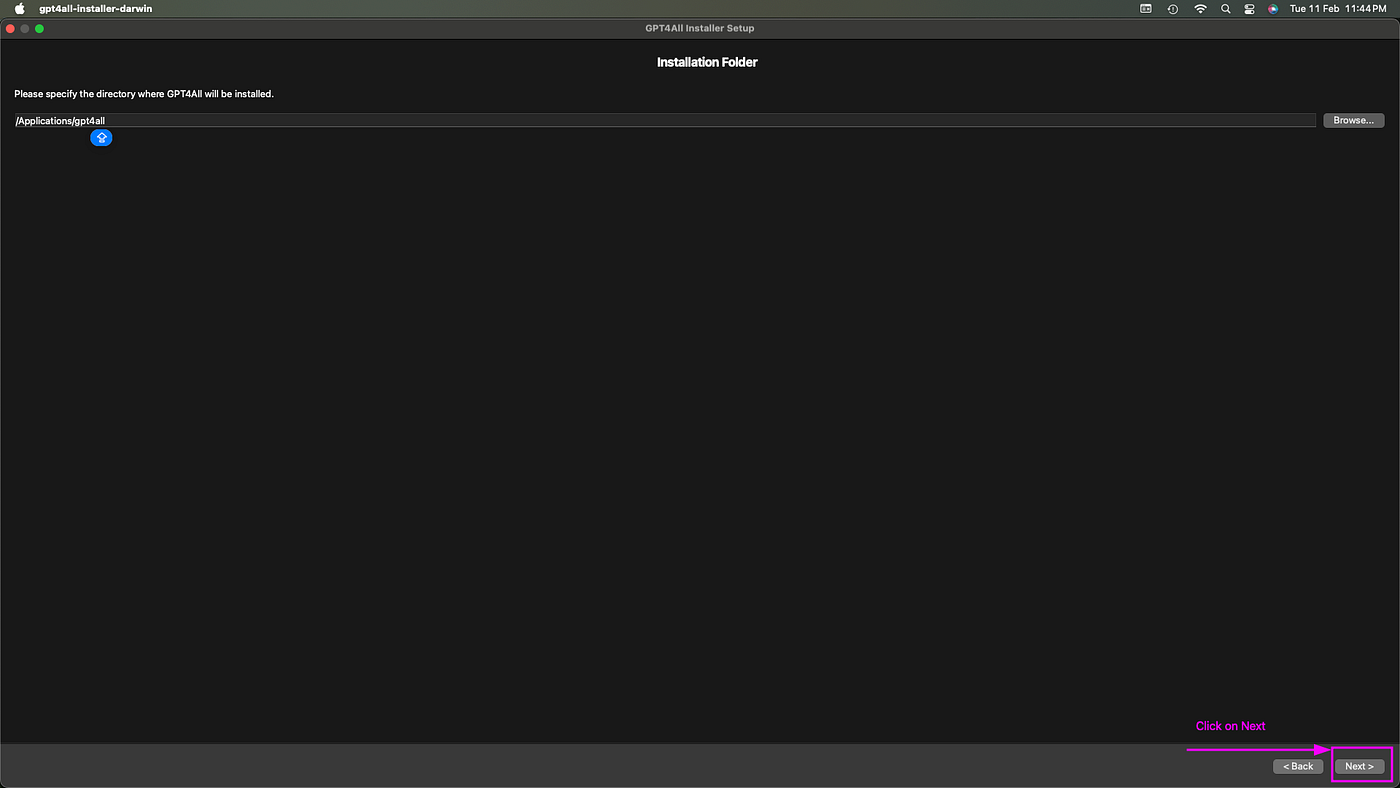
Step 10: Now click on next button to proceed further.
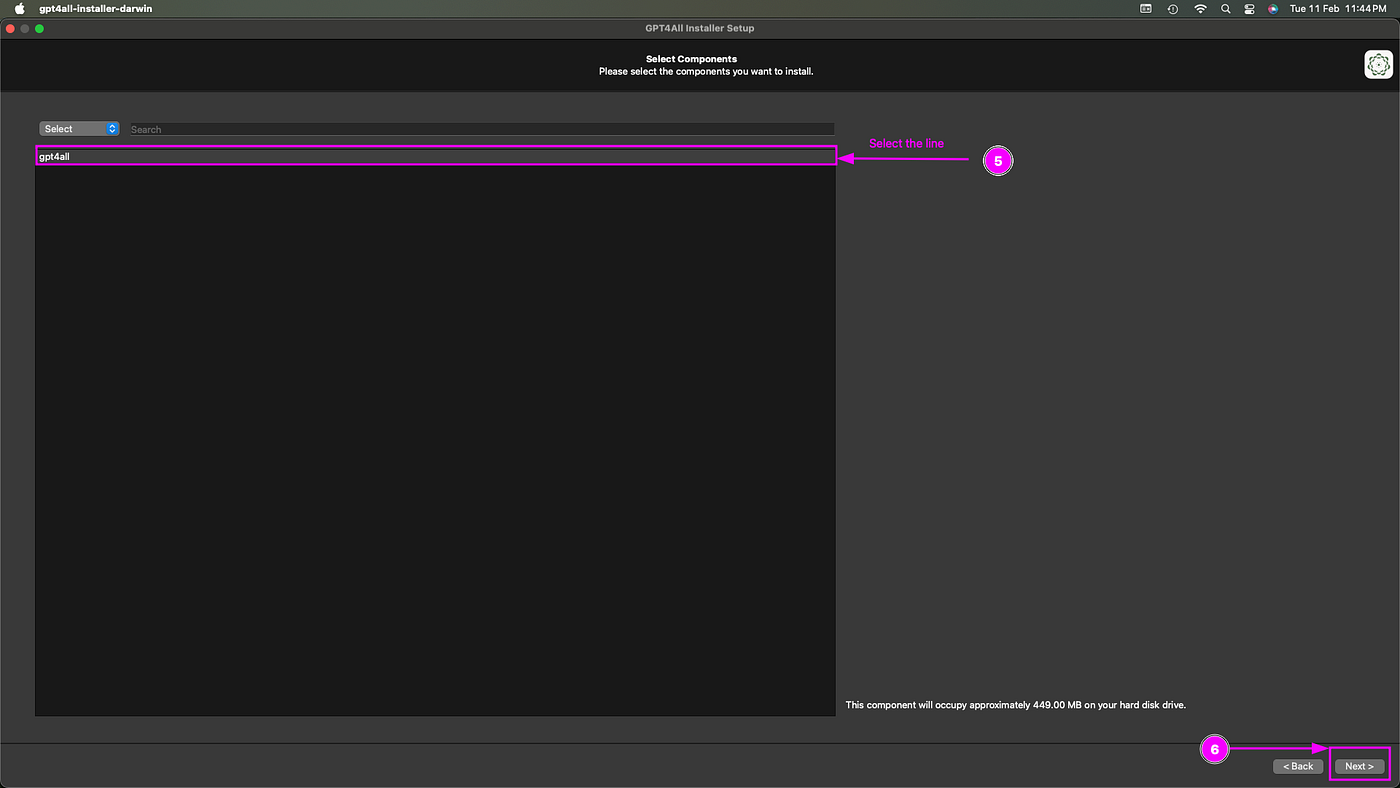
Step 11: Now click on the line as shown in Point 5 and then click on next button as shown in Point 6 of the screenshot.
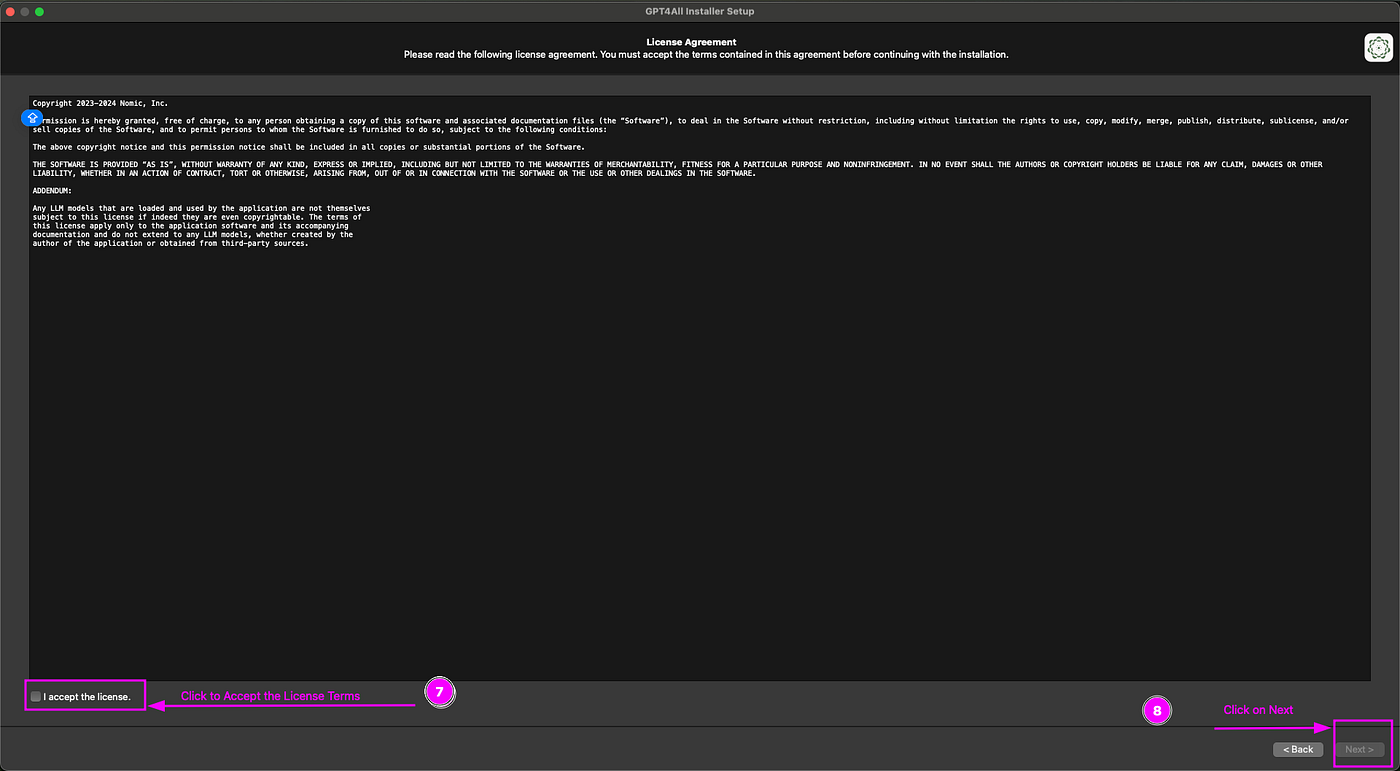
Step 12: Now review the application license terms and condition and click on check box to accept as shown in Point 7 and click on next button shown in Point 8 of the screenshot.
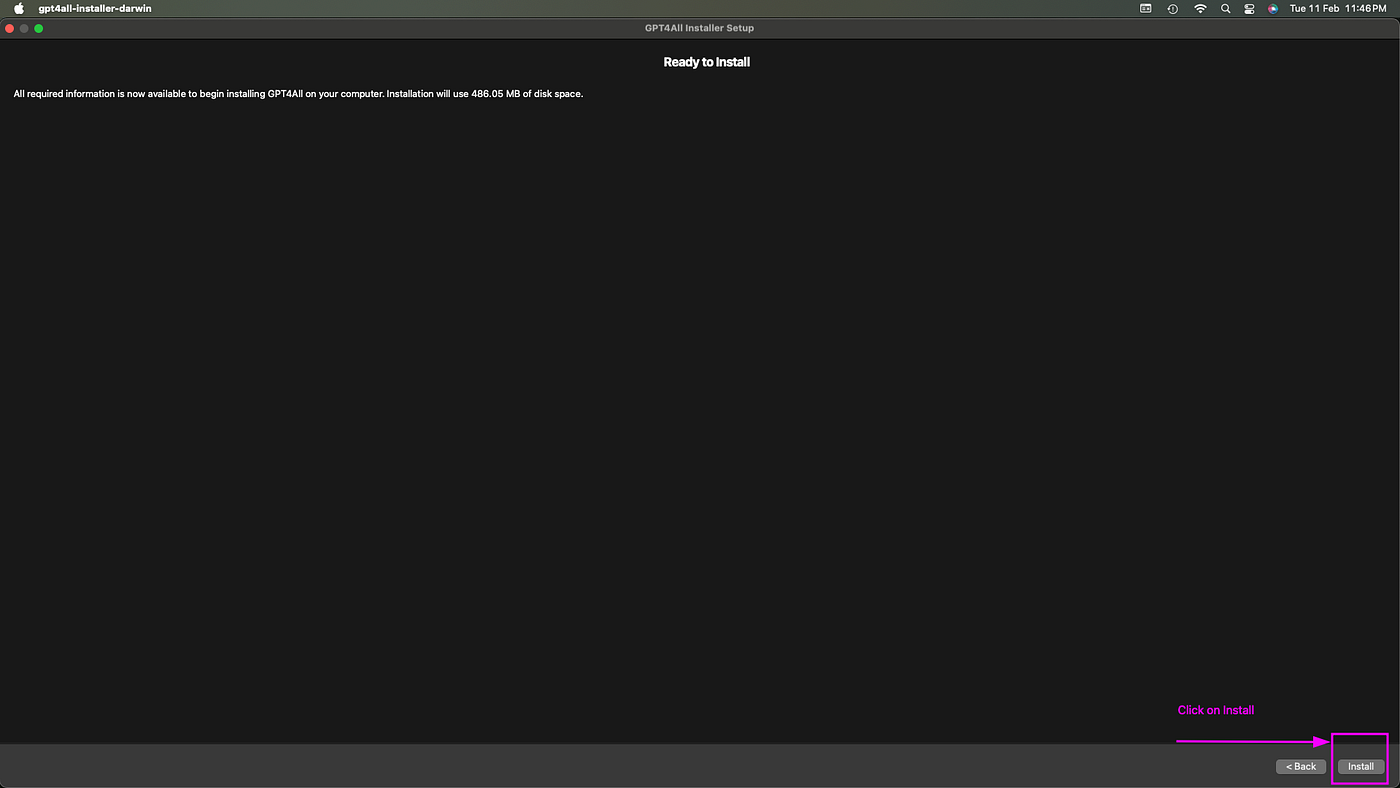
Step 13: Now click on next button to proceed further.
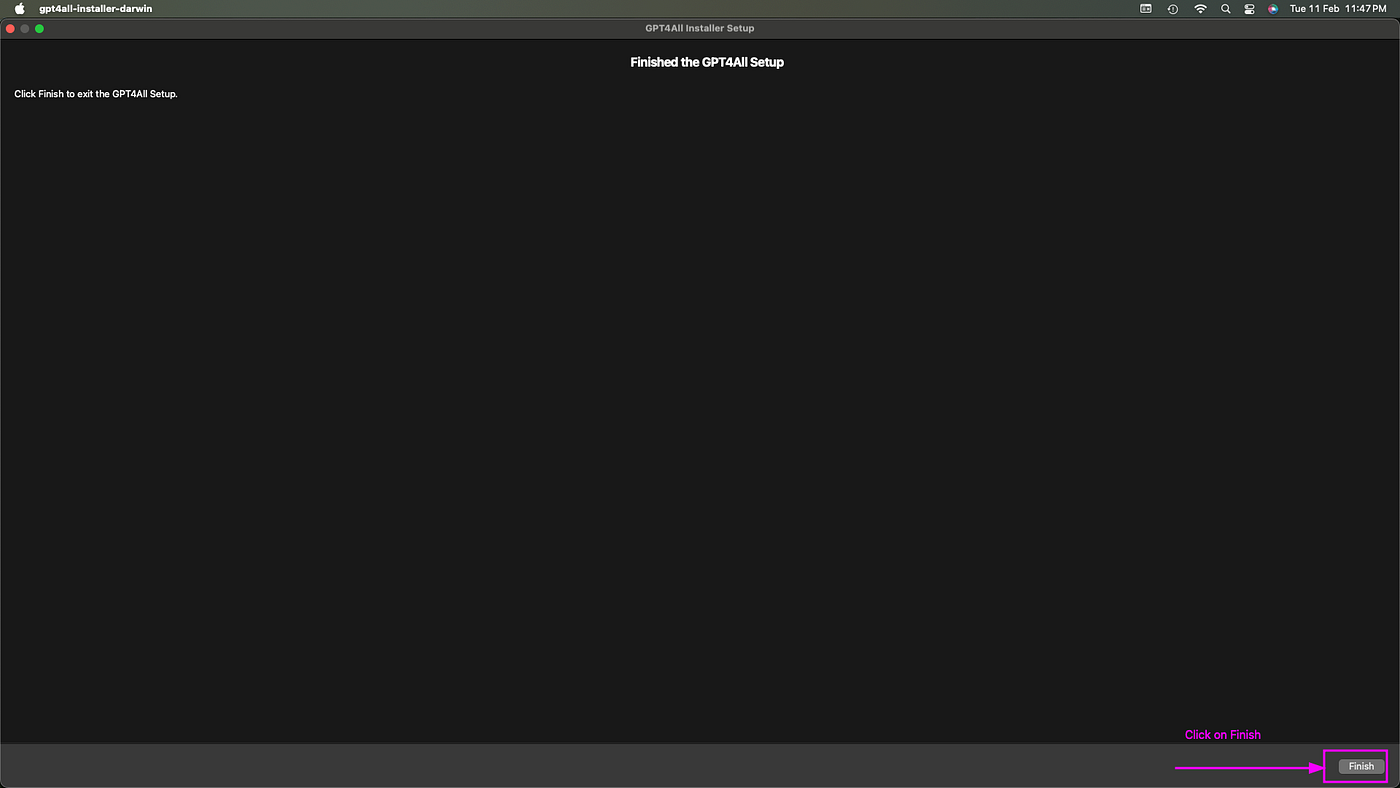
Step 14: Now click on finish button to proceed further.
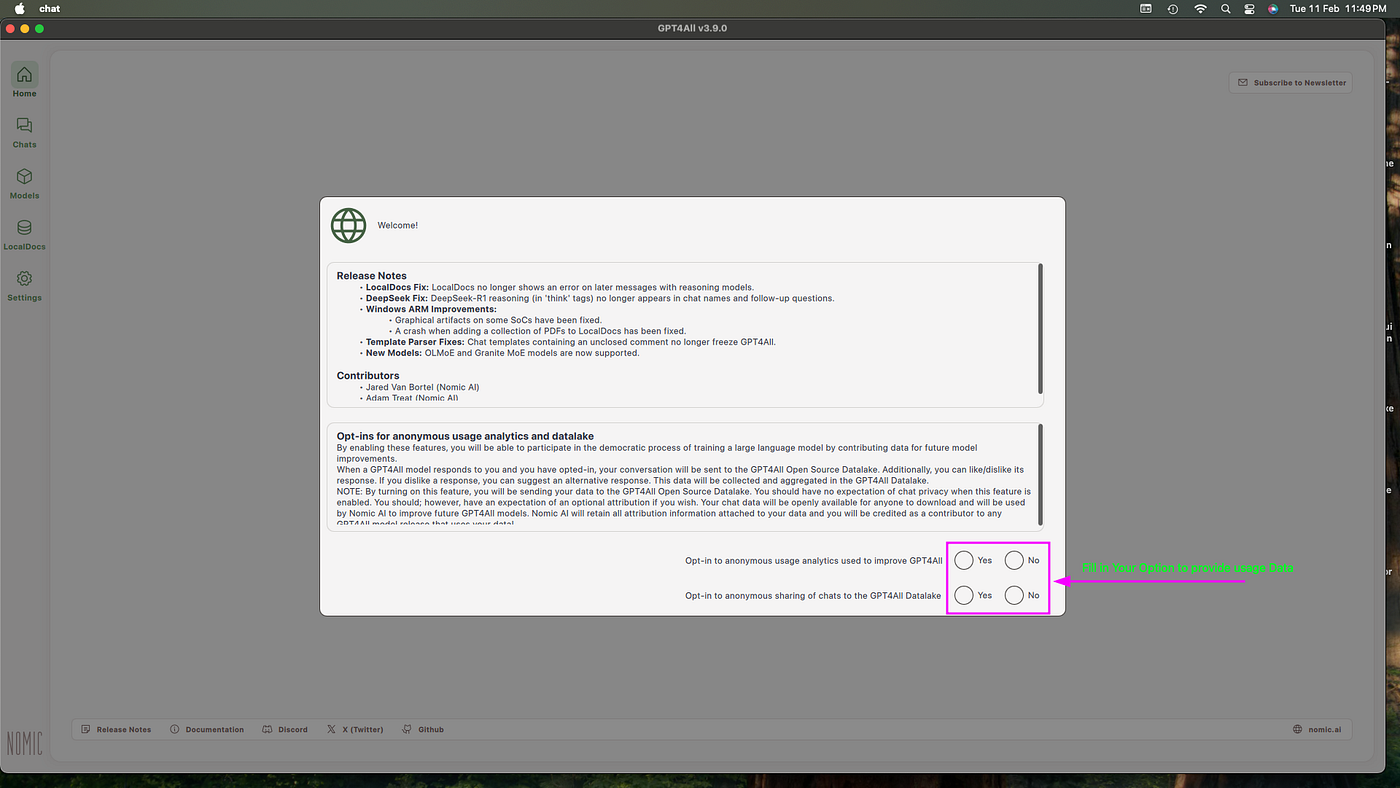
Step 15: Now fill in your option to provide anonymous usage, analytics for improvement of GPT4ALL as shown in the screenshot on your screen.
llamafile Installation on MacOS.
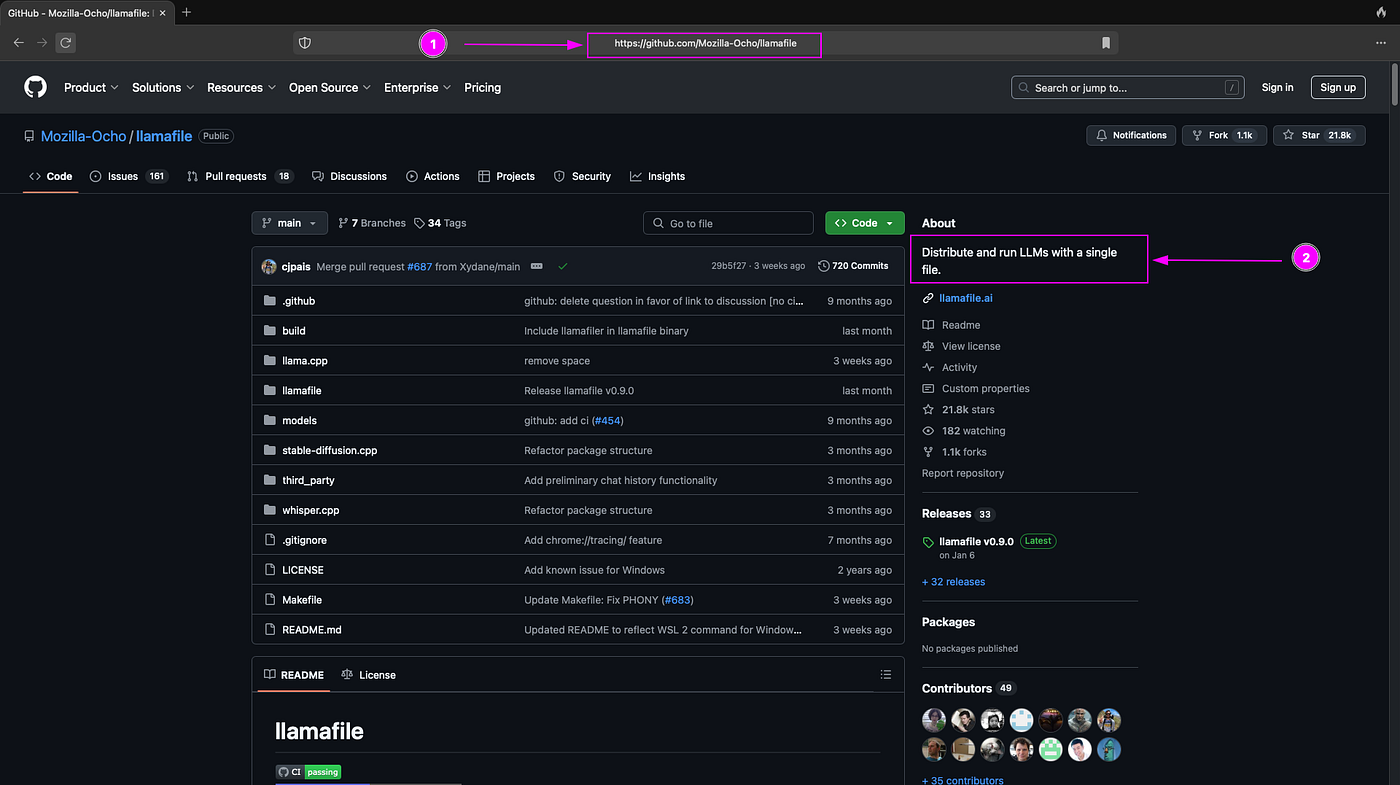
Step 16: You can visit llamafile GitHub repository by typing website address as shown in point 1 of screenshot. You can read quick summary about llamafile as shown in point 2 of the screenshot.
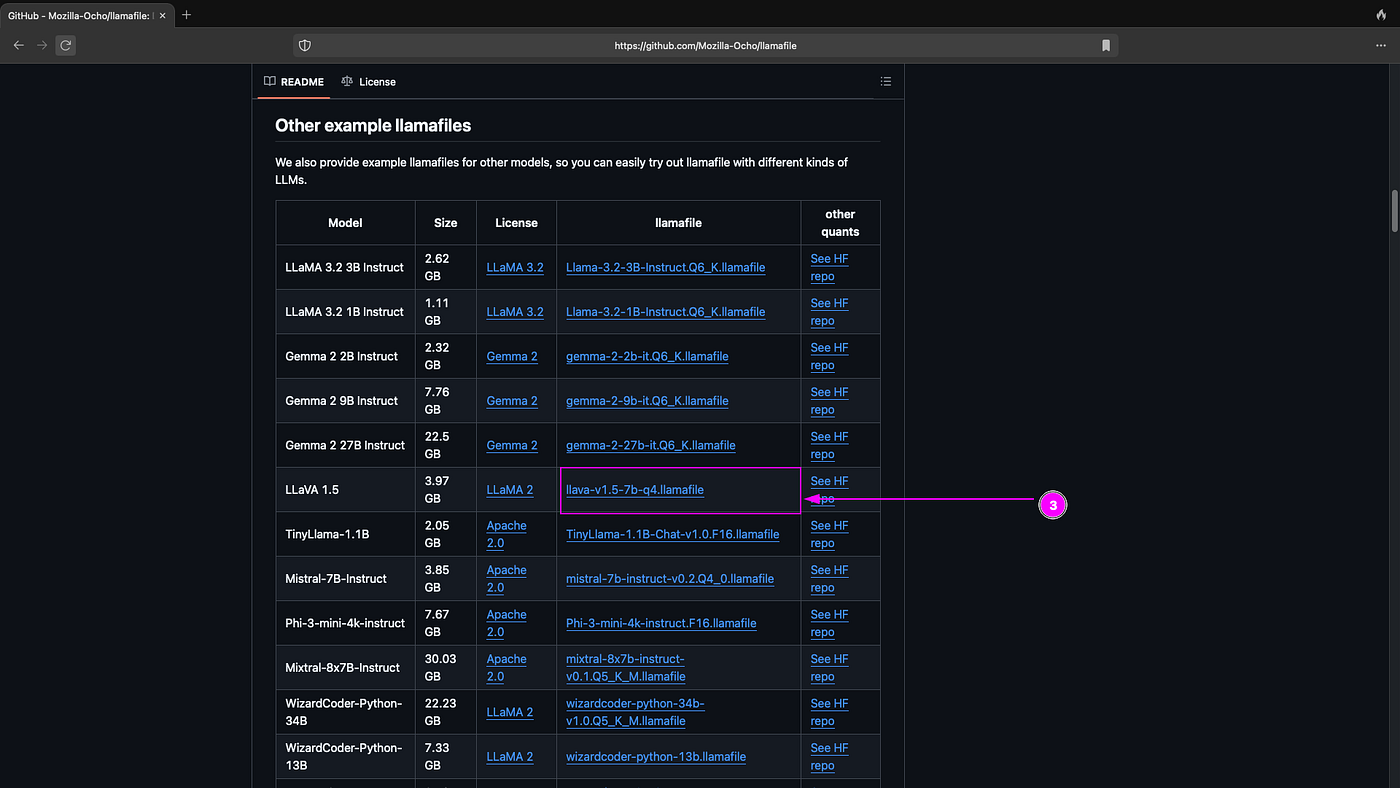
Step 17: Now you can download llamafile models after scrolling down in main GitHub repository as shown in point 3 of the screenshot.
Step 18: Now open your download folder and change the permission of llamafile to make it executable with command shown in the screenshot.

Step 19: Now start the llamafile with the command as shown in point 5 of the screenshot.

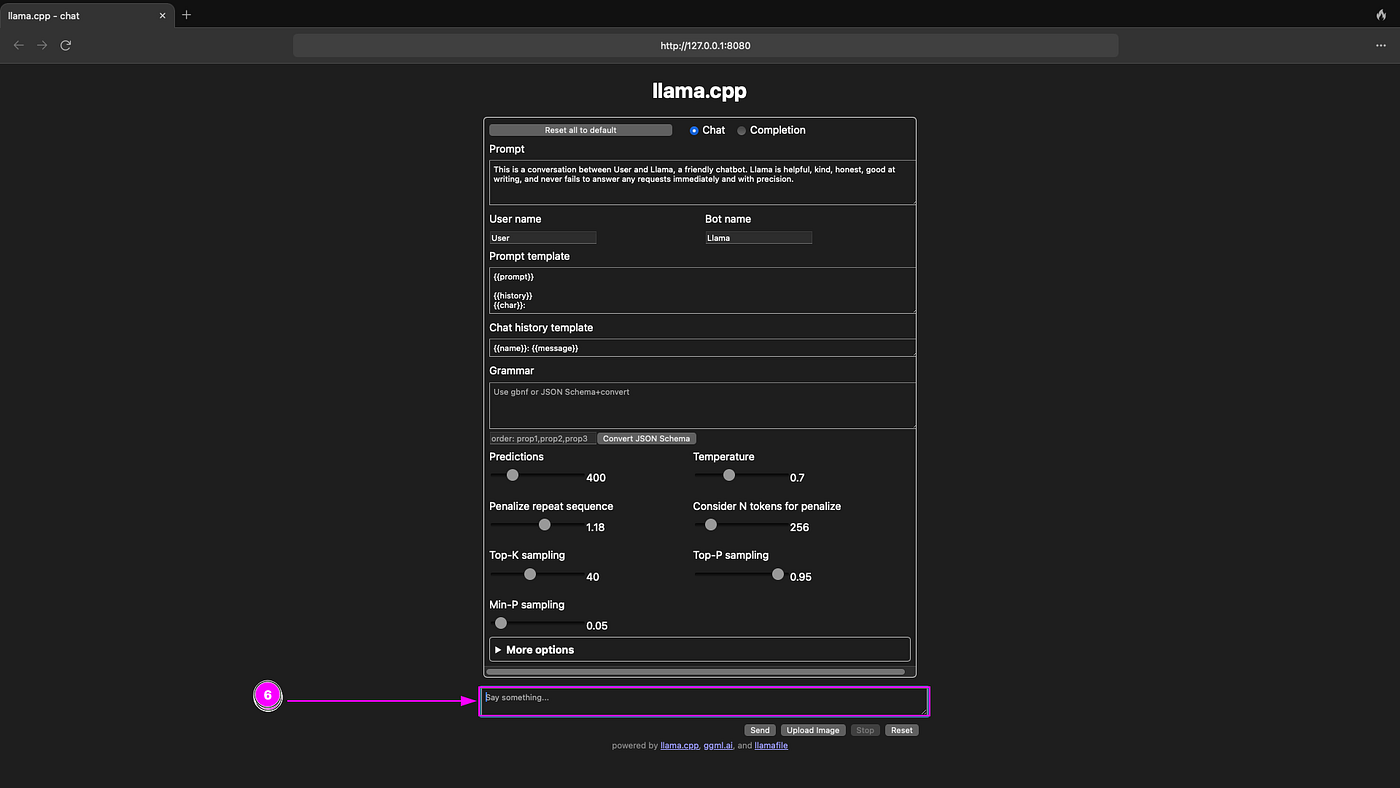
Step 20: You can now directly chat with llamafile at http://localhost:8080 as shown in point 6 of the screenshot.
Ollama Installation on MacOS.
Step 21: You can visit Ollama GitHub repository by typing website address as shown in Point 1 of screenshot, You can read quick summary about Ollama in Point 2 and to download Ollama for Mac OS, Linux and Windows.
You can click on releases as shown in Point 3 of screenshot.

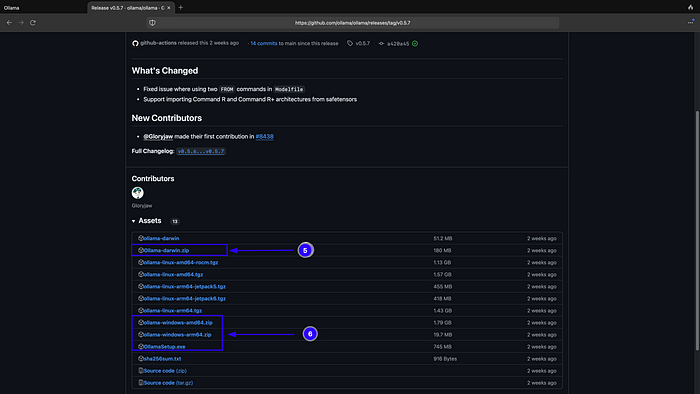
Step 22: Now you can download the release for Mac OS or Windows operating system as highlighted in Point 5 and Point 6 of the screenshot,
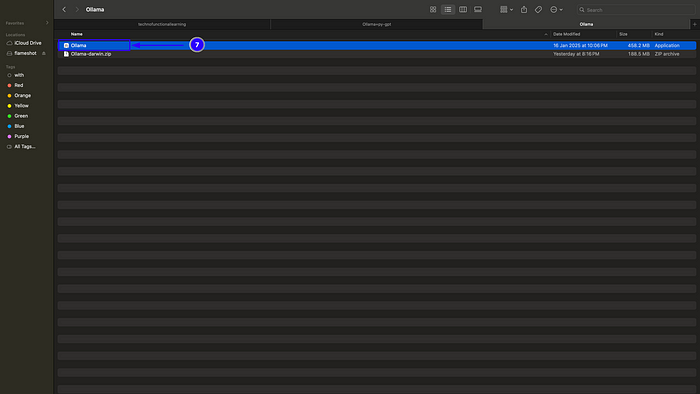
Step 23: Now Double click the Ollama installer after extracting from zip file and Follow self explanatory Instructions as shown in Point 7 of screenshot.
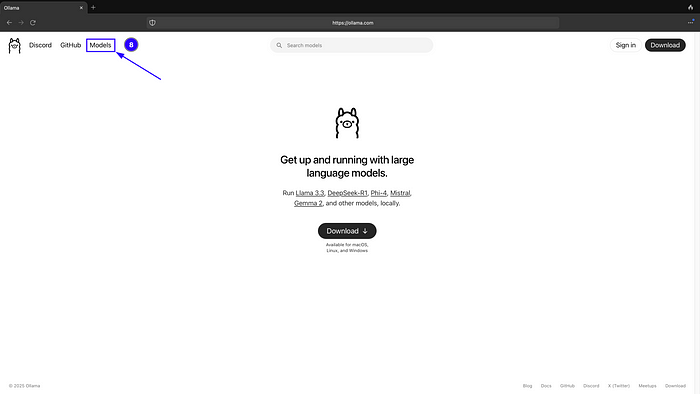
Step 24: Once Ollama is Installed on Mac OS, Windows and Linux Operating system then the Next step is to pull Large Large Models, You can visit Ollama Web site and click on Models to choose the right Model for your work as shown in Point 8 of the screenshot.
Step 25: You Can choose Model based on Features and Popularity as shown in Point 9 and 10 of screenshot or based on specific task required for your work as shown in Point 11 and 12 of the screenshot,

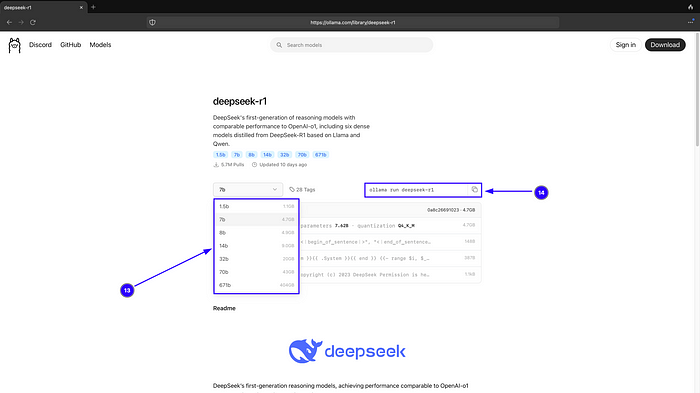
Step 26: Once You click on Model of your choice, You can choose the Model size and respective pull or run command as shown in Point 13 and 14 screenshot. We will use these command to pull or run Ollama Models in our system terminal.
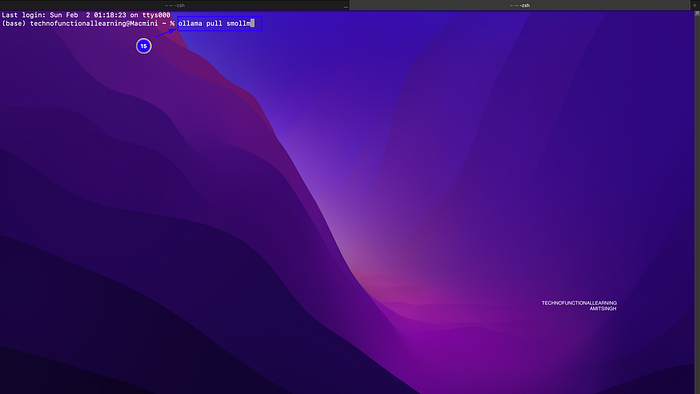
Step 27: Now we just need to Pull the Model by typing in our system terminal Ollama pull smollm or any other model as shown in Point 15 of the screen shot.
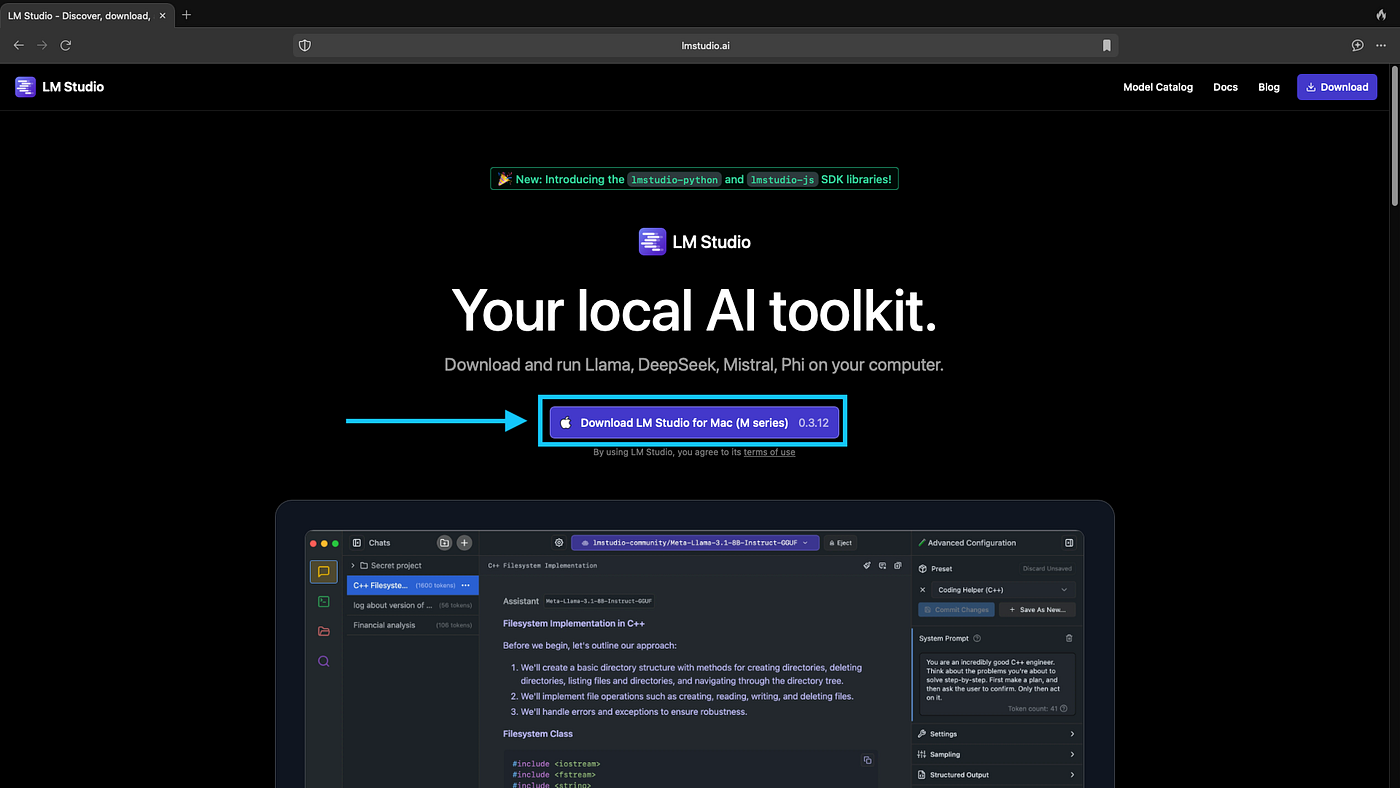
Step 28: Now we will install LMStudio, You can visit https://lmstudio.ai/ and download the installer
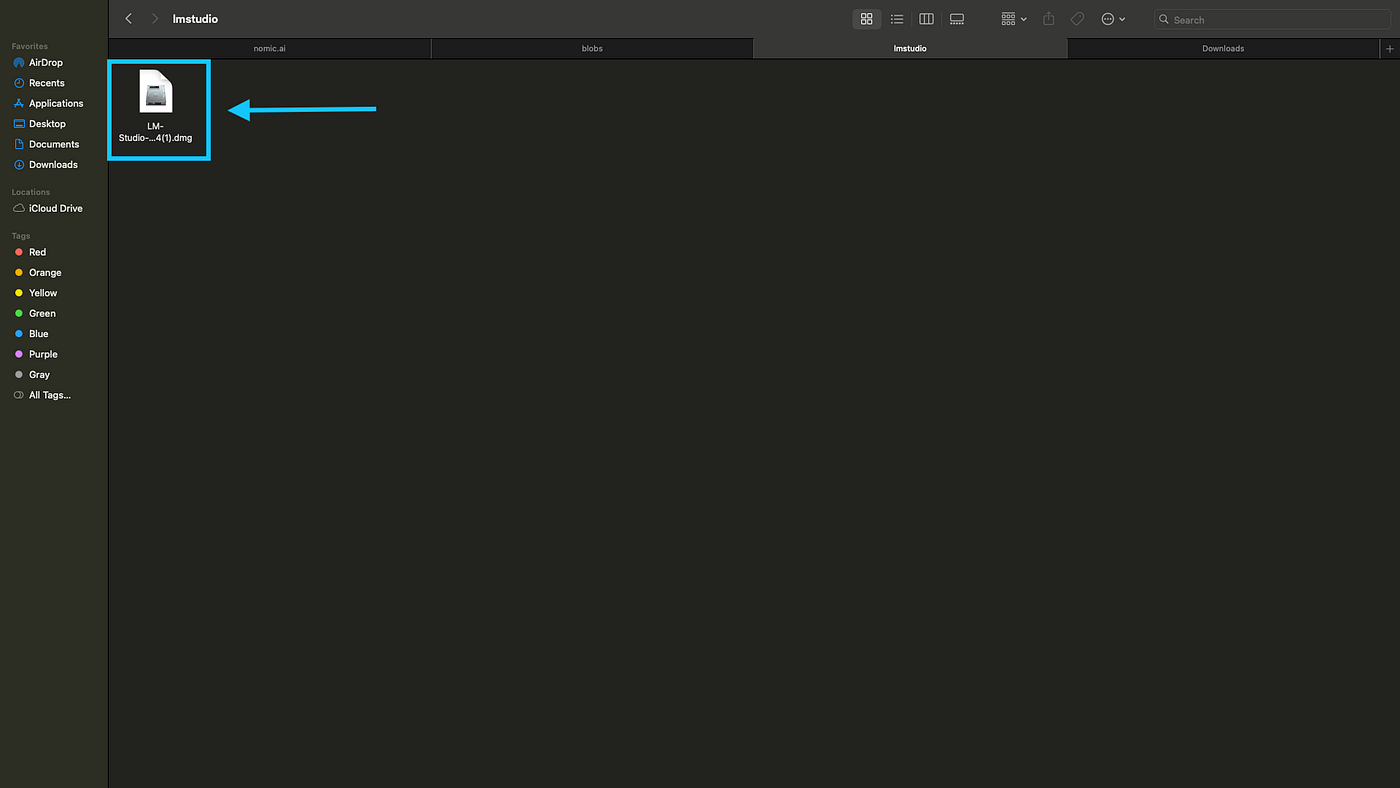
Step 29: Double click the installer to start installation process.
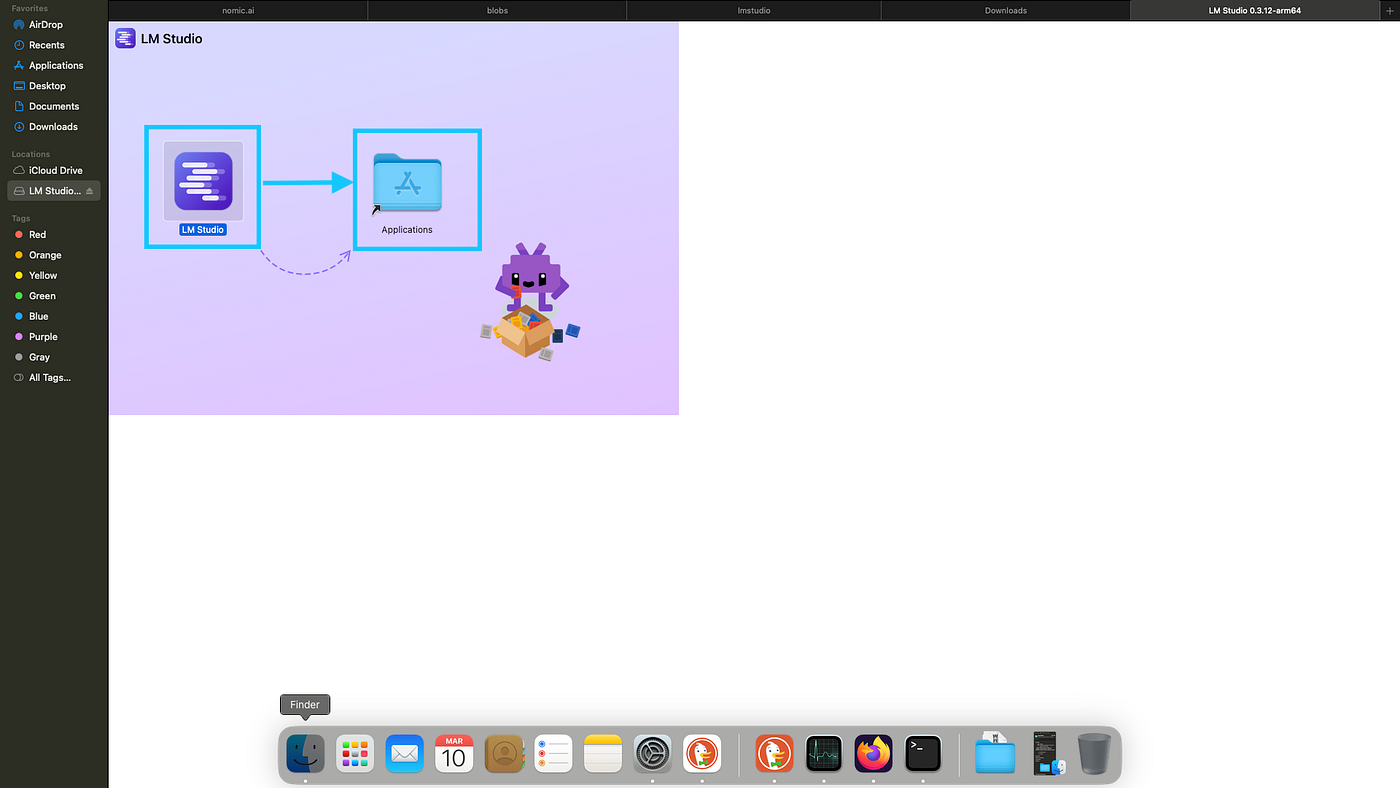
Step 30: Copy LMStudio to Application
Step 31: Now click on discover to download available models.
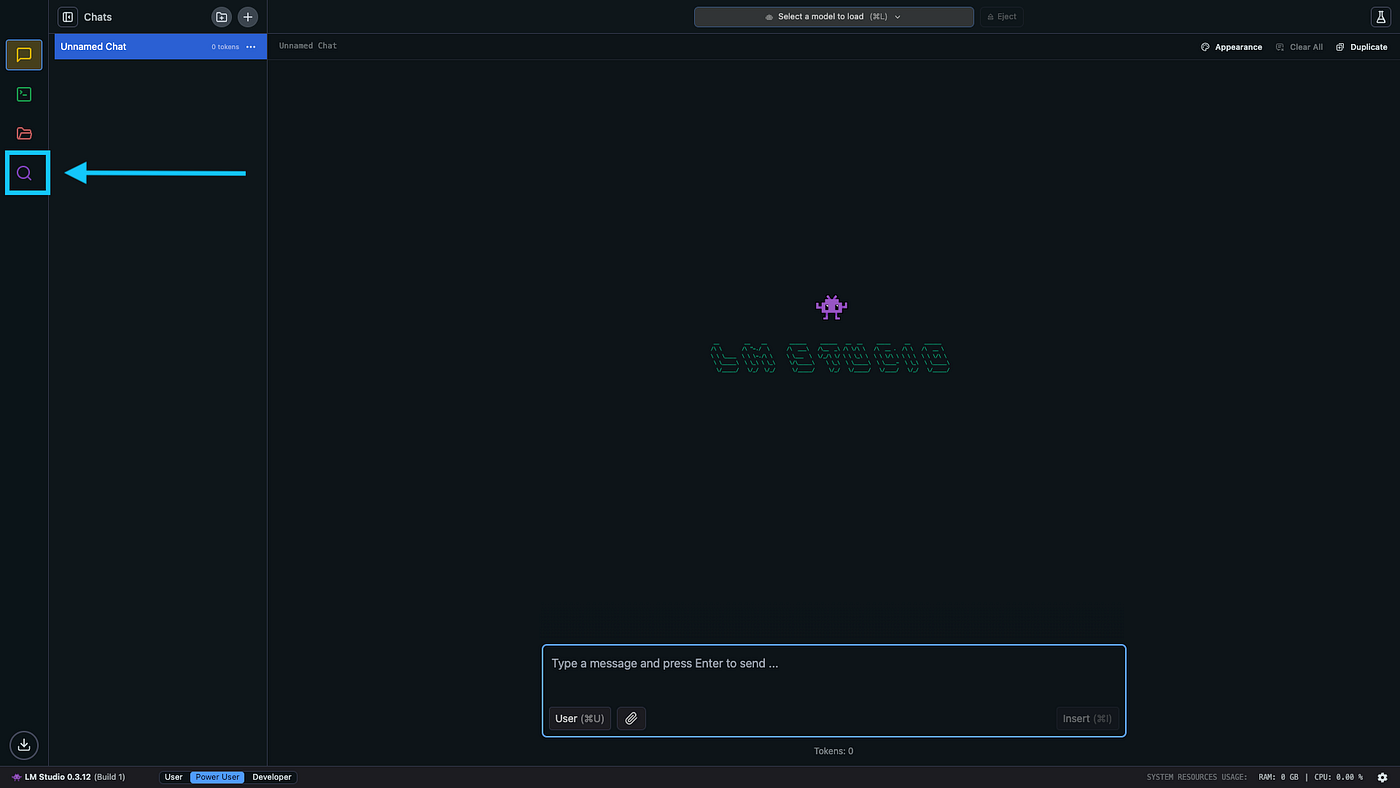
Step 32: Now click download on your choice of Model.
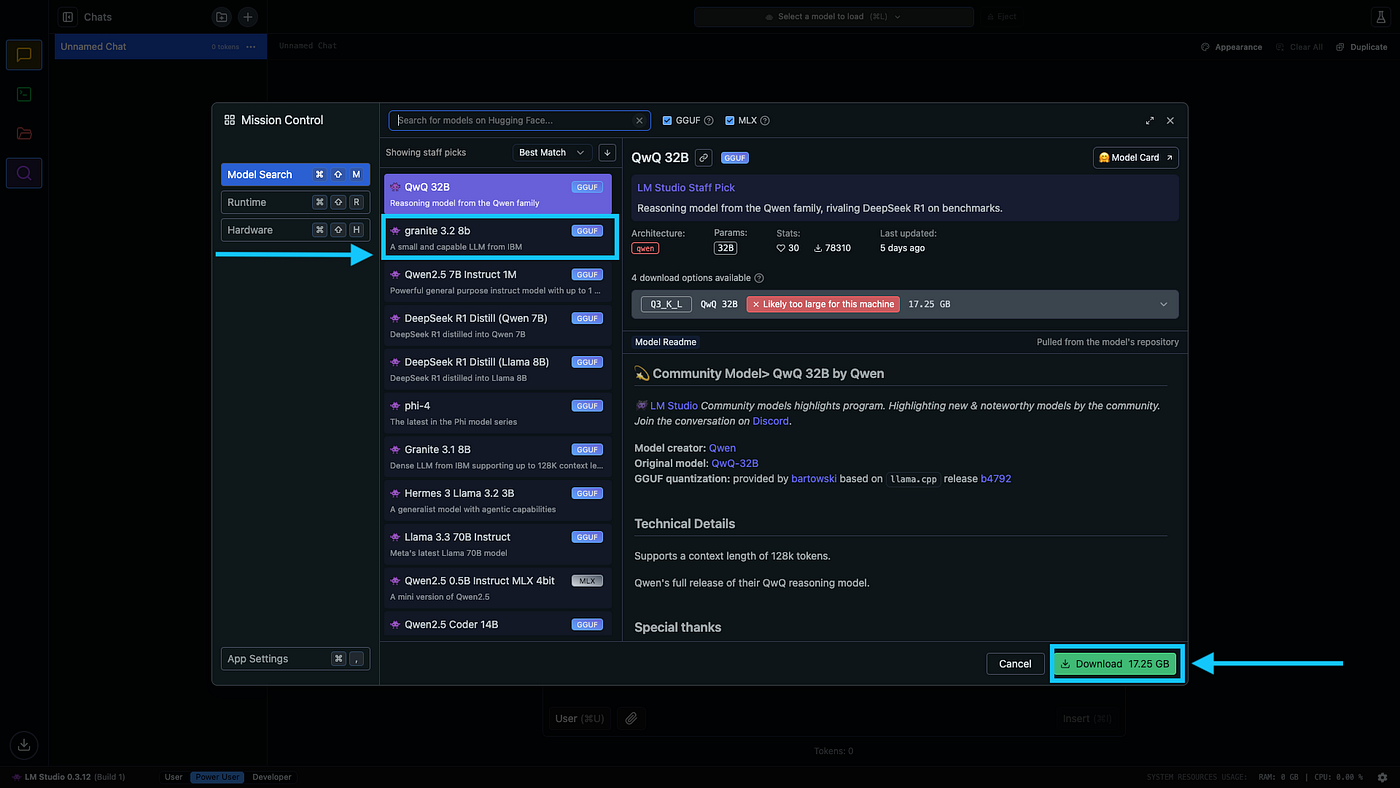
Step 33: Click on Load Model.
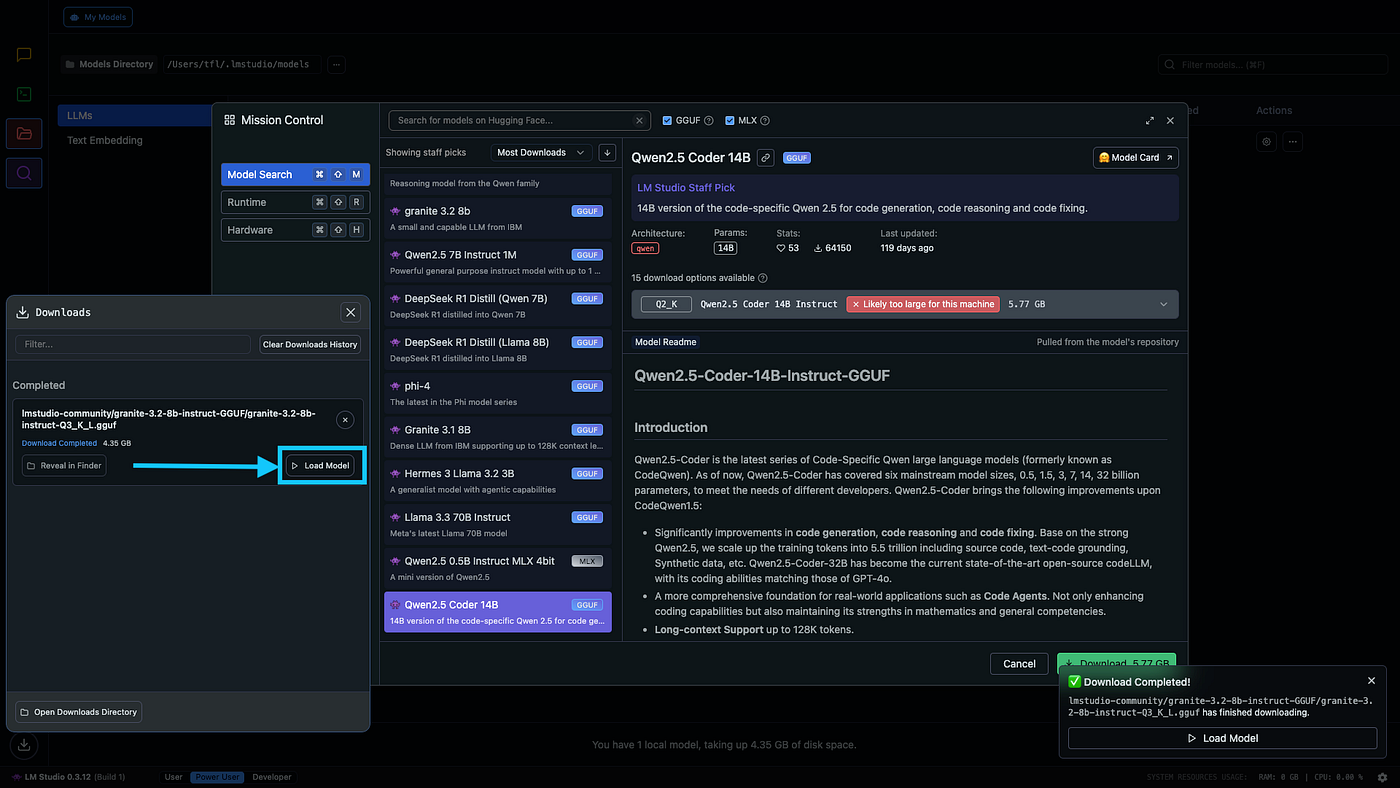
Step 34: Once the Model is loaded, Click on chat icon to start chatting.

Step 35: Now Start the Server for using API in Other Applications.
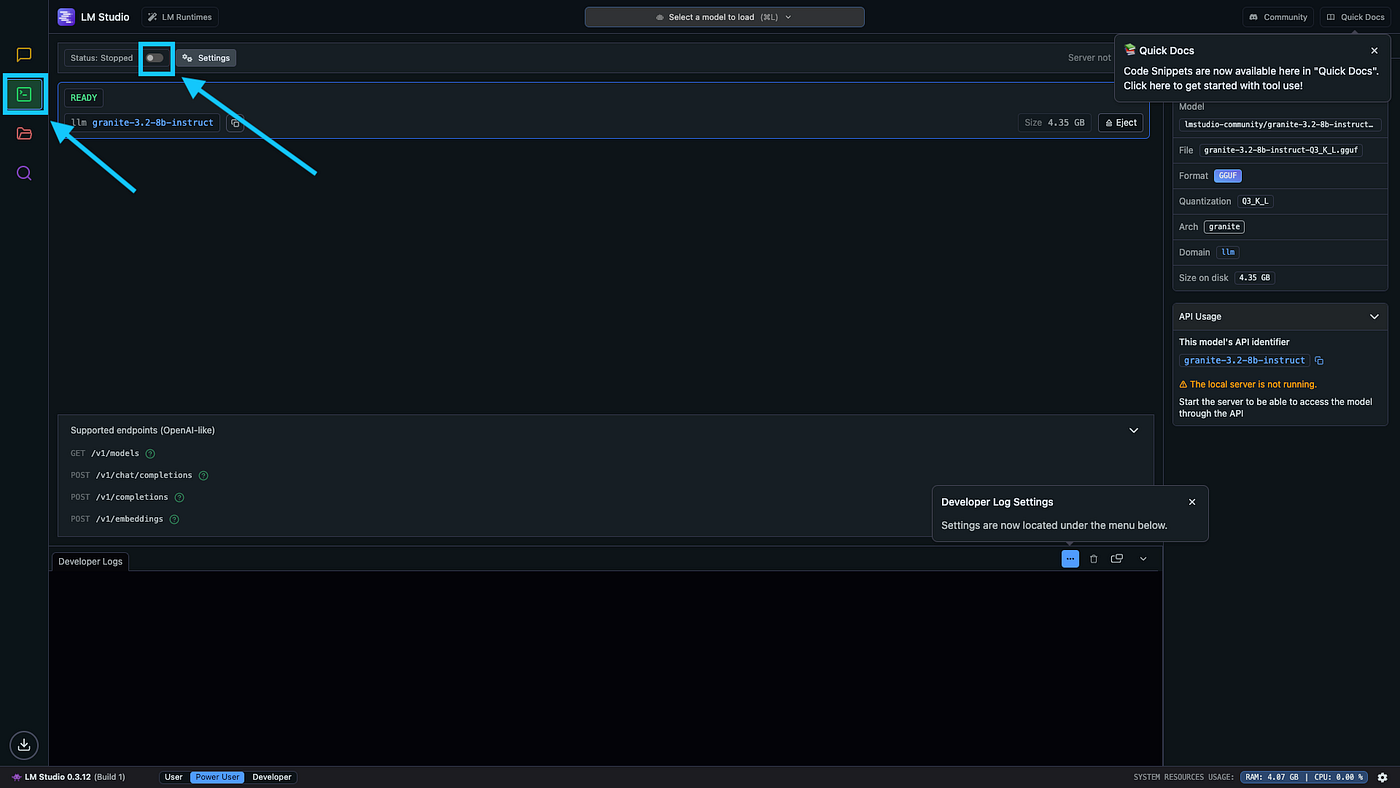
Step 36: Now, You can use API in Other Applications.
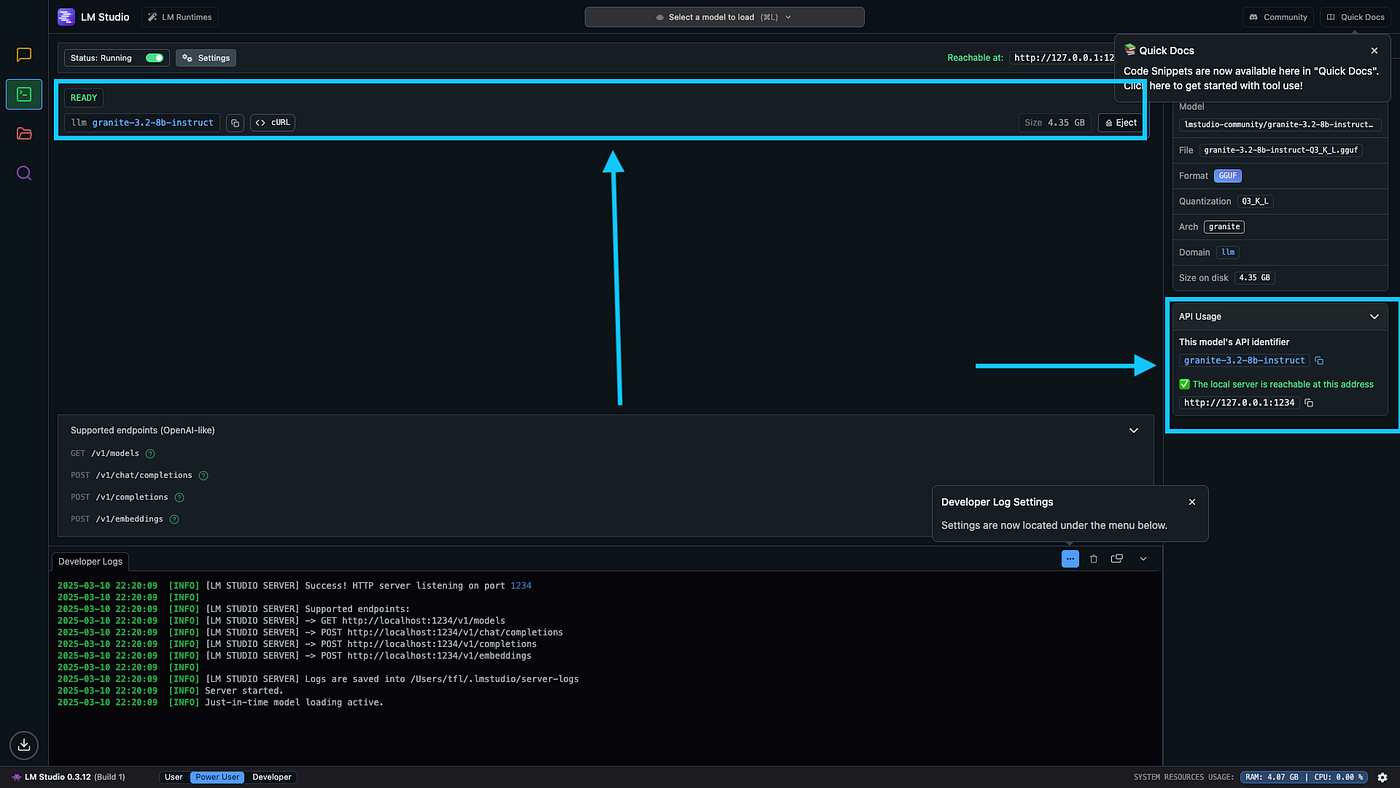
Step 37: Now we will Install Jan AI, To Download Jan AI installer visit github repository or Jan AI website and click on releases.
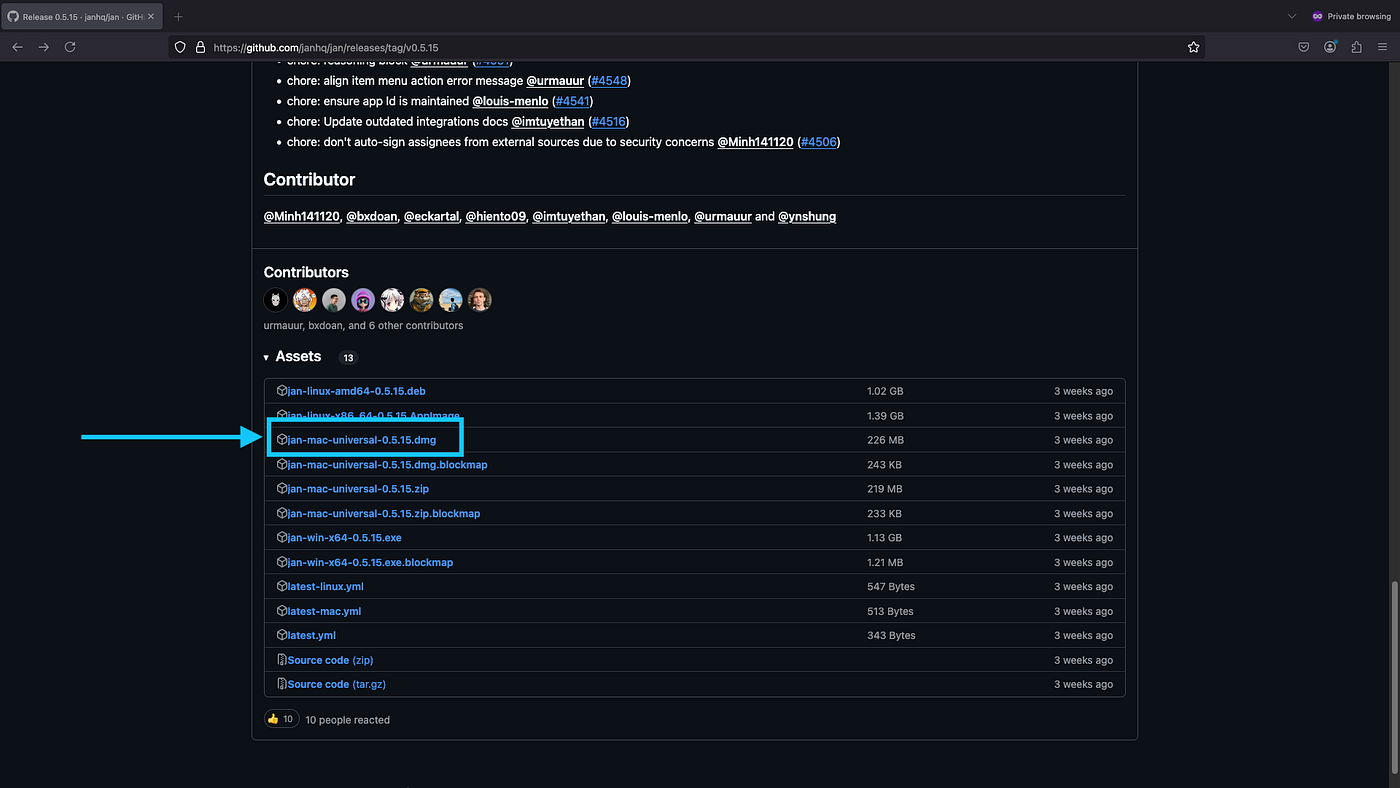
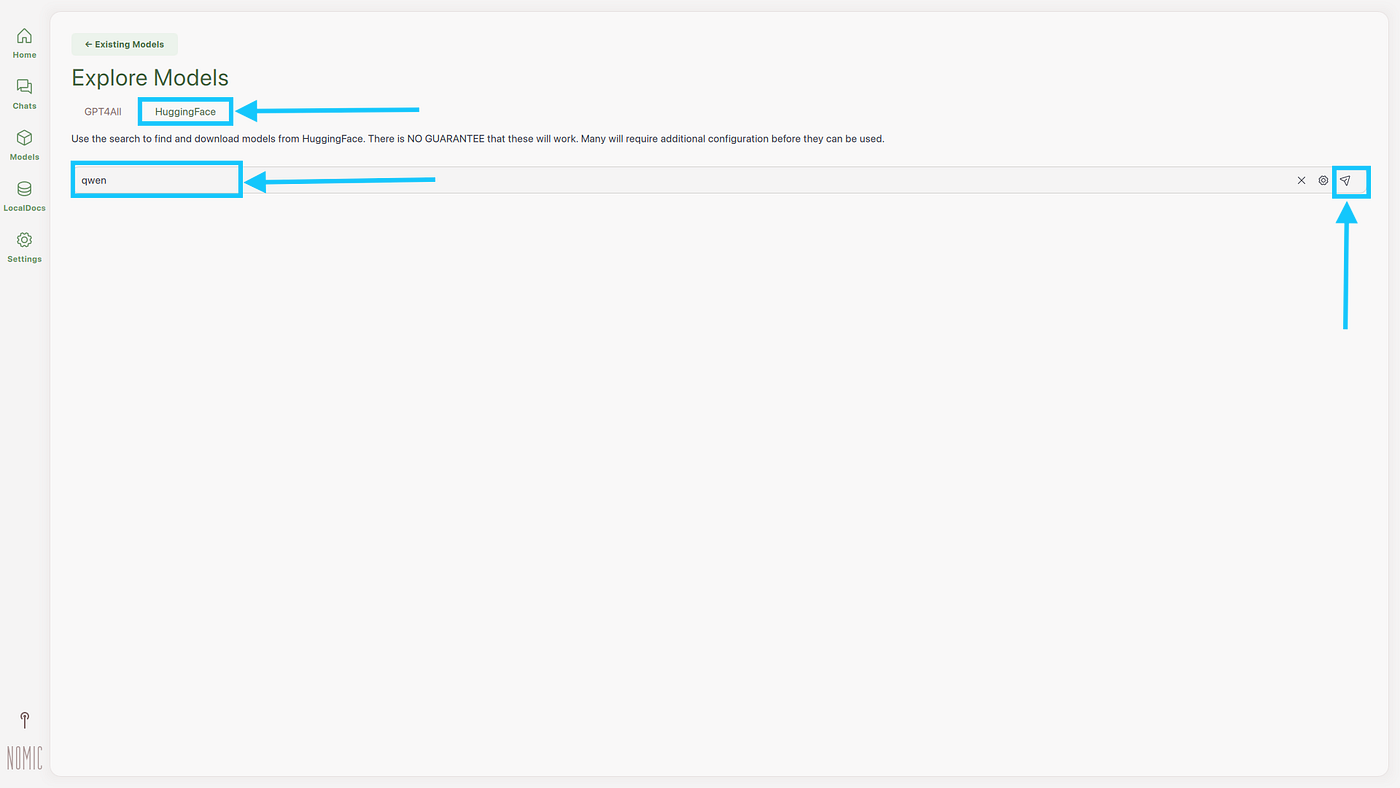
Step 38: Now Click on Installer as per your system specification to download it.
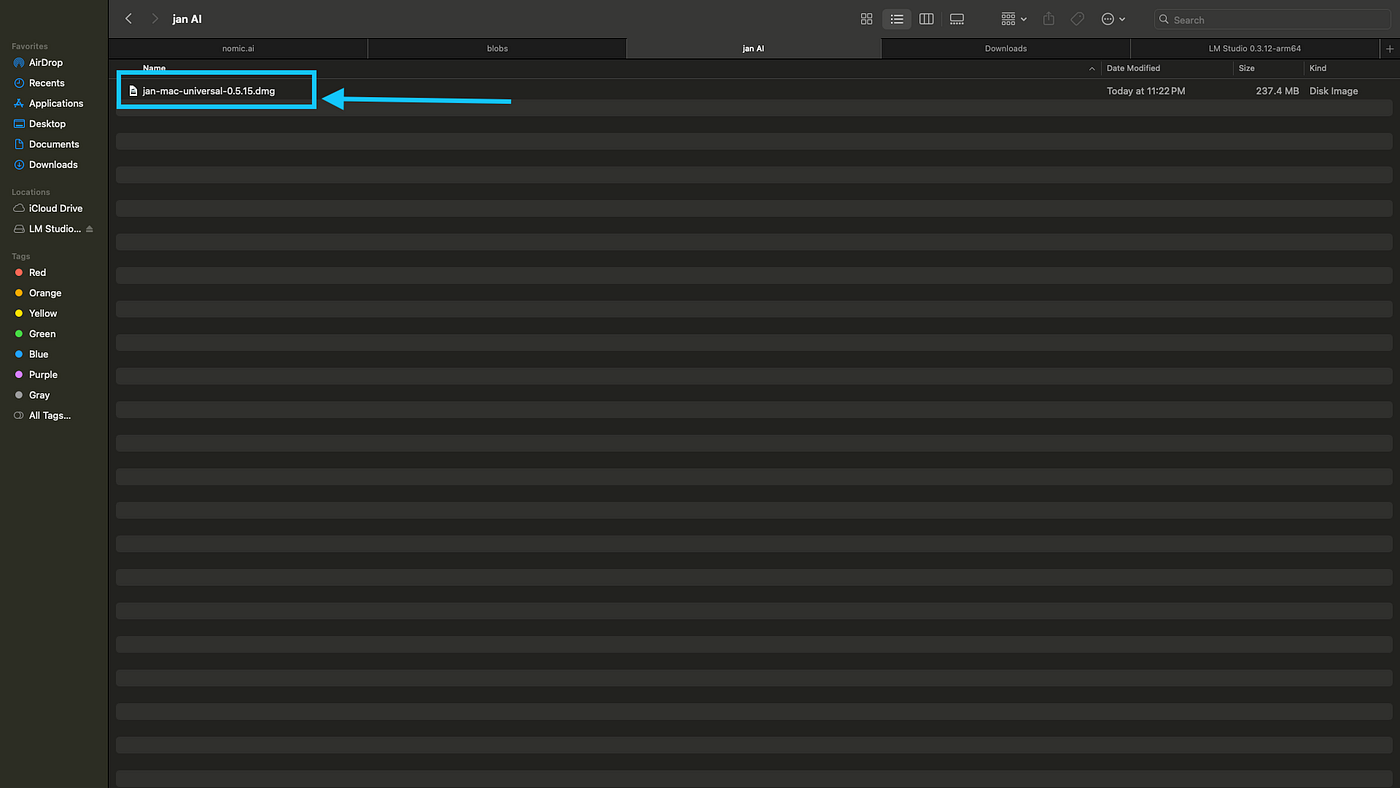
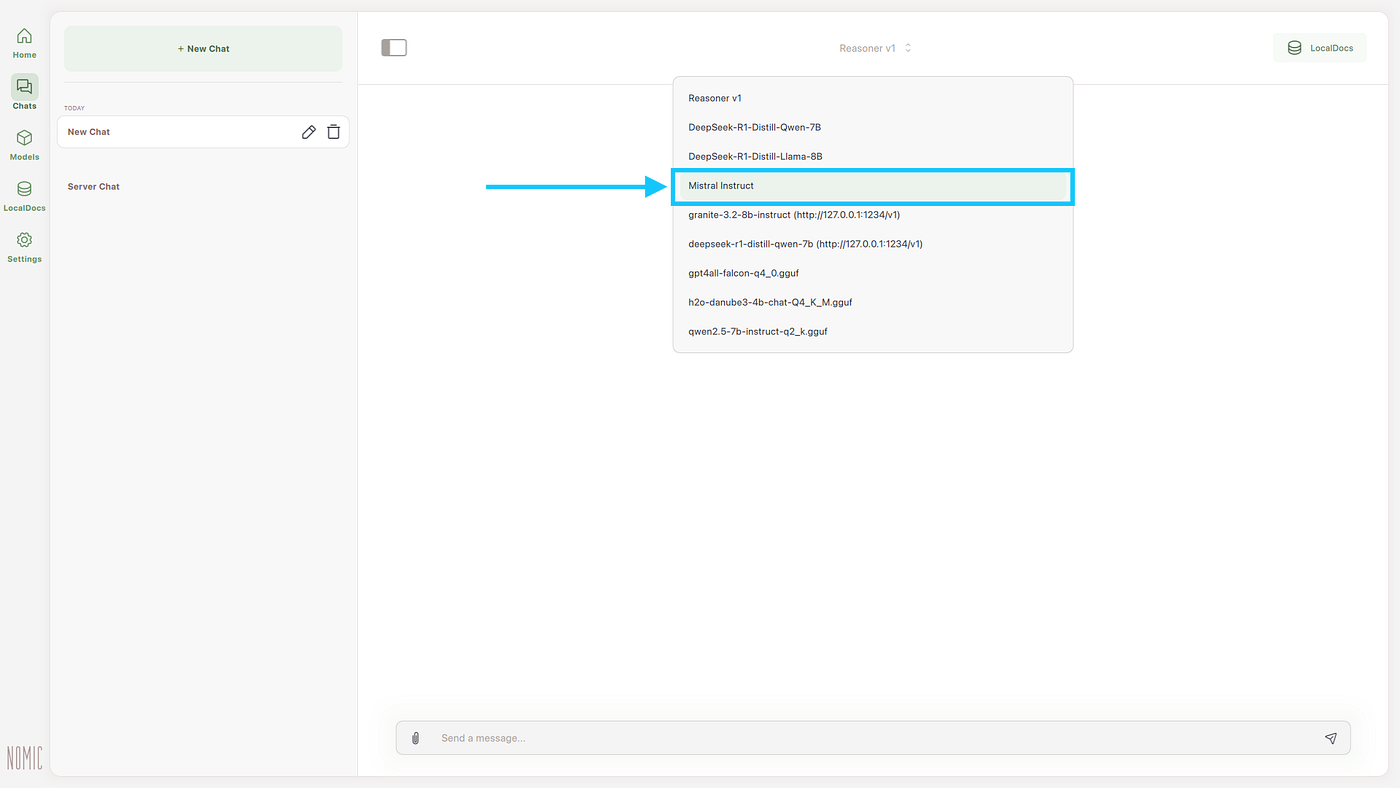
Step 39: Double click the installer to start installation process.
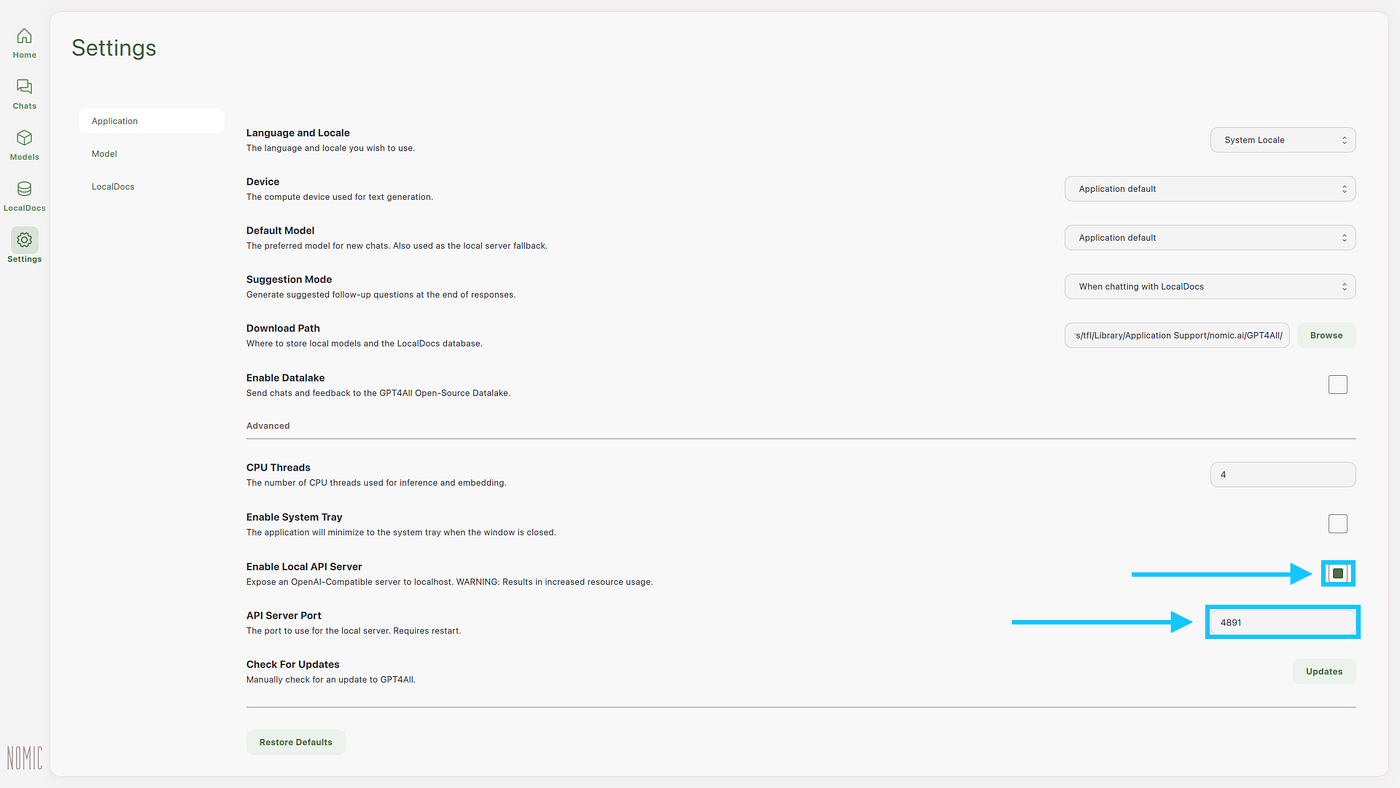
Step 40: Now copy Jan AI to Application Folder.
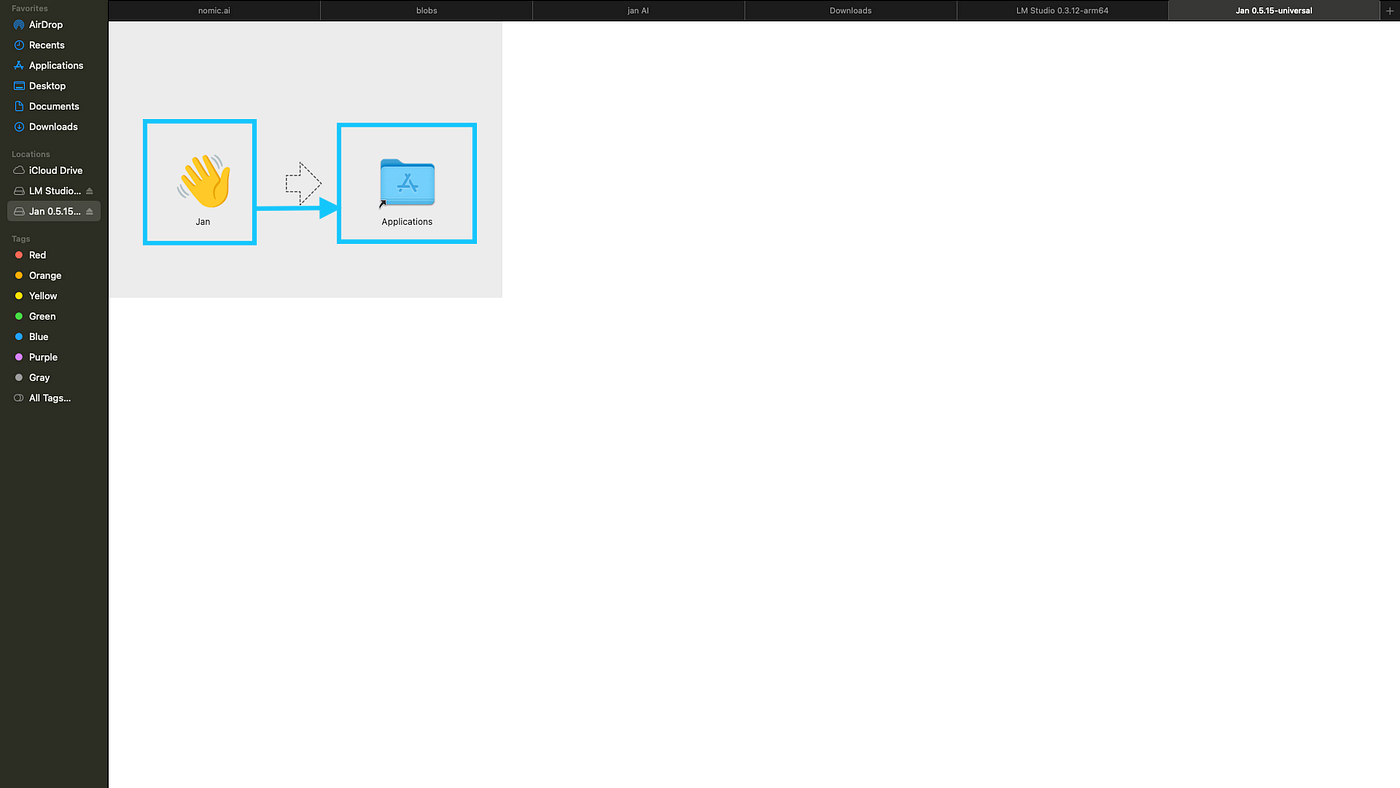
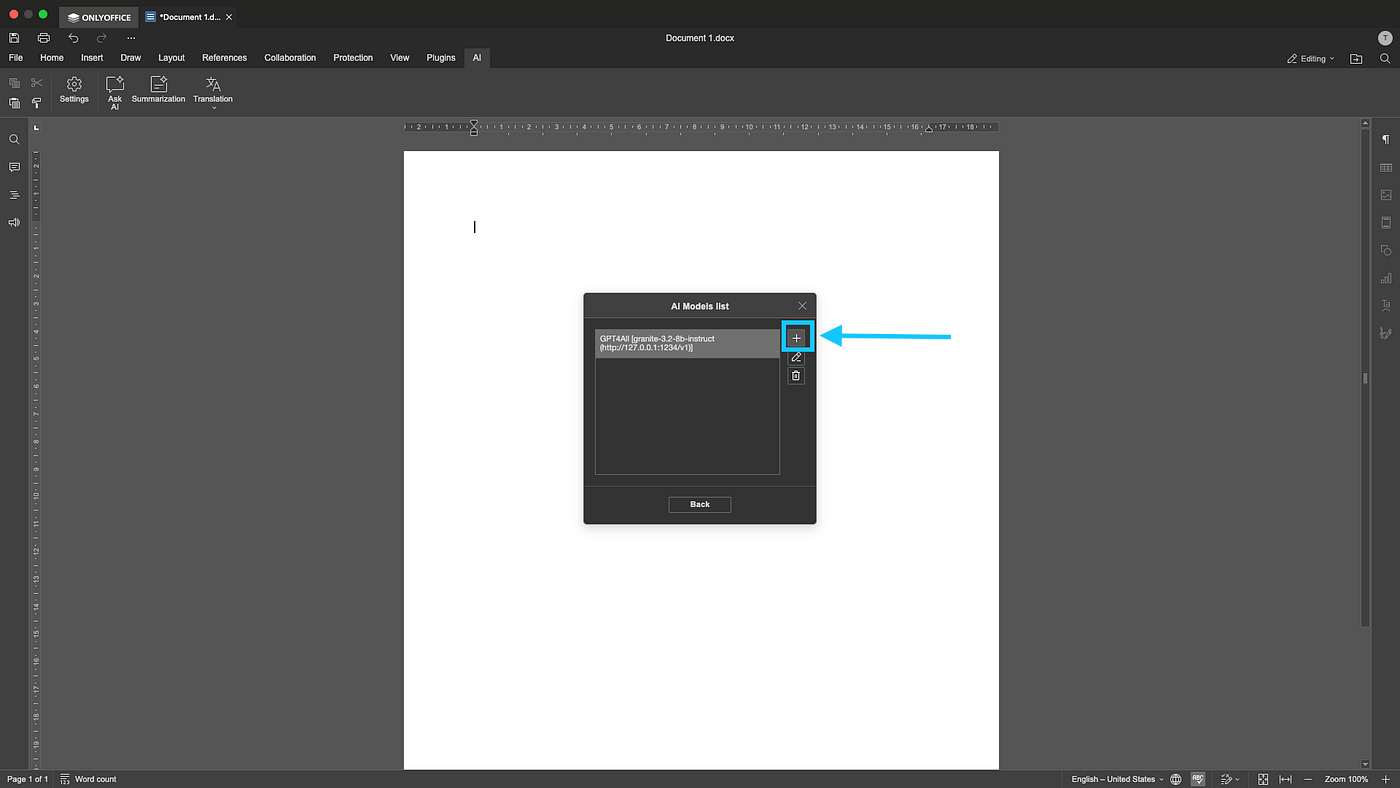
Step 41: Now Open Jan AI from Applications and Click on see all to download and use model of your choice.
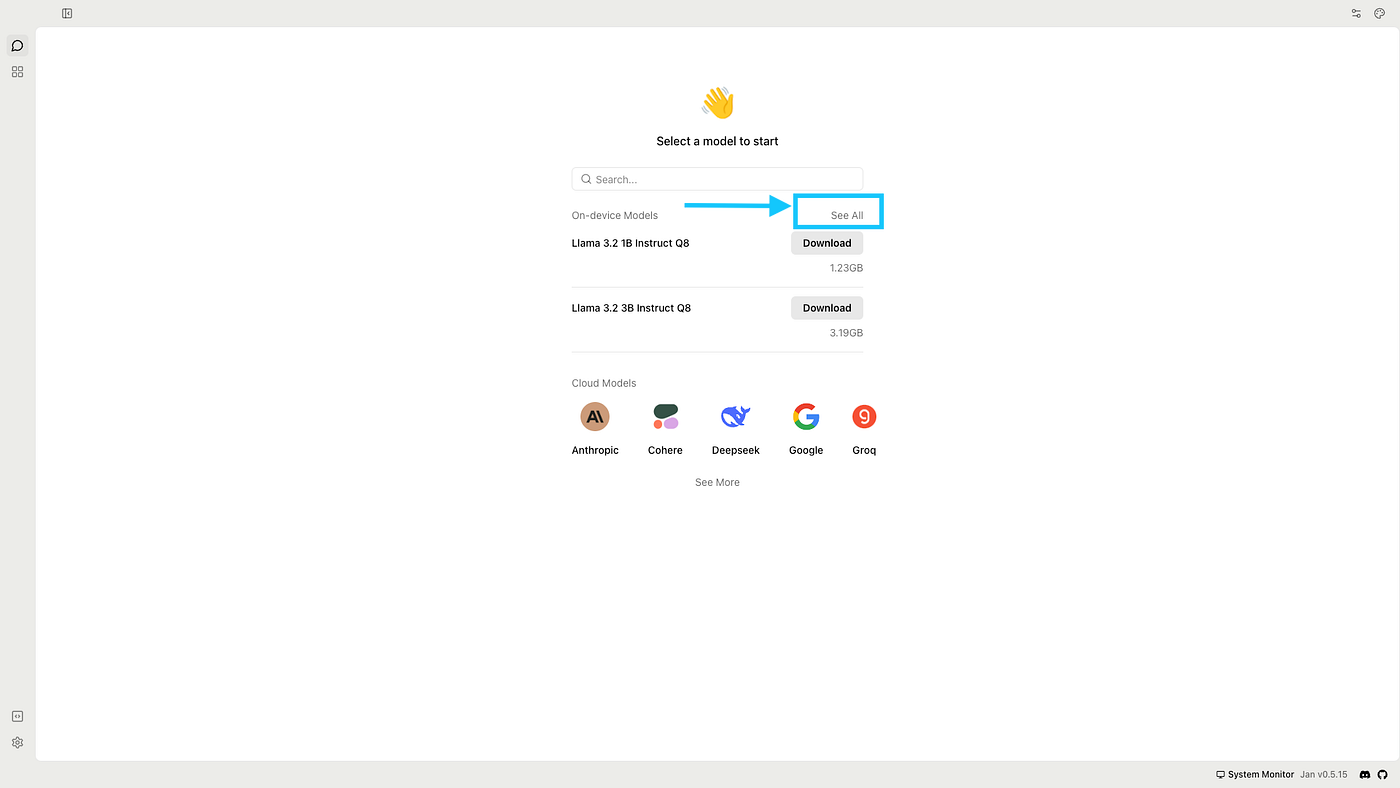
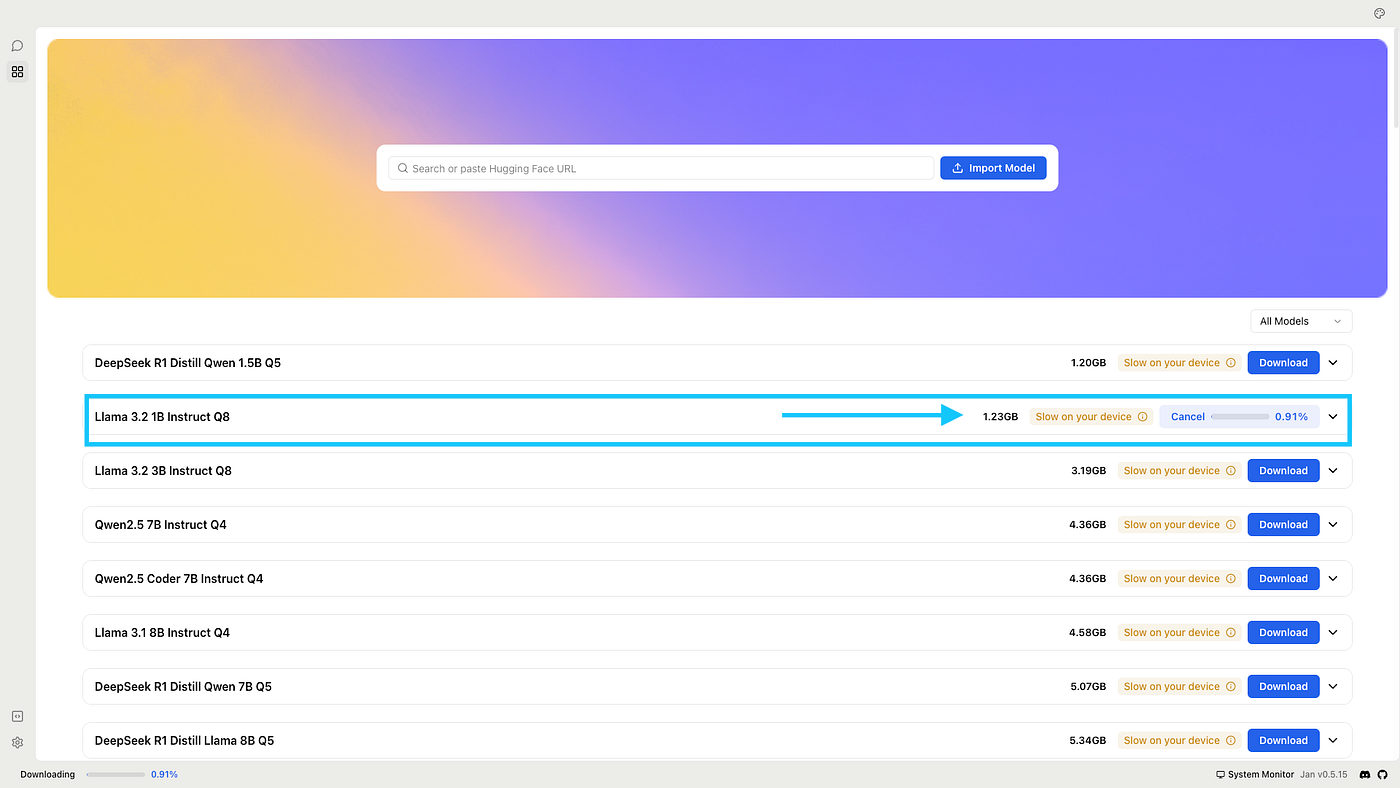
Step 42: Click on Download button on your choice of Model.
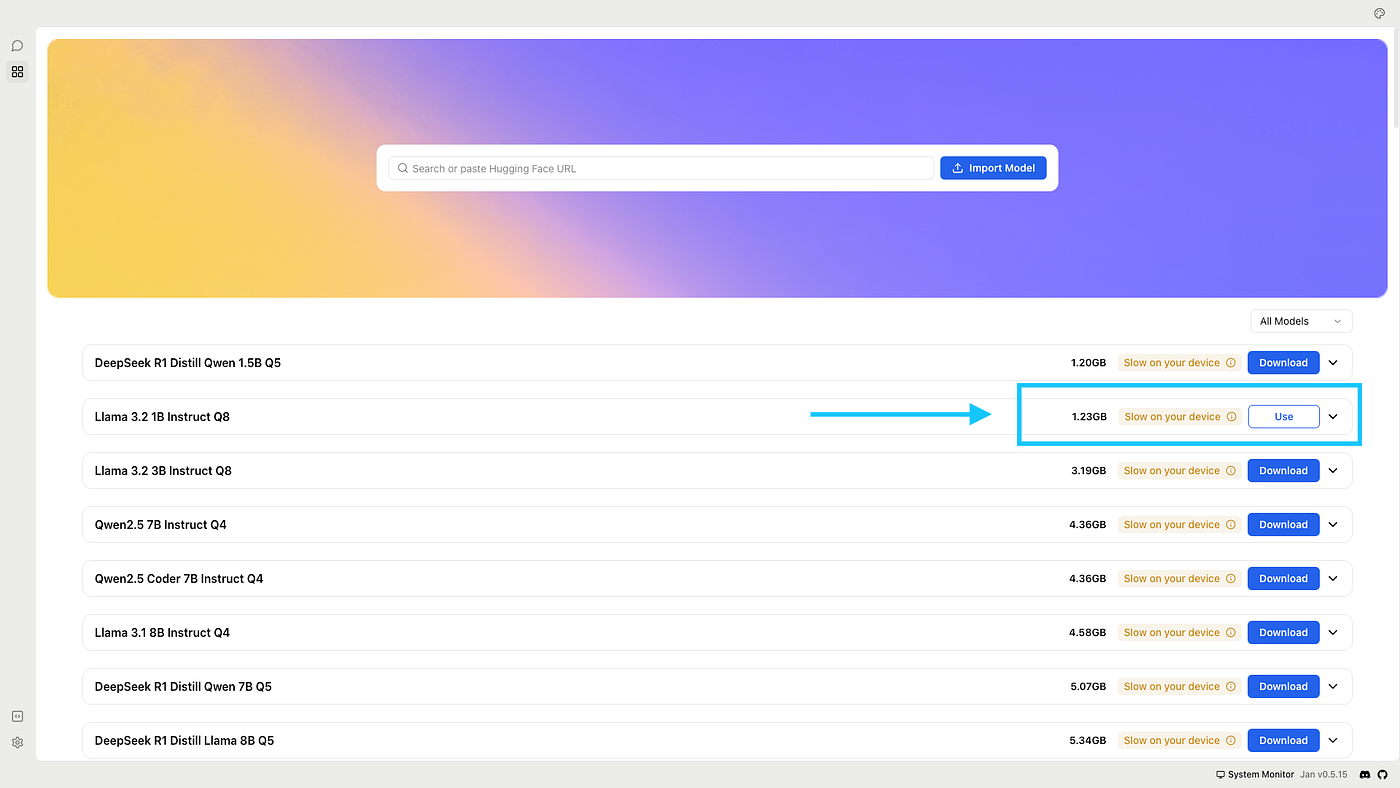
Step 43: Once the Download is Complete, click on use button to load the model.
Step 44: Ask your Question.
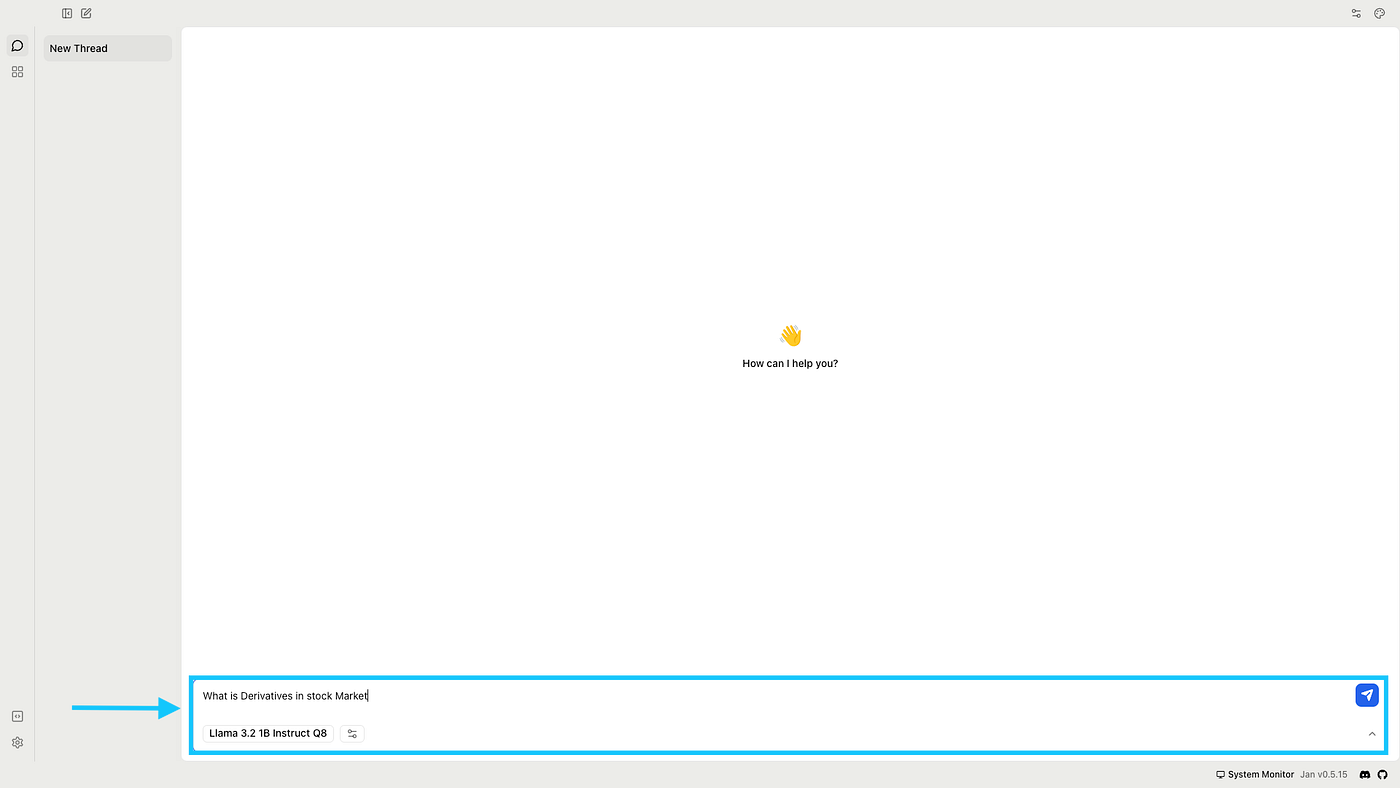
Step 45: Expect answer similar to this.

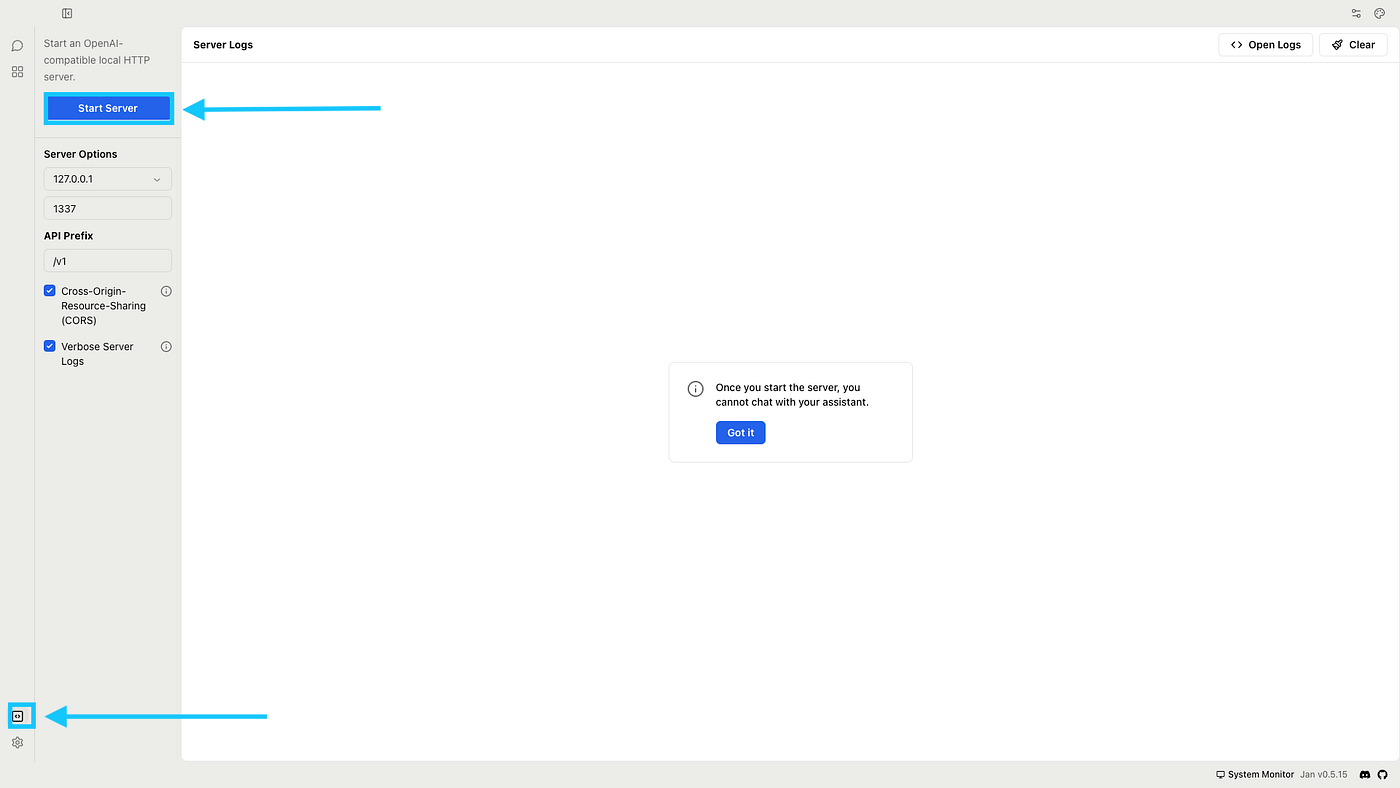
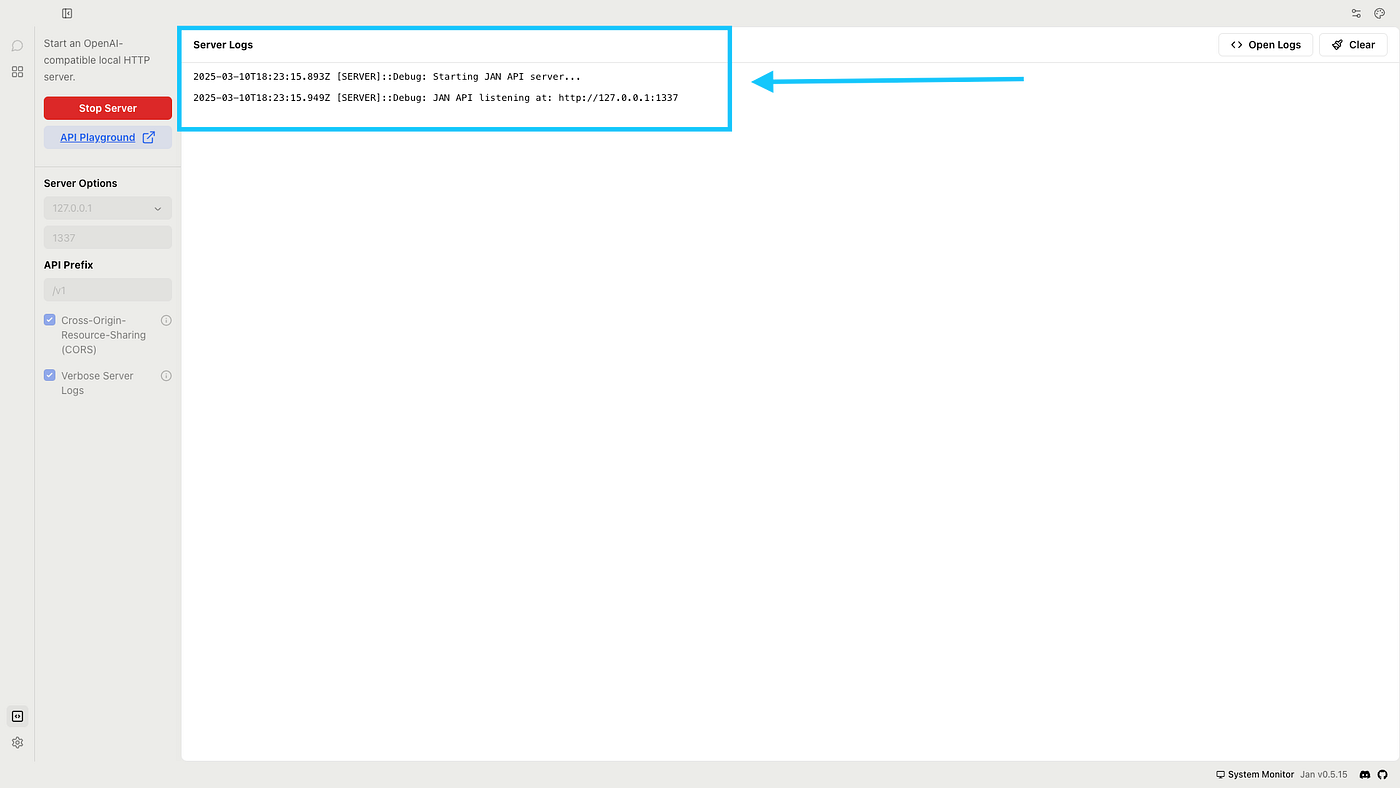
Step 46: Now Start the server to use API in Other Applications.
Step 47: Now Jan AI API can be used in other Applications.
Step 48: Now we will Install OnlyOffice Desktop editor so that it can be integrated with Ollama/GPT4ALL/llamafile/Text generation UI/LMStudio/Jan AI and much more, You can Also Integrate with OpenAI/Anthropic/Google Gemini, Deep Seek, Together AI, Groq, Mistral & xAI (You can fill detail yourself in your system while configuration
To Install Onlyoffice Desktop editor visit github repository or official website to download the installer. Click on releases to download the installer.
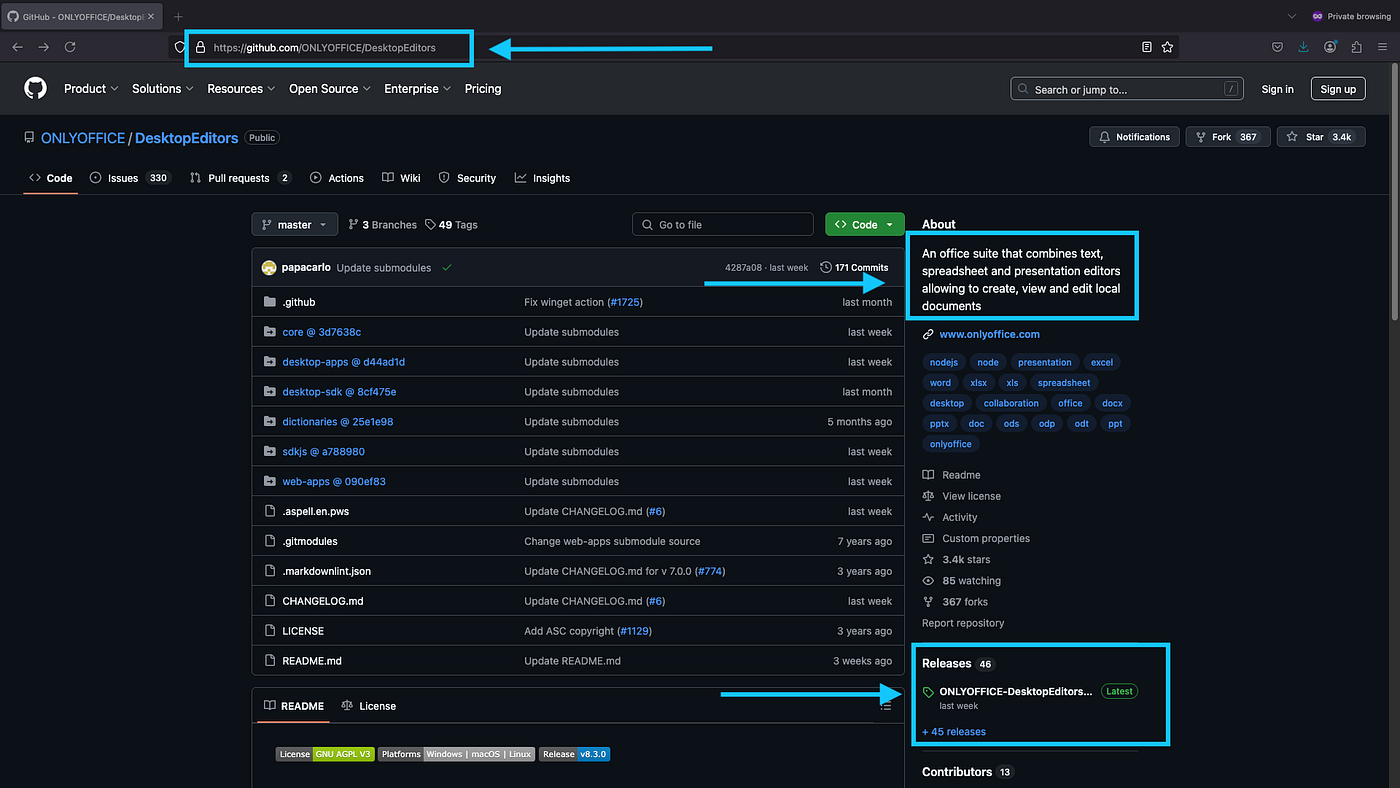
Step 49: Click on installer as per your system specifications to start download process.
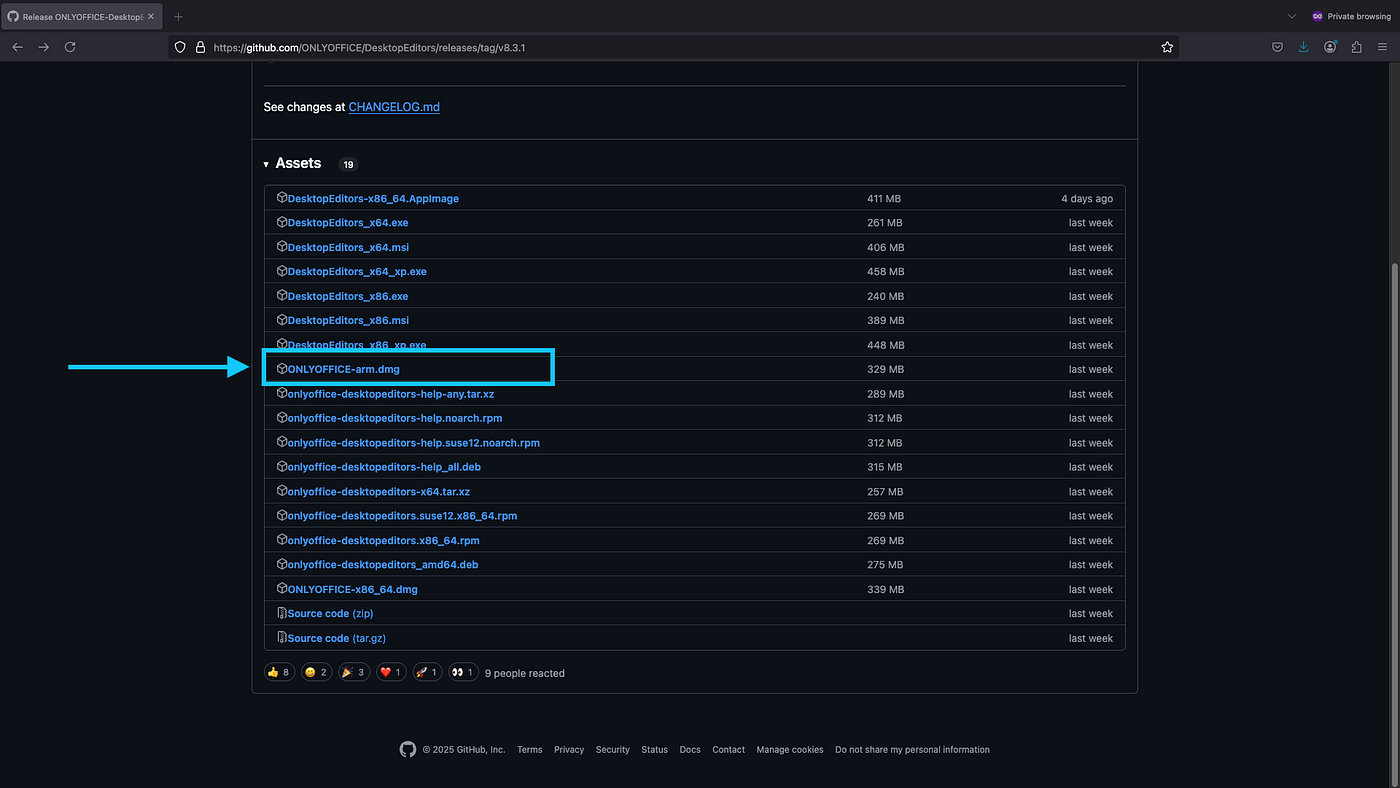
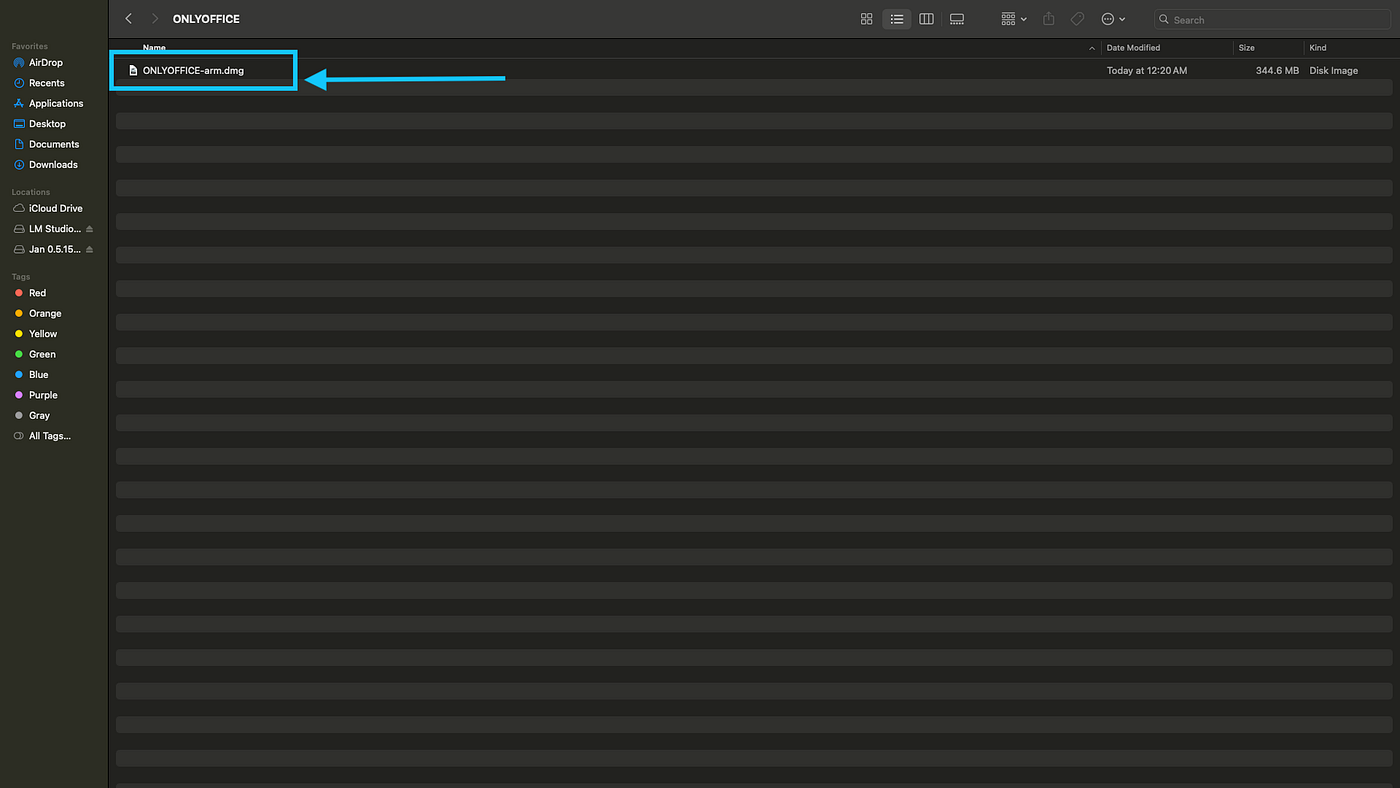
Step 50: Once the download is complete, double click the installer to start installation process.
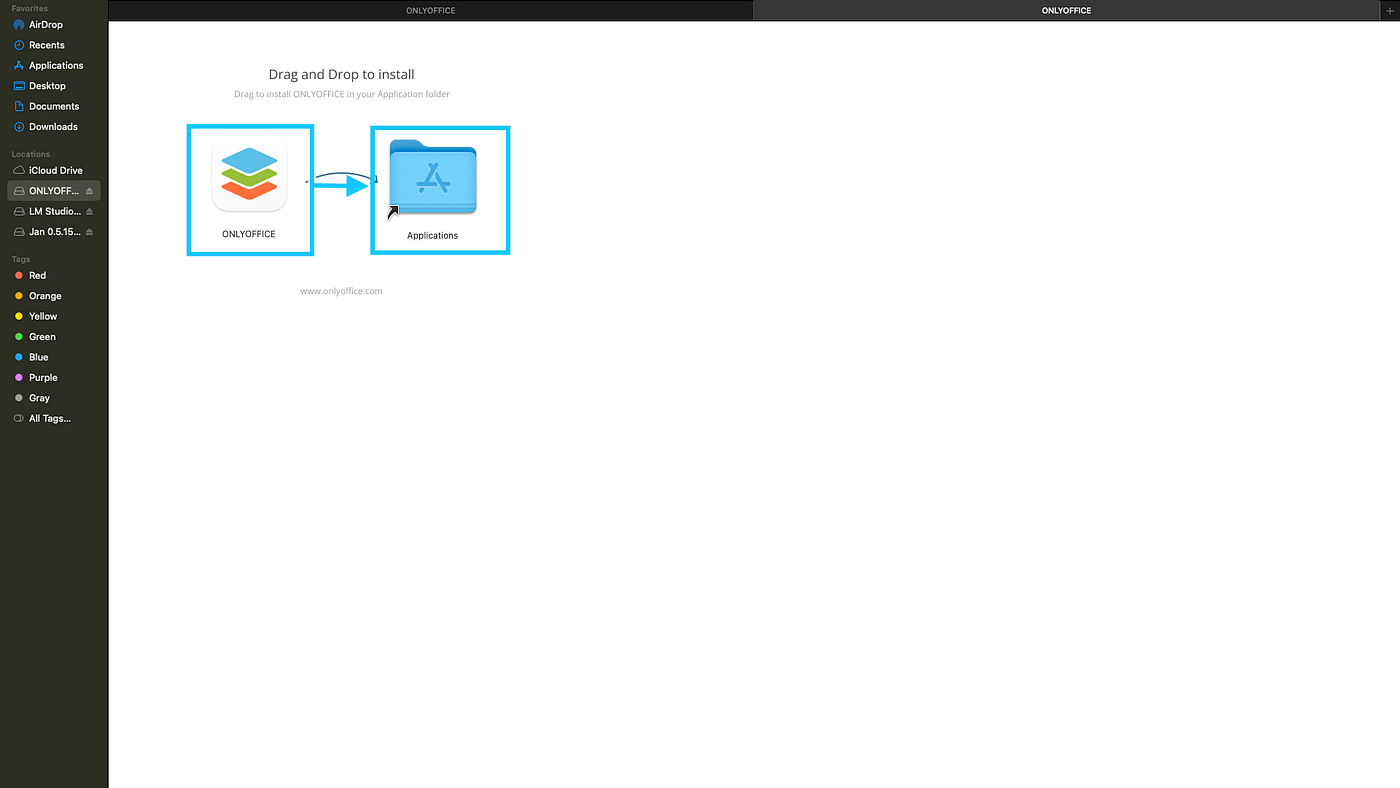
Step 51: Now copy onlyoffice desktop editor in Application folder.
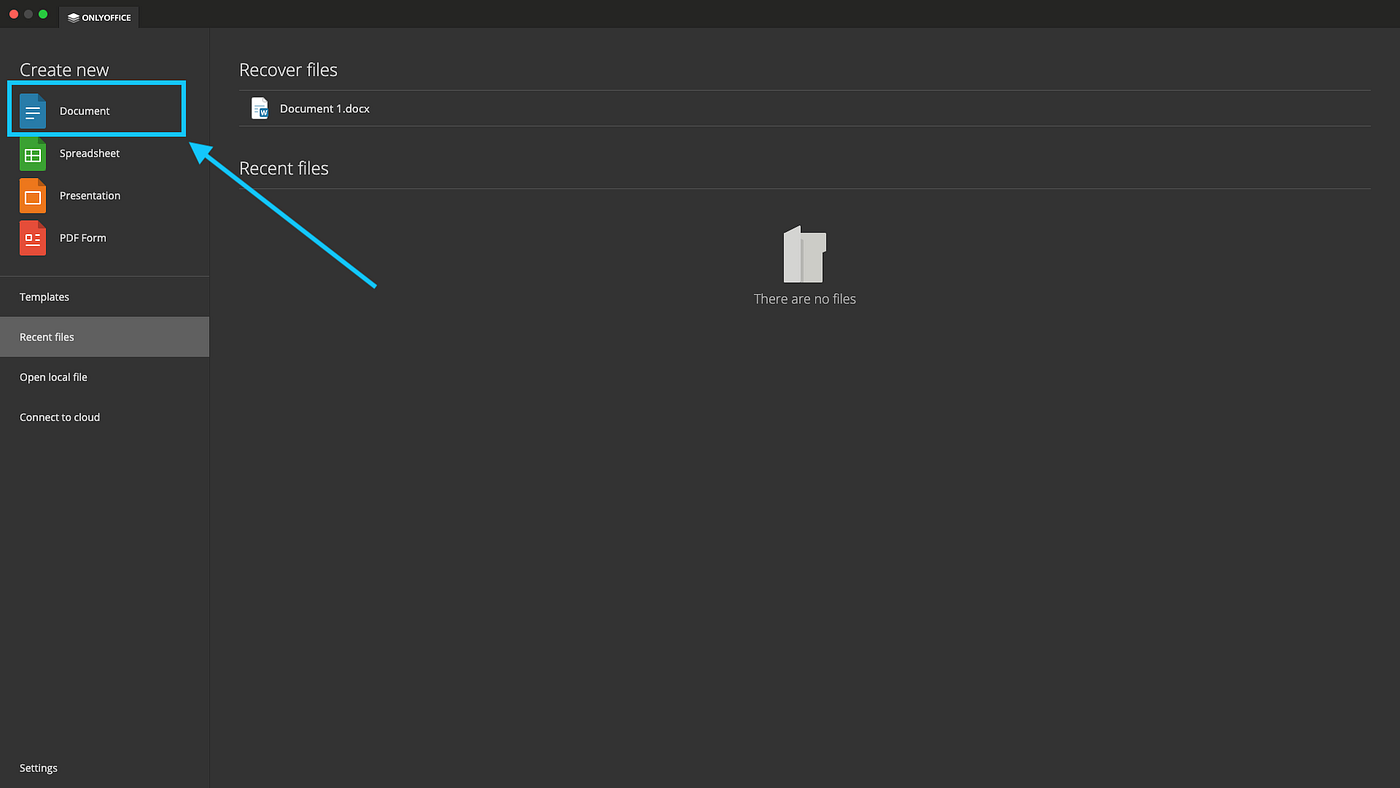
Step 52: Now open onlyoffice desktop editor from Applications and click on Document.
Step 53: Now click on plugin manager to Install AI Plugin.
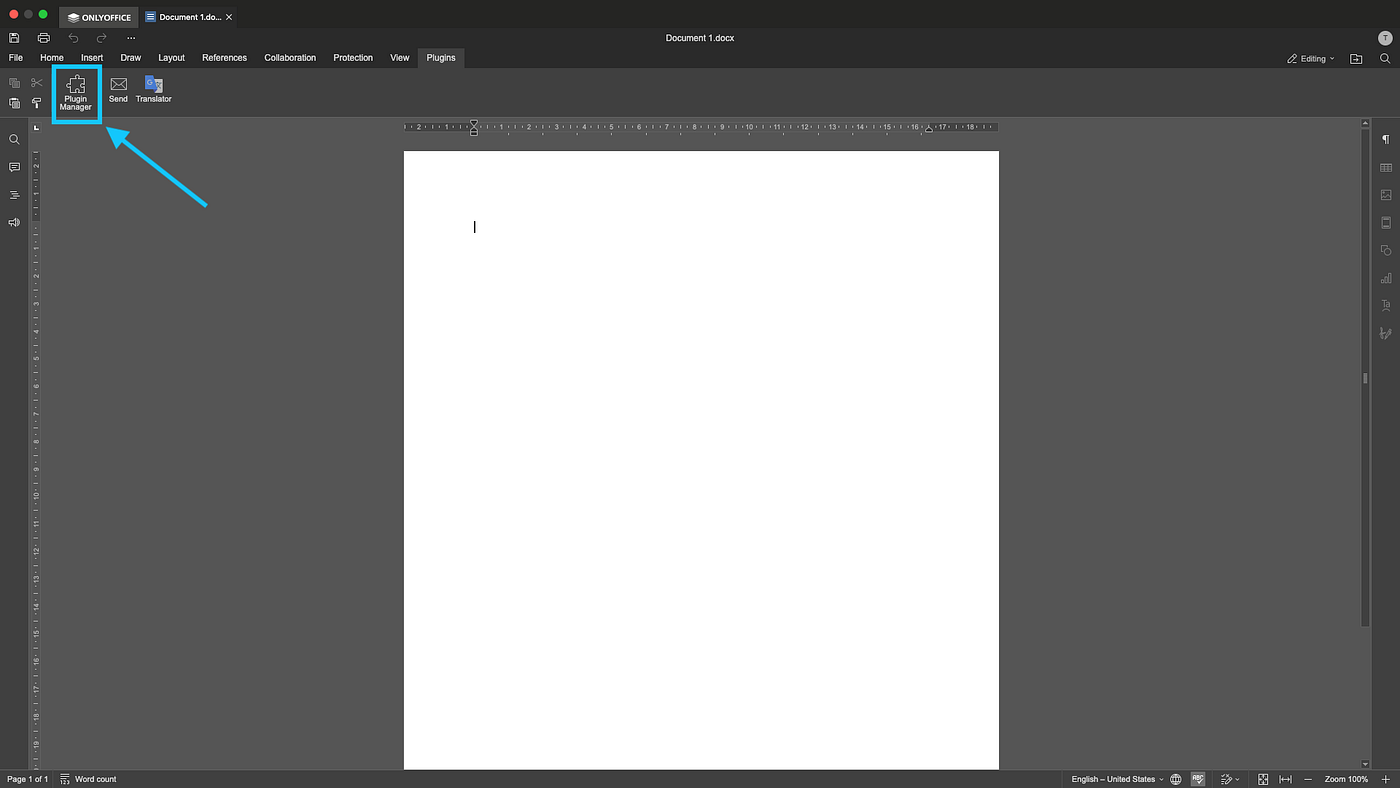
Step 54: Choose AI Plugin and Click on Install.

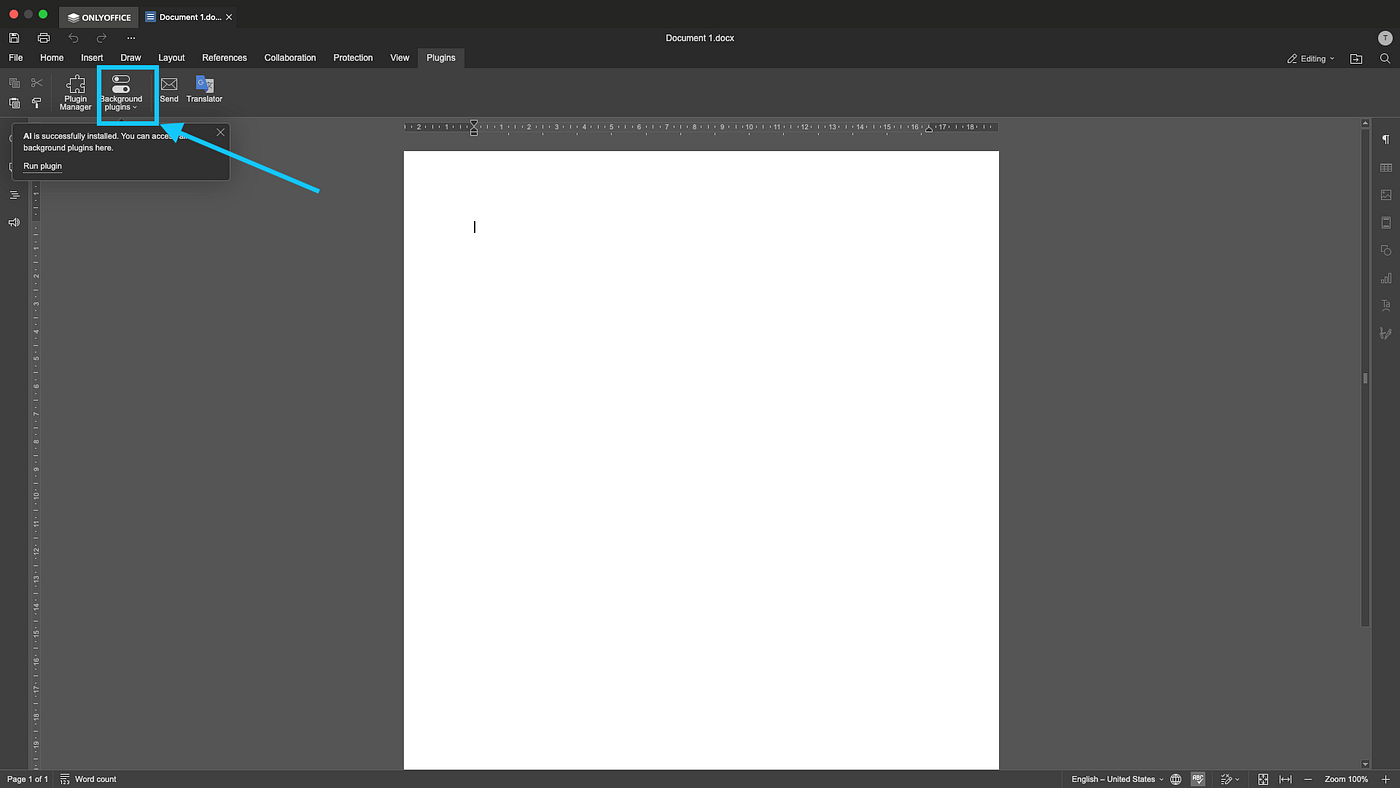
Step 55: Now click on background plugin to activate AI plugin.
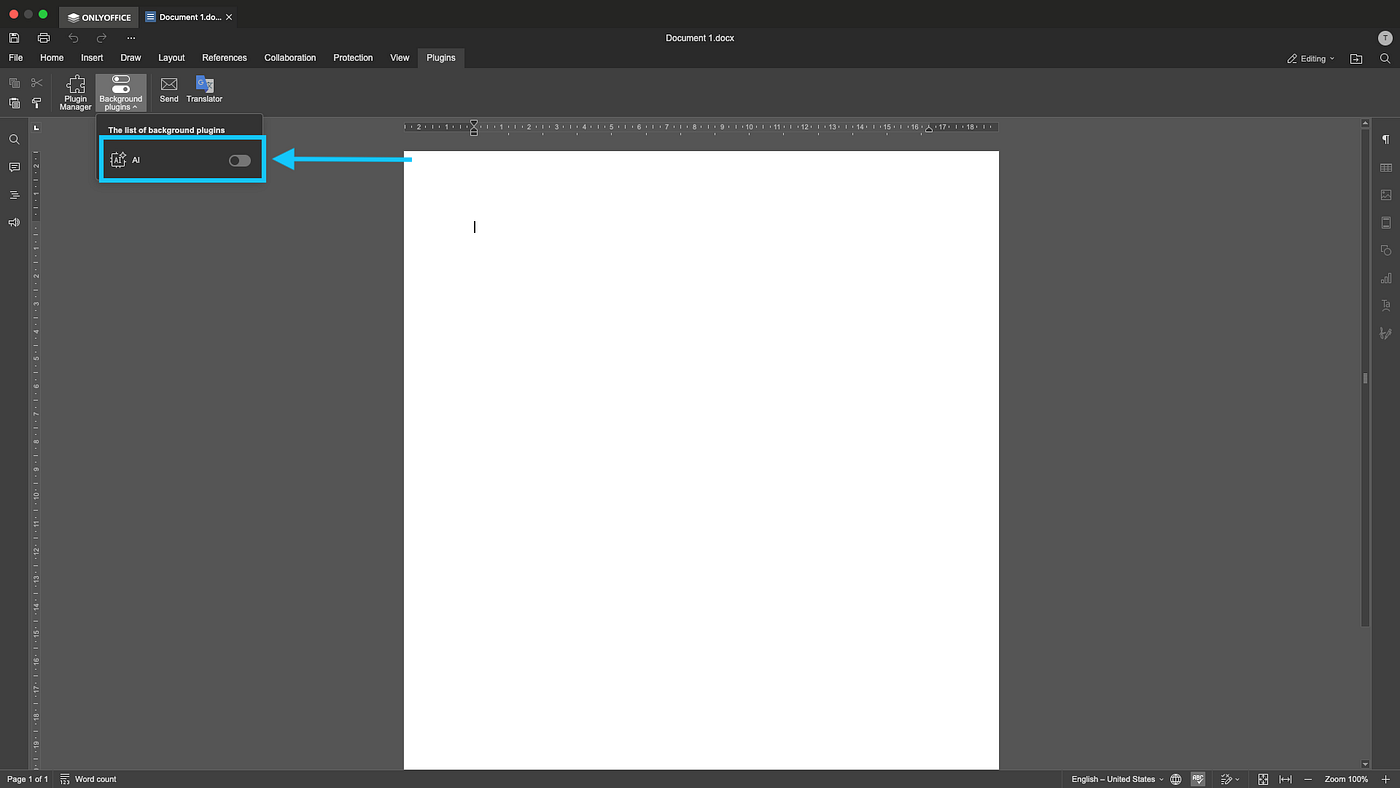
Step 56: Switch on AI Plugin
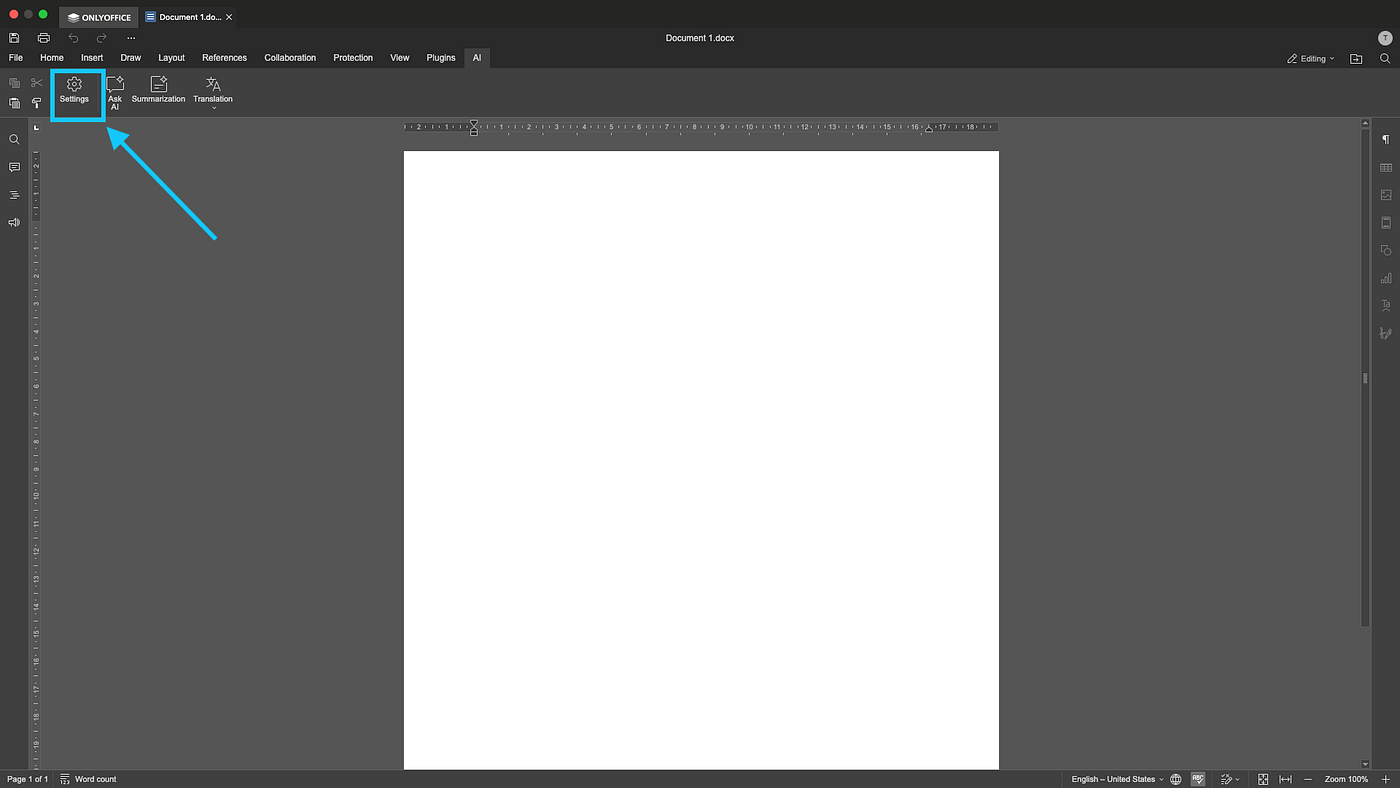
Step 57: Now in AI Tab, click on setting to use different Models.
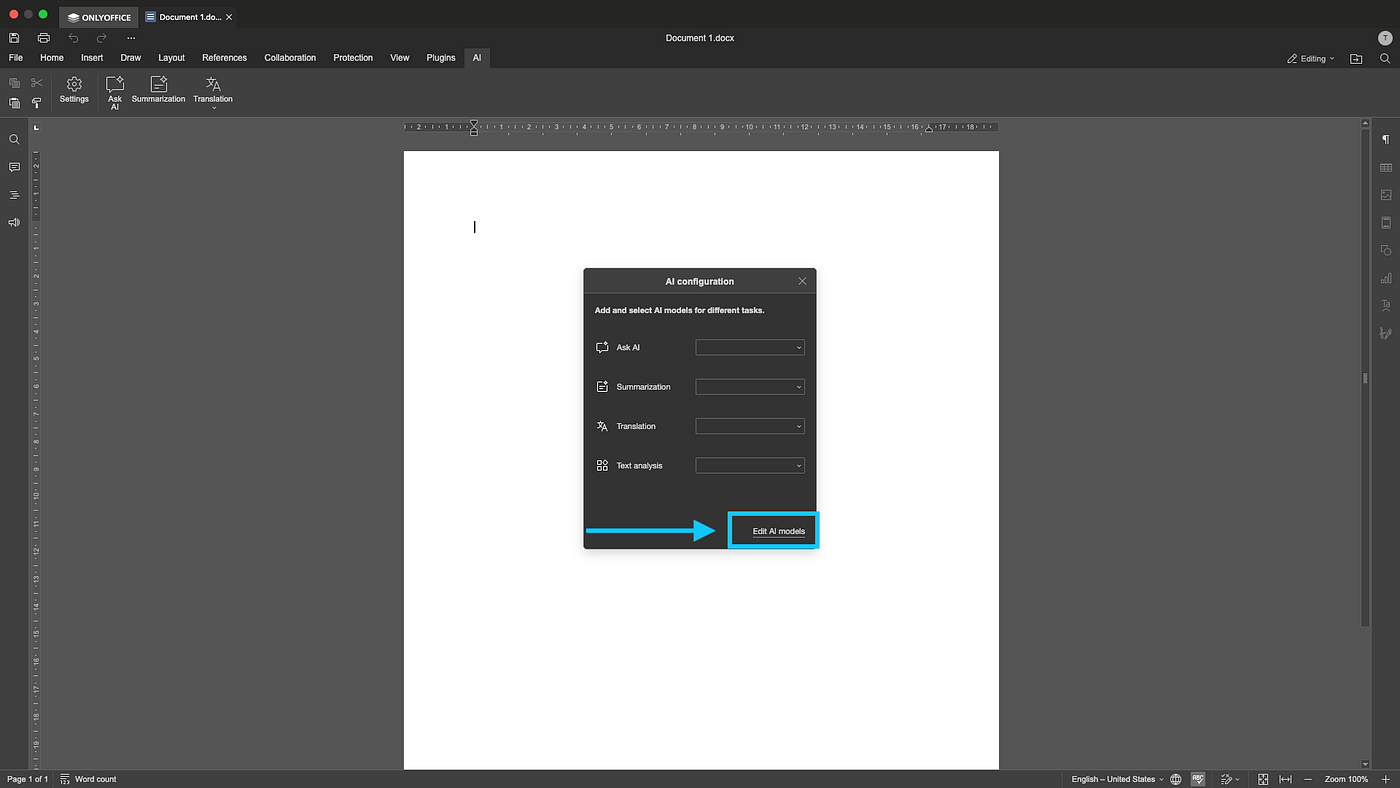
Step 58: Now click on edit Models.
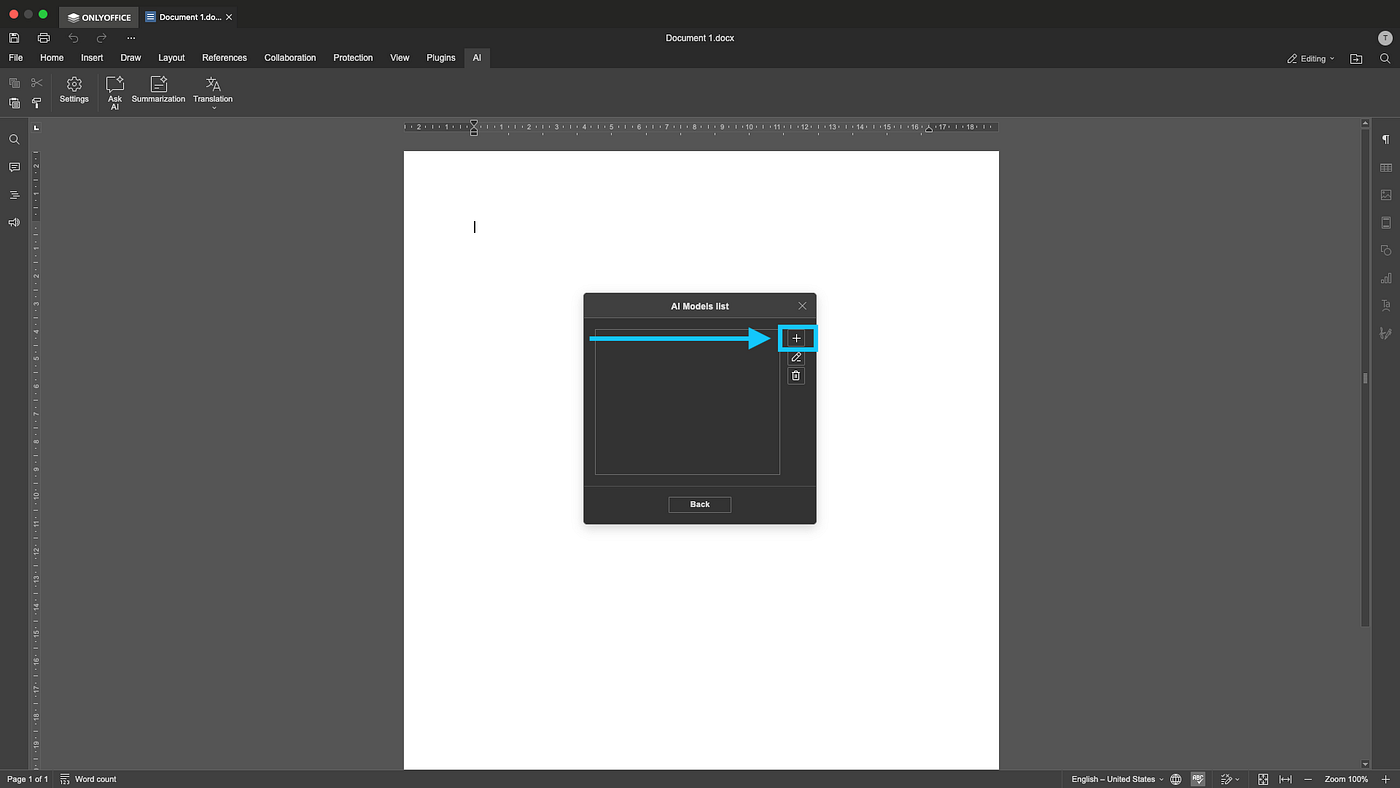
Step 59: Click on add models.
Ollama Integration
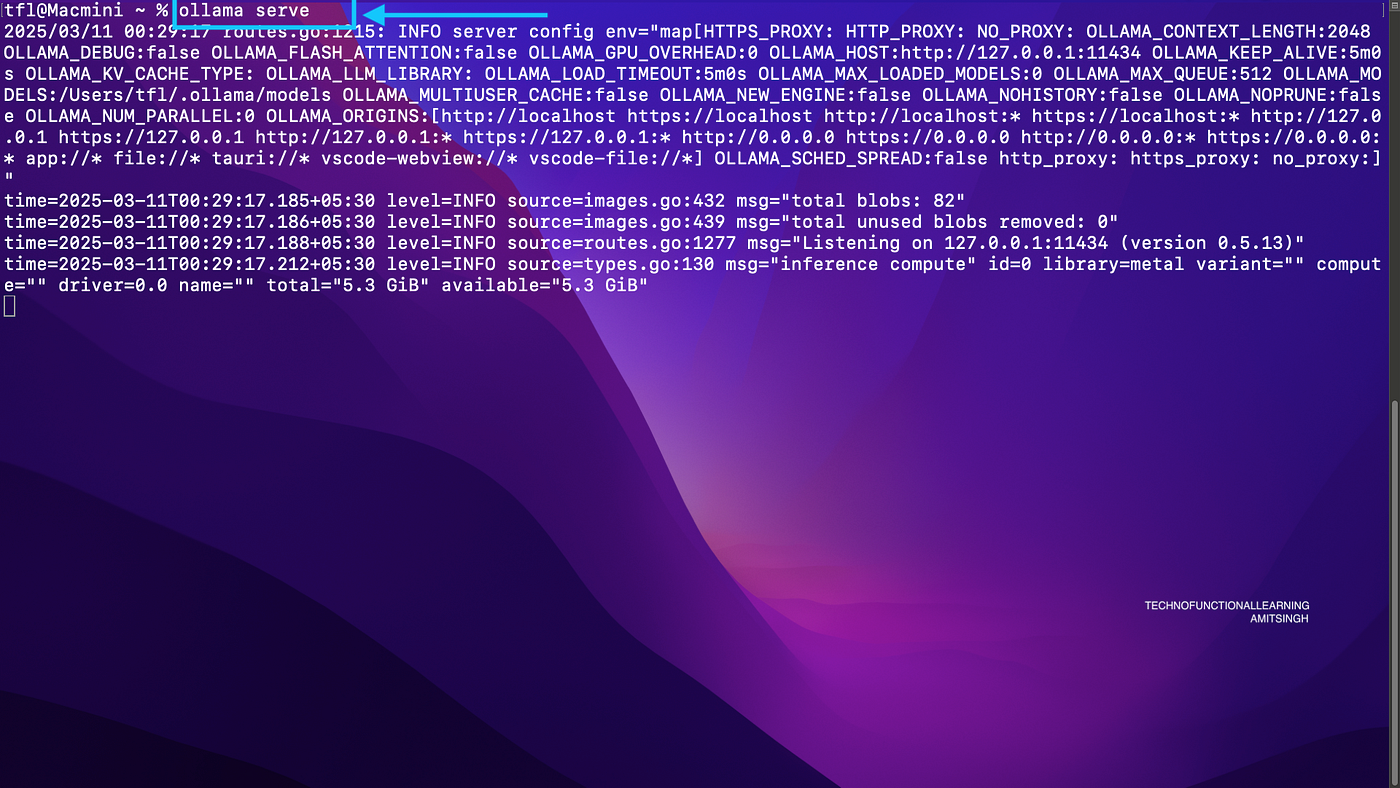
Step 60: Before integrating Ollama, let start ollama server with Ollama serve command in terminal.
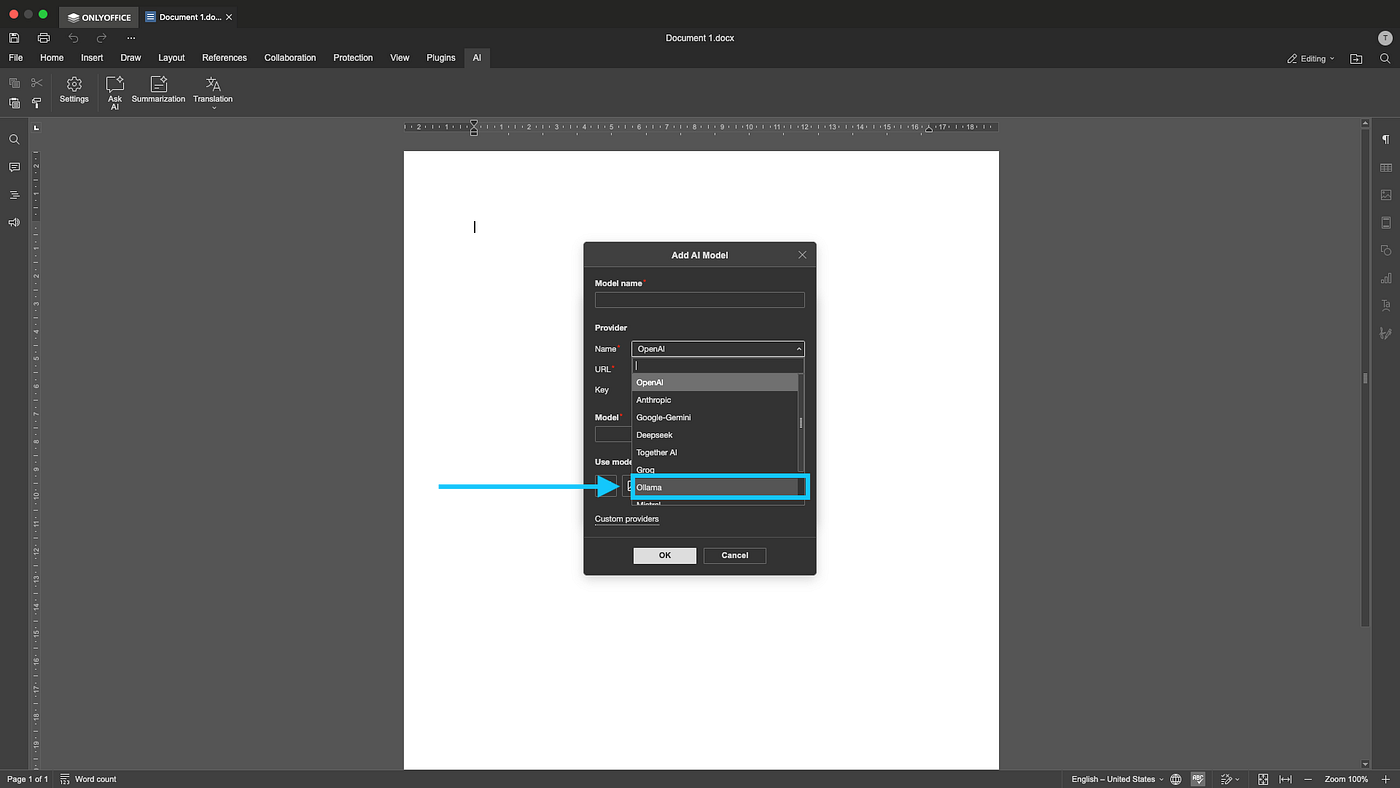
Step 61: Now just choose Ollama, system will take ollama server details and available models automatically, choose you favourite model if your wish to change default model.
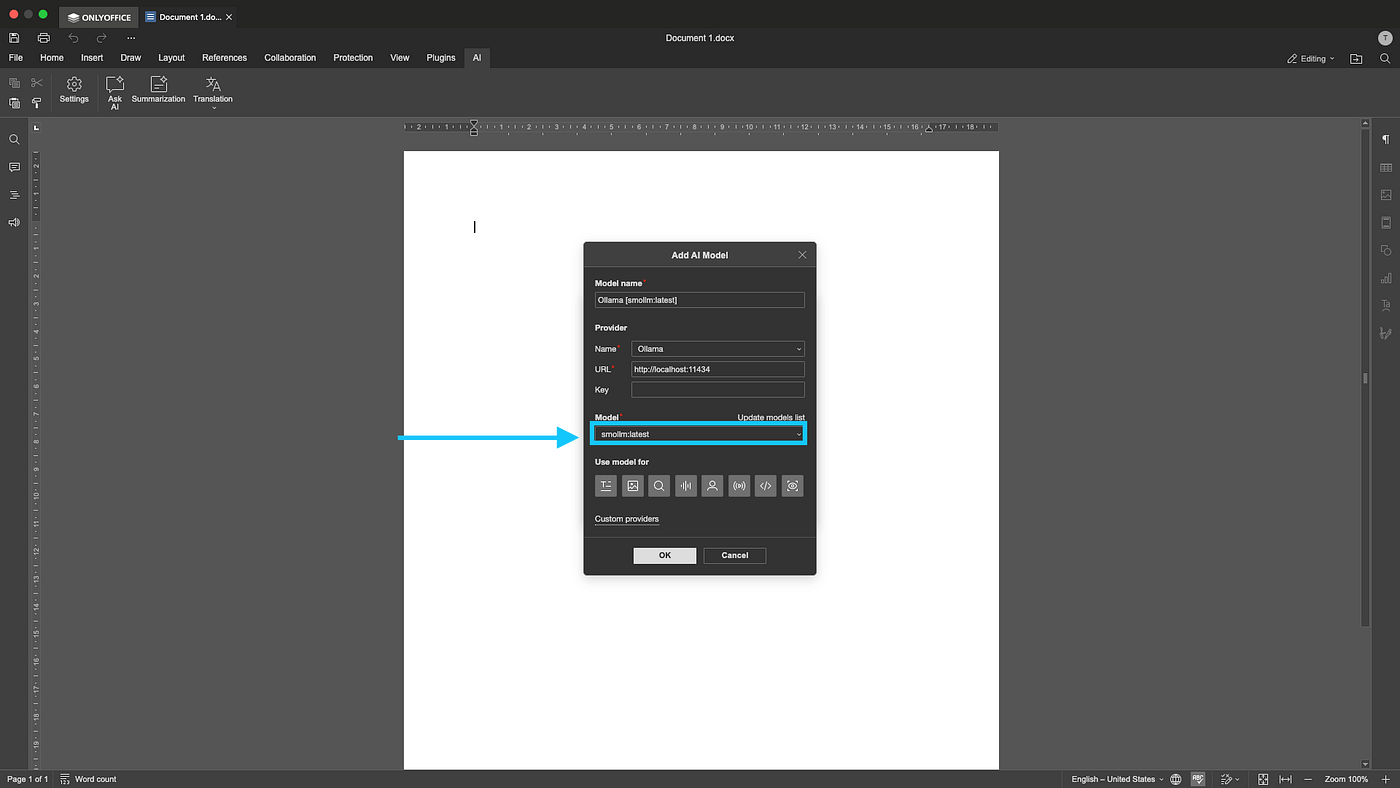
Step 62: Now Choose the model to be used for Asking AI, Summarization, Translation & Text Analysis.
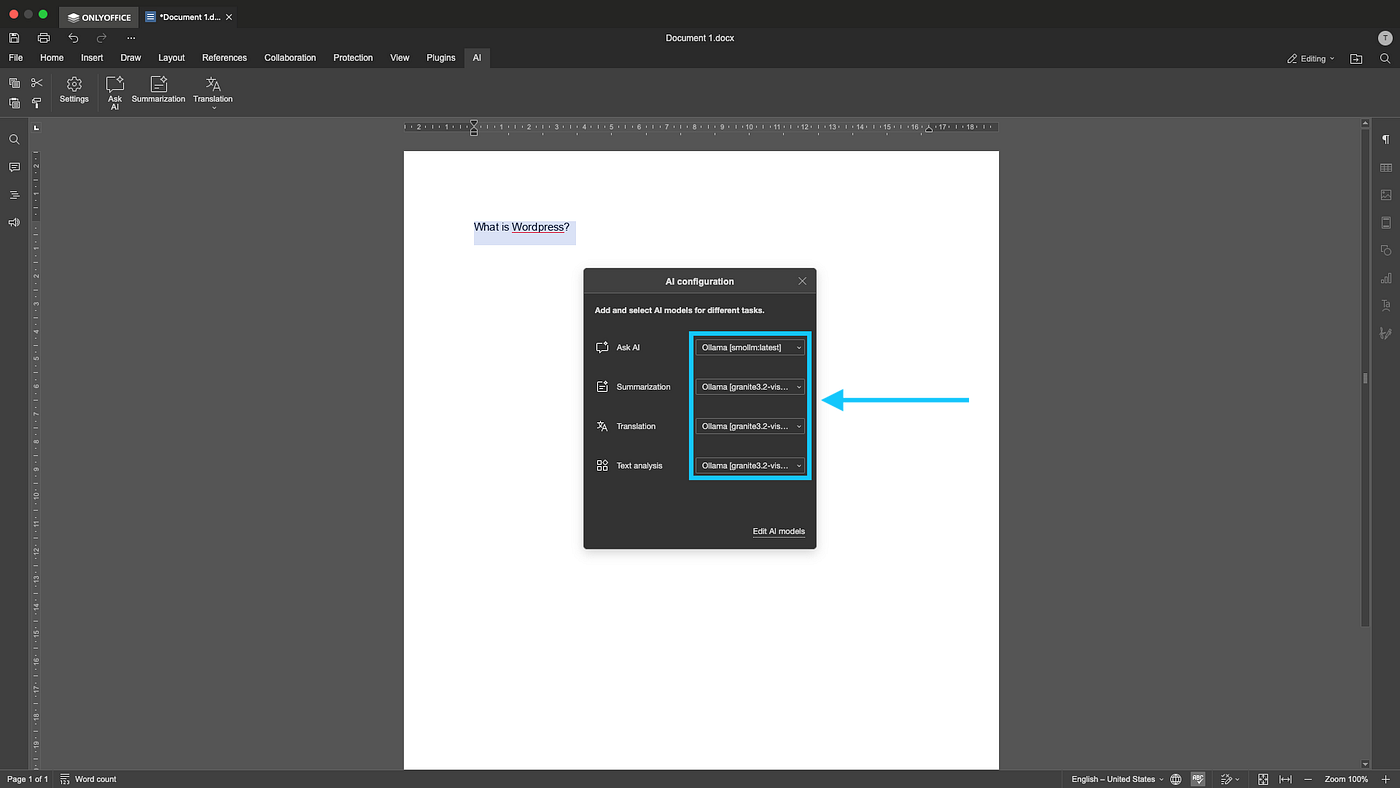
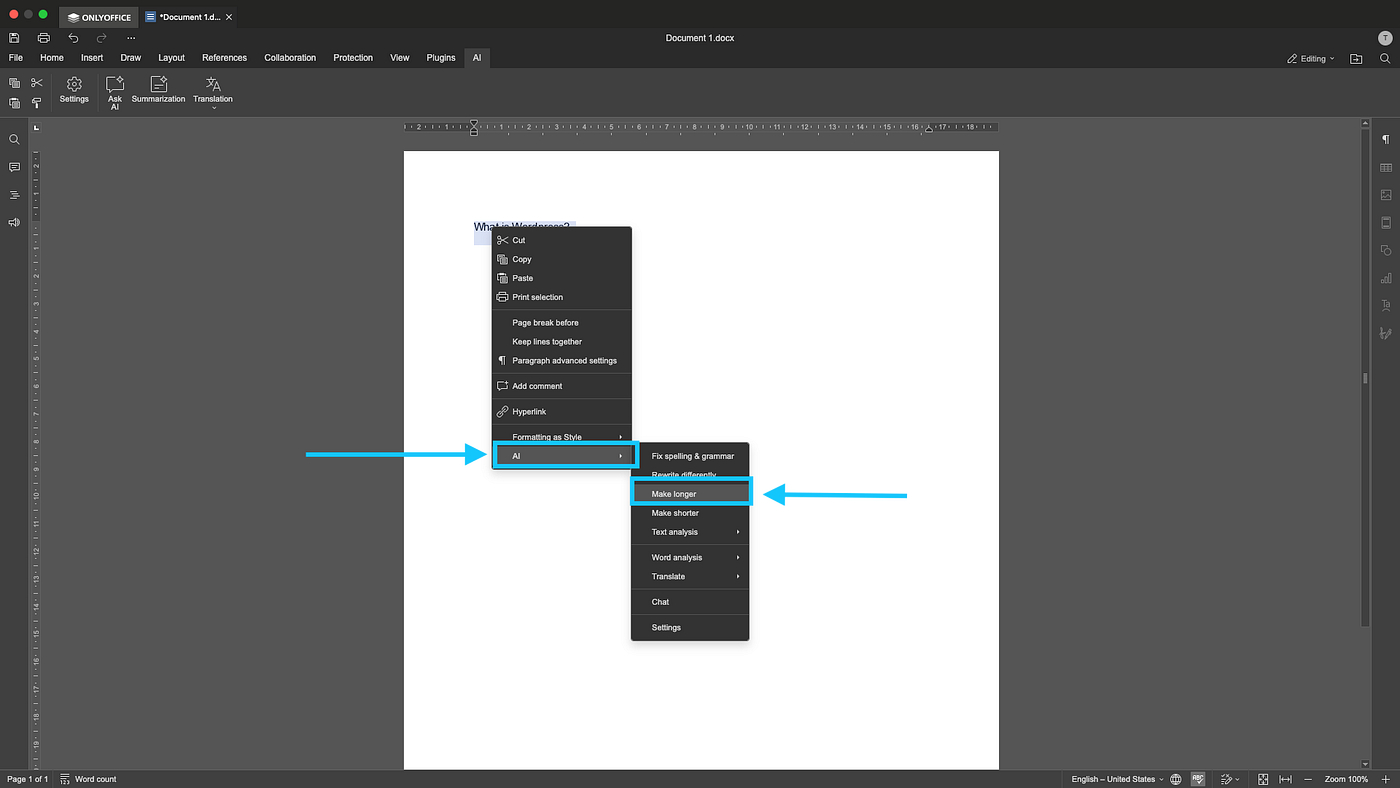
Step 63: Now select the text for your question and you have two options 1) you can just click on make longer, it should answer your question or 2) click on chat option to generate text and copy text back to document. In this I have used option to “make longer” without need to copy and paste generated text.
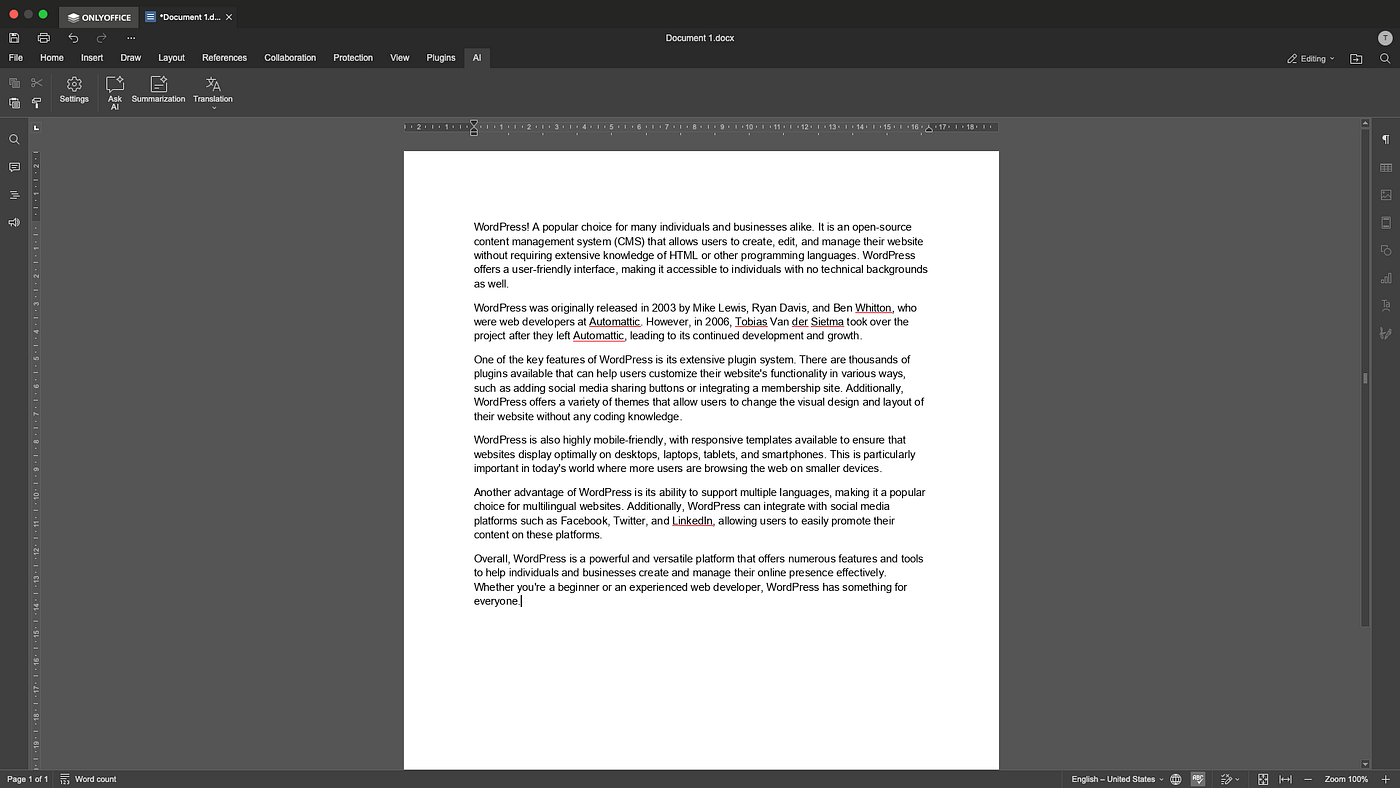
Step 64: Here is the result.
Step 65: Now select the text again and right click to choose “fix spelling and grammer”. Kindly note that you can use different models for text generation and other work by clicking on edit models. sometime you need longer and fast text generation and for document checking and summarization you may use heavy models.

Step 66: Now use rewrite function to write text differently.
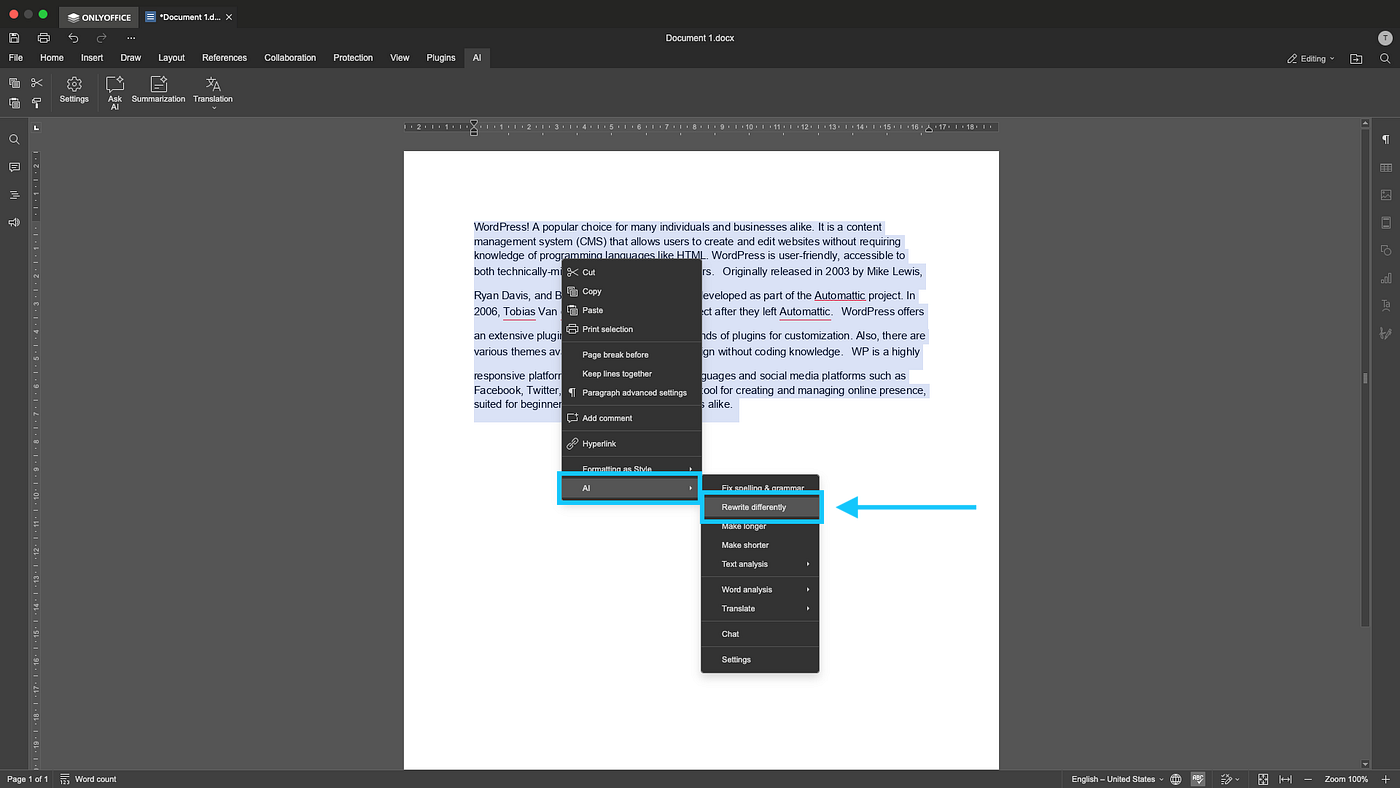
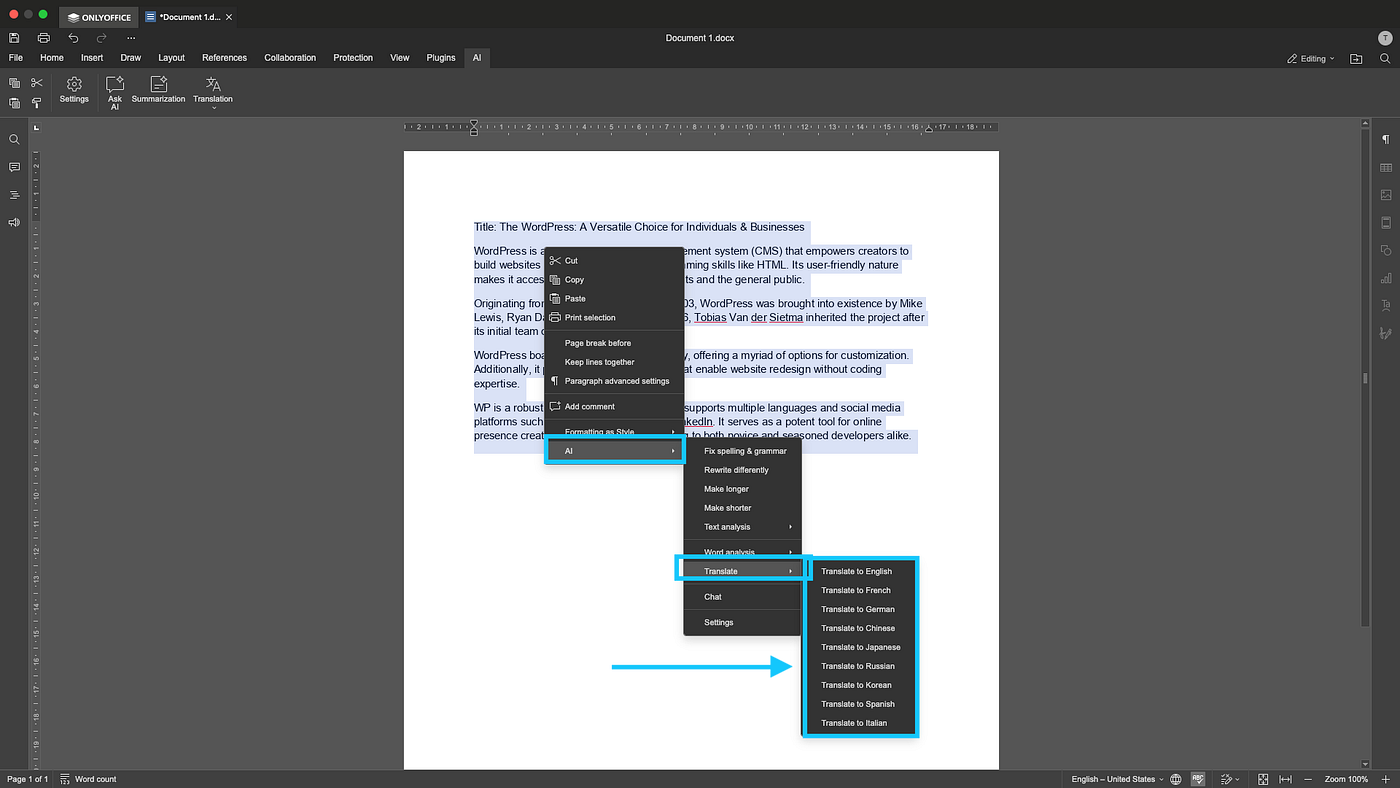
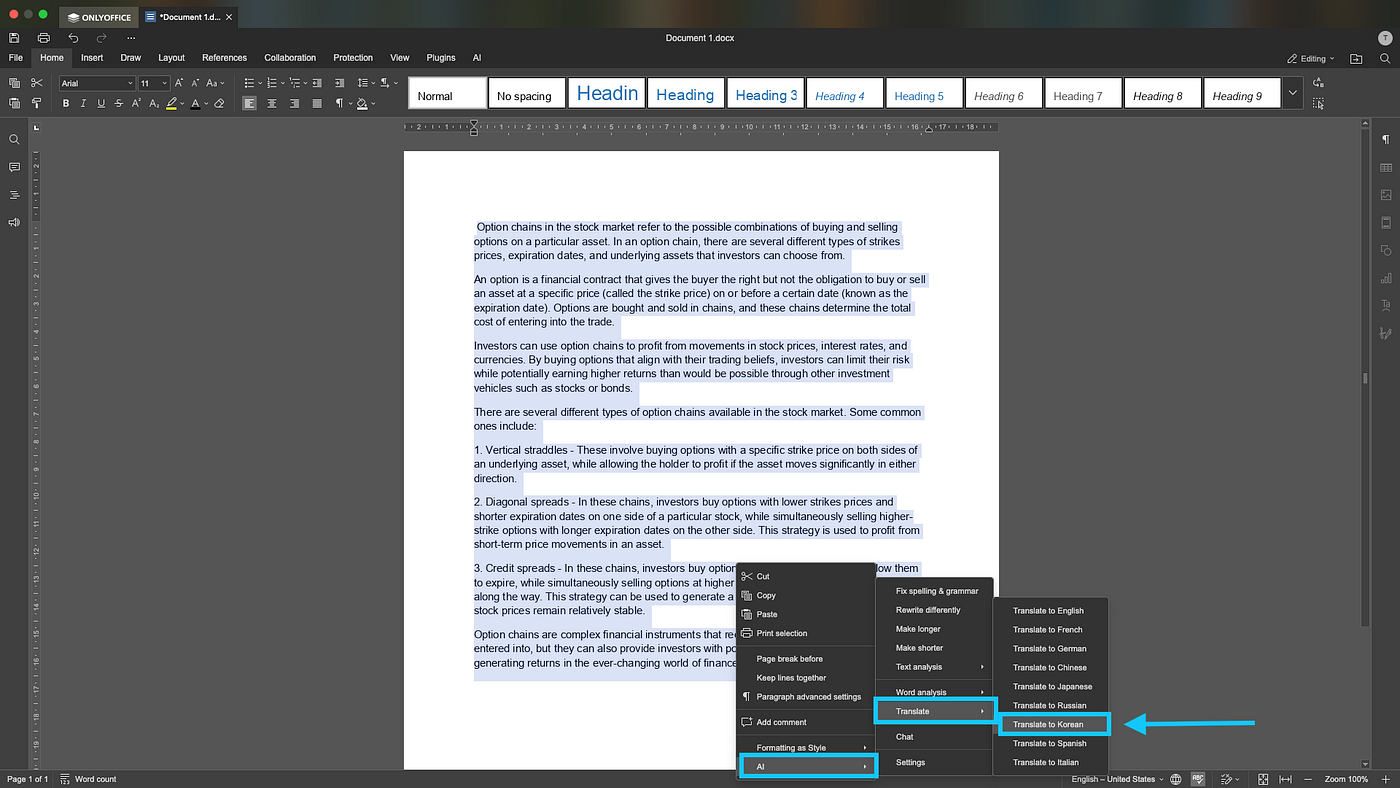
Step 67: Now translate your text in different language based on Model Capability.
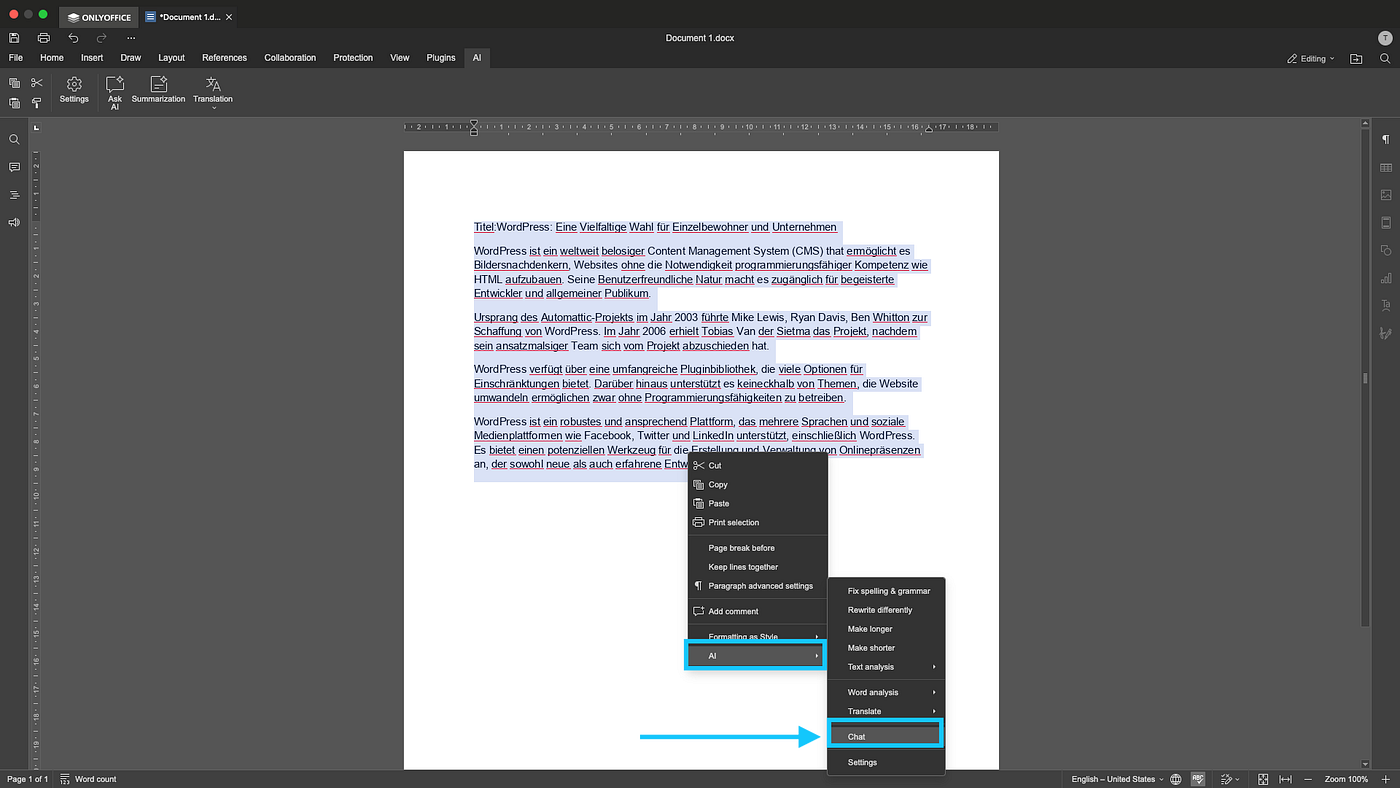
Step 68: You can also click on chat for your text.
Step 69: You can also check summarization of text side by side.

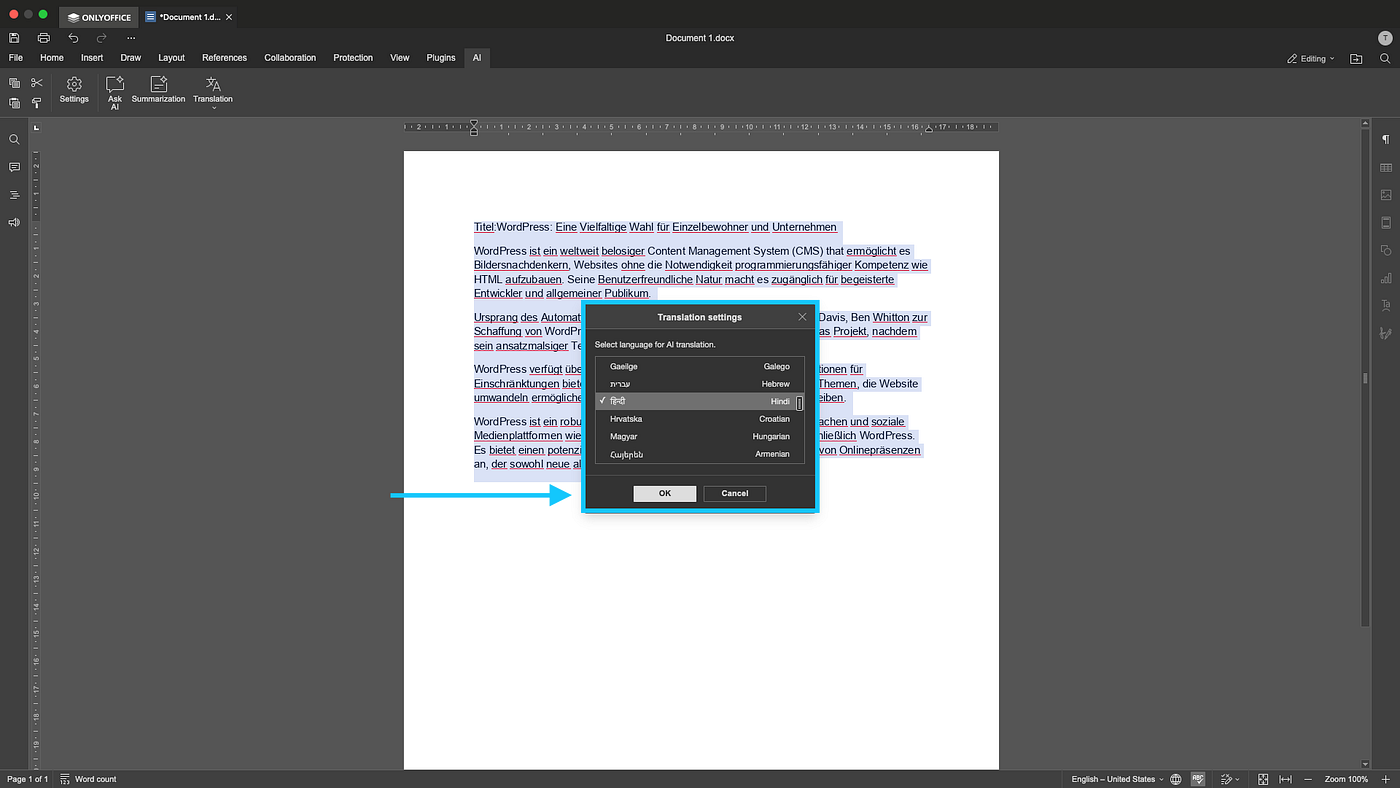
Step 70: Click of Translation setting to choose preferred Languages.
GPT4ALL Integration
Step 71: If you already have some models for GPT4All then you can skip this step, else you can discover and click on download the GPT4ALL models.

Step 72: You can also download the gguf models directly from huggingface via GPT4ALL huggingface tab as shown in below screen and click on download from option shown in search results.
Step 73: Now load the model of your choice.
Step 74: Now in setting tab — → Applications enable API server so that we can use GPT4ALL API in Onlyoffice Desktop editor.
Step 75: Now Open Onlyoffice Desktop editor, Click on AI Tab and then settings icon so that you can edit AI Models as shown below.

Step 76: Now click on add models.
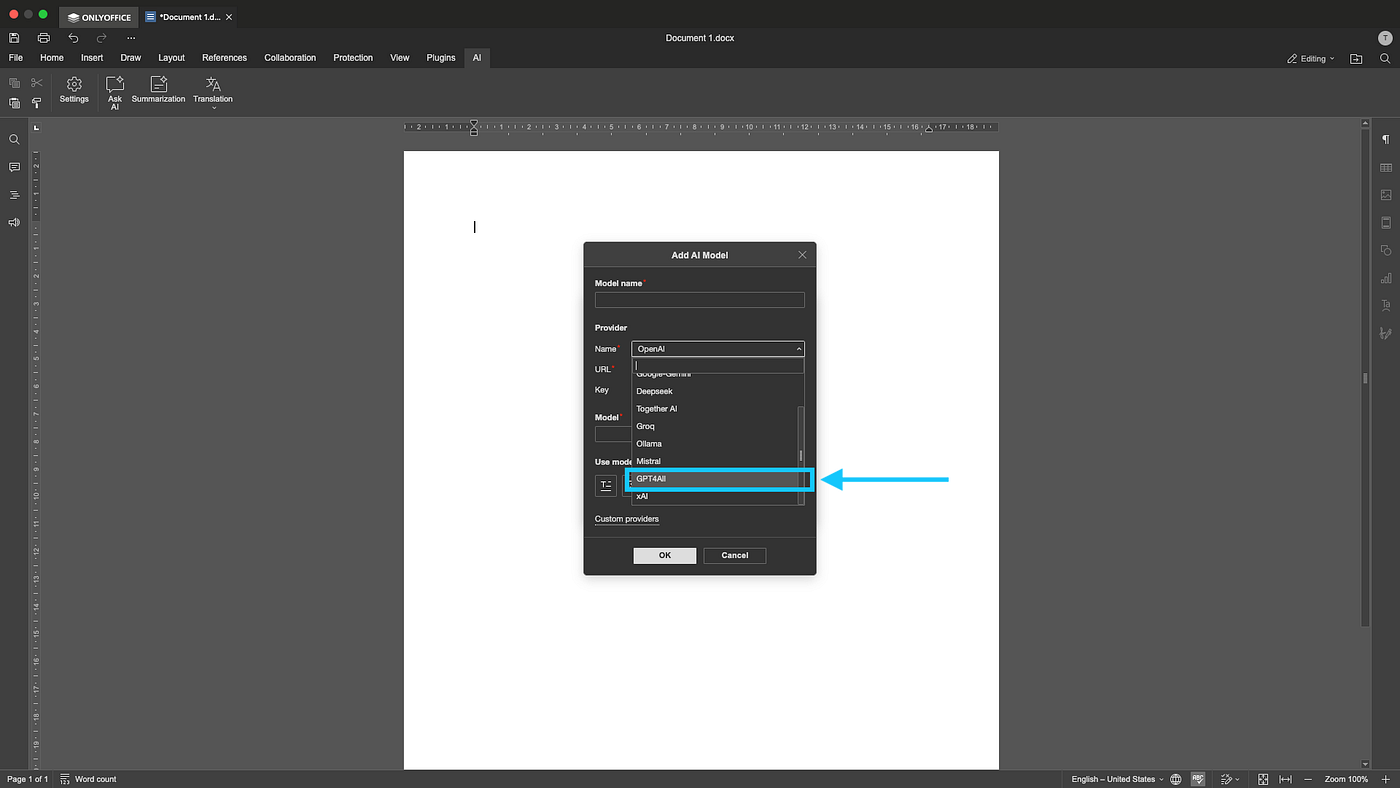
Step 77: Click on GPT4ALL, it will use default model and you can choose your respective model in next step.
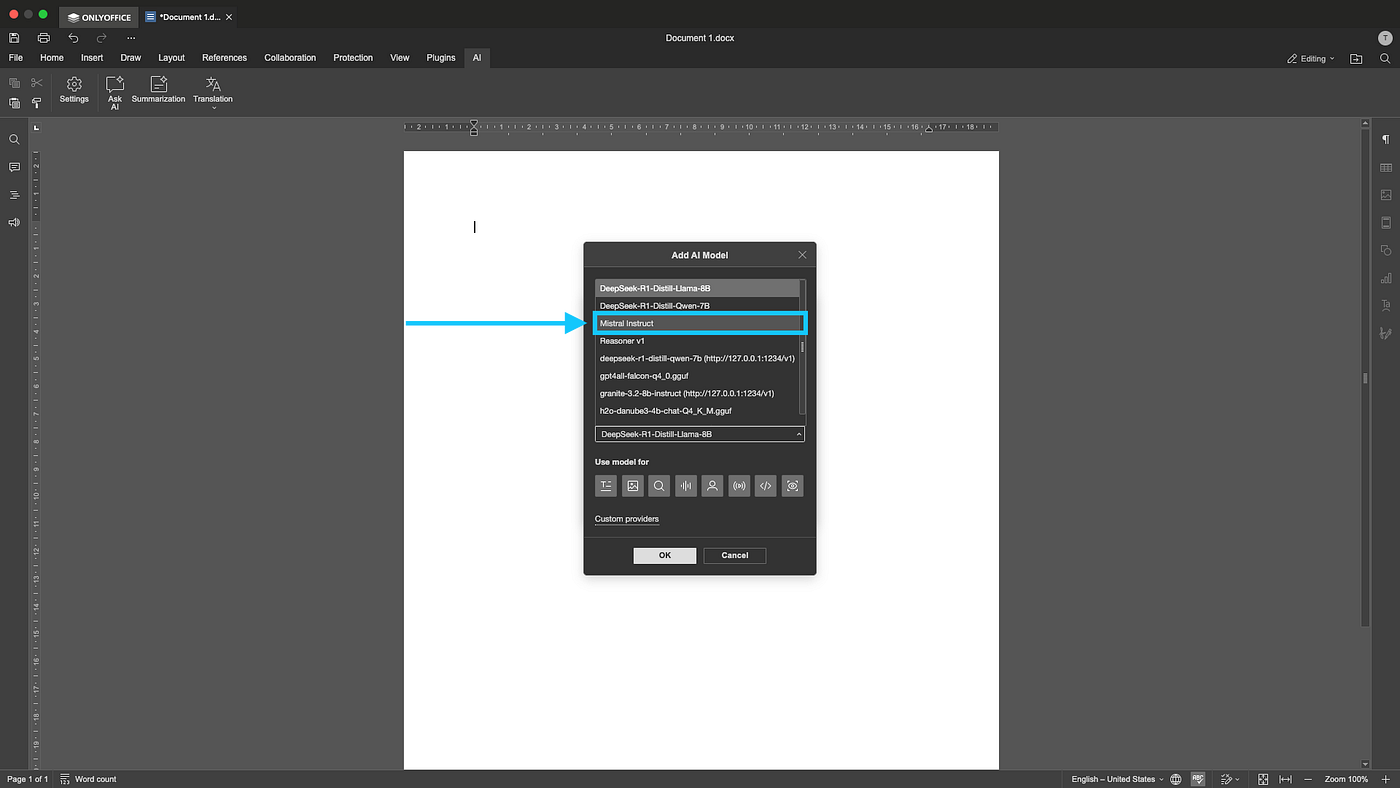
Step 78: Choose your choice of GPT4ALL Model.
Step 79: Click on back, to add your models for various Functions
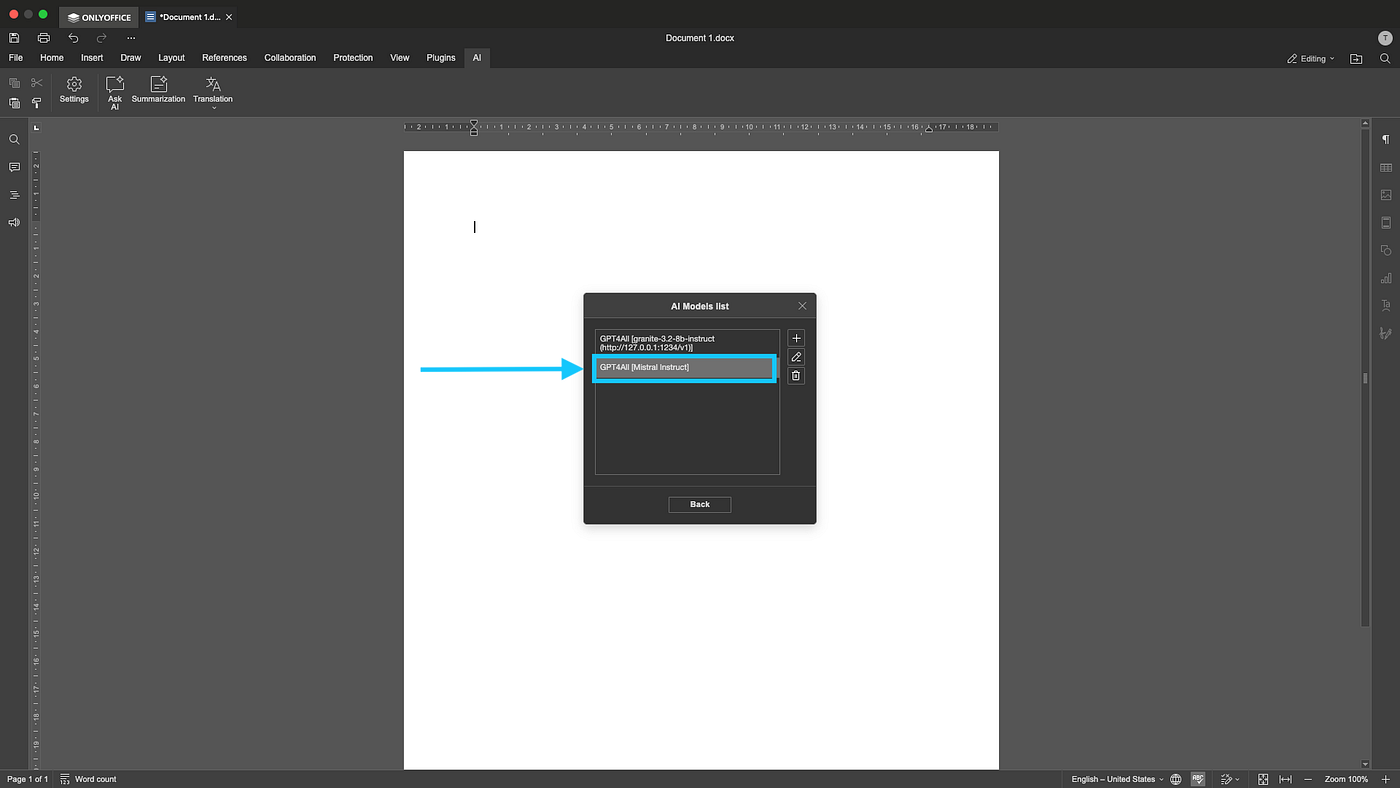
Step 80: Choose GPT4all model Asking AI, Summarization, Translation & Text Analysis.

Step 81: Now type your question and select make longer to get your answer.
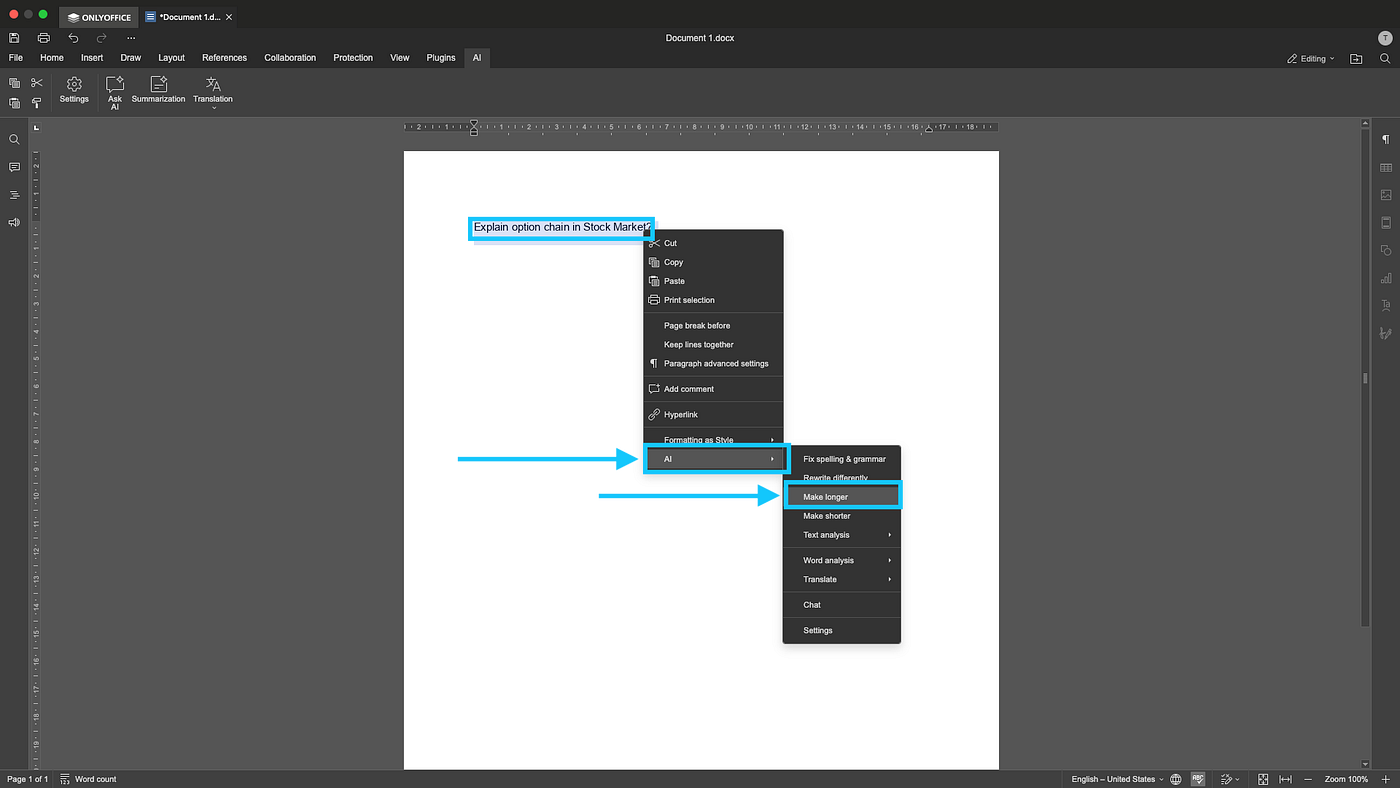
Step 82: Now again select text and click on translate, Other functions are same as we have covered in above points.
Stay Tuned for further integration of Text Generation Webui/llamafile/LMStudio/Jan AI, It will take few days to complete this article for writing about various LLM runner integration with Onlyoffice Desktop on MacOS/Windows/Ubuntu.
메타데이터
- post_id
- 8e877eaed950
- slug
- ai-powered-writing-multi-language-re-writing-summarisation-checking-document-translation-with-8e877eaed950
- url
- https://medium.com/free-to-use-softwares-apps-windows-linux-mac/ai-powered-writing-multi-language-re-writing-summarisation-checking-document-translation-with-8e877eaed950
- canonical_url
- https://medium.com/free-to-use-softwares-apps-windows-linux-mac/ai-powered-writing-multi-language-re-writing-summarisation-checking-document-translation-with-8e877eaed950
- author_url
- https://medium.com/@technofunctionallearning
- status
- ok
- fetched_at
- 2026-07-23 05:51:45