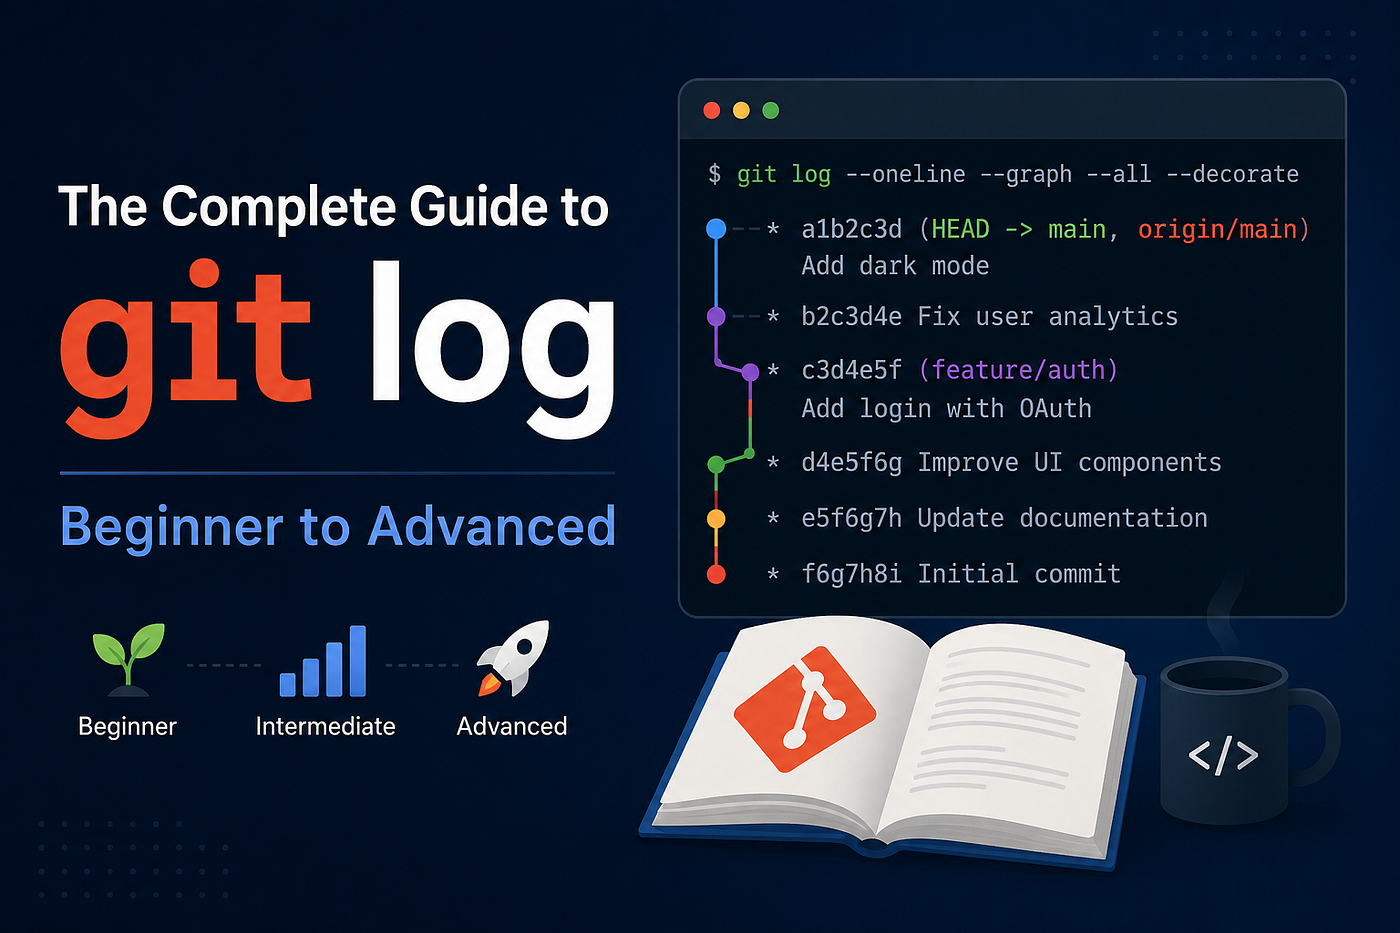
The Complete Guide to git log: Beginner to Advanced (The human-readable manual: git log)
inter-git.com teaches git fundamentals visually: inter-git.com is an interactive Git tutorial where each command is shown visually so you…
The Complete Guide to git log: Beginner to Advanced (The human-readable manual: git log)
**inter-git.com teaches git fundamentals visually: [inter-git.com](https://inter-git.com)** is an interactive Git tutorial where each command is shown visually so you can see exactly how it works in real time. It runs entirely in your browser, so there is nothing to install. Before moving on to the intermediate level, it is a great place to practice what you have just learned.
Table of Contents
- What Is git log and Why Does It Matter?
- Beginner Level 2.1 The mental model: commits as a timeline 2.2 Reading the basic git log output 2.3 git log — oneline 2.4 git log -n: limiting the number of commits 2.5 git log — file: history of a single file 2.6 git log — all: seeing every branch 2.7 Common beginner pitfalls 2.8 Beginner cheatsheet
- Intermediate Level 3.1 git log — graph: visualizing branches 3.2 git log — author: filtering by person 3.3 git log — since and — until: filtering by date 3.4 git log — grep: searching commit messages 3.5 git log -p: viewing the actual changes 3.6 git log — stat: file change statistics 3.7 git log — format: custom output 3.8 git log — decorate: branch and tag labels 3.9 Revision ranges: A..B and A…B 3.10 Filtering merges with — no-merges and — merges 3.11 git log — first-parent: following the main line 3.12 Common intermediate pitfalls 3.13 Intermediate cheatsheet
- Advanced Level 4.1 git log -S and -G: the pickaxe search 4.2 git log -L: tracing a function or line range 4.3 git log — follow: tracking renames 4.4 Commit ordering: topo, date, author-date, reverse 4.5 git log — cherry-pick: finding unique commits 4.6 git log — walk-reflogs: reading reflog history 4.7 History simplification: — full-history, — simplify-merges, — show-pulls 4.8 Custom format deep dive: every placeholder explained 4.9 log configuration settings 4.10 Combining options: real-world recipes 4.11 Complete flags reference table
- Conclusion
What Is git log and Why Does It Matter?
Every time you make a commit in Git, you are saving a permanent snapshot of your project along with a message explaining what changed and why. Over days, weeks, and months, these snapshots form a detailed story of your project’s entire life. git log is the command that lets you read that story.
It sounds simple on the surface. You type git log, you see a list of commits. But the reality is that git log is one of the most powerful and flexible commands in Git. It can answer questions that nothing else can: Who changed this function last Tuesday? Which commit deleted that file? Did anyone touch the authentication code during the last sprint? What exactly changed between version 2.0 and version 2.1? When did this bug first appear?
Think of git log as a search engine for your project's history. Just like a search engine, the more precisely you can phrase your question, the more useful the answer. A developer who knows only git log gets a list. A developer who knows git log --author="Sarah" --since="2 weeks ago" --grep="login" -- src/auth/ finds the exact three commits they need in under a second.
That is the gap this tutorial aims to close. By the end, you will be able to read your history in any format you want, filter it by author, date, keyword, or file, visualize branches graphically, trace a single function across dozens of refactors, and build your own custom log aliases that your whole team can use.
Level 1: Beginner
If you have just started using Git, this section is for you. We will cover what git log does, how to read its output, and the handful of options you will use every single day. Nothing here requires you to understand branching or merging yet. Just commits and a little curiosity.
The Mental Model: Commits as a Timeline
Before you can read git log output, you need a picture in your head of what it is actually showing you. Git stores your project as a chain of commits. Each commit points backward to the one before it, forming an unbroken chain all the way back to the very first commit in the project. Think of it as a timeline that only ever grows to the left, because in Git history is read from newest (at the top) to oldest (at the bottom).

Figure 1: Git stores history as a backward-linked chain of commits. git log walks this chain starting from HEAD and prints newest commits first.
Each commit in this chain contains four essential pieces of information:
First, a hash, which is a 40-character fingerprint that uniquely identifies that commit across every Git repository in the world. You will often see just the first 7 or 8 characters, which is enough to be unique in any normal project. Second, the author, meaning who wrote the change and when. Third, the date, meaning when the commit was created. Fourth, the commit message, meaning the human-readable explanation of what changed and why.
When you run git log, Git starts at the commit your current branch points to (called HEAD), then follows the chain backward, printing each commit one after another. That is literally all it does in its simplest form. The power comes from the options that let you control exactly which commits to show, in what order, and with how much detail.
Reading the Basic git log Output
Open a terminal, navigate to any Git repository, and type:
git logYou will see something like this:
commit a3f9c218b4e72c94d3e18f7b09c2a6e5f13d8b1
Author: Sarah Chen <sarah@example.com>
Date:   Thu May 22 14:31:07 2025 +0200

    Fix login bug when email contains uppercase letters

    Users reported being unable to log in when their email address
    had any uppercase characters. The issue was in the comparison
    function which was case-sensitive.

commit 8d2e140a7c3f91b5e84d2c6a0f17e3b9c52a8d4
Author: Marco Rossi <marco@example.com>
Date:   Wed May 21 09:15:42 2025 +0200

    Add user profile page with avatar upload

commit f1b5a99e2d4c8a7b3e6f1d0c9b5a2e8f4d7c3a1
Author: Sarah Chen <sarah@example.com>
Date:   Mon May 19 16:44:23 2025 +0200

    Update README with installation instructions
Let us look at exactly what each part means, because this is what you will be staring at many times a day.

Figure 2: The anatomy of a single git log entry. Every commit has a hash, author, date, and message. The body is separated from the subject by a blank line.
One thing that confuses a lot of beginners: when you run git log and the output is long, Git opens it in a pager (usually a program called less). You can scroll through it with the arrow keys or spacebar, and you exit by pressing q. If you see a colon at the bottom of your screen, that means the pager is still active. Press q to get your prompt back.
Tip: Scrolling in git log
Inside the git log pager: use j / k (or arrow keys) to move one line at a time, spacebar to move a full page forward, b to go back a page, /keyword to search, and q to quit. These are standard less keybindings.
You will also notice that the default output shows the author’s timezone offset at the end of the date line (like +0200). This matters in distributed teams where people are committing from different time zones. The date always records the committer's local time along with the offset needed to convert it to UTC.
git log — oneline: One Commit Per Line
The default output is detailed, which is great when you need full information. But most of the time you just want a quick overview. That is what --oneline is for:
git log --onelinea3f9c21 Fix login bug when email contains uppercase letters
8d2e140 Add user profile page with avatar upload
f1b5a99 Update README with installation instructions
c7d3e08 Initial project setup
9a1b3c5 Add database migration scripts
4f8e2d1 Configure CI pipelineThis does two things at once. It abbreviates the hash to just 7 characters (still unique enough to identify any commit) and it compresses everything onto a single line: hash followed by the first line of the commit message. When you have a project with hundreds of commits, this is how you get a bird’s eye view of the history without scrolling for ages.

Figure 3: The default format uses 5+ lines per commit. With — oneline, every commit takes exactly one line, letting you scan far more history at a glance.
The --oneline flag is actually a shorthand for two flags combined: --pretty=oneline --abbrev-commit. You will learn about both of these in the Intermediate section. For now, just know that --oneline is the fastest way to get an overview.
Pro habit: make — oneline your default scan
Most experienced developers always start with git log --oneline when they open a new terminal. It gives them a quick sense of where things are without the noise of full dates and author lines. If they see something interesting, they can then run git show a3f9c21 to see the full details of that specific commit.
git log -n: Limiting the Number of Commits
By default, git log shows every single commit in the history. In a project that has been running for a year, that could be thousands of commits. Most of the time you only care about the recent ones. The -n flag lets you say exactly how many you want:
git log -n 5            # show only the 5 most recent commits
git log -5              # shorthand: same result
git log --max-count=5   # long form: same result
All three of these are equivalent. The short form -5 (just a dash and a number) is the one you will see most often in practice because it is the quickest to type. You can use any number:
git log -1   # show only the most recent commit
git log -10  # show the 10 most recent commits
git log -50  # show the 50 most recent commits
Combining -n with --oneline is extremely common in daily work:
git log --oneline -10 # quick scan of the last 10 commitsThere is also a companion flag called --skip that lets you skip the first N commits before starting to display. So git log --skip=5 -5 would show commits 6 through 10. This is rarely needed in everyday work but becomes useful in scripts that page through history.
git log — file: The History of a Single File
One of the most useful things you can do with git log is ask it to only show commits that touched a specific file. The syntax is to put the file path at the end of the command, separated by a double dash:
git log -- src/auth/login.js          # history for one file
git log -- src/                        # history for everything in src/
git log -- "*.css"                     # history for all CSS files
git log --oneline -- README.md         # compact view of README changes
The double dash (--) is a separator that tells Git "everything after this point is a file path, not an option." In most cases you can leave it out and Git will figure it out on its own. But there is a dangerous edge case: if a file happens to have the same name as a branch, Git can get confused. Using -- explicitly always prevents that confusion, so it is a good habit.

Figure 4: When you pass a file path, git log filters to only show commits that modified that file. Commits that did not touch it are skipped entirely.
This is incredibly useful in the real world. Imagine you are reviewing a bug and you want to know every time someone touched the authentication module. Instead of scrolling through hundreds of unrelated commits, you get only the relevant ones. You can then run git show <hash> on any of them to see the exact change that was made.
Pitfall: renamed files
If a file was renamed at some point in history, git log -- old-name.js will stop at the rename and not show older commits from before the rename. To trace history through renames, you need to add the --follow flag. This is covered in the Advanced section.
git log — all: Seeing Every Branch
By default, git log only shows commits that are reachable from your current branch. If you are on main, you see main's history. Commits that exist only on other branches, or on your remote tracking branches, are invisible.
The --all flag changes that. It tells Git to show commits reachable from any ref in the repository: every local branch, every remote-tracking branch, and every tag.
git log --all                       # show all branches
git log --all --oneline             # compact view of all branches
git log --all --oneline --graph     # with branch visualization
Figure 5: Without — all, git log only shows the current branch. With — all, commits from every branch and remote are included in the output.
The most common real-world use of --all is when you want to see what everyone has been working on, including things that have not been merged yet. When combined with --graph (covered next in the Intermediate section), it gives you a complete picture of where all branches currently stand.
Note: — all vs origin/main
If you just ran git fetch, your remote-tracking branches like origin/main have been updated. But git log without --all will not show those new commits from origin. You need git log --all, or more specifically git log origin/main, to see what is on the remote.
Common Beginner Pitfalls
Pitfall 1: Getting Stuck in the Pager
The single most common source of frustration for beginners is running git log on a large project and then not knowing how to exit. The terminal seems frozen. The solution: press q. If you want to avoid the pager entirely, you can add --no-pager before the command: git --no-pager log --oneline -20. This prints directly to the terminal without interactive scrolling.
Pitfall 2: Confusing Author Date with Committer Date
Every commit actually has two dates: the author date (when the original change was written) and the committer date (when the commit was added to the repository). These can be different. For example, if someone wrote code on Monday, then cherry-picked that commit onto another branch on Friday, the author date would be Monday but the committer date would be Friday. The default git log shows the author date. Keep this in mind when you see commits that seem to be in the wrong order.
Pitfall 3: Forgetting That git log Is Read-Only
No matter what you do with git log, you cannot accidentally change your history. It is a purely read-only command. You are just looking at the record. This makes it completely safe to experiment with. Try every combination of flags you want, nothing can go wrong.
Pitfall 4: Not Using — oneline First
Many beginners run git log and then get overwhelmed by the wall of text. The fix is to always start with git log --oneline to get your bearings, then zoom in on specific commits with git show <hash>.
Beginner Cheatsheet
git log
# full history, newest first

git log --oneline
# one line per commit

git log -5
# last 5 commits only

git log --oneline -10
# compact view of last 10

git log -- README.md
# history for one file

git log -- src/
# history for a directory

git log --all
# include all branches

git log --all --oneline
# all branches, compact

git show a3f9c21
# see full details of one commit
**inter-git.com teaches git fundamentals visually: [inter-git.com](https://inter-git.com)** is an interactive Git tutorial where each command is shown visually so you can see exactly how it works in real time. It runs entirely in your browser, so there is nothing to install. Before moving on to the intermediate level, it is a great place to practice what you have just learned.
Level 2: Intermediate
You know how to run a basic git log and read the output. Now it is time to make it work for you in real situations: debugging, code review, auditing, and understanding a codebase you did not write. This section covers the options you will reach for every day once you know they exist.
git log — graph: Visualizing Branches and Merges
Git’s history is not always a straight line. When you work with branches and merges, the history forms a directed graph where commits can have multiple parents. The --graph flag draws this structure using characters in your terminal. When you combine it with --oneline, you get the most popular intermediate git log command there is:
git log --oneline --graph
git log --oneline --graph --all        # all branches included
git log --oneline --graph --decorate   # with branch/tag labels
The output looks something like this:
* a3f9c21 Fix login bug
*   9b2c3d4 Merge branch 'feature/user-profile'
|\
| * 8d2e140 Add avatar upload
| * 3e5f7a8 Add profile page skeleton
|/
* f1b5a99 Update README
* c7d3e08 Initial project setup
The vertical bar (|) represents a line of history. A backslash (\) means a branch splits off. A forward slash (/) means branches converge back together. An asterisk (*) marks a commit. This might look cryptic at first, but once you train your eye to read it, you can understand the branching topology of a project at a glance.

Figure 6: A typical branch-and-merge history. git log — graph draws this structure using vertical bars, backslashes, forward slashes, and asterisks in the terminal.
The most commonly used combination in the real world is this three-flag alias that developers often add to their shell config or Git config:
git log --oneline --graph --all --decorateSome teams add a fourth flag, --date=short, to include the date without the time. You will learn how to create a permanent alias for long commands like this in the Advanced section.
Real-world use: orientation in an unfamiliar repo
When you join a new project or open source repository for the first time, running git log --oneline --graph --all -20 is one of the best first things you can do. It shows you the structure of the project: how many branches exist, when they diverged from main, and whether the team uses merge commits or rebase.
git log — author: Filtering by Person
When you are doing a code review or trying to understand who made a particular set of changes, being able to filter by author saves an enormous amount of time. The --author flag takes a pattern and shows only commits where the author's name or email matches that pattern.
git log --author="Sarah"               # matches any name containing "Sarah"
git log --author="sarah@example.com"   # match by email
git log --author="Sarah\|Marco"        # match either Sarah or Marco
git log --author="Sarah" --oneline    # compact view of Sarah's commits
The pattern in --author is a regular expression, not a plain text search. This is very powerful but also has a small gotcha: special characters like dots and parentheses have special meaning in regex. For example, --author="sarah.example.com" would match "sarah" followed by any character followed by "example.com", not literally sarah.example.com. To be safe, use just the name part when you can.
There is also a --committer flag that works the same way but matches on the committer rather than the author. These can be different in Git, particularly when commits are cherry-picked or applied with git am. The author is the person who originally wrote the code. The committer is the person who added it to the repository.
You can use --author multiple times to match any of several people:
git log --author="Sarah" --author="Marco" # shows commits by Sarah OR MarcoPitfall: case sensitivity
By default --author is case-sensitive on most systems. If you search for --author="sarah" and the author's name is stored as "Sarah", you might get no results. Add -i (which is short for --regexp-ignore-case) to make the pattern case-insensitive: git log -i --author="sarah".
git log — since and — until: Filtering by Date
One of the most underappreciated features of git log is its ability to filter commits by date using surprisingly human-friendly language. You do not need to know Unix timestamps or ISO date formats to use this effectively.
git log --since="2 weeks ago"
git log --since="yesterday"
git log --since="2025-01-01"
git log --since="2025-01-01" --until="2025-03-31"
git log --after="2 months ago"      # --after is an alias for --since
git log --before="last Monday"      # --before is an alias for --until
Git parses these date strings through a library that understands natural language. It handles relative dates like "3 hours ago", "last week", "2 months ago", and absolute dates in ISO format, RFC 2822 format, and many others. When in doubt, the ISO format YYYY-MM-DD is the safest and most portable choice.

Figure 7: — since and — until define a date window. Only commits whose author date falls inside the window are included in the output.
Combining date filters with author and file filters is where this gets really useful in practice. During a sprint retrospective, for example:
git log --since="2025-05-01" --until="2025-05-14" --oneline
# all commits from the last sprint

git log --author="Sarah" --since="1 week ago" --oneline
# Sarah's work from this week

git log --since="last month" --no-merges --oneline -- src/api/
# real changes (no merge commits) to the API layer in the last month
Real-world use: generating release notes
Many teams use git log --since="last tag" --no-merges --oneline as the starting point for generating release notes. The output gives you every change made since the last release, excluding noisy merge commit messages. You then edit this list into proper human-readable release notes.
git log --grep: Searching Commit Messages
The --grep flag searches the text of commit messages and shows only commits whose message contains a match. It is the equivalent of doing a keyword search through your entire project history.
git log --grep="fix"                # commits mentioning "fix"
git log --grep="JIRA-1234"          # find commits for a ticket
git log --grep="authentication"     # commits about authentication
git log -i --grep="login"           # case-insensitive: finds "login", "Login", "LOGIN"
The pattern in --grep is also a regular expression, which means you can do more powerful searches than plain text:
git log --grep="bug #[0-9]+"        # commits mentioning a bug number
git log --grep="^Revert"            # commits that start with "Revert"
git log --grep="breaking change"    # conventional commit style
One important behavior to understand: by default, when you use multiple --grep flags, Git shows commits that match any of the patterns (logical OR). If you want to match commits that contain all of the patterns (logical AND), you need to add --all-match:
git log --grep="login" --grep="security"
# shows commits mentioning "login" OR "security"

git log --all-match --grep="login" --grep="security"
# shows commits mentioning "login" AND "security"
There is also an --invert-grep flag that reverses the meaning: show commits that do not match the pattern. This is useful if you want to exclude certain types of commits, like automated dependency updates:
git log --invert-grep --grep="Bump version"
# everything except version bump commits
Note: — grep searches the whole commit message
Unlike some tools, --grep searches the entire commit message body, not just the first line (subject). So a commit with "fixed bug" in the subject and "closes JIRA-1234" in the body would be matched by --grep="JIRA-1234". This makes it excellent for finding commits by ticket number when teams follow the convention of putting ticket numbers in the commit body or footer.
git log -p: Viewing the Actual Changes
Everything we have looked at so far shows metadata about commits, but what about the actual code that changed? The -p flag (short for --patch) adds the full diff of every commit to the output. This is essentially running git show for each commit automatically.
git log -p                        # full history with all diffs
git log -p -3                     # last 3 commits with diffs
git log -p -- src/auth/login.js   # diff history for one file
git log -p --follow -- login.js   # follow through renames
The diff output uses the unified diff format. Lines starting with a plus sign (+) were added. Lines starting with a minus sign (-) were removed. Lines with no prefix are context lines that were not changed but are shown to help you understand the surrounding code.
commit a3f9c21...
Author: Sarah Chen...
Date:   Thu May 22...

    Fix login bug when email contains uppercase letters

diff --git a/src/auth/login.js b/src/auth/login.js
index 4a3b2c1..9f8e7d6 100644
--- a/src/auth/login.js
+++ b/src/auth/login.js
@@ -42,7 +42,7 @@
 function validateEmail(email, storedEmail) {
-  return email === storedEmail;
+  return email.toLowerCase() === storedEmail.toLowerCase();
 }
Real-world use: code archaeology
When you find a bug and suspect it was introduced by a specific commit, git log -p -- affected-file.js lets you read through every change ever made to that file along with its context. This is one of the fastest ways to find when and why a specific behavior was introduced, far faster than opening each commit individually.
The --full-diff flag changes the behavior slightly: without it, git log -p -- path limits both commit selection and the diff to the specified path. With --full-diff, it still limits which commits are shown to those that touched the path, but shows the full diff for those commits (including other files they changed). This matters when you want to understand the full context of a change.
git log — stat: File Change Statistics
The --stat flag is a lighter-weight alternative to -p. Instead of showing the full diff, it shows a summary of which files changed and how many lines were added or removed in each one. Think of it as a table of contents for the changes in each commit.
git log --stat
git log --stat -5
git log --stat --oneline   # more compact but still shows file stats
commit a3f9c21...
Author: Sarah Chen...
Date: Thu May 22...
Fix login bug when email contains uppercase letters
src/auth/login.js | 2 +-
tests/auth.test.js | 14 ++++++++++++++
2 files changed, 15 insertions(+), 1 deletion(-)Each row shows a filename, a bar chart of insertions and deletions, and a count. The green + characters represent lines added and the red - characters represent lines removed. The summary at the bottom tells you the totals.
There are a few related flags worth knowing:
--shortstatShows only the final summary line (N files changed, X insertions(+), Y deletions(-)) without the per-file breakdown. Useful when you want a single-line summary of the scope of each commit.
--name-onlyShows only the names of files that changed, without any numbers. Great for quickly seeing which files were part of a commit.
--name-statusShows file names with a status letter: M for modified, A for added, D for deleted, R for renamed. More informative than — name-only because you can tell at a glance whether a file was added, deleted, or just changed.
git log --name-status -3
# Output example:
commit a3f9c21...
...
M       src/auth/login.js       # M = Modified
A       tests/auth.test.js      # A = Added

commit 8d2e140...
...
A       src/profile/avatar.js   # A = Added
R095    src/profile.js  src/profile/index.js  # R = Renamed (95% similar)
git log — format: Custom Output
Sometimes none of the built-in formats is quite right for what you need. Maybe you want to pipe the output to a script, or display it in a specific way for a report, or create a compact format with exactly the fields you care about. The --format flag (also written as --pretty=format:) lets you design your own output using placeholder variables.
git log --format="%h %an %s"
# abbreviated hash, author name, subject

git log --format="%h %ad %s" --date=short
# hash, short date (YYYY-MM-DD), subject

git log --format="%H"
# just the full hash, one per line: useful for scripts
Output example for git log --format="%h %an %s":
a3f9c21 Sarah Chen Fix login bug when email contains uppercase letters
8d2e140 Marco Rossi Add user profile page with avatar upload
f1b5a99 Sarah Chen Update README with installation instructions
The most important format placeholders for everyday use are:
Placeholder: %H
What it shows: Full commit hash
Example output: a3f9c218b4e72c94d3e18f7b09c2a6e5f13d8b1
Placeholder: %h
What it shows: Abbreviated hash
Example output: a3f9c21
Placeholder: %an
What it shows: Author name
Example output: Sarah Chen
Placeholder: %ae
What it shows: Author email
Example output: sarah@example.com
Placeholder: %ad
What it shows: Author date (respects --date)
Example output: Thu May 22 14:31:07 2025
Placeholder: %ar
What it shows: Author date, relative
Example output: 2 hours ago
Placeholder: %cd
What it shows: Committer date
Example output: Thu May 22 14:35:00 2025
Placeholder: %cr
What it shows: Committer date, relative
Example output: 2 hours ago
Placeholder: %s
What it shows: Subject (first line of message)
Example output: Fix login bug when email contains uppercase
Placeholder: %b
What it shows: Body (rest of message after subject)
Example output: Users reported being unable to log in...
Placeholder: %D
What it shows: Ref names (branches, tags)
Example output: HEAD -> main, origin/main
Placeholder: %cn
What it shows: Committer name
Example output: Marco Rossi
Placeholder: %n
What it shows: Newline character
Example output: (line break)
Placeholder: %x09
What it shows: Tab character
Example output: (tab)
There are two subtle but important variants of custom format: --pretty=format: and --pretty=tformat:. The difference is that tformat: (the "t" stands for "terminator") adds a trailing newline after the last entry, while format: (separator format) does not. When you use --format= as a shorthand, Git uses terminator mode. This matters when you pipe the output to tools that expect a newline at the end.
You can also add color to your format using %C(color) and %C(reset):
git log --format="%C(yellow)%h%C(reset) %C(blue)%an%C(reset) %s"This would print the hash in yellow, the author name in blue, and the subject in the default terminal color. Accepted color names include: red, green, yellow, blue, magenta, cyan, white, bold, dim, and reset.
Tip: use — date to control date format
When you use %ad or %cd in a custom format, you can control how the date is displayed with the --date flag. The most useful options are: --date=short (YYYY-MM-DD), --date=relative (2 hours ago), --date=iso (ISO 8601 format), and --date=format:"%Y-%m-%d %H:%M" (fully custom strftime format).
git log — decorate: Branch and Tag Labels
By default when you run git log, you see commit hashes and messages but you do not see which commits are currently pointed to by branch names or tags. The --decorate flag adds those labels directly into the output.
git log --oneline --decoratea3f9c21 (HEAD -> main, origin/main, origin/HEAD) Fix login bug
9b2c3d4 Merge branch 'feature/user-profile'
8d2e140 Add avatar upload
f1b5a99 (tag: v2.0.0) Update READMEThe text in parentheses after each hash is the decoration. It tells you that a3f9c21 is what HEAD, main, and origin/main currently point to. And that f1b5a99 has a tag v2.0.0 on it.
--decorate actually has three modes: short (the default when you pass --decorate), which strips the leading refs/heads/, refs/tags/ and refs/remotes/ prefixes; full, which shows the complete ref name like refs/heads/main; and no, which disables decoration entirely. In modern Git, when the output goes to a terminal, decoration is automatically enabled in short mode even without the flag.
Revision Ranges: A..B and A…B
One of the most powerful things you can do with git log is ask it to show commits in a specific range between two points in history. There are two different range syntaxes, and they mean very different things.
The two-dot range: A..B
The syntax git log A..B means "show me all the commits that are reachable from B, but not from A." In plain English: what commits does B have that A does not? This is the answer to "what happened after this point?"
git log main..feature
# commits that are on "feature" but not on "main"
# i.e., work done on the feature branch that has not been merged

git log origin/main..HEAD
# commits you have locally that have not been pushed yet

git log HEAD..origin/main
# commits on origin/main that you do not have locally yet
Figure 8: Two-dot range (A..B) shows commits unique to B. Three-dot range (A…B) shows commits unique to either side, which is useful for seeing what diverged in both directions.
The three-dot range: A…B
The three-dot syntax git log A...B is the "symmetric difference." It shows commits that are reachable from A or B but not from both. In other words, it shows what is unique to each side. This is most useful for understanding how two branches have diverged:
git log main...feature
# commits that are either on main only, OR on feature only
# but not in the shared history

git log --left-right main...feature
# same, but marks < for main-side commits and > for feature-side
The --left-right flag is particularly handy with three-dot ranges because it tells you which side each commit came from:
< a3f9c21 Fix login bug         # < = on main (left side)
> b9c1d2e New dashboard         # > = on feature (right side)
> 3e5f7a8 Draft charts          # > = on feature (right side)
Filtering Merges: — no-merges and — merges
Merge commits are a special type of commit that has more than one parent. In a project that uses a merge-based workflow, your history can be full of merge commits that say things like “Merge branch ‘feature/x’ into main.” These are often not useful when you are trying to understand what code actually changed.
git log --no-merges
# hide all merge commits, show only real changes

git log --no-merges --oneline -20
# last 20 real changes without the merge noise

git log --merges
# show ONLY merge commits

git log --merges --oneline
# find when features were merged in
The --no-merges flag is equivalent to --max-parents=1, which means "show only commits with at most one parent." This excludes all merge commits, which by definition have two or more parents. Conversely, --merges is equivalent to --min-parents=2.
In practice, --no-merges is something you should almost always add when you are trying to get a clean view of what code actually changed. Merge commits are structural and important for understanding the workflow, but they rarely tell you anything about the code itself.
git log — first-parent: Following the Main Line
In a project that uses merge commits to integrate feature branches, the history can get very tangled when you try to view it linearly. The --first-parent flag tells Git to follow only the first parent of every merge commit. This creates a clean, linear view of only the "main line" of development, skipping all the individual commits from feature branches.
git log --first-parent main
# see only the main branch commits and merge points

git log --first-parent --oneline main
# compact version: when did each feature get merged?
Figure 9: — first-parent follows only the first parent of each merge commit, giving you a clean timeline of the main branch development without the noise of individual feature branch commits.
Real-world use: deployment history
If your team uses a workflow where features are merged into main and then main is deployed, git log --first-parent --oneline main gives you a perfect deployment log: every merge to main (and direct commits to main) in chronological order. No noise from individual feature branch commits.
Common Intermediate Pitfalls
Pitfall 1: — grep Does Not Search Code, Only Messages
This one trips up many people. git log --grep="function validateEmail" will not find commits that changed a function called validateEmail. It only searches commit messages. To search the actual code changes, you need -S or -G, which are covered in the Advanced section.
Pitfall 2: — since Uses Author Date, Not Committer Date
When filtering by date, --since checks the author date. If commits were cherry-picked or rebased from an old branch, they might have an old author date even though they were added to the repository recently. This can make commits "disappear" from date-filtered queries. To filter by committer date instead, use --after combined with the configuration option or use a custom format that shows both dates so you can check.
Pitfall 3: Regex in — grep Can Be Surprising
The dot (.) in a regex matches any character. So --grep="v1.0" would also match "v100", "v1x0", etc. If you want to search for a literal dot, escape it: --grep="v1\.0". Alternatively, use -F (--fixed-strings) to turn off regex interpretation entirely: git log -F --grep="v1.0".
Pitfall 4: — all Does Not Fetch from Remote
git log --all shows all refs that your local Git repository knows about, but it does not go online to check what is on the remote. If your colleague pushed new commits to origin 5 minutes ago, you will not see them until you run git fetch first. Always fetch before relying on --all for a complete picture.
Pitfall 5: — graph Can Be Slow on Very Long Histories
On repositories with tens of thousands of commits and many branches, git log --graph --all can take a noticeable amount of time or even hang. The graph drawing algorithm needs to process the entire history structure. Use -n to limit the output, or use --simplify-by-decoration (covered in the Advanced section) to only draw the topology around tags and branch heads.
Intermediate Cheatsheet
git log --oneline --graph --all --decorate # full picture of all branches
git log --author="Sarah" --oneline # filter by author
git log --since="2 weeks ago" --oneline # filter by date
git log --since="2025-05-01" --until="2025-05-14"
git log --grep="JIRA-1234" --oneline # search commit messages
git log -i --grep="login" # case-insensitive search
git log -p -3 # last 3 commits with diffs
git log --stat --no-merges -10 # file stats, no merge commits
git log --format="%h %an %ar %s" # custom format
git log origin/main..HEAD --oneline # commits not pushed yet
git log --no-merges --oneline -20 # real changes, no merge noise
git log --first-parent --oneline main # main-line history only
git log --merges --oneline # only merge commits
git log --name-status -5 # files changed per commitLevel 3: Advanced
Level 3: Advanced
This section is for developers who want to use git log as a forensics tool. When something breaks and you need to find exactly which commit introduced a specific code change, or when a file has been renamed three times and you need to trace its complete history, or when you need to generate a completely custom format for a script or tool, these are the options you reach for.
git log -S and -G: The Pickaxe Search
The single most powerful debugging feature in git log is called the "pickaxe." It searches the actual content of the changes (the diffs), not the commit messages. There are two versions, -S and -G, which behave differently in a way that matters a lot.
The -S flag: count-based search
-S"string" finds commits where the number of occurrences of "string" in the file changed. In practice, this means it finds commits that introduced or removed a specific string. It is perfect for answering the question "when was this function, variable, or string added or deleted?"
git log -S"validateEmail"
# find commits that added OR removed the string "validateEmail"

git log -S"DROP TABLE"
# find dangerous database operations in the history

git log -S"password" --oneline -p
# find and show the actual diff for any commit touching "password"

git log -S"API_KEY" -- config/
# find when an API key was added to config files
A key subtlety about -S: it only matches commits where the count of the string actually changed. If a commit moved the string from one place to another in the same file, but the total count stayed the same, -S would not find that commit. For that case you need -G.
The -G flag: regex-based diff search
-G"pattern" finds commits where any added or removed line matches the given regular expression. Unlike -S, it does not care about counts. If a line containing your pattern appears anywhere in the diff (either added or removed), the commit is included.
git log -G"validateEmail\("
# find any commit where a line matching this regex was added or removed

git log -G"console\.log"
# find commits that added or removed console.log calls

git log -G"TODO|FIXME|HACK"
# find when TODO comments were added or removed
Figure 10: -S finds commits where the count of a string changed (added or removed). -G finds any commit where a line in the diff matches the regex. Use -S for exact identifier tracking, -G for pattern-based diff search.
You can make -S accept a regular expression instead of a plain string by adding the --pickaxe-regex flag:
git log -S"validate(Email|Phone|Address)" --pickaxe-regex
# find changes to any of these validation functions
Real-world use: tracking when a bug was introduced
When you find a bug and you can identify a specific string that the buggy code contains (like a wrong comparison operator, a typo in a config key, or a specific function call), git log -S"the-buggy-string" -p will find and show you the exact commit that introduced it. This is often faster than using git bisect for targeted searches.
git log -L: Tracing a Function or Line Range
The -L flag is one of the most impressive features in all of Git's tooling. It lets you trace the complete history of a specific range of lines or a specific function, showing you every single commit that ever touched those lines, along with exactly what changed. It is like git blame but in timeline form.
git log -L 10,25:src/auth/login.js
# history for lines 10 through 25 in login.js

git log -L :validateEmail:src/auth/login.js
# history for the function named validateEmail in login.js
# (Git figures out the function boundaries automatically)

git log -L '/function authenticate/,/^}/:src/auth.js'
# history for lines between two regex markers
When you run this, you get a beautifully focused output: only commits that changed those specific lines, with a diff showing exactly what changed each time. This is pure forensic power.
The function name form (-L :functionName:file) is especially useful. Git uses language-specific heuristics to detect function boundaries, so it knows where a function starts and ends without you needing to specify line numbers. This works well for C, Java, JavaScript, Python, Ruby, and many other languages. When the function gets longer or shorter between commits, Git automatically adjusts the tracked range.

Figure 11: git log -L traces the complete evolution of a function or line range across the project’s history. Each commit shown actually modified those specific lines.
There are a few things to know about -L:
First, it implies --patch, so you always see the diffs. If you just want a list of which commits touched those lines without the diff, add --no-patch to suppress it. Second, you can use -L multiple times in one command to trace several functions or ranges at once. Third, -L does not work with binary files or files that do not exist at the starting revision.
Pitfall: -L can be slow on large files and long histories
Because -L needs to read every commit's diff to find which ones touched the specified lines, it can be significantly slower than regular git log on repositories with thousands of commits. Pair it with a file path to limit the scope, or use -n to stop after finding a certain number of results.
git log — follow: Tracking Files Through Renames
When a file is renamed, Git normally treats it as a deletion of the old file and a creation of a new one. This means git log -- new-name.js would stop at the rename and not show any history from before it. The --follow flag fixes this by telling Git to follow the file through renames and show the complete history under all its previous names.
git log --follow -- src/auth/login.js
# follows through renames, e.g. if it was previously auth.js

git log --follow --oneline -- components/Button.jsx
# full history even if it started as Button.js

git log --follow -p -- src/api.js
# complete diff history through all renames
Figure 12: Without — follow, git log stops at the most recent rename. With — follow, it traces the file back through all previous names and shows the complete history.
Note: — follow only works for a single file
You can only use --follow with a single file path. It does not work with directories or glob patterns. If you try to follow multiple files, Git will give an error. Also note that --follow uses Git's rename detection, which is heuristic-based. If a file was completely rewritten when it was renamed (very little similarity to the old content), Git might not detect the rename and --follow would stop at that point.
Commit Ordering: Topo, Date, Author-Date, Reverse
By default, git log shows commits in reverse chronological order by the author date. But sometimes that is not what you want. Git offers several ordering modes that change how commits are sorted.
--date-orderShows commits sorted by commit timestamp, but never showing a parent before all its children. This is similar to the default but uses the committer date instead of the author date for ordering. In projects with cherry-picks and rebases, this can surface commits that are in the “wrong” order by author date.
--author-date-orderSimilar to — date-order but sorts by the original author timestamp rather than the commit timestamp. This is useful when you care about when code was actually written, not when it was committed. In a rebase-heavy workflow, the author date better represents when the work happened.
--topo-orderEnsures that commits from a single branch are always shown together, without interleaving commits from parallel branches. This avoids the confusing situation where commits from two different feature branches alternate in the output because of similar timestamps. Use this when you want to see each branch’s commits as a coherent group.
--reverseOutputs commits in chronological order (oldest first) instead of reverse chronological. This is useful when you want to replay history forward, for example when reading through how a feature was built from the initial commit to the final state. Note: cannot be combined with — walk-reflogs.

Figure 13: Three ordering modes compared. Default mode interleaves commits by timestamp. — topo-order groups branch commits together. — reverse shows oldest first for forward-reading of history.
git log — cherry-pick: Finding Unique Commits
When you have two branches that share some commits (perhaps via cherry-pick) and you want to see only the commits that are truly unique to one branch (not present on the other), --cherry-pick combined with symmetric difference notation is the tool for the job.
git log --cherry-pick main...feature --oneline
# show commits unique to either branch, excluding cherry-picked duplicates

git log --cherry-pick --right-only main...feature --oneline
# show only commits unique to "feature" that are not in "main"
# even if they were cherry-picked, they will not appear

git log --cherry-mark main...feature --oneline
# like --cherry-pick but marks equivalent commits with "=" instead of hiding them
# "+" means unique, "=" means has an equivalent on the other side
This is most useful in a workflow where patches are cherry-picked between branches, for example between a long-running release branch and the main development branch. Without --cherry-pick, it can be very difficult to tell which commits have already been applied to both sides.
The — cherry shorthand
--cherry is a shorthand for --right-only --cherry-mark --no-merges. This gives you just the commits on the right side of the range that do not have equivalents on the left side. Example: git log --cherry upstream...mybranch --oneline shows you which of your commits have already been merged upstream.
git log — walk-reflogs: Reading Reflog History
The reflog is Git’s safety net: it records every movement of your branch pointers, even operations that rewrite history like rebase and reset. The --walk-reflogs flag (shorthand: -g) tells git log to walk reflog entries instead of following commit ancestry.
git log -g
# walk the reflog of HEAD

git log -g --oneline HEAD
# compact view of all positions HEAD has been in

git log -g main
# see the history of where the "main" branch pointer has been
The output of git log -g includes extra information: the reflog entry index (like HEAD@{0}, HEAD@{1}) and the operation that caused the movement (like "commit", "rebase", "checkout", "reset").
This is invaluable for recovering lost commits. If you accidentally ran git reset --hard and lost commits, git log -g --oneline shows you the previous positions of HEAD, and you can identify the commit hash of the work you lost and create a new branch there to recover it.
Important: reflogs are local The reflog only exists locally. It is not shared when you push to a remote. If you delete a repository and re-clone it, the reflog is gone. Also, reflog entries expire after a period of time (default 90 days for reachable objects). So the reflog is a safety net, not a permanent backup.
History Simplification: — full-history, — simplify-merges, — show-pulls
When you use git log -- path to see the history of a specific file, Git uses a process called history simplification to decide which commits to show. By default, it tries to show you the "simplest" history that explains how the file reached its current state. Sometimes this simplification hides commits you actually care about.
The default mode and when it hides things
The default simplification works like this: when following a merge commit, if the file looks the same in the merged result as it did in one of the parents, Git follows only that parent and ignores the other side entirely. This can hide commits that were made on a feature branch that got overridden during the merge.
— full-history: show everything
git log --full-history -- src/config.js
# shows all commits that touched config.js, including those
# that the default simplification would have hidden
This is the most thorough option. It shows every commit that ever touched the file, including commits on branches that were merged without preserving the changes. The downside is that for a heavily-merged file, the output can be overwhelming.
— simplify-merges: a middle ground
git log --full-history --simplify-merges -- src/config.js
# full history but with unnecessary merge commits cleaned up
--simplify-merges works with --full-history to remove merge commits that do not actually contribute anything meaningful to the file's history (i.e., merge commits where both parents have the same content for the file). This gives a cleaner view than --full-history alone while still catching the commits that the default mode would hide.
— show-pulls: finding which merge “first introduced” a change
git log --show-pulls -- src/config.js
# shows merge commits that "pulled" a change into the branch
# even when the default mode would hide them
This option is particularly useful for understanding which merge commit was responsible for bringing a specific change into the main branch. If a change appeared on a feature branch and was merged in, --show-pulls shows you the merge commit even when the regular default mode would skip it because the file looks the same as one of the parents.
When to use each
Use the default mode for everyday file history. Use --full-history when you cannot find a commit you know exists. Use --simplify-merges with --full-history for a clean but complete view. Use --show-pulls when you want to know which merge commit introduced a specific change into main.
Custom Format Deep Dive: Every Placeholder Explained
In the Intermediate section we covered the most common format placeholders. Here is a complete breakdown of everything available, organized by category, for when you need to build a sophisticated custom format.
Placeholder: %H
Category: Hash
What it outputs: Full 40-character commit hash
Placeholder: %h
Category: Hash
What it outputs: Abbreviated commit hash (usually 7 chars)
Placeholder: %T
Category: Hash
What it outputs: Full tree hash
Placeholder: %t
Category: Hash
What it outputs: Abbreviated tree hash
Placeholder: %P
Category: Hash
What it outputs: Full parent hashes (space-separated)
Placeholder: %p
Category: Hash
What it outputs: Abbreviated parent hashes
Placeholder: %an
Category: Author
What it outputs: Author name (as stored in commit)
Placeholder: %aN
Category: Author
What it outputs: Author name (mapped via .mailmap)
Placeholder: %ae
Category: Author
What it outputs: Author email
Placeholder: %aE
Category: Author
What it outputs: Author email (mapped via .mailmap)
Placeholder: %al
Category: Author
What it outputs: Author email local part (before @)
Placeholder: %ad
Category: Author
What it outputs: Author date (format controlled by --date)
Placeholder: %aD
Category: Author
What it outputs: Author date in RFC2822 format
Placeholder: %ar
Category: Author
What it outputs: Author date, relative ("2 hours ago")
Placeholder: %at
Category: Author
What it outputs: Author date as Unix timestamp
Placeholder: %ai
Category: Author
What it outputs: Author date in ISO 8601 format
Placeholder: %as
Category: Author
What it outputs: Author date, short: YYYY-MM-DD
Placeholder: %cn
Category: Committer
What it outputs: Committer name
Placeholder: %cN
Category: Committer
What it outputs: Committer name (mailmap)
Placeholder: %ce
Category: Committer
What it outputs: Committer email
Placeholder: %cd
Category: Committer
What it outputs: Committer date (format via --date)
Placeholder: %cr
Category: Committer
What it outputs: Committer date, relative
Placeholder: %ct
Category: Committer
What it outputs: Committer date as Unix timestamp
Placeholder: %ci
Category: Committer
What it outputs: Committer date in ISO 8601
Placeholder: %cs
Category: Committer
What it outputs: Committer date, short: YYYY-MM-DD
Placeholder: %s
Category: Message
What it outputs: Subject (first line of commit message)
Placeholder: %f
Category: Message
What it outputs: Sanitized subject (safe for filenames)
Placeholder: %b
Category: Message
What it outputs: Body (everything after the subject line)
Placeholder: %B
Category: Message
What it outputs: Raw body (subject + body, no escaping)
Placeholder: %N
Category: Message
What it outputs: Commit notes (from git notes)
Placeholder: %d
Category: Decoration
What it outputs: Ref names with parentheses: (HEAD, main)
Placeholder: %D
Category: Decoration
What it outputs: Ref names without parentheses
Placeholder: %GS
Category: GPG
What it outputs: Name of the GPG signer
Placeholder: %GK
Category: GPG
What it outputs: Key used for signing
Placeholder: %G?
Category: GPG
What it outputs: G=good signature, B=bad, N=no signature
Placeholder: %C(color)
Category: Color
What it outputs: Set terminal color: red, green, blue, yellow, cyan, magenta, bold, dim, reset
Placeholder: %Cred
Category: Color
What it outputs: Shorthand: switch to red
Placeholder: %Cgreen
Category: Color
What it outputs: Shorthand: switch to green
Placeholder: %Cblue
Category: Color
What it outputs: Shorthand: switch to blue
Placeholder: %Creset
Category: Color
What it outputs: Reset all color and formatting
Placeholder: %n
Category: Special
What it outputs: Newline character
Placeholder: %x09
Category: Special
What it outputs: Tab character (hex escape for any char)
Placeholder: %w([width,i1,i2])
Category: Special
What it outputs: Wrap text at width, with indent for first and subsequent lines
Placeholder: %>(N)
Category: Special
What it outputs: Right-align next placeholder to N characters
Placeholder: %<(N)
Category: Special
What it outputs: Left-align and pad next placeholder to N characters
Placeholder: %|(N)
Category: Special
What it outputs: Fill with spaces until column N
Here are some practical format recipes you can use immediately:
# Compact log with relative date
git log --format="%C(yellow)%h%Creset %C(blue)%ar%Creset %s"

# Good for pasting into Slack or email (no color codes)
git log --format="%h %as %an: %s" --no-merges

# Full hash + ISO date for processing in scripts
git log --format="%H,%ai,%an,%s" --no-merges

# Changelog format: just subjects, no hashes
git log --format="- %s" --no-merges v1.0..HEAD

# Show GPG verification status
git log --format="%h %G? %GS %s" --show-signature

# Multi-line format with aligned columns
git log --format="%<(10)%h %<(20)%an %s"
log Configuration Settings
You can set default behaviors for git log in your Git configuration so you do not have to type the same flags every time. These can be set globally (~/.gitconfig) or per-repository (.git/config).
# Set default pretty format
git config --global format.pretty "oneline"

# Enable decoration automatically
git config --global log.decorate short

# Abbreviate commit hashes in output
git config --global log.abbrevCommit true

# Set default date format
git config --global log.date short

# Set default initial decoration set
git config --global log.initialDecorationSet all

# Add a git alias for the most common log command
git config --global alias.lg "log --oneline --graph --all --decorate"
# now you can type: git lg

# Add a more detailed alias
git config --global alias.ll "log --format='%C(yellow)%h%Creset %C(blue)%as%Creset %<(15,trunc)%an %s' --no-merges"
The alias approach is very popular in experienced teams. Many teams share a set of .gitconfig aliases as part of their onboarding documentation so that everyone has consistent, useful commands available. Some common alias names you will see in the wild:
Alias: git lg
Command: log --oneline --graph --all --decorate
Purpose: Quick branch overview
Alias: git lol
Command: log --graph --pretty=format:'%Cred%h%Creset ... %s' --abbrev-commit
Purpose: Colorful graph
Alias: git ll
Command: log --format="%h %as %<(15)%an %s" --no-merges
Purpose: Compact daily log
Alias: git recent
Command: log --oneline -10
Purpose: Last 10 commits
Alias: git changes
Command: log --format="- %s" --no-merges v1.0..HEAD
Purpose: Changelog since tag
Combining Options: Real-World Recipes
The true power of git log comes from combining multiple flags into precisely targeted queries. Here are common real-world scenarios and the exact commands to handle them.
Scenario 1: “What did my team ship in the last sprint?”
git log --since="2 weeks ago" --no-merges --onelineScenario 2: “What changed in the API layer between v2.0 and v2.1?”
git log v2.0..v2.1 --no-merges --oneline -- src/api/Scenario 3: “Who has been touching the authentication code?”
git log --format="%an" --no-merges -- src/auth/ | sort | uniq -c | sort -rnScenario 4: “When was a specific function introduced?”
git log -S"function authenticate" --oneline -p -- src/auth.jsScenario 5: “Show me a changelog for the next release”
git log --format="- %s" --no-merges $(git describe --tags --abbrev=0)..HEADScenario 6: “Did anyone push dangerous operations to the database?”
git log -G"DROP TABLE|TRUNCATE|DELETE FROM" --oneline -p -- "*.sql" "migrations/"Scenario 7: “What commits have not been pushed to origin yet?”
git log origin/main..HEAD --onelineScenario 8: “Full history of this function across renames”
git log --follow -p -L :authenticateUser:src/auth.js
# Note: -L and --follow cannot be combined directly.
# Use them separately and compare the results.
Scenario 9: "Show me only merge commits with what they brought in"
git log --merges --format="%h %as %s" mainScenario 10: "Find all commits that touched the config file in the last 6 months"
git log --since="6 months ago" --oneline --follow -- config/settings.jsonScenario 11: "Export commit history as CSV for a report"
git log --format="%H,%as,%an,%ae,%s" --no-merges > commits.csvScenario 12: "Verify all recent commits are GPG-signed"
git log --format="%h %G? %GS %s" -20
# G = good signature, B = bad, U = unknown, N = no signature
Complete Flags Reference Table
# === OUTPUT LIMITING ===

git log -n <number> # limit output to the last N commits
git log --skip=<number> # skip the first N commits
git log --since=<date> # show commits newer than the given date
git log --until=<date> # show commits older than the given date
git log --after=<date> # alias for --since
git log --before=<date> # alias for --until
git log --author=<pattern> # filter commits by author name or email
git log --committer=<pattern> # filter commits by committer name or email
git log --grep=<pattern> # search commit messages for a pattern
git log --all-match # require all --grep patterns to match
git log --invert-grep # exclude commits matching the grep pattern
git log -i # enable case-insensitive matching
git log -E # use extended regular expressions
git log -F # treat patterns as fixed strings instead of regex
git log -P # use Perl-compatible regular expressions
git log --merges # show only merge commits
git log --no-merges # exclude merge commits
git log --min-parents=<n> # show commits with at least N parents
git log --max-parents=<n> # show commits with at most N parents
git log --first-parent # follow only the first parent in merge history
git log --all # include all refs from branches and tags
git log --branches # include all local branches
git log --tags # include all tags
git log --remotes # include all remote-tracking branches
git log --not # reverse the meaning of the next revision arguments

# === DIFF OPTIONS ===

git log -p # show patch diffs with each commit
git log --stat # show file change statistics
git log --shortstat # show only the summary statistics line
git log --name-only # show only changed file names
git log --name-status # show changed files with M/A/D/R status codes
git log --full-diff # show the complete diff, not limited by paths
git log -S<string> # find commits that added or removed a string
git log -G<pattern> # find commits where diff lines match a regex
git log --pickaxe-all # require all files to match with -S or -G
git log --pickaxe-regex # treat the -S string as a regex
git log -L <start>,<end>:<file> # trace the history of a line range in a file
git log -L :<func>:<file> # trace the history of a function
git log -w # ignore all whitespace changes
git log -b # ignore changes in the amount of whitespace
git log --ignore-blank-lines # ignore blank-line-only changes

# === FORMAT AND DISPLAY ===

git log --oneline # show abbreviated hash and subject on one line
git log --format=<format> # use a custom output format
git log --pretty=<format> # alias for --format
git log --abbrev-commit # shorten commit hashes
git log --no-abbrev-commit # always show full commit hashes
git log --decorate # show branch and tag labels
git log --decorate=full # show full reference names in decorations
git log --source # show which ref reached each commit
git log --date=<format> # control date formatting
git log --log-size # print commit message size in bytes
git log --notes # display commit notes
git log --no-notes # hide commit notes
git log --use-mailmap # map author names/emails using .mailmap
git log --encoding=<enc> # re-encode commit messages

# === GRAPH AND ORDERING ===

git log --graph # display an ASCII graph of branches and merges
git log --date-order # sort commits by committer date
git log --author-date-order # sort commits by author date
git log --topo-order # keep related branch commits grouped together
git log --reverse # show oldest commits first

# === HISTORY SIMPLIFICATION ===

git log --follow # track file history across renames
git log --full-history # show complete history without simplification
git log --simplify-merges # simplify merge commits in full history mode
git log --simplify-by-decoration # show mainly tagged or referenced commits
git log --show-pulls # show merge commits that pulled changes
git log --dense # show only non-TREESAME commits
git log --sparse # show all walked commits
git log --ancestry-path # show commits only in the ancestry chain

# === RANGE NOTATIONS ===

git log A..B # show commits in B but not in A
git log A...B # show commits unique to either A or B
git log ^A B # equivalent to A..B
git log --left-right A...B # mark which side each commit belongs to
git log --cherry-pick A...B # exclude equivalent cherry-picked commits
git log --cherry-mark A...B # mark equivalent commits instead of excluding them
git log --cherry A...B # shortcut for right-only plus cherry-mark

# === REFLOG ===

git log -g # walk reflog entries instead of commit ancestry
git log --walk-reflogs # long form of -g

# === OTHER ===

git log --no-walk # show specified commits without traversal
git log --boundary # show boundary commits excluded from traversal
git log --remove-empty # stop traversal when a path disappears
git log --bisect # pretend bisect refs were passed on the command line
git log --stdin # read additional revisions from standard input
git log flags
Category: Limiting
Flag: --max-count
Short: -n
What it does: Limit number of commits shown
Category: Limiting
Flag: --skip
Short:
What it does: Skip first N commits
Category: Limiting
Flag: --since, --after
Short:
What it does: Show commits newer than date
Category: Limiting
Flag: --until, --before
Short:
What it does: Show commits older than date
Category: Limiting
Flag: --author
Short:
What it does: Filter by author name or email
Category: Limiting
Flag: --committer
Short:
What it does: Filter by committer name or email
Category: Limiting
Flag: --grep
Short:
What it does: Filter by commit message text
Category: Limiting
Flag: --all-match
Short:
What it does: Require all --grep patterns to match
Category: Limiting
Flag: --invert-grep
Short:
What it does: Invert the grep match
Category: Limiting
Flag: --regexp-ignore-case
Short: -i
What it does: Case-insensitive pattern matching
Category: Limiting
Flag: --extended-regexp
Short: -E
What it does: Use extended regular expressions
Category: Limiting
Flag: --fixed-strings
Short: -F
What it does: Treat pattern as fixed string
Category: Limiting
Flag: --perl-regexp
Short: -P
What it does: Use Perl-compatible regex
Category: Limiting
Flag: --merges
Short:
What it does: Only show merge commits
Category: Limiting
Flag: --no-merges
Short:
What it does: Exclude merge commits
Category: Limiting
Flag: --first-parent
Short:
What it does: Follow only first parent of merges
Category: Limiting
Flag: --all
Short:
What it does: Include all refs in the repository
Category: Diff
Flag: --patch
Short: -p
What it does: Show full diff for each commit
Category: Diff
Flag: --stat
Short:
What it does: Show per-file insertion/deletion counts
Category: Diff
Flag: --shortstat
Short:
What it does: Show only the summary stats line
Category: Diff
Flag: --name-only
Short:
What it does: List only file names changed
Category: Diff
Flag: --name-status
Short:
What it does: List files with M/A/D/R status
Category: Diff
Flag: --full-diff
Short:
What it does: Show full diff even with path filter
Category: Diff
Flag: -S
Short:
What it does: Pickaxe: find string added or removed
Category: Diff
Flag: -G
Short:
What it does: Pickaxe: find regex match in diff lines
Category: Diff
Flag: -L
Short:
What it does: Trace line range or function history
Category: Format
Flag: --oneline
Short:
What it does: Abbrev hash + subject on one line
Category: Format
Flag: --format, --pretty
Short:
What it does: Custom format string with placeholders
Category: Format
Flag: --abbrev-commit
Short:
What it does: Abbreviate commit object names
Category: Format
Flag: --decorate
Short:
What it does: Show branch and tag labels
Category: Format
Flag: --date
Short:
What it does: Set date format (short, iso, relative, ...)
Category: Format
Flag: --graph
Short:
What it does: Draw branch/merge graph
Category: Ordering
Flag: --date-order
Short:
What it does: Sort by committer timestamp
Category: Ordering
Flag: --author-date-order
Short:
What it does: Sort by author timestamp
Category: Ordering
Flag: --topo-order
Short:
What it does: Group branch commits together
Category: Ordering
Flag: --reverse
Short:
What it does: Show oldest commits first
Category: Simplification
Flag: --follow
Short:
What it does: Follow file through renames
Category: Simplification
Flag: --full-history
Short:
What it does: No simplification, show everything
Category: Simplification
Flag: --simplify-merges
Short:
What it does: Remove unnecessary merge commits
Category: Simplification
Flag: --show-pulls
Short:
What it does: Show merges that pulled in changes
Category: Simplification
Flag: --simplify-by-decoration
Short:
What it does: Show only tagged/branched commits
Category: Reflog
Flag: --walk-reflogs
Short: -g
What it does: Walk reflog instead of commit ancestry
Category: Range
Flag: A..B
Short:
What it does: In B but not reachable from A
Category: Range
Flag: A...B
Short:
What it does: Symmetric difference: unique to either A or B
Category: Range
Flag: --left-right
Short:
What it does: Mark which side of A...B each commit came from
Category: Range
Flag: --cherry-pick
Short:
What it does: Exclude cherry-picked duplicate commits
Category: Range
Flag: --cherry-mark
Short:
What it does: Mark cherry-picked equivalents with "="
Conclusion: git log Is Your Project’s Memory
Most developers use git log as a passive observer, a scrolling list of what happened. The developers who get the most out of Git use it as an active investigation tool, a precision instrument for answering specific questions about their codebase.
The distance between those two groups is exactly what this tutorial covers.
At the beginner level, you built the foundation. You learned that every commit is a snapshot linked to the one before it, forming a permanent chain. You learned to read the anatomy of a log entry (hash, author, date, subject, body), to use --oneline for quick overviews, to limit output with -n, to filter to a single file's history with -- path, and to see the full picture with --all. You also learned the safety habit of pressing q to exit the pager.
At the intermediate level, you gained the tools for real daily work. The --graph flag made branching topology visible. The --author filter let you zoom in on one person's work. The date filters (--since, --until) gave you time-bounded queries. The --grep flag turned commit messages into a searchable database. The -p and --stat flags showed you the actual code and scope of each change. The --format flag gave you complete control over output. Revision ranges (A..B, A...B) let you compare branches and find unpushed work. And --first-parent gave you clean, deployment-ready history on merge-heavy projects.
At the advanced level, you learned the forensic tools. The pickaxe flags (-S, -G) let you search actual code changes instead of just messages. The -L flag gave you function-level time travel. The --follow flag traced files through renames. The ordering modes (topo, date, author-date, reverse) gave you control over how history is presented. The --cherry-pick and cherry-mark flags helped you work with diverged branches and cherry-picked commits. The -g reflog mode became your safety net for recovering lost work. History simplification flags (--full-history, --simplify-merges, --show-pulls) let you see history from different angles. And the complete format placeholder system, along with Git configuration aliases, let you build custom, permanent workflows.
The next time a colleague says “when did this break?” or “who changed this last?” or “what exactly shipped in v3.2?”, you will not shrug and start scrolling. You will type a precise git log command, get the answer in seconds, and move on. That is the difference between using Git and mastering it.
Your codebase’s history is the most accurate record of every decision, every bug fix, every refactor, and every lesson learned. git log, in all its depth, is how you read it.
This tutorial covers Git 2.x and later. The --show-pulls option requires Git 2.29 or later. The %as and %cs format placeholders require Git 2.27 or later. The --since-as-filter option requires Git 2.29 or later. The --maximal-only option requires Git 2.49 or later. Run git --version to check your installed version.
**inter-git.com teaches git fundamentals visually: [inter-git.com](https://inter-git.com)** is an interactive Git tutorial where each command is shown visually so you can see exactly how it works in real time. It runs entirely in your browser, so there is nothing to install.
메타데이터
- post_id
- 8ff5128e5cc2
- slug
- the-complete-guide-to-git-log-beginner-to-advanced-the-human-readable-manual-git-log-8ff5128e5cc2
- url
- https://medium.com/@eloquentcoder/the-complete-guide-to-git-log-beginner-to-advanced-the-human-readable-manual-git-log-8ff5128e5cc2
- canonical_url
- https://medium.com/@eloquentcoder/the-complete-guide-to-git-log-beginner-to-advanced-the-human-readable-manual-git-log-8ff5128e5cc2
- author_url
- https://medium.com/@eloquentcoder
- status
- ok
- fetched_at
- 2026-06-09 14:34:10