CTF Write-up: T1598.002 (Certified Cyber Defenders)
Also known as “Spearphishing Attachment”
CTF Write-up: T1598.002 (Certified Cyber Defenders)
CyberDefenders: Blue team CTF Challenges | T1598.002
Welcome to another CTF Write-up!
My first write-up was received decently well (I’d say), and I had fun writing it. As I wrote on my first write-up: “I’m always in favor of sharing knowledge with others, in hopes it may help them improve or learn something. In return, perhaps I learn something new too. Win-win situation!”. So I’m back for another.
Today, we’re tackling another CyberDefenders CTF (this will be a trend). Let’s begin with the scenario
Scenario Introduction
This scenario is called T1598.002. If you are familiar with Cybersecurity, you might recognize this as a MITRE ATT&CK tag. Specifically, this is the “Spearphishing Attachment” tag: Phishing for Information: Spearphishing Attachment, Sub-technique T1598.002 — Enterprise | MITRE ATT&CK®
This already gives us a hint what the lab is going to be about. It’s a Easy difficulty Endpoint Forensics lab which covers the following Tactic: Reconnaissance.
You can find the lab here: CyberDefenders: Blue team CTF Challenges | T1598.002
Note: If you want to do this CTF, you must be registered at CyberDefenders and have a “Pro Subscriber” license active.
The following information is given to us: “Adversaries may send spearphishing messages with malicious attachments to elicit sensitive information that can be used during targeting. Spearphishing for information is an attempt to trick targets into divulging information, frequently credentials, or other actionable information. Spearphishing for information frequently involves social engineering techniques, such as posing as a source with a reason to collect information (ex: Establish Accounts or Compromise Accounts) and/or sending multiple, seemingly urgent messages.
All forms of spearphishing are electronically delivered social engineering targeted at a specific individual, company, or industry. In this scenario, adversaries attach a file to the spearphishing email and usually rely upon the recipient populating information and then returning the file.[1][2] The text of the spearphishing email usually tries to give a plausible reason why the file should be filled in, such as a request for information from a business associate. Adversaries may also use information from previous reconnaissance efforts (ex: Search Open Websites/Domains or Search Victim-Owned Websites) to craft persuasive and believable lures.
Tools:
- Oledump
- Outlookspy
- CyberChef”
This is quite literally the MITRE-entry for Spearphishing Attachment, and thus, provides no actual information about the lab itself. We can take an educated guess though, based on the MITRE tactic and the chosen tools, that we are going to be analyzing an e-mail with an suspicious attachment in this lab.
Upon opening the lab, we see an Windows-environment with two folders on the desktop worth noting: “Challenge” and “Tools”

The lab, upon initially starting it
The “Challenge” folder contains one file: an Outlook item (.msg) called T1598. This will be the file we will be analyzing for our CTF.

Our challenge
The “Tools” folder contains two sub-folders containing two of the mentioned tools, namely Cyberchef and Oledump, as well as a README file for Oledump:

Our tools
Cyberchef is an web application (also available for download) that allows for encryption, decryption and data analysis of text and files. It is most commonly used by defenders to convert encoded text into human-readible format for further analysis
Oledump is used for analyzing OLE-files (also known as Compound Binary Files) for data streams. OLE-files are used by many applications, and Oledump has plugins for different file types to analyze them.
Knowing what tools you have and what they do is vital to clear any CTF. It also gives you more information about what tools could be useful for you, in your home or corporate environments. With that said, let’s begin diving in the lab and the questions.
The Questions
1: What plugin is included in oledump used to scan streams in MSG files?
It seems we are starting off with a generic question (one you can answer without even opening the lab), because this requires merely knowledge of what plugins Oledump has, and what they serve for. For the sake of the CTF (and this write-up), we will attempt to find the plugin in the lab.
We have located Oledump already, in the “Tools” folder on the Desktop. Looking into the Oledump folder, we see the following:

The oledump folder
As you can tell, there are a bunch of plugins in here, including the correct answer to Question 1. I don’t think it’s necessary to explain why this is the correct answer, as I think it’s fairly straightforward once you see the plugin’s name ;-)
2: What are the 8-digit hexadecimal codes related to the “Attach long filename” stream?
We won’t be able to answer that one without the lab… so let’s start using our tools.
Let’s put our plugin to the test. I opened Powershell from the Oledump folder (C:\Users\Administrator\Desktop\Tools\oledump_V0_0_75) and ran the following command in Powershell to analyze our file:
python oledump.py -p .\plugin_xxx.py C:\Users\Administrator\Desktop\Challenge\T1598.msgCommand Breakdown
python — specifies that we are using Python to execute a python script oledump.py — the python script we want to run -p .\plugin_xxx.py — specifies the plugin we want to use. I have replaced the actual plugin with xxx, since the plugin is the answer to Question 1 C:\Users\Administrator\Desktop\Challenge\T1598.msg — the file we want to analyze with Oledump
This gives us the following output:

The output of the related plugin
Analyzing the full information from this plugin, I found the following information about this e-mail:
- There is an .HTML attachment in this e-mail, called Compensation_897179.html
- The sender is “through-work@grow-jp.com”, which seems to be a spoofed (fake) sender e-mail address
- The e-mail starts with “Good afternoon, The attached file is th…” (which indicates that the sender wanted the recipient to look at the attachment)
No other relevant information can be found. The subject of the mail has been removed by the plugin, and there is no information about the recipient in here either.
Now we need to look for the “Attach long filename” record. You can find this on line 7, or look for it specifically by adding | sls “Attach long filename” to the original Powershell command:
python oledump.py -p .\plugin_xxx.py C:\Users\Administrator\Desktop\Challenge\T1598.msg | sls "Attach long filename"
The original Powershell command, filtered via “sls”
sls stands for Select-String, and is Powershell’s way of filtering output for text patterns (basically, Windows’ equivalent of grep).
The value found on the left, when added after 0x, is the correct answer to Question 2
3: What is the message class?
You can find this in the exact same output as for the previous question. Look for line 21, or filter for “Message class” via sls instead:

Finding the message class
This reveals the correct answer to Question 3
4: What is the sender’s IP address?
IP-address information is not given via the plugin we used earlier, so we have to look for alternatives.
One way is to simply open the e-mail, extract the headers via e-mail properties, and analyze those, since IP information is usually provided in the e-mail headers (via sender IP, as part of checking SPF)
However, I believe it’s a best practice to not actually open the file until you absolutely have to, and extract the information required via other methods. In this case, since it seems the attachment is the actual malicious part of the e-mail, it should be safe to open. However, let’s try to find header information without opening the e-mail.
If you recall from Question 1, when you found the correct answer, there was another plugin very similar to it (the summary plugin). We can use that plugin with some additional parameters in order to find our headers. I ran the following command:
python oledump.py -p .\plugin_xxx_summary.py --pluginoptions -H C:\Users\Administrator\Desktop\Challenge\T1598.msgCommand breakdown python oledump.py -p .\plugin_xxx_summary.py — same as earlier, just a different plugin --pluginoptions -H — This is a flag specific for this plugin, and it will extract the header information from the file you want to analyze. C:\Users\Administrator\Desktop\Challenge\T1598.msg — again, the file we are analyzing

Output of the summary plugin
Scroll down a bit in the output to reveal the header information:

Header information
The information on the top reveals the IP-address used, which is the answer to Question 4
5: What total delays (seconds) happened between the sender and the email receiver?
You will not be able to find this one directly in the header information, but you can extract it with… maths. Simple maths though, luckily
You can do this directly with the Powershell output above. As you can see, there are several “Recieved: from …” entries at the top of the above screenshot. These are the so-called e-mail hops. They tell you what IP-addresses and services the e-mail went through before arriving at your e-mail server. In order to calculate the total delay, you need to take the first and last entry of “Received”, and subtract the times from each other. This will give you the total delay in seconds.
Another way, now that we have the headers, is to use an Email header analyzer. The one I prefer to use is MxToolbox’s E-mail header analyzer. Copy the header information (starting with Return-Path) into the tool and you will see the following result:

MxToolbox’s Header Analyzer
The answer is right on your screen there.
6: What is the company that developed the antispam software used by the target?
We technically have this information already. Take a look at the headers again. There is a header containing “Antispam” which has the company name in it:

There are several other headers that also tell you this answer. Examples are “X-Virus-Scanner” which tells you what e-mail virus scanner is being used (it’s from the same company), as well as several other headers specific to this company:


You shouldn’t have problems figuring this one out ;-)
7: What is the md5 hash of the zip file included in the attached HTML?
So the HTML file has a .zip file included. Somehow. My guess is that it’s a download that starts once you open the HTML file. Before we do that, let’s see if we can verify that guess. Remember: if you have the option to verify a claim like that, do so before opening a potentially malicious file. Safety first, kids!
Since a .msg file can be extracted with Oledump, we should be able to extract specific information from this e-mail by extracting the file streams. If you want to know more about File streams, I’d recommend checking this link out.
When we ran the summary plugin, we got the following output (before the headers):

Stream information
This reveals that the header is stored in stream 28, the body in stream 38, and the attachment in stream 4. Using Oledump, we can extract the attachment stream:
python oledump.py -p .\plugin_xxx_summary.py -s 4 C:\Users\Administrator\Desktop\Challenge\T1598.msgWe added “-s 4” to the earlier command (instead of the header flag) to visualize the contents of stream 4, which should show us the contents of the attachment:

Extracting stream 4
The problem is… this is hard to read. And you cannot really copypaste the contents properly either into other programs. Luckily, we can extract the file entirely by adding the -d flag to the plugin, like this:
python oledump.py -p .\plugin_xxx_summary.py -s 4 -d > C:\Users\Administrator\Desktop\Challenge\Compensation_897179.html C:\Users\Administrator\Desktop\Challenge\T1598.msgThe -d flag allows us to dump the file to a location of your choice. In my case, I extracted the HTML file and put it next to the e-mail we’re analyzing. You can tell the file is created if you navigate to the directory:

We have two files now!
In order to inspect the contents, we can open the HTML-file via a text-editor. Since Notepad++ is installed, let’s open the file with Notepad++:

The file
This reveals the following information:
- The ZIP file is called Compensation_897179.zip, as indicated by var target_file_name = ‘Compensation_897179.zip’;
- There are two bits of encoded text. I bet you’re curious what’s in that text. We have Cyberchef, so let’s use that to find out!
Let’s start with the top one. I attempted to extract some relevant information from Cyberchef by using a simple “Base64 Decode” plugin on the text, which reveals the following:
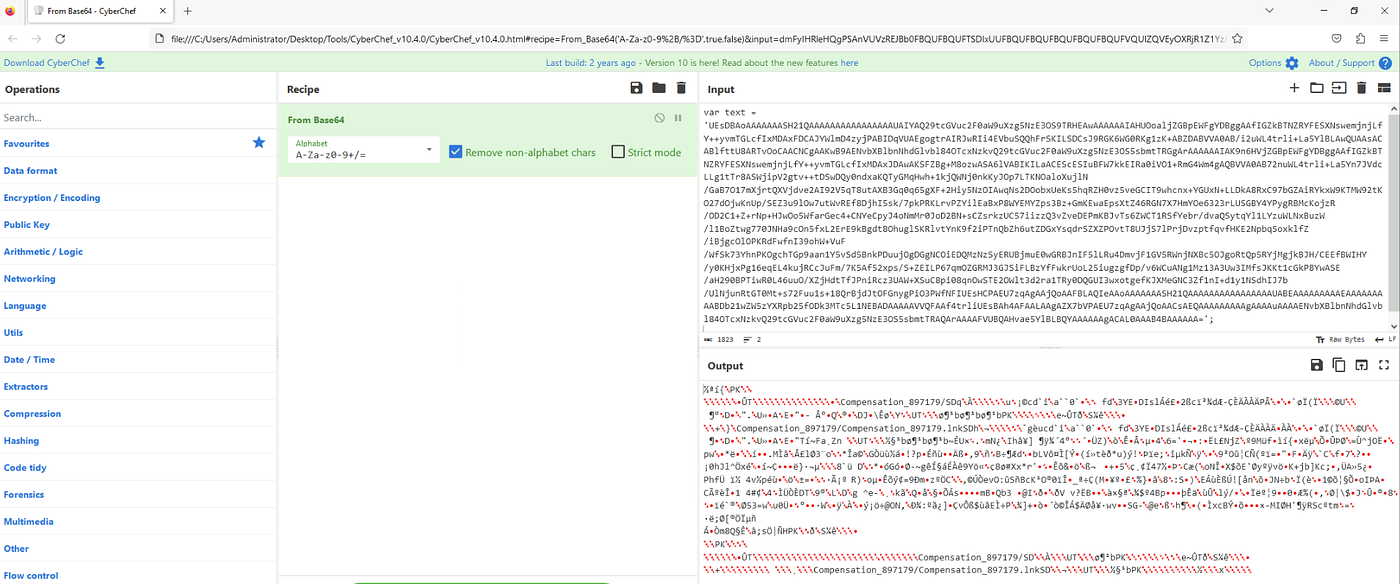
Cyberchef in action
While it’s not entirely readable (and whoever finds the correct set of Recipes to make it fully readable, please let me know!), you can tell that a file called “Compensation_897179.lnk” seems to be in the ZIP file. So the MSG file has a HTML file which, somehow, contains a ZIP file which contains a LNK file. Talk about hiding your artifacts…
The second text is HEX encoded, and is fully readable if you use the “From HEX” plugin in Cyberchef:

Hex decoding in action
The result is a whole bunch of Javascript commands that, when executed in order, allow for a file download without any user interaction. I’m by no means a Javascript-specialist, so I got this information from AI:

Thank you Mr. ChatGPT
Combining these two elements, it seems that the Compensation_897179.zip file will be downloaded when the HTML file is executed, which confirms our earlier guess.
Since we need the ZIP file to do further analysis, we have no choice but to open the HTML file and obtain the ZIP file. When we open the HTML file, a download indeed starts:


The ZIP file has been downloaded
We need the MD5 hash of this zip file, which is simple to obtain if we use Powershell from this directory:
get-filehash -Algorithm MD5 .\Compensation_897179.zipCommand breakdown get-filehash allows us to extract the hash of a file -Algorithm MD5 specifies the hash algorithm. When unspecified, Powershell will calculate the SHA256 hash, which is not what we need here. .\Compensation_897179.zip specifies the file we want to obtain the (MD5) hash from. We run it from the current directory, as indicated by .\ If we wanted the command to work regardless of where we use Powershell, we have to specify the full path here (C:\Users\Administrator\Downloads\Compensation_897179.zip)

Our MD5 filehash
This reveals the correct answer for Question 7
8: What full URL is used by the malicious shortcut embedded in the zip file?
In order to answer this, we need the .LNK file (we know it’s a LNK since we found this earlier in our analysis). When you open the ZIP file, there is indeed a LNK file in there:

The contents of the ZIP file
However, when you try to extract it, you will find that the file is password-protected:

The question is, where would the password be?
Remember that this e-mail was sent to a user, and the user was requested to open the attachment based on the piece of information we found earlier. If it is password protected, it makes sense that the password is in the e-mail itself so that the user knows how to open the file
Again, we can open the e-mail and find the password there, but we can also extract it with Oledump (which is, again, the safer option). Remember the filestream for the e-mail body? (If not, scroll up on the write-up). Let’s extract that into a .txt file similarly to how we extracted the HTML file:
python .\oledump.py -p .\plugin_xxx_summary.py -s 38 -d > C:\Users\Administrator\Desktop\Challenge\body.txt C:\Users\Administrator\Desktop\Challenge\T1598.msg
The body of the e-mail, extracted as a TXT file
Let’s see what the body of the e-mail contained when we open the TXT file:

The e-mail body in question
There’s our password (abc123). Let’s use that to extract the LNK file:

Extracted the LNK file
Now, of course you can just open the LNK file and go to the site it wants you to go to, but I shouldn’t have to explain to you that this is, in general, a horrible idea (plus, it doesn’t work, as you’ll see later). Luckily, you can check the LNK properties to find the URL in question by right clicking the file and choosing “Properties”:

The “Target” is the key
You can find the URL in here. Alternatively, you open Notepad++ and paste the contents of “Target” in here for better readability:

The contents of the LNK file
And there’s the answer to the final question of the lab (Question 8)
As a bonus, I checked via URLScan whether the URL is still active as of today (October 10th), but it resulted in a 404 for me:

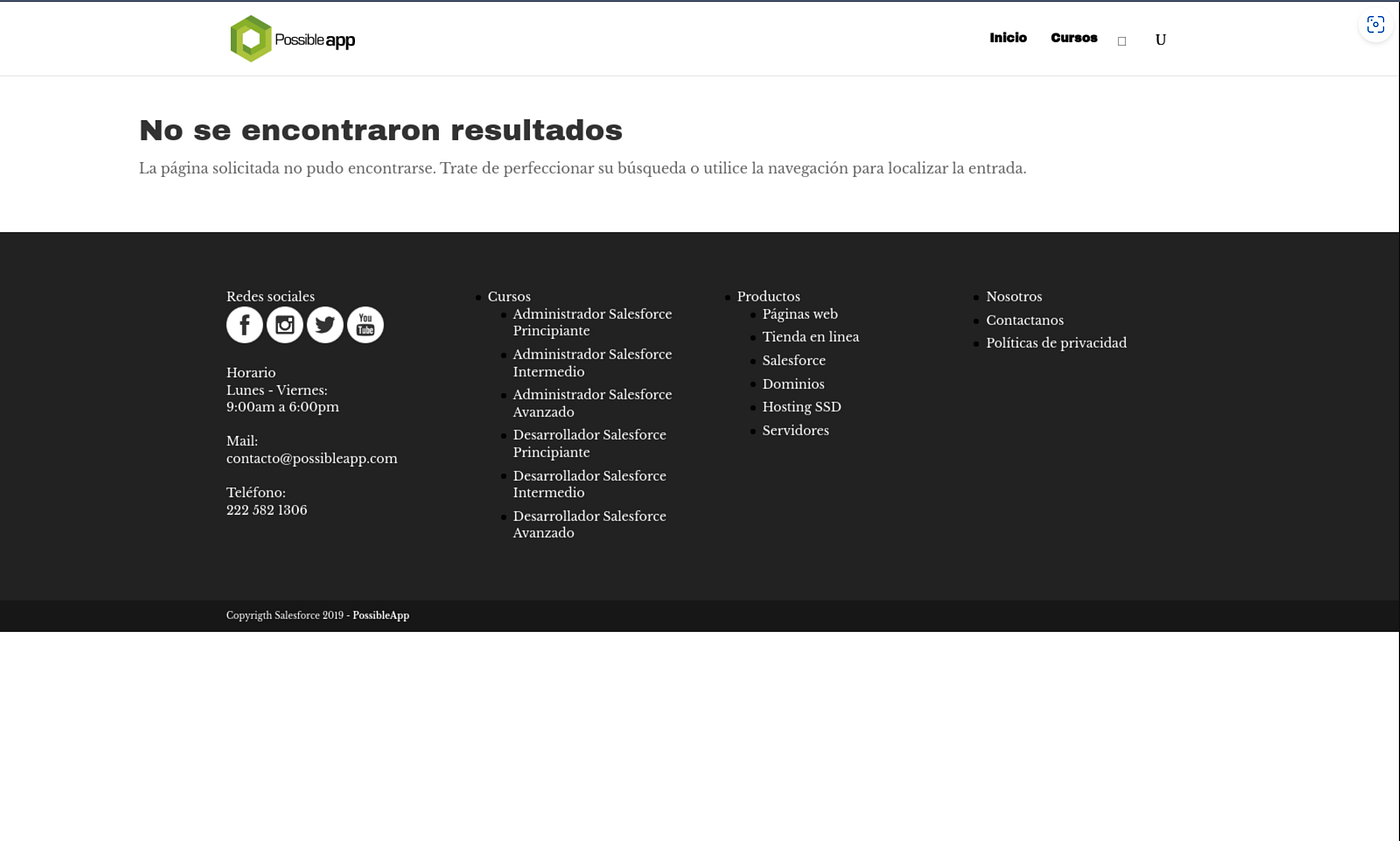
The file wasn’t found…
Review and Conclusion
This lab seemed to have indicated that no actual compromise has taken place. It simply gave you an e-mail message to analyze with Oledump.
The lab difficulty is fair — this is not a hard lab to figure out. The real challenge is to do as much as possible without interacting with the malicious email and attachment in question, which is a good skill to learn as a Blue teamer. Oledump proved to be very useful for the sake of this lab, and it’s nice to practice with a tool like this. I do not see the added value of “OutlookSpy” as a tool, and wound up not using it at all for the purposes of the lab. Cyberchef is technically entirely optional too, and the lab can fully be solved with Oledump alone, but it is useful to verify what the malicious HTML file actually does, since it’s encoded by part.
I hope this write-up was helpful to you. If it was, I hope you’re willing to give it a thumbs up. If you’re doing this lab and find a better method of solving than I did, please do not hesistate and reach out to me on Discord (@itsgir). I will include your work in the write-up with credit.
Until the next one. Stay safe!
메타데이터
- post_id
- 952cd2eb49ca
- slug
- ctf-write-up-t1598-002-certified-cyber-defenders-952cd2eb49ca
- url
- https://medium.com/@itsGir/ctf-write-up-t1598-002-certified-cyber-defenders-952cd2eb49ca
- canonical_url
- https://medium.com/@itsGir/ctf-write-up-t1598-002-certified-cyber-defenders-952cd2eb49ca
- author_url
- https://medium.com/@itsGir
- status
- ok
- fetched_at
- 2026-07-15 14:49:24


