The Complete Guide to git commit: From Your First Snapshot to Mastering Advanced History Rewriting…
Everything you need to know about the command that saves your work forever, explained in plain English with real-world scenarios, visual…
The Complete Guide to git commit: From Your First Snapshot to Mastering Advanced History Rewriting (The human-readable manual: git commit)
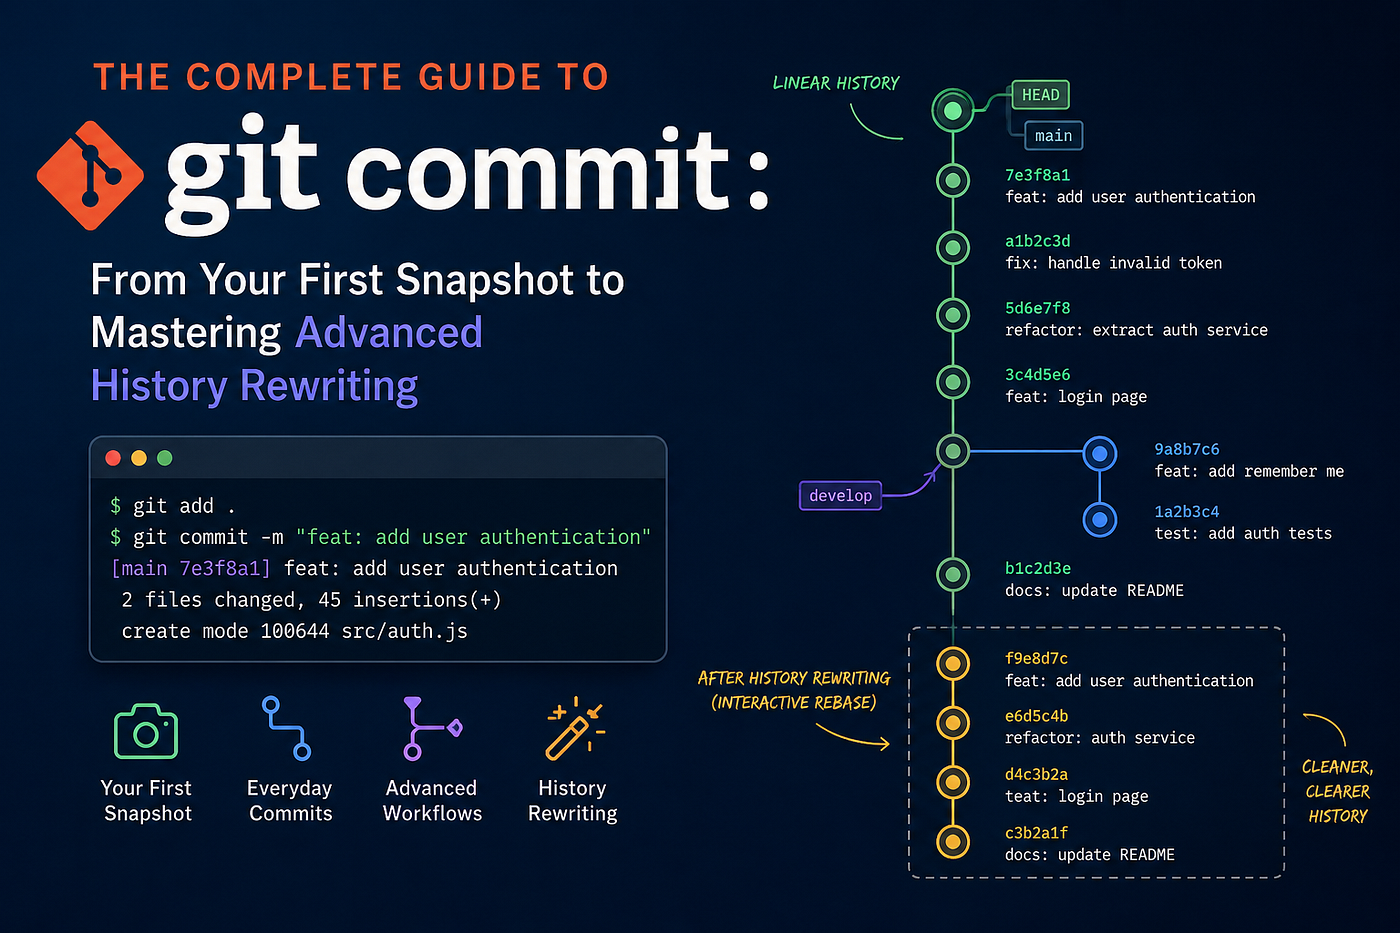
Everything you need to know about the command that saves your work forever, explained in plain English with real-world scenarios, visual diagrams, and an honest look at the mistakes that trip up developers at every skill level.
A deep-dive tutorial covering Beginner, Intermediate, and Advanced usage, all options from the official Git manual, plus commit message best practices, hooks, GPG signing, and real-world workflows.
**inter-git.com teaches git fundamentals visually: [inter-git.com](https://inter-git.com)** is an interactive Git tutorial where each command is shown visually so you can see exactly how it works in real time. It runs entirely in your browser, so there is nothing to install. Before moving on to the intermediate level, it is a great place to practice what you have just learned.
Table of Contents
- Introduction: What a commit actually is and why it matters
- Level 1: Beginner 2.1 The snapshot model: how Git stores your history 2.2 Anatomy of a commit object 2.3 git commit: opening the editor 2.4 git commit -m: committing with an inline message 2.5 How to write a good commit message 2.6 The edit-stage-commit loop 2.7 How to see your commits with git log 2.8 Beginner pitfalls
- Level 2: Intermediate 3.1 git commit -am: stage and commit in one step 3.2 git commit — amend: fixing the last commit 3.3 git commit — amend — no-edit: amend without changing the message 3.4 git commit — allow-empty: commits with no changes 3.5 git commit -v: see your diff while writing the message 3.6 git commit — dry-run: simulate before you commit 3.7 git commit -F: using a file as the commit message 3.8 git commit — no-verify: bypassing hooks 3.9 git commit -s: adding a Signed-off-by trailer 3.10 Intermediate pitfalls
- Level 3: Advanced 4.1 -C and -c: reusing a commit message 4.2 — fixup and — squash: targeted history rewriting 4.3 — author and — date: overriding commit metadata 4.4 — reset-author: taking ownership of a commit 4.5 -p: committing specific hunks 4.6 — cleanup: controlling how your message is processed 4.7 — trailer: structured metadata in commit messages 4.8 -S: GPG-signing your commits 4.9 Committing specific files with pathspec arguments 4.10 -i and -o: include and only modes 4.11 Git hooks that interact with git commit 4.12 Environment variables: GIT_AUTHOR and GIT_COMMITTER 4.13 Author vs. Committer: what the difference means in practice 4.14 Configuration variables that affect git commit 4.15 Real-world advanced workflows 4.16 Advanced pitfalls
- Quick Reference Card
- Complete Flags Reference Table
- Conclusion
Introduction: What a Commit Actually Is and Why It Matters
If you have been using Git for any length of time, you have typed git commit -m "fix stuff" more times than you can count. But there is a good chance that most of what git commit can do is completely invisible to you, sitting quietly behind flags you have never tried.
That matters, because git commit is not just a save button. It is the command that writes your project's permanent history. Every commit you create is a record that future teammates, future versions of yourself, code reviewers, and automated tools will rely on to understand what changed, why it changed, and who changed it. A project with a clean, well-crafted commit history is a joy to work in. A project where every commit says "wip" or "fix" is a nightmare to debug six months later.
This guide covers every option in the official git commit manual, organized into three difficulty levels. It does not stop at listing what each flag does. It explains why you would reach for each one, what real-world scenarios call for it, and what happens when you use it wrong. Diagrams are included throughout because some of these concepts are much easier to see than to read.
Whether you are writing your first commit ever, trying to understand --amend properly, or ready to dive into --fixup and GPG signing, this is the only reference you need.
Level 1 Beginner: Understanding git commit From the Ground Up
The Snapshot Model: How Git Stores Your History
Before touching a single flag, you need a mental model of what a commit actually is. Most people think of Git as something that tracks changes, like a list of differences from one version to the next. That is true for display purposes, but it is not how Git actually stores your work internally.
Git stores snapshots, not diffs. Every time you run git commit, Git takes a complete picture of every file in your staging area and saves it permanently. If a file has not changed since the last commit, Git does not store a duplicate. It just points to the same content it already has. But from your perspective, every commit is a full, self-contained snapshot of your entire project at that point in time.
This is a very different mental model from, say, emailing around a file called report_v2_FINAL_FINAL.docx. With Git, each commit is a labeled point in a timeline that you can jump back to at any moment. The commits form a chain: every commit (except the very first one) knows which commit came before it. That parent-child relationship is what makes the timeline.

Figure 1: Every commit is a permanent snapshot linked to the one before it. HEAD and the branch name always point to the most recent commit.
One important thing to notice in that diagram: HEAD is just a pointer. It says “this is the commit you are currently at.” When you run git commit, two things happen: a new commit is created pointing back at the current one, and HEAD (along with the current branch label) moves forward to point at the new commit. That is it. The old commits are never touched.
Anatomy of a Commit Object
When you create a commit, Git stores more than just your file changes. A commit object is a small text record that contains several distinct pieces of information, and understanding each one will help you use the flags in this tutorial much more confidently.

Figure 2: The six fields stored inside every Git commit object. The hash is computed from all the other fields together, so changing anything changes the hash.
Here is something that surprises most people: the hash of a commit is computed from all its contents. If you change the commit message, even by one character, the entire hash changes. This is why operations like --amend and rebase create new commits rather than editing the old ones. The original commit stays in Git's database unchanged. You are just creating a replacement.
Notice that a commit has both an Author and a Committer. For most everyday work these are the same person. But they can differ: if you apply a patch that someone else wrote, or if a senior developer cherry-picks your commit onto another branch, the author stays as the original writer while the committer is whoever performed the operation. This distinction matters for open-source projects and you will see flags for controlling both.
git commit: Opening the Editor
The simplest way to run git commit is just to type it with no flags at all:
git commitWhen you do this, Git opens your default text editor (usually Vim, Nano, or whatever you have configured) so you can write a commit message. Inside that editor, you will see something like this:
# Please enter the commit message for your changes. Lines starting
# with '#' will be ignored, and an empty message aborts the commit.
#
# On branch main
# Changes to be committed:
#       modified:   src/login.js
#       new file:   src/auth/token.js
#
The lines that start with # are comments. They are shown to help you remember what you staged, but they will not appear in the final commit message. Git strips them out automatically. Your job is to type your message above or among those comments, then save and close the editor.
If you save the file with an empty message (or a message made up entirely of comments), Git cancels the commit and tells you about it. This is intentional: a commit with no message is almost never useful.
Tip: Changing your default editor
If Vim opens and you are not comfortable in it, you can change Git’s editor to something friendlier. For VS Code, run: git config --global core.editor "code --wait". For Nano: git config --global core.editor nano. For Notepad on Windows: git config --global core.editor notepad.
git commit -m: Committing With an Inline Message
Most of the time you know exactly what your commit message should say before you even run the command. The -m flag (short for --message) lets you provide that message directly on the command line, which skips the editor entirely:
git commit -m "Fix null pointer exception in login handler"This is probably the most commonly used form of git commit in the world. It is fast, it is simple, and for short single-line messages it works perfectly.
You can provide multiple -m flags in one command, and Git will treat each one as a separate paragraph in the message body:
git commit -m "Fix null pointer exception in login handler" \
           -m "The user object was not checked for null before calling .getRole()." \
           -m "Added a null check and a fallback to the guest role."
That creates a commit with a subject line followed by two body paragraphs, which is actually very good commit message structure. You will learn more about that in the next section.
Note: -m is mutually exclusive with several other flags
You cannot use -m together with -c, -C, or -F. Those are all different ways of supplying a commit message, and Git will not let you specify more than one source at a time.
How to Write a Good Commit Message
The official Git documentation has a section on this. So does every major style guide for engineering teams. And yet, most commit histories in the wild are full of messages like “fix”, “update”, “stuff”, “wip”, and “asdfgh”. This section exists because writing a useful commit message is one of the highest-leverage habits you can develop as a developer.
The well-established convention for Git commit messages has three parts:

Figure 3: The three-part commit message structure. Subject, blank line, and body. Many tools, including GitHub, GitLab, and git log — oneline, rely on this structure to display commit information correctly.
Here are the rules that the Git project itself follows, and that most professional teams adopt:
- Use imperative mood for the subject line. Write “Add user authentication” not “Added user authentication” or “Adding user authentication”. The reason: Git’s own auto-generated messages (like “Merge branch ‘feature’”) use imperative mood, and your messages should match that style. Think of it as a completion of the sentence “If applied, this commit will…”
- Keep the subject line to 50 characters or fewer. GitHub truncates it after 72 characters. Many terminals wrap at 80. Keeping it short also forces you to be precise about what the commit does.
- Separate the subject from the body with a blank line. This is not just a convention. Git commands like
git log --oneline,git shortlog, andgit format-patchall use the blank line to know where the subject ends. If you skip the blank line, your subject will bleed into the body and these tools will behave oddly. - Wrap the body at 72 characters per line. Commit messages are not markdown files. They will be displayed in terminals, email clients, and code review tools that have fixed widths. Wrapping at 72 keeps them readable everywhere.
- Explain what and why, not how. The code shows how. The commit message should explain the reasoning: what problem this solves, why this approach was chosen, what the side effects are, what issue tracker ticket it closes.
Real World: The cost of bad commit messages
Imagine you are debugging a crash in production at 2 AM. You narrow it down to a particular function that changed three months ago. You run git blame to see which commit touched that line. The commit hash leads you to a message that says "fix." That is it. Just "fix." You now have to read the entire diff, try to reconstruct what the developer was thinking, and figure out whether the bug you are seeing is related. That process can take an hour.
Now imagine the message says: “Fix race condition in session token refresh. The old code called token.refresh() without checking whether a refresh was already in progress. Under high load, two threads could trigger a double-refresh, invalidating the first token while the second was still in use. Added a mutex lock around the refresh call. Closes INFRA-2981.” You have the answer in 30 seconds.
The time it takes to write that message is about two minutes. The time it saves every future reader is potentially hours. Good commit messages are an act of kindness to your future self and your team.
The Edit-Stage-Commit Loop
Now that you understand what a commit is and how to write a good message, let us put it all together into the basic workflow you will use every single day.

Figure 4: The edit-stage-commit loop is the fundamental rhythm of working with Git. Every meaningful piece of work follows this cycle.
Here is a complete example from start to finish. Imagine you are fixing a bug in a JavaScript file:
# Step 1: You edited src/login.js to fix the bug
# Check what has changed before doing anything
git status

# Step 2: Stage the file you want in this commit
git add src/login.js

# Step 3: Confirm the staging area has what you want
git status

# Step 4: Commit with a clear message
git commit -m "Fix null pointer exception in login handler"

# Git will respond with something like:
[main e40a7c2] Fix null pointer exception in login handler
 1 file changed, 3 insertions(+), 1 deletion(-)
The output tells you: the branch you committed to (main), the short hash of the new commit (e40a7c2), the commit message, and a summary of what changed. This is your confirmation that the commit was created successfully.
How to See Your Commits With git log
After committing, you will naturally want to see the history. The git log command is the main way to browse commits:
# Full log with all details
git log

# Compact one-line-per-commit view
git log --oneline

# One-line view with a branch graph
git log --oneline --graph --all
The full git log output for each commit shows the hash, author, date, and complete message. The --oneline flag is what you will use most often for a quick overview. It shows the short hash followed by the subject line of the message. This is why keeping the subject line short and descriptive matters so much: that is the text you will be scanning hundreds of times.
Beginner Pitfalls
Pitfall 1: Committing before staging anything
If you run git commit without first running git add, Git will tell you "nothing to commit, working tree clean" (if you have no changes at all) or "nothing added to commit but untracked files present" (if you have new files that have never been staged). New files must always be explicitly staged with git add before they can be committed. Running git commit alone will not pick them up unless you use the -a flag, and even then -a only works for files that Git already knows about.
Pitfall 2: Committing too much in one go
It is tempting to work for hours and then do one giant git add . followed by git commit -m "all the stuff". This creates commits that are nearly impossible to reason about later. If you need to revert one part of that commit, you cannot do it without reverting everything. If a reviewer needs to understand why a specific line changed, they will find a commit with fifty unrelated files. Commit frequently, commit small, and commit logically.
Pitfall 3: Accidentally staging files you did not mean to
Running git add . stages everything in the current directory, including things you did not intend: debug logs, temporary files, personal notes, build artifacts, or API keys. Always run git status and verify what is staged before committing. Use a .gitignore file to tell Git which files to always ignore.
Pitfall 4: Committing directly to main or master
In most team environments, the main branch is protected. You are expected to commit to a feature branch and then open a pull request. If you have been committing directly to main locally, you will get a rejection when you try to push. Create a branch before you start working: git checkout -b my-feature.
Pitfall 5: Writing commit messages that do not say anything Messages like “fix”, “update”, “changes”, “work in progress”, and “asdf” are not commit messages. They are notes to yourself that you forgot to replace. Six months later, neither you nor anyone else will know what that commit changed. Take the extra ten seconds to write a real subject line.
**inter-git.com teaches git fundamentals visually: [inter-git.com](https://inter-git.com)** is an interactive Git tutorial where each command is shown visually so you can see exactly how it works in real time. It runs entirely in your browser, so there is nothing to install. Before moving on to the intermediate level, it is a great place to practice what you have just learned.
Level 2 Intermediate: Real-World Flags You Will Use Every Week
You know how to make a basic commit. Now let us talk about the flags that solve the problems every developer runs into after the first few days: “I forgot to include a file,” “I made a typo in the commit message,” “I want to stage and commit in one step,” or “I need to simulate what would happen before I actually commit.” These are the tools that make your day-to-day Git usage both faster and safer.
git commit -am: Stage and Commit in One Step
Typing git add followed by git commit is the full workflow, but there is a common shortcut for the most routine case. The -a flag (short for --all) tells Git to automatically stage all modifications and deletions to files it already knows about, before making the commit.
In practice, you almost always see it combined with -m:
git commit -am "Fix validation logic in signup form"This is equivalent to:
git add -u
git commit -m "Fix validation logic in signup form"
Critical limitation: -a does NOT add new files
The -a flag only works on files that Git is already tracking, meaning files that appear in at least one previous commit. If you created a brand-new file in this session, -a will not stage it. You will need to git add <newfile> first. This trips up many developers who expect -am to capture everything.

Figure 5: The -a flag is a useful shortcut but only stages files Git already knows about. New files still need an explicit git add before they will be included.
Real World: When -am is your best friend
If you are working on a feature branch where you have already staged all new files, and you are iterating on existing code, git commit -am is genuinely faster than the two-step workflow. Many experienced developers have an alias like gc mapped to git commit -am for exactly this reason. Just remember the rule: if you added a new file, check git status first to make sure it is being picked up.
git commit — amend: Fixing the Last Commit
--amend is one of the most useful flags in all of Git. It lets you replace the most recent commit with a new one. You can use it to fix a typo in the commit message, add a file you forgot to stage, or change the content of the commit entirely.
# You just committed and realized you have a typo in the message
git commit --amend
# This opens your editor with the previous message, ready to edit

# Or provide a new message directly on the command line
git commit --amend -m "Fix null pointer exception in login handler"
# You committed but forgot to include auth.js
git add src/auth.js
git commit --amend
# The editor opens, and the new commit will include auth.jsWhat actually happens under the hood is important to understand: --amend does not edit the existing commit. It discards it and creates a completely new commit that includes the original commit's tree plus any new staged changes, using either the original message or the new one you provide. The old commit becomes unreachable and will eventually be cleaned up by Git's garbage collector.

Figure 6: git commit — amend creates a brand-new commit (C2 prime) with a completely new hash, and moves HEAD and the branch pointer to it. The old C2 becomes an orphan and is eventually removed.
Warning: Do not amend commits you have already pushed
Once a commit has been pushed to a shared remote (like GitHub or GitLab), other people may have based their work on it. Amending that commit creates a new hash, and when you try to push the amended version, Git will reject it as a non-fast-forward push. If you force-push (git push --force), everyone else's local history will diverge from the remote. This can cause serious confusion and lost work. The rule is simple: only amend commits that exist only on your local machine and have not been shared yet.
git commit — amend — no-edit: Amend Without Touching the Message
This combination is incredibly useful when you just want to add a forgotten file to the last commit without changing anything about the message.
# You committed, then realized you forgot to include styles.css
git add src/styles.css

# Amend the last commit, keeping the exact same message
git commit --amend --no-edit

# The commit now includes both the original files and styles.css
# but the message is unchanged
Without --no-edit, the editor would open every time you amend, even if you do not want to change the message. Adding --no-edit skips that step entirely, making the operation instant.
Real World: The most common use for — amend — no-edit
You have just committed. You run your linter and it reports an error in the file you just committed. You fix the error. Now you want to fold that tiny fix into the commit you just made, without creating a separate commit like “fix lint error” that clutters the history. git add <file> followed by git commit --amend --no-edit does exactly that. Your commit looks clean, and the lint fix never appears in the history as a separate distraction.
git commit — allow-empty: Commits With No Changes
By default, Git refuses to create a commit when there is nothing staged. If you try, it will say “nothing to commit.” The --allow-empty flag overrides that protection and lets you create a commit with no content changes at all:
git commit --allow-empty -m "Start of Sprint 14: user notifications module"
git commit --allow-empty -m "Trigger CI pipeline rebuild"
git commit --allow-empty -m "chore: mark branch as ready for review"
This might sound useless, but it has real-world applications. Empty commits can serve as meaningful markers in your history, signaling the start of a new sprint, a decision point, a trigger for a CI/CD pipeline, or a note that something important happened at this point in time. Some CI systems (including older GitHub Actions configurations) can be triggered by pushing any commit, even an empty one.
Related: — allow-empty-message
There is also a --allow-empty-message flag that lets you create a commit with an empty commit message. This is rarely something you want intentionally. It exists mainly for scripted migration workflows and tools that create commits programmatically from other version control systems.
git commit -v: See Your Diff While Writing the Message
The -v flag (short for --verbose) is one of the most underrated flags in all of Git. When you run git commit -v, Git opens your editor as usual, but it appends a full unified diff of your staged changes at the bottom of the editor window:
git commit -vInside the editor you will see:
# Please enter the commit message for your changes.
# ...
# ------------------------ >8 ------------------------
# Do not touch the line above.
# Everything below will be removed from the commit message.
diff --git a/src/login.js b/src/login.js
index 3b9e2a..f1c8d7 100644
--- a/src/login.js
+++ b/src/login.js
@@ -42,7 +42,10 @@ function authenticate(user) {
-  const role = user.getRole();
+  if (!user) {
+    return guestRole;
+  }
+  const role = user.getRole();
That diff is shown for reference only. The >8 scissors line marks the boundary: everything below it is stripped out before the commit is saved. Your message goes above the scissors line. The diff content never ends up in the actual commit message.
This is extremely useful when you want to write a precise commit message that accurately describes every change, without having to switch back and forth between your editor and a terminal running git diff --cached.
If you specify -v twice (git commit -vv), Git adds a second diff at the bottom showing the unstaged changes in your working directory, alongside the staged diff. This gives you a full picture of what you staged versus what you left out.
Tip: Make -v your default
Many developers set -v as the permanent default: git config --global commit.verbose true. Once you get used to having the diff visible while writing the message, committing without it feels oddly blind.
git commit — dry-run: Simulate Before You Commit
The --dry-run flag does not create a commit. Instead, it shows you a summary of what would be included in a commit if you ran it right now, listing which files are staged, which have local modifications that are not staged, and which are untracked. It is like asking Git: "If I committed right now, what would be in it?"
git commit --dry-runThe output looks like a git status report:
On branch feature/login-fix
Changes to be committed:
  (use "git restore --staged <file>..." to unstage)
        modified:   src/login.js
        new file:   src/auth/token.js

Changes not staged for commit:
        modified:   src/styles.css

Untracked files:
        debug.log
You can combine --dry-run with -a to simulate what git commit -a would include, or with a list of paths to simulate a path-specific commit.
There are also output format options that work alongside --dry-run:
--short: gives a compact, shorter output format--porcelain: gives machine-readable output suitable for scripting--long: gives the full verbose output (the default)--branch: shows branch and tracking information even with short output
Real World: Using — dry-run in scripts and CI pipelines
In automated scripts, git commit --dry-run --porcelain lets you check whether there are any uncommitted staged changes without actually creating a commit. The exit code is non-zero if there is nothing to commit, so you can use it as a condition. Teams use this pattern to detect uncommitted generated files in CI pipelines: if the generated code was updated but not committed, the build fails and the developer knows they forgot a step.
git commit -F: Using a File as the Commit Message
Sometimes your commit message is long, complex, or needs to be generated programmatically. Instead of writing everything inline with -m, you can store the message in a file and point git commit to it using -F (or --file):
# Write the message in a separate file first
cat > /tmp/commit_msg.txt << 'EOF'
Refactor authentication module for OAuth 2.0 support

Replaced the legacy session-based auth with OAuth 2.0 token exchange.
This is a breaking change for internal API clients: all clients must
now include a Bearer token in the Authorization header.

Migration guide: https://wiki.internal/auth-migration
Closes: INFRA-891, INFRA-905
EOF

git commit -F /tmp/commit_msg.txt
You can also read the message from standard input by using a dash as the filename:
# Pipe a message directly from a script or echo
echo "Deploy tag: v2.4.1 $(date +%Y-%m-%d)" | git commit -F -
This pattern is common in release scripts and automated pipelines where the commit message is assembled from variables, version numbers, or changelog entries.
git commit — no-verify: Bypassing Hooks
Git allows you to install scripts called hooks that run automatically at certain points in the workflow. Two hooks run during the commit process: pre-commit runs before the commit message is even requested, and commit-msg runs after you have typed your message to validate it. You will learn much more about hooks in the Advanced section.
The --no-verify flag (also spelled -n) bypasses both hooks:
git commit --no-verify -m "WIP: do not merge, quick save"
git commit -n -m "Emergency hotfix: bypass linting for now"
Warning: — no-verify should be rare and intentional
Hooks exist for good reasons. A pre-commit hook might run your test suite, your linter, or a security scanner that checks for accidentally committed passwords. A commit-msg hook might enforce a ticket number in every commit message. Using --no-verify means deliberately skipping those checks. In a team environment, using it routinely signals that you do not respect the process. Use it only for genuine emergency situations or when you are creating a temporary work-in-progress commit that will never be pushed.
git commit -s: Adding a Signed-off-by Trailer
The -s flag (or --signoff) appends a special line to the end of your commit message:
Signed-off-by: Jane Smith <jane@example.com>The information is pulled from your user.name and user.email configuration. This is a convention that originated in the Linux kernel development process and is widely used in large open-source projects. Its meaning varies by project, but the general idea is: the person who signed off has reviewed the change, confirms they have the right to contribute it, and agrees with the project's contributor agreement (often the Developer Certificate of Origin, or DCO).
git commit -s -m "Add IPv6 support to network listener"The resulting commit message becomes:
Add IPv6 support to network listener

Signed-off-by: Jane Smith <jane@example.com>
You can also use --no-signoff to cancel an earlier --signoff option if you have it set in a script or alias and want to override it for a specific commit.
Real World: Signed-off-by in open-source projects
If you contribute to the Linux kernel, Git itself, or many other major open-source projects, every commit is required to have a Signed-off-by line. The DCO (Developer Certificate of Origin) at developercertificate.org lays out exactly what you are certifying. Some GitHub repositories enforce this with a bot that checks every pull request commit and rejects any that are missing the trailer. If you contribute to such a project and forget the -s flag, you will need to amend your commits.
Intermediate Pitfalls
Pitfall 1: Amending a pushed commit and force-pushing This bears repeating because it causes real damage on teams. Once a commit is on a shared remote, amending it and force-pushing rewrites history that others have pulled. Their local branches will diverge from the remote, leading to confusing merge conflicts or lost work. If you need to fix a commit that is already on a remote branch, create a new commit that corrects it. Do not amend and force-push to shared branches.
Pitfall 2: Using -am and wondering where your new file went
Hundreds of developers have been confused by this. You create a new file, you run git commit -am "add new feature", you check git show HEAD, and the new file is not there. The -a flag does not know about files that have never been staged. Git has to be introduced to a file via git add at least once. After that, -a will track its changes automatically.
Pitfall 3: Confusing — dry-run with a safety check you can rely on for complex operations
--dry-run simulates what would be included in the commit, not what the final state of your repo will look like. It is a previewing tool, not a transaction preview. For complex multi-step Git operations, dry run alone may not tell you everything you need to know.
Pitfall 4: Forgetting that — amend changes the commit hash
Even if you run git commit --amend with exactly the same message and exactly the same staged content as the original commit, the hash will change. Why? Because the timestamp of the commit is also part of the hash, and a new commit is created at the current time. This is relevant when you are using commit hashes in scripts, documentation, or issue tracker references.
Pitfall 5: Ignoring what -v tells you
Many developers have committed the wrong content because they did not look carefully at what was staged. Using git commit -v and actually reading the diff before you type your message is one of the best habits you can form. The diff is right there in your editor. Use it.
Level 3 Advanced: Precision Tools for Power Users
This level covers the flags and techniques that separate a developer who uses Git from a developer who truly understands Git. You will learn how to reuse and restructure commit messages, how to prepare commits for automated rebase squashing, how to override metadata, how to cryptographically sign your commits, and how hooks give you complete control over the commit process. These are the tools that make large-scale collaborative development and open-source contribution feel manageable rather than chaotic.
-C and -c: Reusing a Commit Message From Another Commit
Sometimes you need to create a new commit that should have the same message (and author information) as an existing commit. Git gives you two flags for this:
-C <commit> / --reuse-message=<commit>Takes the log message, author, and timestamp from the specified commit and uses them for the new commit. The editor does NOT open. The entire message is reused verbatim and silently.
-c <commit> / --reedit-message=<commit>Like -C, but the editor DOES open, pre-filled with the existing commit's message. You can then edit it before committing. Think of lowercase -c as "reuse and let me edit" and uppercase -C as "reuse silently."
# Reuse the message from the last commit silently (useful in scripts)
git commit -C HEAD

# Reuse the message from a specific commit by its hash, silently
git commit -C a3f2b91

# Reuse and open the editor to tweak the message
git commit -c HEAD~2
The most common scenario for -C HEAD is when you are working in a script that needs to re-create the last commit with different staged content but the same message, for example after splitting a large commit into smaller ones manually.
— fixup and — squash: Targeted History Rewriting With Autosquash
This is one of the most powerful patterns in the entire Git toolset, and also one of the least known. The idea is this: while you are working on a feature branch, you sometimes realize that a change you just made is actually a correction or improvement to a commit you made earlier in the same branch. Instead of creating a vague “fix” commit, you can use --fixup to create a commit that is explicitly tagged as a fix for a specific earlier commit, and then have Git automatically merge them together when you rebase.
Here is how it works step by step:
# You made C1, C2, C3 on your feature branch
# Now you find a bug that belongs with C2

# Stage the fix normally
git add src/broken-file.js

# Create a fixup commit targeting C2 by its hash
git commit --fixup=b81d94e

# Git automatically names the commit "fixup! Fix validation logic in signup form"
# (where "Fix validation logic in signup form" was C2's message)
Now your history looks like: C1, C2, C3, fixup!C2. When you are ready to clean up before merging your PR, you run:
git rebase -i --autosquash origin/mainGit automatically rearranges the fixup commit right after C2 and marks it to be squashed in, without any input from you. The result is a clean history where C2 now contains its own fix and there is no trace of the messy intermediate state.

Figure 7: The — fixup and — autosquash workflow. Create fixup commits as you go, then let git rebase — autosquash fold them in automatically. The result is a clean history with no “fix lint” or “oops” commits.
There are three variants of --fixup:
--fixup=<commit>: Standard fixup. Changes the content of the target commit but keeps its original message untouched. The fixup commit's own message is discarded after squashing.--fixup=amend:<commit>: Like a standard fixup, but also replaces the target commit's message with the message of the fixup commit. Useful when you want to both fix content and update the description.--fixup=reword:<commit>: Only changes the commit message of the target commit. Does not touch the file content at all. This is equivalent to using--fixup=amend:<commit>combined with--only.
The sibling flag --squash=<commit> is similar to --fixup but creates a "squash!" prefix instead. During rebase, instead of silently merging the message away, it opens the editor with both messages combined, letting you craft a new unified message.
Tip: Make autosquash permanent with a config setting
If you use --fixup frequently, set this: git config --global rebase.autoSquash true. Then every git rebase -i will behave as if --autosquash was always passed, saving you from typing it every time.
— author and — date: Overriding Commit Metadata
Sometimes you need to create a commit that records a different author or a different date than the current user and current time. Git provides flags for both.
# Commit as a different author
git commit -m "Add payment integration" \
  --author="Alice Johnson <alice@company.com>"

# Commit with a backdated timestamp (useful for migrations)
git commit -m "Initial commit" \
  --date="2024-01-15T09:00:00+0100"

# Human-readable date formats also work
git commit -m "Archive old logs" \
  --date="yesterday"

git commit -m "Year-end summary" \
  --date="last Friday at noon"

# Combine both
git commit -m "Port feature from old repo" \
  --author="Bob Lee <bob@old-company.com>" \
  --date="2023-06-10T14:30:00Z"
Git supports several date formats: the Git internal format (Unix timestamp plus timezone offset), RFC 2822 format, ISO 8601 format, and natural language dates like “yesterday” or “last Friday at noon.” Note that --date only affects the author date field. The committer date is always the current time unless you use the GIT_COMMITTER_DATE environment variable.
Real World: When you legitimately need — author
The classic scenario is pair programming or mob programming. Two or three developers write code together. Only one of them runs the actual git commit command. By using --author, you can properly credit the person who wrote the majority of the code, even though someone else physically ran the commit. Some teams use a convention of listing all contributors in the commit message body as "Co-authored-by" trailers (which GitHub renders specially), while using --author for the primary author.
— reset-author: Taking Ownership of an Amended Commit
When you amend a commit or create one with -C or -c, Git preserves the original author and author date by default. The --reset-author flag changes that behavior: it sets the author to the current committer (you) and resets the author date to now.
# You cherry-picked someone else's commit and made changes
# Now you want to take authorship of the modified version
git commit --amend --reset-author --no-edit
This is also useful in open-source workflows where a maintainer needs to make small edits to a contributor’s commit before merging, and wants the history to accurately reflect who the final version was written by.
-p: Committing Specific Hunks
Just like git add -p, the -p flag on git commit puts you into interactive patch mode. Instead of committing everything that is staged, it asks you hunk by hunk which pieces of your changes you want to include in this commit.
git commit -p -m "Fix login handler: null check only"This is useful when you realize you have mixed multiple logical changes in the same file and want to commit them separately without going back to git add -p first. The interface is identical to git add -p: Git shows you each diff hunk and asks Stage this hunk [y,n,q,a,d,/,s,e,?]?
You can also use --interactive (-i) for the full interactive menu that includes status, add, revert, diff, and patch options in a numbered menu. This is the same interface as git add -i applied at commit time.
— cleanup: Controlling How Your Message Is Processed
Before Git saves your commit message, it passes it through a cleanup process. The --cleanup flag lets you control exactly what that process does. This matters when your message might contain characters or formatting that Git's default cleanup would modify.
Mode: strip
What It Does: Strips leading/trailing blank lines, trailing whitespace, and comment lines (lines starting with #). It also collapses multiple consecutive blank lines. This is the default when an editor opens.
When to Use It: Default for interactive commits. Cleans up editor artifacts.
Mode: whitespace
What It Does: Same as strip, except comment lines starting with # are kept in the message. Only trailing whitespace and blank lines are cleaned.
When to Use It: Use it when your message legitimately contains lines starting with #, such as Markdown headings.
Mode: verbatim
What It Does: Does nothing. The message is saved exactly as-is, byte for byte.
When to Use It: Use it in scripted workflows where precise control over the message is required.
Mode: scissors
What It Does: Same as whitespace, except it also strips everything from the scissors marker line (# ---- >8 ----) onward when the message is being edited. This is what -v uses.
When to Use It: Use it when working with templates that include a scissors separator.
Mode: default
What It Does: Acts like strip when an editor is open, and like whitespace when the message is provided non-interactively (via -m or -F).
When to Use It: Default mode. You rarely need to specify this explicitly.
# Use verbatim to preserve a message generated by a script exactly
git commit --cleanup=verbatim -F /tmp/generated_message.txt

# Use whitespace if your message starts a section with # headers
git commit --cleanup=whitespace -m "$(cat changelog_entry.md)"
— trailer: Structured Metadata in Commit Messages
The --trailer flag adds structured key-value pairs to the end of your commit message in the conventional trailer format. Trailers are lines of the form Key: Value at the very end of the message, separated from the body by a blank line.
# Add multiple trailers in one commit command
git commit -m "Add OAuth2 login support" \
  --trailer "Reviewed-by: Alice Johnson <alice@co.com>" \
  --trailer "Co-authored-by: Bob Lee <bob@co.com>" \
  --trailer "Fixes: #892" \
  --trailer "Refs: #887, #891"
The resulting commit message becomes:
Add OAuth2 login support

Reviewed-by: Alice Johnson <alice@co.com>
Co-authored-by: Bob Lee <bob@co.com>
Fixes: #892
Refs: #887, #891
Several of these trailer keys have special meaning on platforms like GitHub and GitLab. Co-authored-by is rendered by GitHub as additional contributors to the commit. Fixes: #N and Closes: #N automatically close the referenced issue when the commit is merged to the default branch.
You can configure how Git handles duplicate trailers and where specific trailers are placed using the trailer.* family of configuration variables in your gitconfig.
-S: GPG-Signing Your Commits
Git allows you to cryptographically sign your commits using GPG (GNU Privacy Guard). A signed commit proves that the commit was created by someone who holds a specific private key, providing a verifiable chain of authorship that cannot be faked.
# Sign with your default GPG key
git commit -S -m "Release v2.4.0"

# Sign with a specific key ID
git commit -S=ABCD1234 -m "Release v2.4.0"

# Override commit.gpgSign config and explicitly NOT sign
git commit --no-gpg-sign -m "WIP: local only"
Figure 8: GPG-signed commits use asymmetric cryptography. You sign with your private key, anyone can verify with your public key. GitHub and GitLab display a green Verified badge next to commits with valid signatures.
To use GPG signing, you need to:
- Generate a GPG key:
gpg --full-generate-key - Find your key ID:
gpg --list-secret-keys --keyid-format=long - Tell Git which key to use:
git config --global user.signingkey YOUR_KEY_ID - Optionally sign all commits by default:
git config --global commit.gpgSign true - Upload your public key to GitHub or GitLab so they can display the Verified badge
Modern Git also supports signing with SSH keys instead of GPG, which many developers find simpler since they already have SSH keys for repository access:
# Configure SSH signing
git config --global gpg.format ssh
git config --global user.signingkey ~/.ssh/id_ed25519.pub
git config --global commit.gpgSign true
Committing Specific Files With Pathspec Arguments
You can pass file paths directly to git commit as arguments. This is different from staging with git add: when you give paths to git commit, it records only the changes to those specific files, bypassing the staging area entirely for the purpose of that commit.
# Commit changes to specific files only
# (even if other files are staged, they are ignored for this commit)
git commit src/login.js src/auth.js -m "Fix authentication module"

# Use glob patterns
git commit "src/**/*.js" -m "Update all JS source files"
This mode records the current working tree content of the named files, not what is in the staging area. Their content is also automatically staged for the next commit. This can be confusing and is rarely used in modern workflows, where git add followed by git commit is much clearer.
You can also use --pathspec-from-file=<file> to read the list of paths from a text file, one path per line. This is useful in scripts where you have a dynamically generated list of files to commit:
# Generate a list of changed configuration files
find config/ -name "*.yml" -newer last_deploy.txt > /tmp/changed_configs.txt
git commit --pathspec-from-file=/tmp/changed_configs.txt \
  -m "Update deployment configuration files"

# Use NUL separator for filenames with spaces or special characters
find . -name "*.json" -print0 | git commit --pathspec-from-file=- \
  --pathspec-file-nul -m "Update all JSON files"
-i and -o: Include and Only Modes
These two flags control how Git combines staged content with file paths given as arguments.
-i / --includeStages the contents of the path arguments in addition to what is already staged, then commits everything together. Useful when you want to add a few extra files to a commit that is otherwise already staged. This is typically used when concluding a conflicted merge resolution.
-o / --onlyCommits only the paths specified as arguments, ignoring everything that is already in the staging area. If this option is specified together with --amend and no paths are given, it amends the commit without committing currently staged changes, which is useful when you want to reword the last commit message without accidentally including something new.
# Amend only the message, do not include anything from the staging area
git commit -o --amend -m "Better subject line for the last commit"

# Stage a lot of files, then commit only two of them with -o
git add src/
git commit -o src/login.js src/auth.js -m "Auth module: initial implementation"
# The rest of src/ remains staged for the next commit
Git Hooks That Interact With git commit
A hook is an executable script that Git runs automatically at a specific point in a workflow. For git commit, there are four hooks, each running at a different stage:

Figure 9: The four commit-related hooks run in sequence. Hooks 1, 2, and 3 can abort the commit by exiting with a non-zero status. Only post-commit cannot stop the commit, since it runs after the commit is already done.
Hooks are stored as executable files in the .git/hooks/ directory of your repository. Git ships sample hook files with a .sample extension: to activate one, remove the extension and make sure the file is executable. Hooks can be written in any scripting language your system supports: bash, Python, Ruby, Node.js, and so on.
# Example pre-commit hook that runs eslint before every commit
# File: .git/hooks/pre-commit (must be executable: chmod +x)

#!/bin/sh
npm run lint --silent
if [ $? -ne 0 ]; then
  echo "Linting failed. Fix errors before committing."
  exit 1
fi
# Example prepare-commit-msg hook that prepends the branch name
# Extracts JIRA ticket like PROJ-123 from the branch name
#!/bin/bash
BRANCH=$(git branch --show-current)
TICKET=$(echo "$BRANCH" | grep -oE '[A-Z]+-[0-9]+')
if [ -n "$TICKET" ]; then
sed -i "1s/^/$TICKET: /" "$1"
fiHooks are local to your machine by default: they live in .git/hooks/ which is not tracked by Git itself. To share hooks with your team, a common approach is to store them in a .githooks/ directory in the repository root and configure Git to use that path:
git config core.hooksPath .githooksEnvironment Variables: GIT_AUTHOR and GIT_COMMITTER
Git’s author and committer information can be overridden not just with flags but with environment variables. This is particularly important for scripted and automated workflows where setting configuration files is not practical.
# Override author identity for a single commit
GIT_AUTHOR_NAME="Release Bot" \
GIT_AUTHOR_EMAIL="releases@company.com" \
GIT_AUTHOR_DATE="2025-01-01T00:00:00Z" \
git commit -m "v3.0.0 release"

# Override committer separately
GIT_COMMITTER_NAME="CI Server" \
GIT_COMMITTER_EMAIL="ci@company.com" \
git commit -m "Auto-generated migration"
The six environment variables are: GIT_AUTHOR_NAME, GIT_AUTHOR_EMAIL, GIT_AUTHOR_DATE, GIT_COMMITTER_NAME, GIT_COMMITTER_EMAIL, and GIT_COMMITTER_DATE. When set, they override the values from your git config. When unset, Git falls back to user.name and user.email from the configuration.
Author vs. Committer: What the Difference Means in Practice

Figure 10: The four scenarios where Author and Committer differ. In normal single-developer commits they are the same. Operations like cherry-pick, rebase, and patch application separate them to preserve accurate attribution.
Configuration Variables That Affect git commit
Several git config settings change the default behavior of git commit. Knowing these lets you customize your workflow once globally and stop passing the same flags every time:
Config Variable: commit.verbose
What It Controls: Whether to show the diff in the editor when committing interactively (same as always passing -v)
Default: false
Example Value: true
Config Variable: commit.template
What It Controls: Path to a file used as the default message template in the editor
Default: none
Example Value: ~/.gitmessage.txt
Config Variable: commit.status
What It Controls: Whether to include the output of git status in the commit message editor
Default: true
Example Value: false
Config Variable: commit.gpgSign
What It Controls: Sign all commits with GPG by default (same as always passing -S)
Default: false
Example Value: true
Config Variable: commit.cleanup
What It Controls: Default message cleanup mode used when the editor opens
Default: default
Example Value: scissors
Config Variable: core.editor
What It Controls: The text editor Git opens for commit messages and other editing
Default: vi
Example Value: code --wait
Config Variable: rebase.autoSquash
What It Controls: Whether git rebase -i automatically squashes fixup! and squash! commits
Default: false
Example Value: true
Config Variable: user.signingkey
What It Controls: The GPG or SSH key ID to use for signing commits
Default: none
Example Value: ABCD1234EFGH5678
Config Variable: commit.signoff
What It Controls: This does NOT exist. There is no config option to automatically add signoff. You must use -s each time or create an alias.
Default: n/a
Example Value: use alias instead
Config Variable: i18n.commitEncoding
What It Controls: Declares the encoding used for commit messages (default is UTF-8)
Default: UTF-8
Example Value: ISO-8859-1
A popular setup for a developer who always wants verbose commits and uses VS Code:
git config --global core.editor "code --wait"
git config --global commit.verbose true
git config --global commit.template ~/.gitmessage.txt
And a typical ~/.gitmessage.txt template:
# Subject: (50 chars or less, imperative mood)

# Body: (Why? What? Wrap at 72 chars.)
#
# Refs: #
# Co-authored-by: Name <email@example.com>
Every time you run git commit, the editor opens pre-filled with that template. The comment lines remind you of the rules, and the trailer fields are right there waiting to be filled in.
Real-World Advanced Workflows
Workflow 1: The Perfect Feature Branch Before Merging
Before merging a feature branch into the main branch, many teams expect a clean and logical commit history. Here is how to achieve that using everything you have learned:
# While working on the feature, make regular commits freely
git commit -m "WIP: scaffold login component"
git commit -m "Add form validation"
git commit --fixup=HEAD~1     # fix a bug in the form validation commit
git commit -m "Add unit tests for login"
git commit --fixup=HEAD~1     # fix a test assertion
git commit -m "Add error messages to login form"

# When ready to open the pull request, clean up
git rebase -i --autosquash origin/main

# Now sign the clean commits if your team requires it
git rebase HEAD~4 --exec 'git commit --amend -S --no-edit'
Workflow 2: The Release Commit Script
# A release script that creates a perfectly formed commit
VERSION="v2.5.0"
DATE=$(date -u +%Y-%m-%dT%H:%M:%SZ)

# Build the changelog entry
CHANGELOG=$(git log --oneline origin/main..HEAD | head -20)

git commit \
  --allow-empty \
  -m "Release $VERSION" \
  -m "$(echo "$CHANGELOG")" \
  --trailer "Release-date: $DATE" \
  --trailer "Released-by: $(git config user.name)" \
  -S
Workflow 3: Pair Programming Attribution
# You and a colleague wrote this together
git commit \
  --author="Alice Johnson <alice@company.com>" \
  -m "Implement real-time notifications" \
  --trailer "Co-authored-by: Bob Lee <bob@company.com>"
Workflow 4: Importing Commits From Another Repository
# Preserve original author and date when porting commits
# between repositories (common in open-source contribution)

GIT_AUTHOR_NAME="$(git log -1 --format='%an' <original-hash>)" \
GIT_AUTHOR_EMAIL="$(git log -1 --format='%ae' <original-hash>)" \
GIT_AUTHOR_DATE="$(git log -1 --format='%aI' <original-hash>)" \
git commit -C <original-hash>
Advanced Pitfalls
Pitfall 1: Using — fixup on commits that have already been pushed
The --fixup and --autosquash workflow requires rebasing. Rebasing rewrites history. If the commits you are fixing up have already been pushed to a shared remote, rebasing will cause the same force-push problems as amending. The entire pattern is designed for use on local feature branches that have not been shared yet. Once you push, switch to regular "fix: description" commits instead.
Pitfall 2: GPG signing failing silently
If you have commit.gpgSign = true and your GPG agent is not running or your key has expired, git commit will fail with a cryptic error. This is particularly annoying when it happens in the middle of an automated pipeline. Always make sure your GPG key is valid (check with gpg --list-keys) and your agent is running (gpg-agent --daemon) before relying on automatic signing. Consider using SSH signing for automated workflows, as SSH key management is generally simpler.
Pitfall 3: Hooks that pass locally but fail in CI Your pre-commit hook runs linting, but it depends on a locally installed tool that is not installed in your CI environment. The commit passes on your machine but the CI build fails. Hooks and CI pipelines need to be consistent. Either use the same toolchain in both places, or use a tool like Husky (for Node.js projects) that pins hook dependencies in your project’s package.json and ensures everyone on the team has the same hooks.
Pitfall 4: The — date flag and the difference between author date and committer date
--date only sets the author date, not the committer date. When you look at the commit with git log, the "Date" field shown is actually the author date by default, so it will show what you set. But if someone sorts commits by committer date (which is how git log --format=%cd works), your backdated commit will appear in the position matching its actual creation time, not the date you specified. This can be confusing in chronological logs. To backdate both, you need to also set the GIT_COMMITTER_DATE environment variable.
Pitfall 5: Reusing commit messages with -C and getting the wrong author
When you use git commit -C <commit>, you get the log message AND the authorship of the original commit. If you are creating a new commit and want to preserve your own authorship while reusing the message, combine it with --reset-author: git commit -C <commit> --reset-author.
Pitfall 6: Trailers being treated as body text
Trailers must come at the very end of the commit message, after a blank line, with no non-trailer lines after them. If you put a trailer in the middle of the body, most tools will not recognize it as a trailer. The --trailer flag handles placement correctly, but if you are writing messages manually or with templates, make sure your trailers are truly at the end with a blank line separating them from the body text.
Quick Reference Card
Everything you need in one place. Keep this section bookmarked.
git commit # Open editor to write commit message
git commit -m "message" # Commit with inline message
git commit -m "subject" -m "body paragraph" # Multi-paragraph message
git commit -a # Stage all tracked changes and commit
git commit -am "message" # Stage tracked changes and commit together
git commit -v # Show diff in editor while writing message
git commit -vv # Show staged AND unstaged diff in editor
git commit --dry-run # Preview what would be committed
git commit --dry-run --short # Preview in compact format
git commit --dry-run --porcelain # Preview in machine-readable format
git commit --amend # Replace last commit (opens editor)
git commit --amend -m "new message" # Replace last commit with new message
git commit --amend --no-edit # Add staged files to last commit, keep message
git commit --amend --reset-author # Amend and update author to current user
git commit --allow-empty -m "message" # Commit with no file changes
git commit --allow-empty-message # Commit with empty message (rare)
git commit -F /path/to/file.txt # Use file content as commit message
git commit -F - # Read message from stdin
git commit -n # Skip pre-commit and commit-msg hooks
git commit --no-verify # Same as -n
git commit -s # Add Signed-off-by trailer
git commit --signoff # Same as -s
git commit -C HEAD # Reuse last commit message silently
git commit -C a3f2b91 # Reuse specific commit message silently
git commit -c HEAD # Reuse last message and open editor
git commit --fixup=<hash> # Create fixup commit for a target commit
git commit --fixup=amend:<hash> # Fixup that also replaces the message
git commit --fixup=reword:<hash> # Replace message only, no content change
git commit --squash=<hash> # Create squash commit for target
git commit --author="Name <email>" # Override author identity
git commit --date="2025-01-01T09:00" # Override author date
git commit --date="yesterday" # Natural language dates work too
git commit -p # Interactive patch: choose hunks to commit
git commit --interactive # Full interactive staging menu before commit
git commit --cleanup=strip # Strip comments and extra whitespace
git commit --cleanup=verbatim # Save message exactly as written
git commit --cleanup=scissors # Use scissors line as message boundary
git commit --trailer "Key: Value" # Add structured trailer to message
git commit -S # GPG sign with default key
git commit -S=ABCD1234 # GPG sign with specific key ID
git commit --no-gpg-sign # Override commit.gpgSign=true for this commit
git commit -q # Quiet: suppress commit summary output
git commit -e # Force editor open even when message given
git commit --no-edit # Skip editor (used with --amend)
git commit -i <file> # Stage file and include with existing staged
git commit -o <file> # Commit only this file, ignore staged
git commit --pathspec-from-file=list.txt # Read paths to commit from file
git commit --pathspec-file-nul # Use NUL separator in pathspec file
git commit --no-post-rewrite # Skip post-rewrite hook
git commit -u # Control untracked files display
git commit -t <template-file> # Use template file for message editor
Complete Flags Reference Table
Every flag and option from the official manual in one place.
Short: -a
Long Form: --all
What It Does: Automatically stage all modifications and deletions for tracked files, then commit. Does not add new untracked files.
Level: Beginner
Short: (none)
Long Form: --amend
What It Does: Replace the most recent commit with a new one. Retains original message unless a new one is given. Retains original author unless --reset-author is used.
Level: Intermediate
Short: (none)
Long Form: --no-edit
What It Does: Use the existing commit message without opening an editor. Most commonly used with --amend.
Level: Intermediate
Short: -m
Long Form: --message=<msg>
What It Does: Use the given text as the commit message. Multiple -m flags create separate paragraphs. Mutually exclusive with -F, -c, and -C.
Level: Beginner
Short: -v
Long Form: --verbose
What It Does: Show the staged diff in the commit message editor. Specified twice, also shows unstaged diff. Does not become part of the commit message.
Level: Beginner
Short: -q
Long Form: --quiet
What It Does: Suppress the commit summary output that normally prints the branch, hash, and file statistics.
Level: Intermediate
Short: (none)
Long Form: --dry-run
What It Does: Simulate the commit. Show what would be included but do not actually create a commit. Useful for previewing and scripting.
Level: Intermediate
Short: (none)
Long Form: --short
What It Does: Use short-format output for --dry-run. Implies --dry-run.
Level: Intermediate
Short: (none)
Long Form: --branch
What It Does: Show branch and tracking information in short-format dry-run output.
Level: Intermediate
Short: (none)
Long Form: --porcelain
What It Does: Use machine-readable porcelain output for --dry-run. Implies --dry-run.
Level: Advanced
Short: (none)
Long Form: --long
What It Does: Use long-format output for --dry-run. This is the default. Implies --dry-run.
Level: Intermediate
Short: -z
Long Form: --null
What It Does: In short or porcelain output mode, terminate entries with NUL instead of LF. Safe for filenames with special characters.
Level: Advanced
Short: -F
Long Form: --file=<file>
What It Does: Read commit message from a file. Use - to read from stdin. Mutually exclusive with -m, -c, -C.
Level: Intermediate
Short: -t
Long Form: --template=<file>
What It Does: Pre-fill the commit message editor with the contents of a template file. Aborts if user exits without editing. Overrides commit.template config.
Level: Advanced
Short: -s
Long Form: --signoff
What It Does: Append a Signed-off-by trailer using the committer's name and email. Meaning depends on the project (often DCO compliance).
Level: Intermediate
Short: (none)
Long Form: --no-signoff
What It Does: Cancel an earlier --signoff option (useful in scripts).
Level: Advanced
Short: (none)
Long Form: --trailer <key>[:=]<value>
What It Does: Add a structured trailer line to the commit message. Multiple --trailer flags are allowed. Follows gitinterpret-trailers rules.
Level: Advanced
Short: -n
Long Form: --no-verify
What It Does: Bypass the pre-commit and commit-msg hooks. Use sparingly; these hooks exist to protect code quality.
Level: Intermediate
Short: -e
Long Form: --edit
What It Does: Force the editor to open even when a message is provided via -m, -F, or -C. Lets you refine the message before committing.
Level: Intermediate
Short: -C
Long Form: --reuse-message=<commit>
What It Does: Take log message and authorship from an existing commit without opening an editor. Silent and exact.
Level: Advanced
Short: -c
Long Form: --reedit-message=<commit>
What It Does: Like -C but opens the editor pre-filled with the borrowed message so you can modify it.
Level: Advanced
Short: (none)
Long Form: --fixup=<commit>
What It Does: Create a fixup! commit that targets the specified commit. When combined with git rebase --autosquash, the fixup is folded in automatically.
Level: Advanced
Short: (none)
Long Form: --fixup=amend:<commit>
What It Does: Like --fixup but also replaces the target commit's message with the fixup commit's message during autosquash.
Level: Advanced
Short: (none)
Long Form: --fixup=reword:<commit>
What It Does: Create a commit that only changes the message of the target commit, not its content. Shorthand for --fixup=amend: combined with --only.
Level: Advanced
Short: (none)
Long Form: --squash=<commit>
What It Does: Like --fixup but creates a squash! prefix. During rebase, the editor opens to merge both messages, letting you craft a combined description.
Level: Advanced
Short: (none)
Long Form: --reset-author
What It Does: When used with --amend, -C, or -c, sets authorship to the current committer and resets the author timestamp to now.
Level: Advanced
Short: (none)
Long Form: --author=<author>
What It Does: Override the author identity. Use standard "Name <email>" format or provide a name pattern to search for in existing commits.
Level: Intermediate
Short: (none)
Long Form: --date=<date>
What It Does: Override the author date. Supports Git internal format, RFC 2822, ISO 8601, and human-readable formats like "yesterday".
Level: Intermediate
Short: (none)
Long Form: --allow-empty
What It Does: Allow creating a commit with no file changes. Bypasses the protection against empty commits. Useful for markers and CI triggers.
Level: Intermediate
Short: (none)
Long Form: --allow-empty-message
What It Does: Allow creating a commit with no commit message. Used mainly in automated migration scripts.
Level: Advanced
Short: (none)
Long Form: --cleanup=<mode>
What It Does: Control how the commit message is cleaned up. Modes: strip (default), whitespace, verbatim, scissors, default.
Level: Advanced
Short: -p
Long Form: --patch
What It Does: Use interactive patch selection to choose which hunks to commit. Same interface as git add -p.
Level: Advanced
Short: -i
Long Form: --include
What It Does: Stage the listed paths in addition to what is already staged, then commit everything together.
Level: Advanced
Short: -o
Long Form: --only
What It Does: Commit only the listed paths, ignoring everything in the staging area. Default mode when paths are given on the command line.
Level: Advanced
Short: -u
Long Form: --untracked-files[=<mode>]
What It Does: Control how untracked files are shown in dry-run output. Modes: no, normal (default), all.
Level: Advanced
Short: -U<n>
Long Form: --unified=<n>
What It Does: When showing the diff in -v mode or with -p, use n lines of context around each change.
Level: Advanced
Short: (none)
Long Form: --inter-hunk-context=<n>
What It Does: Show up to n lines of context between diff hunks, fusing nearby hunks together. Useful with -v for readability.
Level: Advanced
Short: -S
Long Form: --gpg-sign[=<key-id>]
What It Does: GPG-sign the commit. Key ID is optional; defaults to user.signingkey config or committer identity.
Level: Advanced
Short: (none)
Long Form: --no-gpg-sign
What It Does: Override commit.gpgSign=true for this specific commit. Useful when you have auto-signing enabled but need an unsigned commit.
Level: Advanced
Short: (none)
Long Form: --status
What It Does: Include git status output in the commit message editor template. On by default. Can be overridden with commit.status config.
Level: Advanced
Short: (none)
Long Form: --no-status
What It Does: Do not include git status in the message editor. Overrides commit.status=true config.
Level: Advanced
Short: (none)
Long Form: --no-post-rewrite
What It Does: Bypass the post-rewrite hook. Used mainly by tools performing history rewriting.
Level: Advanced
Short: (none)
Long Form: --pathspec-from-file=<file>
What It Does: Read pathspec arguments from a file. Use - for stdin. Paths are LF or CRLF separated by default.
Level: Advanced
Short: (none)
Long Form: --pathspec-file-nul
What It Does: With --pathspec-from-file: use NUL as path separator. Safe for all filenames including those with spaces and newlines.
Level: Advanced
Short: (none)
Long Form: --
What It Does: Signal end of options. Everything after this is treated as a pathspec, not a flag. Useful when filenames could be confused with flags.
Level: Advanced
Conclusion: git commit Is Where Your Project’s Story Is Written
Most developers think of git commit as a save button. Type the command, push to GitHub, done. But hopefully this guide has reframed that completely. Every commit you create is a permanent entry in a log that your teammates, your future self, and automated tools will read, search, query, and reason about for years. The care you put into each commit is not just technical discipline: it is communication.
At the beginner level, you built the mental model that matters most: commits are permanent snapshots, not diffs. Each commit stores a full picture of your project, linked to its parent. You learned the anatomy of a commit object, the discipline of the edit-stage-commit loop, and what it takes to write a message that is actually useful. You learned why “fix” is not a commit message and why the subject-blank-line-body structure exists and what breaks when you ignore it.
At the intermediate level, you gained the vocabulary for real-world situations. The -am shortcut for tracked-only changes, with its critical limitation around new files. The --amend and --amend --no-edit pair for fixing the last commit without cluttering history, paired with the understanding of why you cannot safely amend commits that have already been pushed. The -v flag that puts the diff right in front of you when you are writing the message. The --dry-run flag for previewing before committing. The -F flag for message files and the --no-verify flag for hook bypassing and the -s flag for signoff trailers.
At the advanced level, you unlocked the tools that make large-scale collaborative development clean and readable. The --fixup and --autosquash pattern for maintaining a clean history on feature branches without losing the safety of frequent commits. GPG and SSH signing for cryptographic authorship verification. The --trailer flag for structured metadata. The four commit hooks and how to use them to enforce quality and automate workflows. The Author-vs-Committer distinction that matters for open-source attribution. The configuration variables that let you set your preferences once and stop repeating yourself.
The next time you type git commit, you now have everything you need to make that commit mean something. Whether it is a tiny fix or a massive refactor, you can give it the message it deserves, sign it if needed, attribute it correctly, and position it cleanly in the history. That is the real purpose of this command: not to save your work, but to tell the truth about what changed and why, one well-crafted snapshot at a time.
This tutorial covers Git 2.x and later. The --pathspec-from-file option requires Git 2.25 or later. The --trailer flag requires Git 2.32 or later. SSH key signing requires Git 2.34 or later. The --fixup=amend: and --fixup=reword: variants require Git 2.32 or later. Run git --version to check your installed version.
**inter-git.com teaches git fundamentals visually: [inter-git.com](https://inter-git.com)** is an interactive Git tutorial where each command is shown visually so you can see exactly how it works in real time. It runs entirely in your browser, so there is nothing to install.
메타데이터
- post_id
- 95fe2da47cb7
- slug
- the-complete-guide-to-git-commit-from-your-first-snapshot-to-mastering-advanced-history-rewriting-95fe2da47cb7
- url
- https://medium.com/@eloquentcoder/the-complete-guide-to-git-commit-from-your-first-snapshot-to-mastering-advanced-history-rewriting-95fe2da47cb7
- canonical_url
- https://medium.com/@eloquentcoder/the-complete-guide-to-git-commit-from-your-first-snapshot-to-mastering-advanced-history-rewriting-95fe2da47cb7
- author_url
- https://medium.com/@eloquentcoder
- status
- ok
- fetched_at
- 2026-06-09 15:37:30