Jewelry Photography Editing Tips for Online Stores
Imagine walking into a jewelry boutique with dusty glass cases, dim lighting, and rings tossed carelessly on a velvet tray. You’d walk…
Jewelry Photography Editing Tips for Online Stores
Jewelry Photography Editing Tips for Online Stores
Imagine walking into a jewelry boutique with dusty glass cases, dim lighting, and rings tossed carelessly on a velvet tray. You’d walk right back out. That’s exactly the experience a poorly edited product photo creates for your online shoppers — except they don’t even have to say a word. They just click away.
In the world of e-commerce, your product photos are your storefront window, your sales team, and your brand ambassador all rolled into one. This is especially true for jewelry. A well-lit, precisely edited photo of a piece can make a $50 ring look worth $500. A blurry, color-distorted image of that same ring can destroy trust before a shopper even reads the price.
The challenge? Unlike clothing or home decor, jewelry is a deeply tactile product. Shoppers can’t feel the weight of a pendant, test how a bracelet sits on their wrist, or watch a diamond catch the light. Your edited photos have to do all of that for them — communicating craftsmanship, quality, and desire through pixels alone.
The good news is that you don’t need a $10,000 studio setup or years of Photoshop training. With the right editing workflow, the correct tools, and a few professional techniques, you can create images that convert casual browsers into confident buyers.
This guide walks you through every stage of jewelry photo editing — from essential software to advanced retouching techniques — plus a complete breakdown of how to optimize your images for SEO, so your products not only look stunning but also get found.
📌 What you’ll learn in this guide: essential editing tools, step-by-step retouching techniques, background removal, color correction, focus stacking, shadow work, SEO image optimization, common mistakes to avoid, and how to build an efficient high-volume workflow.
Why Photo Editing Is Non-Negotiable for Jewelry E-Commerce?
The global jewelry market is worth approximately $348 billion, and a significant — and growing — share of those sales happen online. In that environment, the quality of your product imagery is not a nicety; it’s a competitive necessity.
Consider the psychology of online shopping. When a visitor lands on your product page, they make a trust decision within seconds. That decision is driven almost entirely by what they see. High-quality, professionally edited images signal that your brand takes craftsmanship seriously. Inconsistent, low-quality images signal the opposite.
The E-Commerce Visual Hierarchy
Online shoppers rely on images at every stage of their purchase journey:
• Discovery — A sharp thumbnail in a Google Shopping result or Etsy search gets the click.
• Evaluation — Multiple angles and close-up detail shots build confidence in the product.
• Decision — A lifestyle image showing the piece worn on a person seals the emotional connection.
• Post-purchase — Clean, accurate photos reduce returns by setting correct expectations.
Poor editing disrupts every single one of these stages. An overly brightened photo creates unrealistic expectations and drives returns. An image with a muddy background signals an amateur operation. Inconsistent white balance across your catalog looks unprofessional and erodes brand trust.
The Standard Editing Workflow at a Glance
-
Shoot in RAW format for maximum editing flexibility
-
Import and cull — select only the best shots
-
Global corrections — exposure, white balance, contrast
-
Retouching — remove reflections, dust, scratches
-
Background work — remove, replace, or clean up
-
Detail enhancement — sharpening, noise reduction
-
Color grading — gemstone saturation, metal tone accuracy
-
Export and SEO optimization — correct format, filename, alt text
Essential Tools for Editing Jewelry Photos
Choosing the right editing software depends on your skill level, budget, and output volume. Here’s a breakdown of the most effective tools used by professional jewelry photographers and e-commerce sellers today.
Adobe Lightroom — Best for Batch Editing and Color Correction
Lightroom is the industry standard for organizing and globally editing large catalogs. Its HSL (Hue/Saturation/Luminance) panel is particularly valuable for jewelry, allowing you to isolate and correct specific color ranges — essential when working with gold, silver, rose gold, and gemstones. Lightroom’s preset system also lets you build a signature look and apply it across your entire catalog with one click, saving hours of repetitive work.
Adobe Photoshop — Best for Advanced Retouching
Photoshop is the go-to tool when precision matters most. For jewelry, it excels at removing unwanted reflections, creating precise clipping paths for background removal, applying the dodge and burn technique for light control, and performing frequency separation to smooth metallic surfaces. If you’re working on hero product shots or campaign images, Photoshop’s depth of control is unmatched.
Capture One — Best for Color Grading Metallic Tones
Capture One is preferred by many high-end jewelry photographers for its superior color science, particularly when dealing with the subtle tonal differences between yellow gold, white gold, and platinum. Its tethered shooting support also makes it a natural choice for studio workflows.
AI-Powered Tools — Best for Speed and Beginners
Tools like Photoroom and Remove.bg use AI to automate background removal in seconds. While they can’t replicate the precision of a manual Photoshop clipping path, they’re remarkably effective for standard product shots and ideal for sellers who need to process large batches quickly without advanced software skills.
Free Alternatives
GIMP offers a free, open-source alternative to Photoshop with many of the same retouching capabilities. Canva Pro provides an accessible entry point for basic background removal and exposure adjustments, particularly useful for social media content.
• Adobe Lightroom — Batch editing, presets, catalog management. Suitable for all skill levels. ~$10/mo.
• Adobe Photoshop — Advanced retouching, clipping paths, frequency separation. Intermediate to advanced. ~$23/mo.
• Capture One — Superior color grading, tethered shooting. Intermediate to advanced. ~$24/mo.
• Photoroom — AI background removal, fast turnaround. Beginner-friendly. Free tier available, paid from ~$10/mo.
• Remove.bg — Quick AI background removal. Beginner. Pay per image.
• GIMP — Free, open-source retouching alternative to Photoshop. Intermediate level.
• Canva Pro — Simple edits, social content creation. Beginner. ~$15/mo.
Pre-Editing Checklist — Set Yourself Up for Success
The best editing work starts before you open your software. These pre-editing habits will dramatically reduce the time you spend correcting problems later.
• Shoot in RAW, not JPEG — RAW files retain all image data captured by your camera sensor, giving you far more latitude to correct exposure, white balance, and shadow detail in post without degrading image quality. JPEG discards this data permanently.
• Use a tripod — Even minor camera shake creates soft edges that no amount of sharpening can fully recover. A sturdy tripod is non-negotiable for jewelry macro work.
• Shoot at ISO 100 and f/8–f/11 — These settings deliver the sharpest, cleanest files with the least noise, giving you the best starting point for editing.
• Use a gray card — Photograph a gray card under your shooting lights before each session. This gives you a neutral reference point in Lightroom or Capture One for accurate white balance correction.
• Calibrate your monitor — Color-accurate editing requires a calibrated display. Use a hardware colorimeter (like the X-Rite i1Display) and always export in sRGB for web use.
• Organize files with SEO-friendly names from the start — Rename files immediately on import. Use descriptive names like sterling-silver-hoop-earrings-front.jpg rather than DSC_4821.jpg.
💡 Pro Tip: Create a Lightroom import preset that automatically applies your baseline exposure adjustments, lens correction profile, and noise reduction settings. This saves 5–10 minutes per shoot and ensures every file starts from the same baseline.
Top Jewelry Photography Editing Tips
This is the core of the guide. Work through each of these techniques in order — they build on each other. Master them one at a time and your images will improve dramatically.
Correct Exposure and Contrast
Exposure is the foundation of every jewelry edit. The goal is to achieve bright, clean highlights without blowing out the reflective surfaces of metals or gems. Overexposed highlights lose all surface detail — you’ll see pure white blobs where intricate prong settings and facets should be visible. Underexposed images make even beautiful pieces look dull and cheap.
Always adjust exposure, contrast, and white balance when editing jewelry shots, as these adjustments help emphasize the sophisticated details and ensure your subject looks true to life.
• Use the Histogram panel in Lightroom — aim for a smooth, well-distributed curve with no clipping at either end.
• Pull down Highlights and Whites sliders to recover metallic surface detail.
• Lift Shadows slightly to reveal detail in dark settings and stone undersides.
• Apply a subtle S-curve in Tone Curve to add depth without creating harsh contrast.
• In Photoshop, use Curves adjustment layers non-destructively for precise tonal control.
💡 Before touching any sliders, zoom to 100% and check your key areas: the brightest highlight on the metal, the darkest shadow in a stone setting, and the detail along any engraving or texture work.
Fix White Balance for Accurate Metal Tones
Inaccurate white balance is one of the most damaging and most common jewelry editing mistakes. A color cast — even a subtle one — can make yellow gold look sickly green, white gold look blue, or rose gold look overly orange. Online shoppers who receive a product that looks different from the photo will return it.
Each metal type has an ideal white balance target:
• Yellow Gold — Aim for a warm color temperature of 5000–5500K to preserve the richness of the metal.
• White Gold, Platinum, and Silver — Target a neutral 5500–6000K range to avoid any blue or yellow cast.
• Rose Gold — A slightly warm 4800–5200K brings out the pink tones without making them look orange.
• Colorless Diamonds — A neutral to cool 6000–6500K enhances brilliance and reads as premium to most buyers.
• Colored Gemstones — Match the stone’s natural hue using the HSL panel for fine-tuned, per-color control.
In Lightroom, use the eyedropper tool on a neutral gray surface in the image (or your gray card shot) to set an objective baseline, then make subtle aesthetic adjustments from there. In Photoshop, a Color Balance adjustment layer gives you channel-level control over shadows, midtones, and highlights independently.
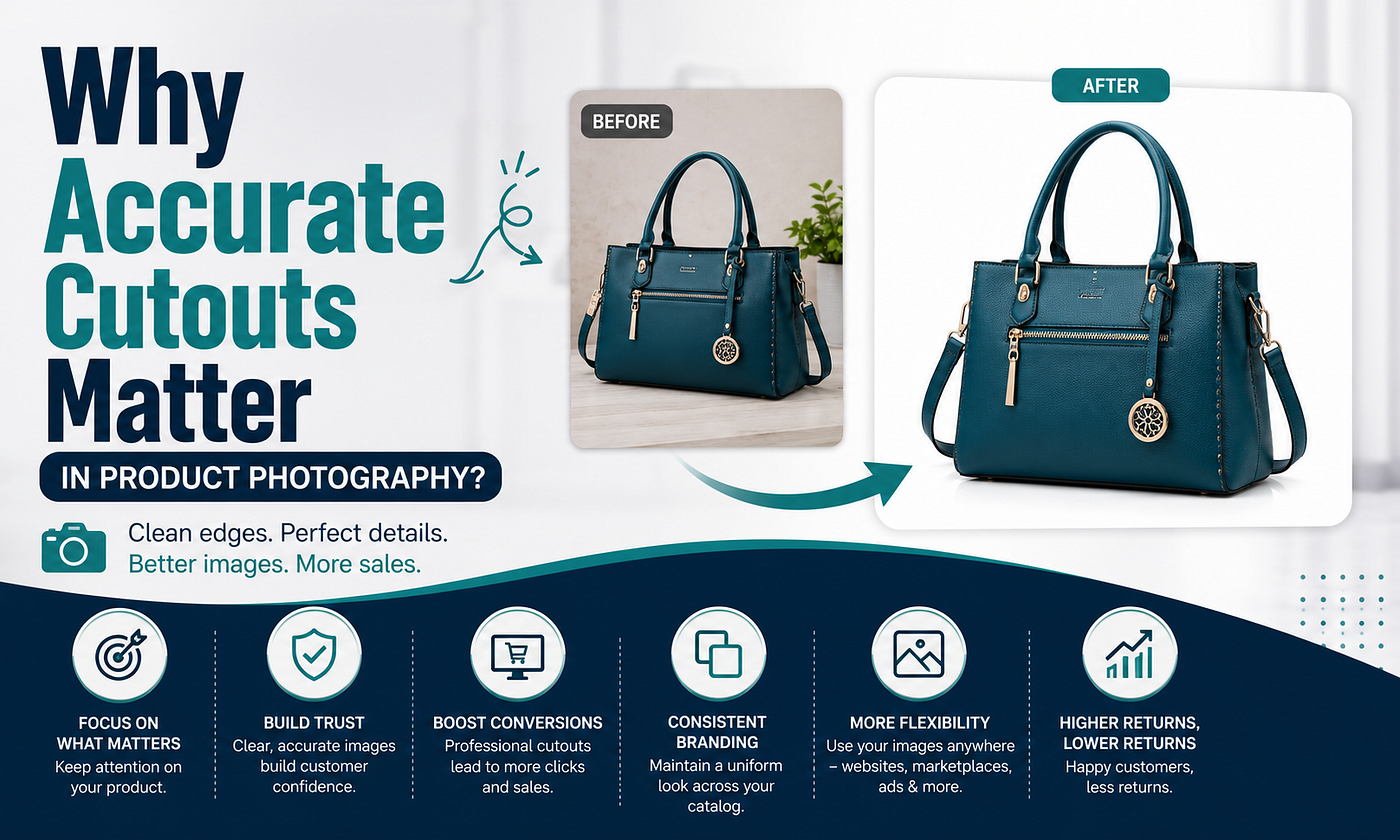
Remove and Replace Backgrounds
Background choice is one of the most visible and impactful editing decisions you’ll make. A clean, consistent background removes distractions and directs all visual attention to the piece. Platform conventions also matter:
• Amazon and Google Shopping — Pure white (#FFFFFF) is often required by platform guidelines. Non-compliance can get listings rejected.
• Shopify product pages — White or very light gray delivers a clean, premium look that suits most jewelry brand aesthetics.
• Etsy listings — Warm neutrals, lifestyle contexts, and textured surfaces align with the handmade and artisan aesthetic that Etsy buyers expect.
• Instagram and Social Media — Lifestyle or brand-consistent styled backgrounds create emotional resonance and drive saves and shares.
• Luxury brand websites — A subtle gradient, deep dark backdrop, or branded accent color elevates the perceived value of high-end pieces.
For precision background removal in Photoshop:
-
Use the Pen Tool to draw a clipping path around the jewelry piece — this is the most accurate method for complex shapes.
-
Convert the path to a selection (Paths panel > Load Path as Selection).
-
Add a Layer Mask to isolate the subject.
-
Use Refine Edge / Select and Mask to clean up fine details like chain links.
-
Place the piece on your chosen background on a layer below.
For AI-assisted background removal (Photoroom, Remove.bg, or Photoshop’s AI Remove Background), always review the result at 100% zoom — AI tools frequently leave artifacts around complex chain structures or thin prongs that require manual cleanup.
Handle Reflections and Glare
Reflections are the most frequent technical challenge in jewelry editing. Jewelry is highly reflective by design — that sparkle is a selling point. But unintended reflections of studio lights, the photographer, or equipment appear as distracting white blobs that obscure surface detail.
Eliminating reflections in post-processing:
• Clone Stamp Tool — Samples a nearby texture and paints over the reflection. Best for small, isolated areas on consistent surfaces like a flat metal band.
• Healing Brush Tool — Similar to Clone Stamp but blends edges automatically. Excellent for gradual reflections on curved surfaces.
• Dodge and Burn — Lightening (dodge) or darkening (burn) specific areas to rebalance the light across a surface without replacing texture. This is the most natural-looking technique for metals.
• Frequency Separation — Separates texture from tone into two layers, allowing you to smooth out blown-out metallic areas while preserving fine engraving or grain texture.
💡 The best time to deal with reflections is at the shoot stage, not in post. Use a polarizing filter on your lens and polarizing sheets over your light sources to eliminate most reflections before the shutter fires.
Sharpen Details and Reduce Noise
Jewelry demands a level of sharpness that most other product categories don’t. Shoppers expect to zoom in and see every prong, every facet, every millimeter of chain link. Soft, slightly blurry images suggest low quality regardless of how beautiful the piece actually is.
Sharpening workflow in Lightroom:
• Amount: 50–80 for jewelry detail shots.
• Radius: 0.8–1.2 — fine radius values preserve metal edge detail without creating haloing.
• Detail: 60–80 — higher values enhance texture and edge sharpness.
• Masking: Hold Alt/Option while dragging to paint sharpening only onto edges, preventing noise from being amplified in smooth background areas.
In Photoshop, Smart Sharpen (Filter > Sharpen > Smart Sharpen) offers more control than Unsharp Mask and handles the highlight/shadow zones of metallic surfaces better. Use the Remove Lens Blur option for the most natural-looking sharpness on jewelry.
For noise reduction, use Lightroom’s Luminance and Color noise sliders conservatively. Over-smoothing creates a plastic-like appearance that destroys the textural qualities that make fine jewelry desirable. Aim to reduce noise just enough that it’s not visible at typical viewing sizes, without affecting surface texture.
Color Grading for Gemstones
Gemstone color accuracy is a legal and ethical obligation in jewelry e-commerce. A ruby that looks fire-engine red in your edited photo but arrives looking dark burgundy in person is a return waiting to happen. At the same time, flat, undersaturated gemstone images fail to capture the brilliance that makes colored stones desirable.
The target: accurate vibrancy. Not oversaturated fantasy, and not washed-out reality.
• In Lightroom’s HSL panel, adjust Hue, Saturation, and Luminance for the specific color of each gemstone independently — a ruby’s red can be adjusted without affecting gold tones.
• For diamonds, target a cool, neutral white with maximum clarity. Slight blue-white tones read as ‘premium’ to most buyers.
• For sapphires, emeralds, and other deeply colored stones, use the Vibrance slider rather than Saturation. Vibrance boosts muted tones more than already-saturated ones, preventing a single color from going neon.
• Build a Lightroom preset for each stone color type — this ensures catalog consistency across multiple photoshoots.
💡 When in doubt about gemstone color accuracy, photograph your piece next to a physical Pantone swatch card and calibrate your edit to match. This creates a defensible, objective reference standard.
Focus Stacking for Macro Shots
One of the inherent limitations of close-up jewelry photography is shallow depth of field. At macro distances, even at f/11, you may only have a few millimeters of sharp focus at any given point. A ring shot from above might have the front half of the band in sharp focus while the far edge is soft. This is where focus stacking transforms your images.
Focus stacking is a compositing technique where you take multiple exposures of the same composition at different focus points — moving the focus plane in small increments across the piece — and then blend all the sharp areas from each frame into a single fully-sharp image in post-processing.
Focus Stacking Workflow:
-
Mount your camera on a sturdy tripod and use a remote shutter release or timer.
-
Set your camera to manual focus. Focus on the nearest point of the jewelry.
-
Take a shot, then move focus slightly further back. Repeat until the entire piece has been covered, typically 5–15 frames.
-
In Photoshop: File > Scripts > Load Files into Stack. Select all frames and check ‘Attempt to Automatically Align Source Images.’
-
Select all layers, then Edit > Auto-Blend Layers > Stack Images. Check ‘Seamless Tones and Colors.’
-
Flatten and refine — manually clean any blending artifacts with the Clone Stamp or Healing Brush.
Dedicated focus stacking software like Helicon Focus or Zerene Stacker offers more advanced control and handles complex jewelry shapes — like chains or articulated bracelets — with fewer artifacts than Photoshop’s native blending.
Adding Shadows and Reflections
Jewelry photographed against a pure white background and then placed directly on a white product page can appear to float unnaturally, creating a disconnected, artificial look. A well-crafted shadow grounds the piece visually and gives it dimensional weight. A mirror reflection adds a touch of luxury that resonates particularly well for fine jewelry brands.
Drop Shadow vs. Natural Shadow:
• Drop shadows (created digitally in Photoshop using Layer Effects) are fast but often look artificial — the angle, softness, and color rarely match the original shoot lighting.
• Natural shadows captured in-camera and preserved through the background removal process look far more authentic. During your shoot, position a sheet of white acrylic below the piece to capture a soft, natural shadow that you retain during background cleanup.
Creating a Mirror Reflection Effect in Photoshop:
-
Duplicate the jewelry layer.
-
Flip it vertically: Edit > Transform > Flip Vertical.
-
Position it directly below the original piece.
-
Add a layer mask and apply a gradient (black to transparent, top to bottom) to fade the reflection out naturally.
-
Reduce the reflection layer’s opacity to 20–35% for a subtle, realistic result.
SEO Optimization of Your Jewelry Images
Editing beautiful images is only half the equation. If those images aren’t optimized for search engines, they exist in a vacuum. Image SEO is a significant and often overlooked traffic channel for jewelry stores — Google Image Search, Google Shopping, and Pinterest’s visual search engine can all drive meaningful purchase-intent traffic directly to your product pages.
File Naming: Your First SEO Signal
Every image file you upload to your website has a filename that search engine crawlers read. This is a direct, cost-free SEO opportunity that most sellers completely waste by leaving camera-generated filenames like IMG_2841.jpg intact.
The rule: your filename should describe the product using the same keywords a shopper would type into Google.
For example, a default camera file named IMG_4821.jpg tells search engines absolutely nothing. Renamed to 14k-yellow-gold-diamond-solitaire-ring.jpg, that same file becomes a keyword-rich signal that helps your image surface in relevant searches. DSC_0047.jpg becomes sterling-silver-pearl-drop-earrings-side.jpg. photo_001.jpg becomes rose-gold-emerald-tennis-bracelet-front.jpg. The rename takes five seconds and the SEO benefit lasts indefinitely.
Use hyphens (not underscores) to separate words. Keep filenames under 60 characters. Include the most important keyword first. Add a descriptive angle indicator (front, side, back, worn, close-up) when uploading multiple images per product.
Alt Text: Describe for Accessibility and Search
Alt text serves two purposes: it helps visually impaired users understand your images via screen readers, and it provides search engines with text context for images they cannot visually process. Both purposes demand the same thing: a clear, specific, keyword-rich description.
Write descriptive alt text using relevant keywords and precise product descriptors. For example: ‘14k white gold pear-shaped halo engagement ring with 1.5 carat diamond’ is vastly more useful for SEO than ‘engagement ring’ or simply ‘ring.’
Alt text best practices for jewelry:
• Include metal type, metal color, stone type, stone shape/cut, and product category.
• Keep alt text between 80–120 characters — enough to be descriptive, short enough to be readable.
• Never stuff alt text with keywords — write naturally for a human reader first.
• Don’t include ‘image of’ or ‘photo of’ — search engines already know it’s an image.
• For lifestyle shots, describe the setting: ‘Gold charm bracelet worn on a woman’s wrist against a white linen background.’
Image Compression and Format: Speed Equals Rankings
Page load speed is a confirmed Google ranking factor. Large, uncompressed image files are the most common cause of slow-loading jewelry store pages — and a slow page costs you both rankings and conversions.
Compress images using WebP format for optimal page speed without compromising visual quality. WebP delivers roughly 25–35% smaller file sizes than JPEG at equivalent visual quality, and it’s now supported by all major browsers.
Image format recommendations:
• WebP — Best overall choice for web product images. Use for all new uploads.
• JPEG — Acceptable fallback. Compress to 80–85% quality, targeting under 200KB per image.
• PNG — Only for images requiring transparency (cut-out product shots with no background). Larger file size.
• Avoid TIFF or uncompressed RAW exports on the web — these are archive formats only.
Recommended compression tools: TinyPNG (free, web-based), Squoosh (free, by Google), ShortPixel (WordPress plugin with bulk compression), and ImageOptim (Mac desktop app).
⚡ Target file size: under 200KB per image for standard product shots. Under 150KB for thumbnails. Hero/banner images can go up to 400KB if necessary, but no larger.
Multiple Angles and the 5-Shot Rule
Showing a jewelry piece from a single angle is like a salesperson only describing half the product. Multi-angle photography reduces buyer uncertainty, increases time-on-page (a positive SEO signal), and significantly reduces returns.
For every product, aim to include close-ups, top views, and side views — this variety has been shown to increase audience engagement and build buyer confidence.
The 5-Shot Rule for jewelry products:
-
Front/Top Shot — Clean, centered, primary product image (used as thumbnail).
-
Side/Profile Shot — Shows depth, thickness, and edge detail.
-
Back Shot — Shows clasp, hallmarks, or other reverse details.
-
Close-Up Detail Shot — Macro image showing stone, engraving, or texture work.
-
Lifestyle/Worn Shot — Piece worn on a person, showing scale, feel, and context.
For higher-end pieces and strong SEO performance, 360-degree views provide a near in-store experience that helps customers visualize the piece from every angle — and the increased engagement time sends strong positive signals to search engines.
Structured Data and Schema Markup
Schema markup is code added to your product pages that helps search engines understand and display your content more richly in search results. For jewelry stores, Product schema enables your listings to appear in Google Shopping carousels, Knowledge Panels, and rich results that show price, availability, and ratings directly in the SERP.
Key schema properties for jewelry product images:
• image — The URL of the product’s primary image.
• name — The product name, matching your SEO title.
• offers — Price and availability data.
• brand — Your jewelry brand name.
• material — Metal type, stone type (e.g., ‘14k Yellow Gold, Ruby’).
Platforms like Shopify and WooCommerce offer plugins and built-in features for schema markup. If you’re building custom, use Google’s Structured Data Testing Tool to validate your markup before publishing.
Common Jewelry Photo Editing Mistakes to Avoid
Even experienced editors fall into these traps. Recognizing them is the first step to avoiding them.
Mistake 1: Over-Brightening
Pushing exposure too high in the pursuit of a clean, bright image blows out metallic highlights and turns reflective surfaces into flat white voids. You lose all the surface texture, engraving detail, and dimensional quality that makes the piece look real. Pull your highlights down — jewelry should sparkle, not glow.
Mistake 2: Over-Saturating Gemstones
A ruby does not look like a traffic light. An emerald is not neon green. Over-saturated gemstone images look digitally manipulated, trigger buyer suspicion, and lead to returns when the actual product arrives. Aim for vivid and accurate, not vivid and unrealistic.
Mistake 3: Inconsistent Backgrounds Across Your Catalog
Your product catalog should look like a cohesive editorial collection, not a random assortment of images shot in different environments. Inconsistent backgrounds — some white, some grey, some contextual — signal a lack of professionalism and make product pages look disorganized. Choose a standard and apply it uniformly.
Mistake 4: Ignoring the Mobile Preview
More than 60% of e-commerce traffic comes from mobile devices. An image that looks perfectly balanced on a desktop monitor can appear too dark, too busy, or lacking in key detail on a 375-pixel-wide phone screen. Always preview your edited images on a mobile device before publishing.
Mistake 5: Misusing White Balance
Incorrect white balance results in color tones that misrepresent the actual product — a mistake that directly causes customer disappointment and returns. Always set white balance as a priority before any other color adjustment. No amount of hue shifting or saturation work compensates for a fundamentally incorrect white balance.
Mistake 6: Exporting in the Wrong Color Space
Adobe RGB has a wider color gamut than sRGB, which makes it preferable for print output. But for web and screen display, you must export in sRGB. Images exported in Adobe RGB that are displayed in a browser without color profile support will appear desaturated and flat. Always export web images in sRGB, at 72–96 DPI, in JPEG or WebP format.
Editing Workflow for High-Volume Sellers
If you’re managing a catalog of hundreds or thousands of SKUs, manual editing of every individual image quickly becomes unsustainable. These workflow strategies let you maintain quality at scale.
Build and Use Lightroom Presets
A Lightroom preset captures all your adjustment settings — exposure, white balance, sharpening, noise reduction, HSL values — into a one-click apply. Develop a master preset for each primary product category (e.g., ‘Gold Rings,’ ‘Silver Earrings,’ ‘Diamond Pieces’) and apply it as a starting point for every image in that category. You still fine-tune individual shots, but you eliminate the time spent building from zero each time.
Batch Processing with Photoshop Actions
Photoshop Actions record a sequence of editing steps and replay them across multiple files automatically. Create actions for routine tasks like background removal to a specific color, sharpening passes, canvas sizing to platform-specific pixel dimensions, and export naming conventions. Run them via File > Automate > Batch to process entire folders overnight.
When to Outsource
Professional jewelry retouching services become cost-effective when your volume exceeds what you can personally edit without compromising other business priorities, typically around 50–100 images per week. Services like Graphic Aid, FixThePhoto, and Masking Aid specialize in jewelry editing, with turnaround times of 24–48 hours and per-image pricing from $0.50–$3.00 depending on complexity.
When outsourcing, always provide a detailed style guide with reference images, color targets, background specifications, and export requirements to ensure consistency with your existing catalog.
Editing Jewelry Photos on a Smartphone
Not every seller has access to a desktop editing setup, and not every photo needs one. For social media content, quick catalog updates, or testing shots, smartphone editing apps have become remarkably capable.
Best Smartphone Editing Apps for Jewelry
• Adobe Lightroom Mobile — The full power of Lightroom’s RAW processing in your pocket. Syncs with your desktop catalog. Free tier is capable; paid tier unlocks healing brush and geometry tools.
• Snapseed (Free) — Google’s professional editing app. Excellent selective adjustment brush for targeting specific areas of a jewelry shot. The Details module provides strong sharpening control.
• Adobe Express (Free/Paid) — Ideal for creating social media content with branded templates. Includes a background removal tool suitable for standard jewelry shots.
• Photoroom (Free/Paid) — Best-in-class AI background removal on mobile. Useful for quick product shots for Instagram Stories or Etsy listings.
Smartphone Editing Limitations
Smartphone editing tools are excellent for quick content creation and social media use, but they have meaningful limitations for primary product listing images. The processing power constraints mean large-file operations like focus stacking, advanced frequency separation, or precision clipping paths are not practical. For your main product images — the ones that live on your product pages and drive purchase decisions — desktop editing remains the professional standard.
Conclusion: Great Editing = Trust = Sales
Every technique in this guide serves a single, unified goal: building buyer confidence. When a shopper can see the exact warmth of the gold, the depth of a sapphire’s blue, the precision of a prong setting, and the texture of a hammered band — all rendered accurately, consistently, and beautifully — they feel confident enough to buy. That confidence is built in your editing suite, one deliberate adjustment at a time.
You don’t need to master every technique at once. Start with the fundamentals: correct your exposure and white balance first. Then build a consistent background workflow. Then begin sharpening for detail. Each skill compounds on the last, and each improvement in image quality compounds directly into your conversion rate.
Pair your edited images with SEO-optimized filenames, accurate alt text, and the right file format, and you’re not just creating beautiful product photos — you’re building a search-visible, trust-driving visual asset for your entire catalog.
🎯 Start today: Pick one product, shoot it in RAW, apply the white balance correction technique to remove the background cleanly, and upload it with a properly named file and descriptive alt text. Then measure the difference in engagement. That single image is your proof of concept.
Frequently Asked Questions
Q: What software is best for editing jewelry photos?
A: Adobe Lightroom is the best starting point for most jewelry sellers — it handles batch editing, color correction, and catalog management efficiently. For advanced retouching, background removal, and precision work, Adobe Photoshop is the industry standard. Beginners on a budget can start with GIMP (free) or Photoroom for AI-assisted background removal.
Q: How do I remove reflections from jewelry photos?
A: In Photoshop, use the Clone Stamp or Healing Brush tools for isolated reflections, and the Dodge and Burn technique to rebalance light across larger metallic surfaces. For a more advanced approach, Frequency Separation separates texture from tone, allowing you to smooth highlight blowout while preserving surface texture. Prevention at the shoot stage (using polarizing filters) is always more effective than correction in post.
Q: What background color is best for jewelry product photos?
A: Pure white (#FFFFFF) is required by Amazon and recommended for Google Shopping. Light gray or white works best for Shopify and professional e-commerce sites. Warm neutrals, lifestyle contexts, and textured backgrounds perform well on Etsy and Instagram where the aesthetic is part of the brand story.
Q: How do I make gold jewelry look realistic in edited photos?
A: Start with accurate white balance — yellow gold should have a warm color temperature (5000–5500K). Use the HSL panel in Lightroom to precisely control the yellow and orange channels without affecting other colors in the image. Avoid oversaturating: vivid and accurate is the target, not vivid and artificial. Always compare your edit to the physical piece under neutral daylight.
Q: Should I edit jewelry photos in RAW or JPEG?
A: Always shoot and edit in RAW. RAW files retain all the tonal and color data captured by your camera sensor, giving you far greater latitude to correct exposure, white balance, and shadow detail in post-processing without degrading image quality. JPEG compresses and discards data permanently — fine for final export, not for editing.
Q: How do I optimize jewelry images for Google search?
A: Use descriptive, keyword-rich filenames separated by hyphens. Write detailed alt text describing the metal, stone, cut, and product type. Export in WebP or compressed JPEG format and target file sizes under 200KB. Use Product schema markup to enable rich results. Include multiple angle shots per product to increase engagement time, which indirectly supports SEO rankings.
메타데이터
- post_id
- 9bf758be8e43
- slug
- jewelry-photography-editing-tips-for-online-stores-9bf758be8e43
- url
- https://medium.com/@graphicaid24/jewelry-photography-editing-tips-for-online-stores-9bf758be8e43
- canonical_url
- https://medium.com/@graphicaid24/jewelry-photography-editing-tips-for-online-stores-9bf758be8e43
- author_url
- https://medium.com/@graphicaid24
- status
- ok
- fetched_at
- 2026-06-09 15:37:30