Building your first AWS Transform Agent in Kiro with the Agent Builder Toolkit
A step-by-step walkthrough to get your first agent that can be deployed and registered with AWS Transform.
Building your first AWS Transform Agent in Kiro with the Agent Builder Toolkit
A step-by-step walkthrough to get your first agent that can be deployed and registered with AWS Transform.
AWS Transform is AWS’s agentic service for migration and modernization work. It covers .NET, SQL, VMware, mainframe, and custom code transformations. The addition of AWS Transform composability in May of 2026 changed that. Partners, ISVs, and customers can now build their own transformation agents and plug them into the same AWS Transform user experience within Kiro and the AWS console.
AWS Transform agent builder toolkit, which ships as a Kiro power, is how the agents are built. The toolkit helps you build agents on Amazon Bedrock AgentCore using the Strands Agents SDK, then allows you to register them with AWS Transform so they show up inside the product.
This post outlines how to use AWS Transform Agentic Toolkit to generate agents for your own use cases. We’ll walk through an agent that does a simple transformation task, so you can see how it works end-to-end.
A Kiro power is a packaged capability (tools plus guidance) that the IDE loads when needed. The agent builder toolkit is a power that will walk you through scaffolding, testing, and registering a transformation agent. The agent we will build is a small AgentCore and Strands project. It’s important to keep those two things separate as they have different purposes.
What you’ll end up with
A project that looks roughly like this:
hello-transform-agent/
├── agent/
│   ├── agent.py            # the Strands agent plus one custom tool
│   └── requirements.txt
├── transform/
│   └── agent.manifest.json # how AWS Transform discovers and invokes the agent
└── README.md
You’ll also have the toolkit power installed in Kiro, doing the scaffolding and registration work.
Step 0. Prerequisites
You’ll need a few things in place to support the build:
An identity to sign in with. Kiro accepts Google, GitHub, or AWS Builder ID, along with organizational sign-in through IAM Identity Center and external IdPs like Okta and Microsoft Entra ID. You don’t need an AWS account just to run Kiro. You will need AWS credentials with the right permissions for the AgentCore and Transform steps later on.
Python 3.11 or newer is recommended and Node.js on your PATH. The toolkit and Strands tooling both use them.
AWS credentials configured (aws configure or an SSO profile) in a region where AWS Transform and Bedrock AgentCore are available.
Step 1. Install the Kiro IDE
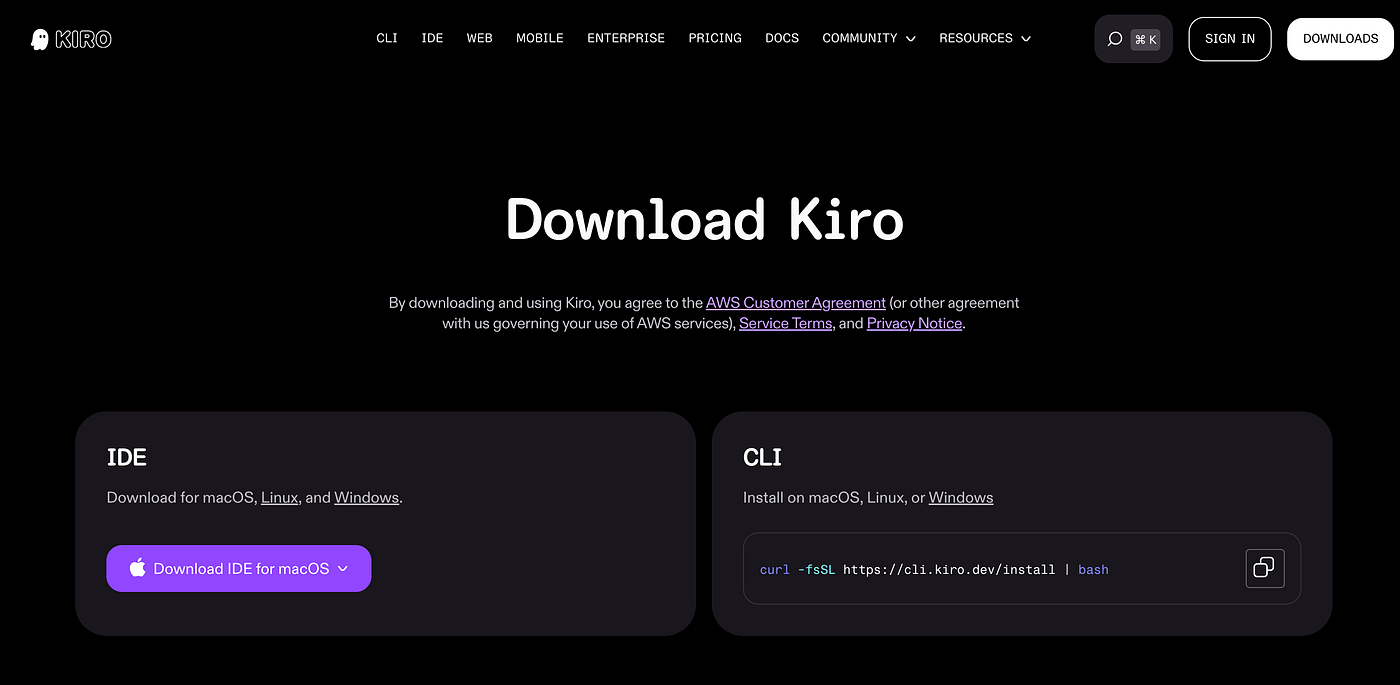
- Go to kiro.dev/downloads and grab the installer for your platform.
- Launch Kiro. On first run it asks you to sign in. Pick Google, GitHub, AWS Builder ID, or your organization’s provider.
- You can import your VS Code settings and extensions if you want, since Kiro is VS Code compatible. Then pick a theme and allow shell integration so the agent can run commands for you.
Once complete, you should land on the Kiro welcome screen.

Step 2. Create your project workspace
Make an empty folder and open it in Kiro:
mkdir hello-transform-agent && cd hello-transform-agent
kiro .
Kiro will then open at your newly created folder. You can also use Open a project from the welcome screen or file navigation within Kiro. Opening a real folder matters here. Kiro keeps project context in a .kiro/ directory, and powers can scaffold files straight into your workspace.
Step 3. Install the AWS Transform agent builder toolkit power
Powers install in a couple of clicks from inside the IDE.
- In Kiro’s left activity bar, click the ghost icon to open the Powers panel.
- Choose Browse powers or Explore powers to open the marketplace.
- Search for AWS Transform agent builder toolkit.
- Click Add to Kiro or Install.

Once you install it should show within your installed powers section as well as the buttons now show a “Try Power” button as well as unistall and check for updates.

The power registers automatically. When you mention transformation-related keywords in chat, Kiro activates the power, loads its guidance into context, and wires up any MCP tools the power bundles.
If a power includes MCP servers, Kiro writes them into your powers MCP config at ~/.kiro/powers.mcp.json and namespaces the server names to avoid collisions. A server named transform, for example, becomes something like power-<powername>-transform.
Powers load on demand. A raw MCP server dumps every tool into context at startup. A power keeps its tools dormant until the conversation is relevant, which keeps the agent focused and cuts your token usage.
Before we build our first agent, we need to make sure all the prerequisites are installed and setup correctly. To do this you can simply click the “Try Power” button which will message Kiro in the chat “I just installed the aws-transform-agent-toolkit power and want to use it” and the agent will begin to check your machine to make sure everything that is necessary is setup correctly.

If the agent identifies items that aren’t installed correctly, not the latest version, or if it needs to be reconfigured in order to run, Kiro will respond in the chat on how to make sure everything is setup correctly. For my instance below, you can see that I need to run a few commands to make sure python is at or above 3.11 and AWS cli is installed correctly.

Once you make it thorugh the configuration items with Kiro, your machine should be set up and ready to make an agent!
Step 4. Use the toolkit to scaffold an agent
Open Kiro chat and tell it what you want:
“Use the AWS Transform agent builder toolkit to scaffold a minimal hello-world transformation agent.”
Because the toolkit is a power, it responds with an interactive workflow. It asks you a small set of questions, a few at a time, so you don’t have to memorize a schema. Expect it to collect things like:
The agent name, for example hello-transform-agent,a display name and a one to three sentence description of what the agent does.
Be aware of your use of trigger words. Generic words like test, data, or api cause false activations. To limit this, use domain words that describe the transformation.
For a Transform agent the runtime will be Amazon Bedrock AgentCore, with the agent logic written using Strands Agents.
It then generates the project files. The agent code itself is small. A representative agent/agent.py looks like this:
# agent/agent.py
from strands import Agent, tool

@tool
def annotate_file_header(source: str, owner: str = "platform-team") -> str:
    """A trivial 'transformation': prepend a standardized header comment.
    Stands in for real modernization logic like SDK upgrades or code rewrites."""
    header = f"// Modernized by hello-transform-agent | owner: {owner}\n"
    return header + source
agent = Agent(
    system_prompt=(
        "You are a hello-world transformation agent. "
        "When asked to modernize a file, call annotate_file_header and "
        "return the transformed source."
    ),
    tools=[annotate_file_header],
)
if __name__ == "__main__":
    sample = "function greet(){ console.log('hi'); }"
    print(agent(f"Modernize this file:\n{sample}"))
# agent/requirements.txt
strands-agentsThis agent is built to prepend a header while a production transformation agent can swap this for code analysis, dependency mapping, or pattern-based rewriting. The surrounding layout of the agent stays the same allowing you to build small, focused, interoperable agents and combine them with the capabilities AWS Transform already gives you.
The agent builder toolkit is new so some commands and layout can change in the future as new enhancements and modifications are released. Because of that it is important for the toolkit’s interactive workflow to generate those files and to read what it produces as it will leveraged the latest updates to build then. The agent.manifest.json below shows what to expect.
// transform/agent.manifest.json  (rough shape, confirm against what the toolkit generates)
{
  "name": "hello-transform-agent",
  "displayName": "Hello Transform Agent",
  "description": "Prepends a standardized header to a source file. A minimal composability demo.",
  "runtime": "bedrock-agentcore",
  "entrypoint": "agent/agent.py",
  "keywords": ["hello-transform", "header-annotation", "modernization-demo"]
}
Step 5. Run the agent locally
Before you add it to AWS Transform, you can test that the agent works on its own by running it locally.
cd agent
python -m venv .venv && source .venv/bin/activate   # Windows: .venv\Scripts\activate
pip install -r requirements.txt
python agent.py
You should see the sample source come back with the header line prepended. That confirms the Strands agent loads, the tool is registered, and the model calls it. You’ll need valid AWS credentials in your environment, since Strands talks to Bedrock for the model.
If you scaffolded with AgentCore’s local dev workflow, the toolkit may also give you an AgentCore command to launch the agent locally, so you can exercise it the same way the AgentCore runtime will. Use that to catch packaging issues early.
Step 6. Deploy to AgentCore and register with AWS Transform
Two sub-steps, both driven by the toolkit.
First, deploy the agent to Amazon Bedrock AgentCore. AgentCore is the managed runtime that hosts the agent. The toolkit walks you through packaging and deploying. You’ll authenticate with the AWS credentials or profile you set up in Step 0.
Second, register the agent with AWS Transform. This is the step that makes your agent show up inside the Transform experience. The toolkit’s register flow points Transform at your deployed AgentCore agent using the manifest from Step 4. Once it’s registered, you can share the agent with your team, and it becomes discoverable alongside the AWS-managed transformations.
The lifecycle the toolkit is built around is build, share, and register for discovery. Composability means your registered agent can run with AWS Transform’s own agents for Windows, VMware, mainframe, and custom code inside a single workspace. A customer gets your specialized step plus AWS’s managed steps in one run.
Step 7. Iterate with Kiro’s native features
Once the deployment works, Kiro can help you to enhance the agent.
Kiro will allow you to use simple commands like “I want it to also handle X” into a structured implementation plan before you write code.
Steering files can also be leveraged to let you drop guidance into .kiro/steering/ so every agent run in this workspace follows your conventions.
The PwC view: turning months into weeks
At PwC, a critical portion of our cloud work is supporting enterprise clients exiting their data centers. These programs move hundreds or thousands of applications and workloads off infrastructure and onto AWS. Historically, these are large projects that can take many months to several years.
The reason it takes so long is rarely the cloud itself, but rather the process. Every application has to be discovered, assessed, dependency-mapped, planned into a migration wave, refactored or replatformed where needed, validated, and cut over. Multiply that by a few hundred applications and the manual effort adds up fast. A migration factory helps by standardizing the steps, but much of the work still lands on people repeating the same analysis and the same fixes across the application portfolio.
The agent builder toolkit lets us take the migration methodology PwC already uses, the assessment patterns, the wave-planning logic, the refactoring playbooks, and the validation gates, and build them as composable agents that run inside AWS Transform. The process becomes less of a manual process and more embedded into tooling that executes the work.
Once a step is captured as an agent, it runs across the whole estate without a person redoing it each time. A dependency analysis that took an analyst days can now happen in the matter of minutes. A modernization pattern that was built and proven out on one application can now be applied to the next applications automatically, with engineers reviewing and tuning the output instead of writing it by hand. The agent can then be leveraged to capture feedback and fine tune itself to be more reliable in future runs.
Composability is what makes AWS Transform fit the way our organization delivers these migrations and modernizations. Agents do not displace AWS Transform’s managed agents (e.g. Windows, VMware, mainframe) but complement them in the same workspace. A client gets AWS’s depth on the common patterns plus PwC’s accelerators and industry knowledge on the parts that are specific to their estate.
Instead of an enterprise waiting months or years to see applications land in the cloud and start paying off, waves can move in weeks. Applications reach production sooner, the business realizes the benefits of the cloud sooner, and the long tail of a data center exit compresses which is beneficial for all parties involved.
The hello-world agent is built to help enhance the tooling and processes that already exists. It is a tool that can be used for building upon existing modernization logic that runs inside AWS Transform next to AWS’s own agents.
References
- AWS Transform agent builder toolkit (GA announcement): https://aws.amazon.com/about-aws/whats-new/2026/05/aws-transform-agent-builder-toolkit/
- AWS Transform partners and composability initiative: https://aws.amazon.com/transform/partners/
- AWS Transform one-year milestone (agent builder toolkit and AgentCore framing): https://aws.amazon.com/blogs/migration-and-modernization/aws-transform-one-year-milestone/
- AWS Transform agents in Kiro (the consumer-side power): https://aws.amazon.com/about-aws/whats-new/2026/04/aws-transform-developer-tools/
- Kiro powers, overview and install: https://kiro.dev/docs/powers/ and https://kiro.dev/docs/powers/installation/
- Kiro powers, create your own: https://kiro.dev/docs/powers/create/
- Kiro IDE install and getting started: https://kiro.dev/docs/getting-started/installation/ and https://kiro.dev/downloads/
- AWS Transform custom samples (AgentCore and Strands): https://github.com/aws-samples/aws-transform-custom-samples
메타데이터
- post_id
- 9c09cd4c0265
- slug
- building-your-first-aws-transform-agent-in-kiro-with-the-agent-builder-toolkit-9c09cd4c0265
- url
- https://medium.com/@cmcconnor/building-your-first-aws-transform-agent-in-kiro-with-the-agent-builder-toolkit-9c09cd4c0265
- canonical_url
- https://medium.com/@cmcconnor/building-your-first-aws-transform-agent-in-kiro-with-the-agent-builder-toolkit-9c09cd4c0265
- author_url
- https://medium.com/@cmcconnor
- status
- ok
- fetched_at
- 2026-06-24 11:06:28



