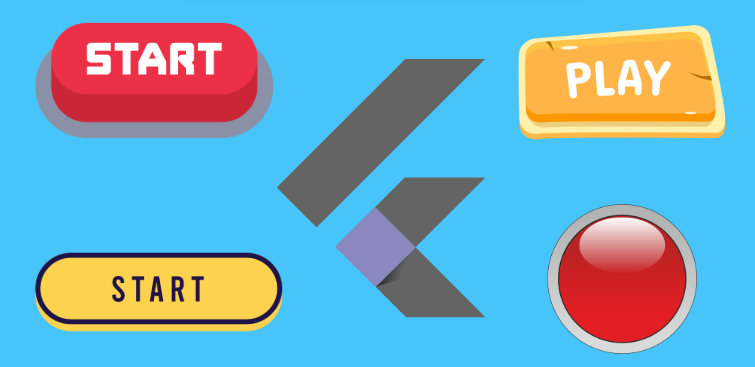
Flutter. Everything about buttons
I started writing the “ButtonStyle cheat sheet” article, and realized that there is a lot about Flutter buttons before ButtonStyle.
Flutter. Everything about buttons
I started writing the “ButtonStylecheat sheet” article, and realized that there is a lot about Flutter buttons before ButtonStyle.
· 1. Material buttons ∘ 1.1. ElevatedButton ∘ 1.2. OutlinedButton ∘ 1.3. FilledButton ∘ 1.4. TextButton ∘ 1.5. icon constructor ∘ 1.6. onLongPress ∘ 1.7. Tapping feedback ∘ 1.8. Customization of Material buttons · 2. CupertinoButton · 3. FloatingActionButton (FAB)
1. Material buttons
Those buttons are styled according to Google’s Material design spec.
1.1. ElevatedButton

              ElevatedButton(
                onPressed: () {  },
                child: Text(
                  'Click me',
                  style: TextStyle(fontSize: 50),
                ),
              ),
According to the documentation, it should not be used on elevated elements like dialogs and cards. Typically used as a standalone button. For example, the Registration button on the registration form.
1.2. OutlinedButton

             OutlinedButton(
                onPressed: () {  },
                child: Text(
                  'Click me',
                  style: TextStyle(fontSize: 50),
                ),
              ),
We usually use it as a secondary action button on dialogs. Like Cancel or No buttons.
1.3. FilledButton

             FilledButton(
                onPressed: () {  },
                child: Text(
                  'Click me',
                  style: TextStyle(fontSize: 50),
                ),
              ),
It is used as a primary action button on dialogs like Yes or Save.
Therefore, the Outlinedand FilledButtonare frequently used together:

The FilledButtonhas an additional tonalconstructor that creates a button filled with a secondary color.

              FilledButton.tonal(
                  onPressed: () {},
                  child: Text(
                    'Click me',
                    style: TextStyle(fontSize: 50),
                  ),
                ),
1.4. TextButton

             TextButton(
                  onPressed: () {},
                  child: Text(
                    'Click me',
                    style: TextStyle(fontSize: 50,
                                      color: Colors.blue.shade900,
                                      decoration: TextDecoration.underline),
                  ),
                ),
The convenient way to create weblink-like elements.
Another ironically important use case of Material TextButtonare iPhone’s action buttons.
      appBar: AppBar(
        title: const Text('ButtonsView'),
        centerTitle: true,
        actions: [TextButton(onPressed: (){}, child: Text('Edit'),),],
      ),
1.5. iconconstructor
All Material buttons have an iconconstructor that simplifies the creation of buttons with icons.

              ElevatedButton.icon(
                onPressed: () {  },
                label: Text(
                  'Click me',
                  style: TextStyle(fontSize: 50),
                ),
                icon: Icon(Icons.handyman, size: 50,),
              ),
It has an iconAlignmentproperty that changes the location of the icon.
1.6. onLongPress
All Material buttons have an onLongPressproperty that allows providing handlers for long-press events.
               ElevatedButton.icon(
                  onPressed: () {},
                  onLongPress: () {},
...
1.7. Tapping feedback
Material buttons display a ripple animation when tapped. The ElevatedButtonadditionally shows a “pressing animation”.

1.8. Customization of Material buttons
All Material buttons are customizable using ButtonStyle.
Let’s define some ButtonStylesand later use them to customize buttons.
final class Styles {
  Styles._();

  static const wideBlue = ButtonStyle(
    backgroundColor: WidgetStatePropertyAll<Color>(Colors.blue),
    minimumSize: WidgetStatePropertyAll<Size>(Size(double.infinity, 70)),
    foregroundColor: WidgetStatePropertyAll<Color>(Colors.yellow),
  );

  static const prevNext = ButtonStyle (
    foregroundColor: WidgetStatePropertyAll<Color>(Colors.black),
    backgroundColor: WidgetStatePropertyAll<Color>(Colors.yellow),

  );

   static const red = ButtonStyle (
    foregroundColor: WidgetStatePropertyAll<Color>(Colors.white),
    backgroundColor: WidgetStatePropertyAll<Color>(Colors.red),
  );

}
We can customize a single button, a group (sub-tree) of buttons, or all buttons in the application.
Customizing a single button
                ElevatedButton(
                  onPressed: () {},
                  style: Styles.wideBlue,
                  child: Text(
                    'Click me',
                    style: TextStyle(fontSize: 50),
                  ),
Alternatively, we can use the styleFromstatic method. It returns ButtonStyleand doesn’t require the usage of WidgetStateProperty.
               ElevatedButton.icon(
                  onPressed: () {},
                  onLongPress: () {},
                  style: ElevatedButton.styleFrom(     //<-here
                    backgroundColor: Colors.blue,
                    minimumSize: Size(double.infinity, 70),
                    foregroundColor: Colors.yellow
                  ),
                 ...
Customizing a group of buttons
It’s done using the OutlinedButtonThemewidget.
Other button types have their related ButtonThemewidgets: ElevatedButtonTheme, TextButtonTheme, and so on.
               OutlinedButtonTheme(
                  data: OutlinedButtonThemeData(style: Styles.prevNext),
                  child: Row(
                    mainAxisAlignment: MainAxisAlignment.spaceEvenly,
                    children: [
                      OutlinedButton(
                        onPressed: () {},
                        child: Text(
                          'Prev',
                          style: TextStyle(fontSize: 30),
                        ),
                      ),
                      OutlinedButton(
                        onPressed: () {},
                        child: Text(
                          'Next',
                          style: TextStyle(fontSize: 30),
                        ),
                      ),
                    ],
                  ),
                ),
Customizing all buttons
To customize all FilledButtonsin the application, we should specify ThemeData.filledButtonTheme.
return MaterialApp(
...
      theme: ThemeData(
        filledButtonTheme: FilledButtonThemeData(style: Styles.red),
      ),
...
All FilledButtonsbecame red.
Other button types can be managed in the same way using their related theme objects: ThemeData.textButtonTheme, ThemeData.ElevatedButtonThemeetc.
2. CupertinoButton
I don’t understand the need for a separate Cupertino library in Flutter. Just a waste of resources.
The CupertinoButtonis a button that looks similar to an iPhone’s buttons.
It can be used on the Material Scaffold.
              CupertinoButton(
                  onPressed: () {},
                  child: Text(
                    'Click me',
                    style: TextStyle(
                        fontSize: 50,
                       ),
                  ),
                ),
The button created by the default CupertinoButtonconstructor looks like Material TextButton.
But there are additional constructors.
              CupertinoButton.filled(
                  onPressed: () {},
                  child: Text(
                    'Click me',
                    style: TextStyle(
                        fontSize: 50,
                       ),
                  ),
                ),
               CupertinoButton.tinted(
                  onPressed: () {},
                  child: Text(
                    'Click me',
                    style: TextStyle(
                        fontSize: 50,
                       ),
                  ),
                ),
CupertinoButtondoesn’t have a styleproperty and cannot be customized using ButtonStyle.
Instead, it has several properties that allow easier but limited customization compared to Material buttons.
borderRadius
 CupertinoButton.tinted(
    borderRadius: BorderRadius.circular(40),
...
color
 CupertinoButton.tinted(
     color: Colors.amber.shade900,
sizeStyle
 CupertinoButton.tinted(
     sizeStyle: CupertinoButtonSize.small,
There is a minSizeproperty, which surprisingly takes a doubleinstead of Size. I cannot make it work, it produces an exception unrelated to the provided doublevalue.
To resize CupertinoButton, we can just use SizedBoxas follows:
               SizedBox(
                  width: double.infinity,
                  child: CupertinoButton.tinted(
...
**CupertinoButtonconclusion**
My current perception is that it is a useless waste of time. Material buttons can be easily customized to look like iPhone buttons, so what is the point?
Honestly, I use them for my educational projects because I like their default look. But for the real project, I would take a minute and customize the button from the material library.
3. FloatingActionButton(FAB)
My approach to designing a Flutter app is to create a brand design with greater respect to HIG than Material, and then submit the same design to both platforms.
With this approach, FAB became obsolete since iPhone users don’t know what it is.
Thank you for reading, and happy designing!

메타데이터
- post_id
- 9c9fdb9bcebe
- slug
- flutter-everything-about-buttons-9c9fdb9bcebe
- url
- https://medium.com/easy-flutter/flutter-everything-about-buttons-9c9fdb9bcebe
- canonical_url
- https://medium.com/easy-flutter/flutter-everything-about-buttons-9c9fdb9bcebe
- author_url
- https://medium.com/@yurinovicow
- status
- ok
- fetched_at
- 2026-07-07 15:26:23