Garmin GPSMAP 64s imagery
How I load high-resolution raster satellite or aerial imagery onto my Garmin GPSMAP 64sc GPS.
Garmin GPSMAP 64s imagery
How I load high-resolution raster satellite or aerial imagery onto my Garmin GPSMAP 64sc GPS.
Viewing imagery tiles in ExpertGPS
I’ve configured ExpertGPS to use satellite imagery tiles from NSW Geospatial Services using this URL template:
https://maps.six.nsw.gov.au/arcgis/rest/services/public/NSW_Imagery/MapServer/tile/{z}/{y}/{x}
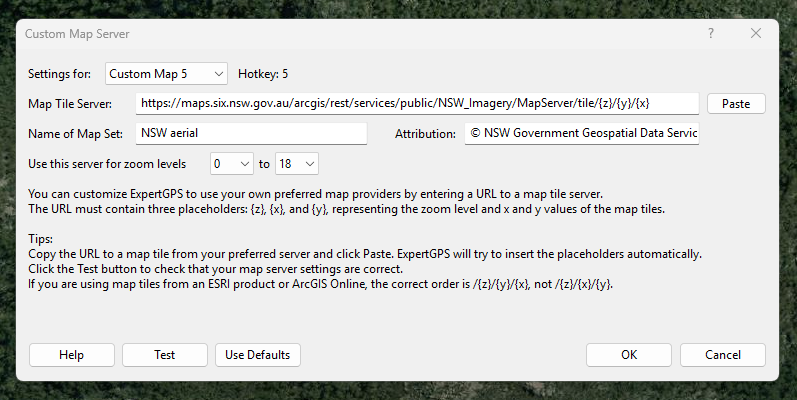
NSW aerial imagery as a Custom Map Server in ExpertGPS Pro
The ability to have custom additional base maps is only available in ExpertGPS Pro.
I have configured ACT’s higher-resolution and more recent aerial imagery in JOSM but have not yet figured out how to get it working in ExpertGPS.
Exporting imagery from ExpertGPS
Using the File > Export Image feature in ExpertGPS and first matching the scale to my zoom level I stretched the box to cover the full area I wanted satellite imagery for. It helps if you pan around and force ExpertGPS to retrieve all the tiles it’ll need for the export before going to Export Image otherwise it’ll keep aborting and ask you to wait until it’s downloaded all the tiles.
You don’t need to worry about exporting smaller tiles or exporting 1024x1024 pixel squares or anything; ExpertGPS handles that for you.
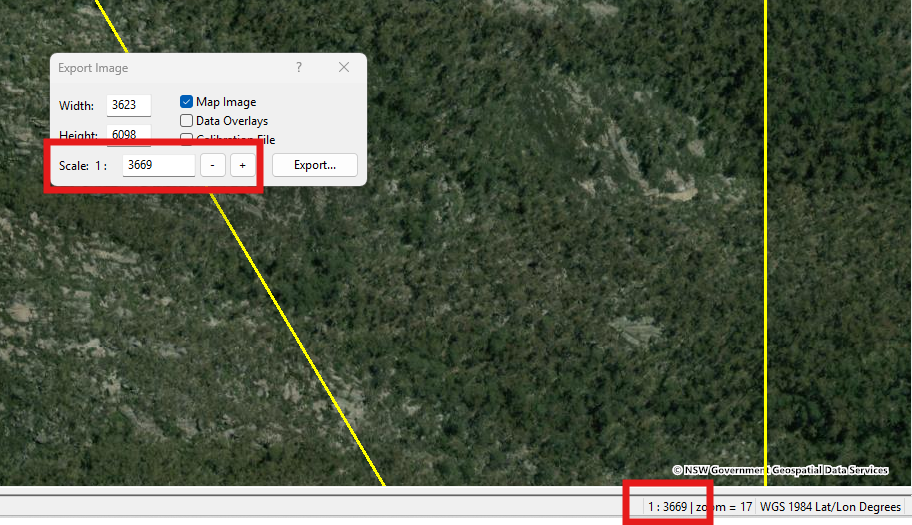
Export Image in ExpertGPS
While the sunlight-readable transflective colour display of the GPSMAP 64 is great for outdoors and viewing the screen in direct sunlight, raster images can look a bit dull and low contrast so I edit them to optimise for the GPS LCD.
Adjusting colour and brightness of imagery
I navigated to the folder where ExpertGPS exported the image(s) to run a batch job in Affinity Photo to adjust levels, reduce saturation and re-export to make sure they were non-progressive JPGs (which Garmin doesn’t like):
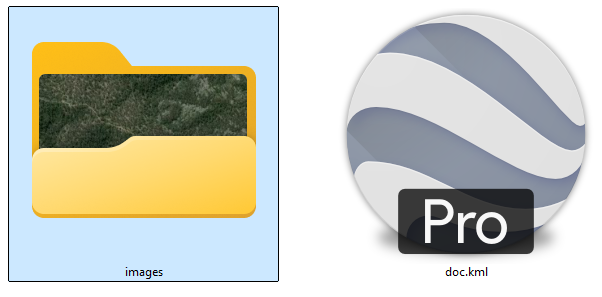
The doc.xml and images folder created by the Export Image feature in ExpertGPS
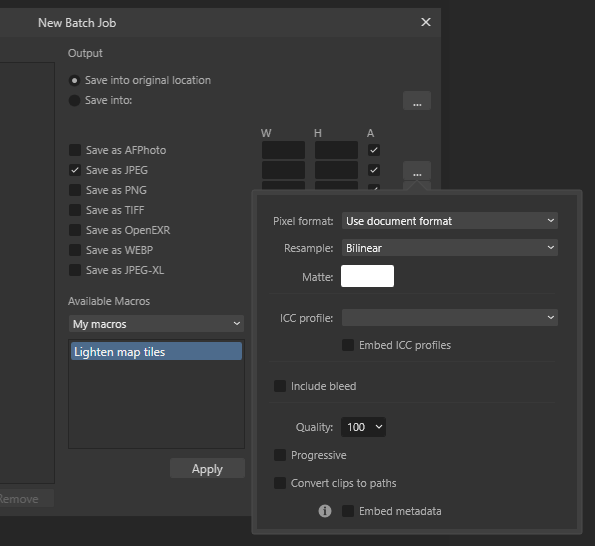
Batch job in Affinity Photo to increase imagery tile brightness
Creating the .KMZ file
I had tried manually compressing the doc.kml and images folder to a .zip file and renaming to .kmz, which Google Earth recognised but my Garmin didn’t; it just showed black tiles.
What did work was opening the doc.kml file in Google Earth and exporting the folder as a .kmz to the /CustomMaps/ folder on my Garmin.
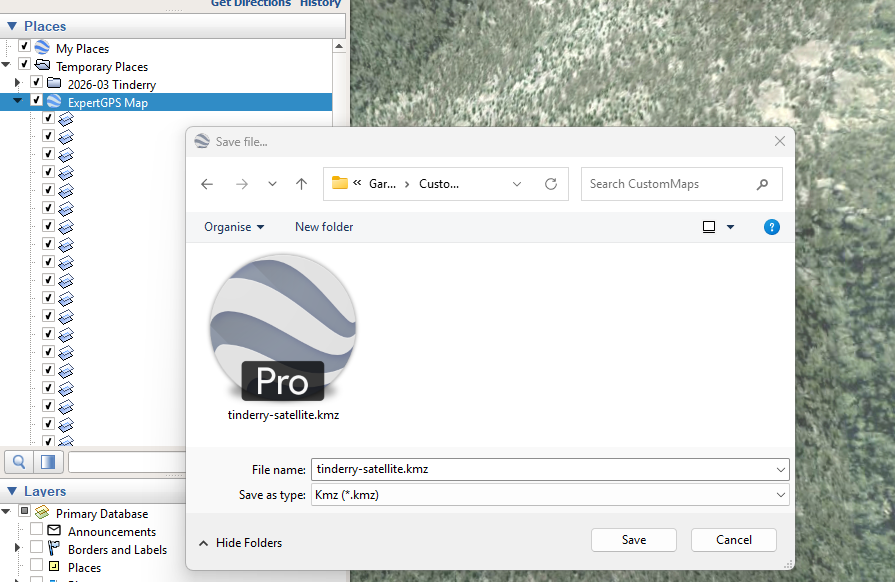
Viewing the doc.kml in Google Earth and exporting as a .kmz
The only difference I could see by renaming the .kmz that Google Earth created and renaming it to .zip was that Google Earth had renamed the /images/ folder to /files/ and had compressed to 26MB, slightly more than the 27MB .zip that I got when I manually zipped the doc.kml and images.
The XML file that Google Earth exported used tab characters to indent elements and the Linux convention of only linefeed characters for new lines whereas ExertGPS’ XML file used spaces to indent elements and the Windows convention of carriage returns and line feed characters for new lines.
They also used difference namespaces which may be relevant.
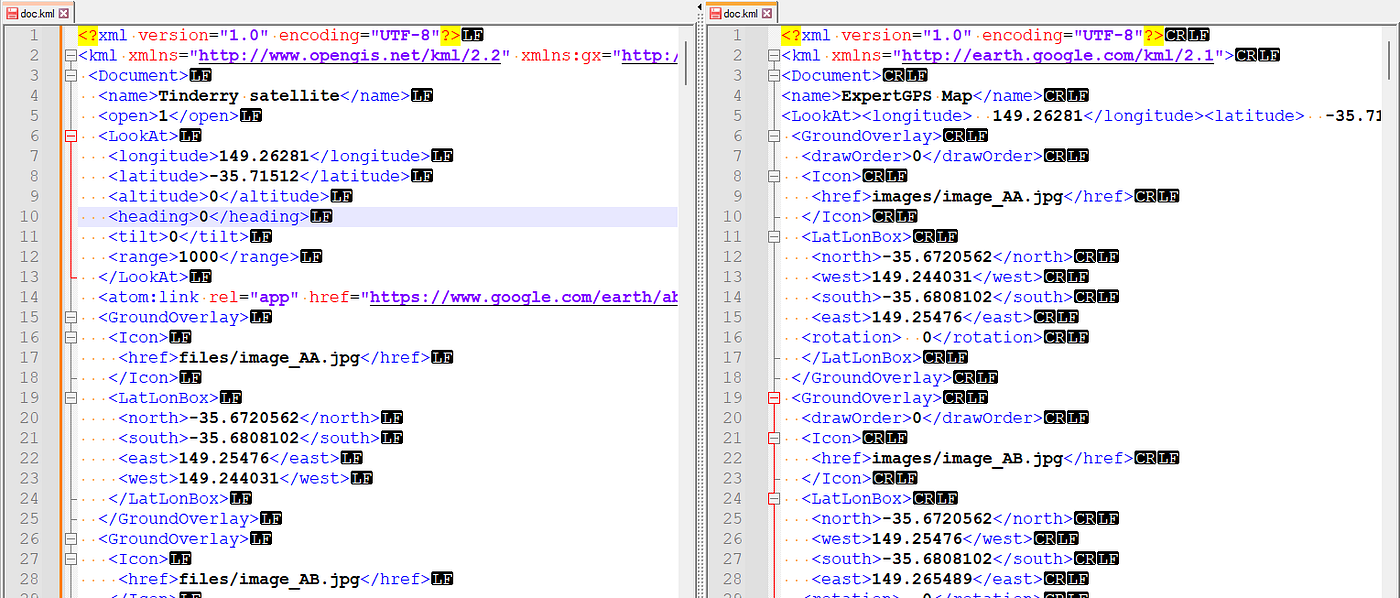
XML generated by Google Earth’s on the left, ExpertGPS on the right
I didn’t look too closely at the structure and data of each document as exporting from Google Earth is convenient so I didn’t need to resolve the issue with manually zipping the imagery and doc.kml.
Once the .kmz file was in the /CustomMaps/ folder on my Garmin, I turned it on and panned to the area I had downloaded imagery for and zoomed to 300-metre scale to verify it had worked. I didn’t have to go into Setup Maps and enable the custom map; it was enabled by default.
What it looks like on my Garmin GPSMAP 64
In this example I’d also uploaded my route and waypoints from ExpertGPS, and my intended area of travel as there are no marked tracks here so the route was indicative only. The shape
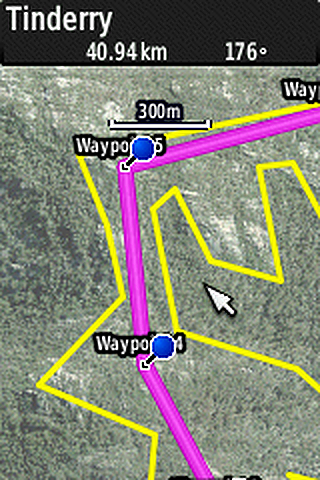
Screenshot of custom map with raster satellite imagery on Garmin GPSMAP 64s
The intended area of travel shape shown in yellow was converted to a track in ExpertGPS and then shown on my Garmin via Track Manager. It helps me avoid obstacles such as valleys and escarpments, prioritises open rocky landscape that should be easier and quicker to navigate, and keeps me going in the right direction. It could also help in the event of a search & rescue to show the area I’m likely within, although I don’t always leave intentions plans with someone.
And this is what it looks like in Google Earth with the default satellite imagery as I can’t figure out how to show both the custom map imagery without obscuring my intended area of travel shape, which I’d converted from a track back to a shape before viewing in Google Earth so it can be rendered will a fill instead of just an outline.
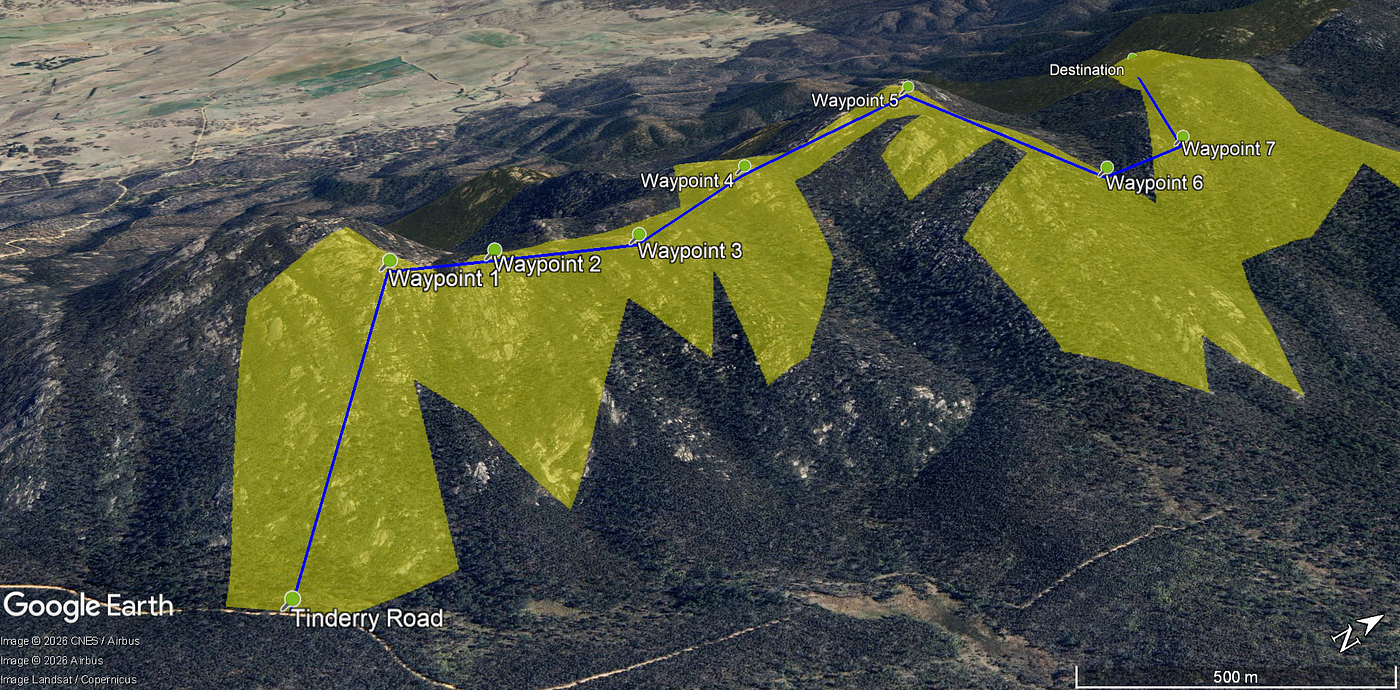
Tentative route, waypoints and intended area of travel viewed in Google Earth
I also regularly download a Garmin IMG file of OpenStreetMap for Australia from **OpenMTBMap.org** including 10-metre contours as a separate custom map I can toggle on and off.
메타데이터
- post_id
- 9d09a294d0e5
- slug
- garmin-gpsmap-64s-imagery-9d09a294d0e5
- url
- https://explore.purecaffeine.com/garmin-gpsmap-64s-imagery-9d09a294d0e5
- canonical_url
- https://explore.purecaffeine.com/garmin-gpsmap-64s-imagery-9d09a294d0e5
- author_url
- https://medium.com/@purecaffeine
- status
- ok
- fetched_at
- 2026-07-13 12:09:53