Genie ACS on Ubuntu — TR069 Automatic Configuration Server
If you have many TR069-enabled devices, then you can configure an open source ACS server on Ubuntu to monitor and manage the devices.
Genie ACS on Ubuntu — TR069 Automatic Configuration Server
How to configure an open-source ACS server on Ubuntu. Monitor and manage all networked TR069-enabled devices in one dashboard.
Genie ACS is an open-source TR-069 remote management solution that is fast and lightweight.

Genie ACS Logo
The official guide is here: http://docs.genieacs.com/en/latest/installation-guide.html. The following guide is slightly different from the official guide. You can follow this guide on Ubuntu to install the Genie ACS server. This guide contains additional steps related to the full working setup (e.g. opening the firewall for CPE access). A demo of connecting a CPE is also available at the end.
Install NodeJS
You need to install the latest NodeJS on your Ubuntu system. Install the NodeJS with the following commands.
sudo apt install nodejsnode -v
List the installed Node JS version
Install MongoDB
GenieACS requires MongoDB 3.6 and up. Use the following commands to install MongoDB 4.4 on your Ubuntu system.
wget -qO - https://www.mongodb.org/static/pgp/server-4.4.asc | sudo apt-key add -echo "deb [ arch=amd64,arm64 ] https://repo.mongodb.org/apt/ubuntu focal/mongodb-org/4.4 multiverse" | sudo tee /etc/apt/sources.list.d/mongodb-org-4.4.listsudo apt-get updatesudo apt-get install mongodb-org=4.4.8 mongodb-org-server=4.4.8 mongodb-org-shell=4.4.8 mongodb-org-mongos=4.4.8 mongodb-org-tools=4.4.8mongod --version
Install GenieACS
Once you have NodeJS and MongoDB, you can use NPM to install the Genie ACS. Use the following command to install Genie ACS.
sudo npm install -g genieacs@1.2.8Navigate to your npm global installation and to your GenieACS binaries directory. /home/praveen/.nvm/versions/node/v16.14.2/lib/node_modules/genieacs/bin

Create the configuration file
The following configuration file is required to run the Genie ACS. You need to give a unique phrase for GENIEACS_UI_JWT_SECRET.

Set up logging for Genie ACS
Having logs enables you to see what happens with your ACS installations. Use /var/logs/genieacs/ location to set up logs for the Genie ACS.
mkdir /var/log/genieacs
chown praveen:praveen /var/log/genieacs
The tail of the UI log is shown below as an example log.

Create Systemd Services
System and Service Manager: systemd is a suite of basic building blocks for a Linux system. It provides a system and service manager that runs as PID 1 and starts the rest of the system.
Learn more about systemd : https://systemd.io
Create the following four services required for genieacs.

- genieacs-cwmp.service
[embed]
- genieacs-ui.service
[embed]
- genieacs-nbi.service
[embed]
- gedit genieacs-fs.service
[embed]
Enable, Start and Verify the Genie ACS services
sudo systemctl enable genieacs-cwmp
sudo systemctl start genieacs-cwmp
sudo systemctl status genieacs-cwmp
sudo systemctl enable genieacs-ui
sudo systemctl start genieacs-ui
sudo systemctl status genieacs-ui
Note: Enable, start and verify the other two services too.
Allow connections with Ubuntu Firewall
If you have a firewall set up in your Ubuntu system, it will not allow TCP connections on the CWMP port. Use the following code to allow connections.
sudo ufw allow 7547/tcpUse the following code to verify the UFW configuration.
sudo ufw status
Using the Genie ACS
You should configure the TR069 parameters in your CPE to allow the CPE to connect to the Genie ACS.
The following is an example UI interface showing the ACS server configuration. Your device interface may be different.

Example TR069 configuration UI of a CPE
Use the ifconfig command to find the Ubuntu box IP address. Use that address and port 7547 as the ACS server URL.

Once you enter the URL and apply the new configuration, the devices should show up in the ACS.
Log in to the ACS server.

Open the Genie ACS UI. For the first time, it will configure the basic settings for you.
The device should show up as follows.

You can click and enter the device.

See the device parameter tree (TR069) below.

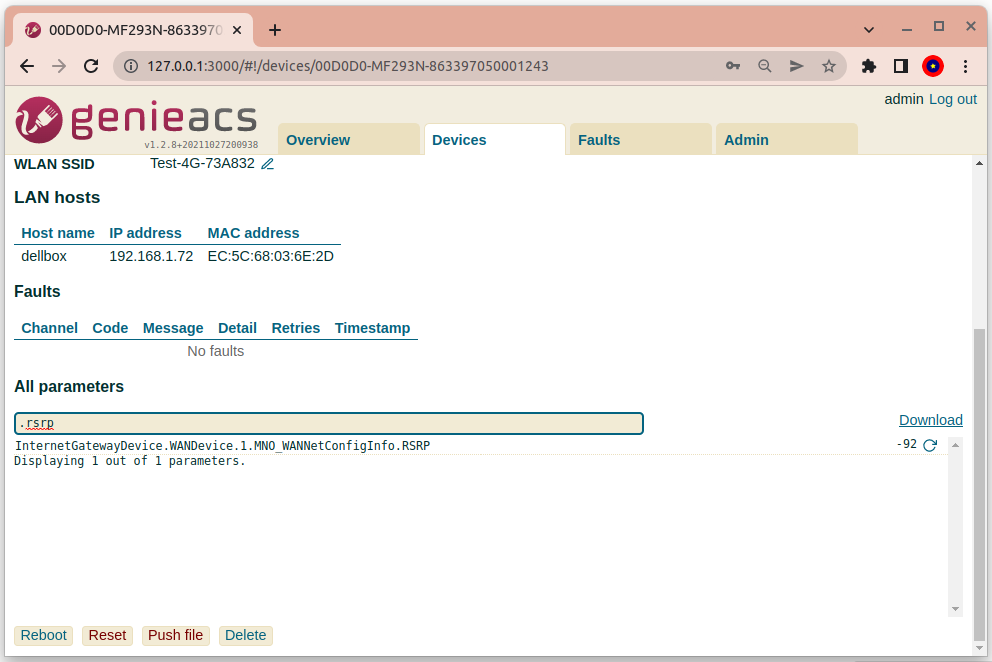
Since there are many parameters, you may need to search for the parameter you are interested in. The below shows the RSRP values after searching RSRP.
Device Summary
The summary of all of your devices can be seen in the Genie ACS dashboard. It can also show you near real-time network device KPI. The UI shows faults info too. You can also change the device parameters with the UI.
Visit the official website for more information: https://genieacs.com

Device Summary Screen — Genie ACS
메타데이터
- post_id
- 9d7d94a7cd01
- slug
- genie-acs-on-ubuntu-tr069-automatic-configuration-server-9d7d94a7cd01
- url
- https://medium.com/@praveendias/genie-acs-on-ubuntu-tr069-automatic-configuration-server-9d7d94a7cd01
- canonical_url
- https://medium.com/@praveendias/genie-acs-on-ubuntu-tr069-automatic-configuration-server-9d7d94a7cd01
- author_url
- https://medium.com/@praveendias
- status
- ok
- fetched_at
- 2026-07-19 06:43:54


