How To Draw Your Own Twitch Emotes: 5 Easy Tips For Beginners
Getting started on Twitch and need your own emotes? Try drawing your own!
How To Draw Your Own Twitch Emotes: 5 Easy Tips For Beginners
Getting started on Twitch and need your own emotes? Try drawing your own!
We’ve studied the official Twitch emote guidelines. Here’s the basics: You’ll need a 1000x1000 pixel canvas, thick lines, exaggerated expressions, and a white outline for dark mode. Export them as transparent PNGs under 1MB.

1. Use Thick Lines
Most Twitch/Discord emotes are drawn with thick lines. This is because Twitch usually shrinks the image to a tiny 28x28px image. To ensure the emote is still visible and readable, try not to use too much tiny details. Or else your image will turn into a blurry blob!

Try zooming out occasionally while drawing to see if the image still conveys the expression you want
2. Exaggerate Every Expression
People in the community like to express their reactions in the most extreme way possible. It’s comedic and gets the message across. What better way to do so than to ensure your image has the most outrageous expression. Try to make it so your eyes and mouth are exaggerated and cover most of the character’s face. Being realistic is a detriment to your expression!

Wider mouth and larger eyes show what the character is emoting clearly
👉**Need a starter pack? Download my FREE Goblin Mode Emote Pack!**
3. Add a White Outline for Dark Mode
Most Twitch viewers and Discord users tend to have their app in dark mode. To really improve readability of your emotes, try adding a white line to your emotes. In Photoshop, you can easily set this by double-clicking your layer to open Layer Styles, check the “Stroke” box, adjust the size, and set the color to white.

Works much better on darker backgrounds
4. The Best Canvas Size and Export Settings
To start, set your canvas size to either 500x500 or 1000x1000. The latter works best if you plan to repurpose your artwork to different forms of merchandise like stickers or pins. As for your resolution, set it to 300 DPI. While 72 DPI is fine for web-only use, starting at 300 DPI ensures the art remains crisp if you ever decide to print it. Set the color profile to sRGB or RGB, keep the background transparent and you’re all set to create!
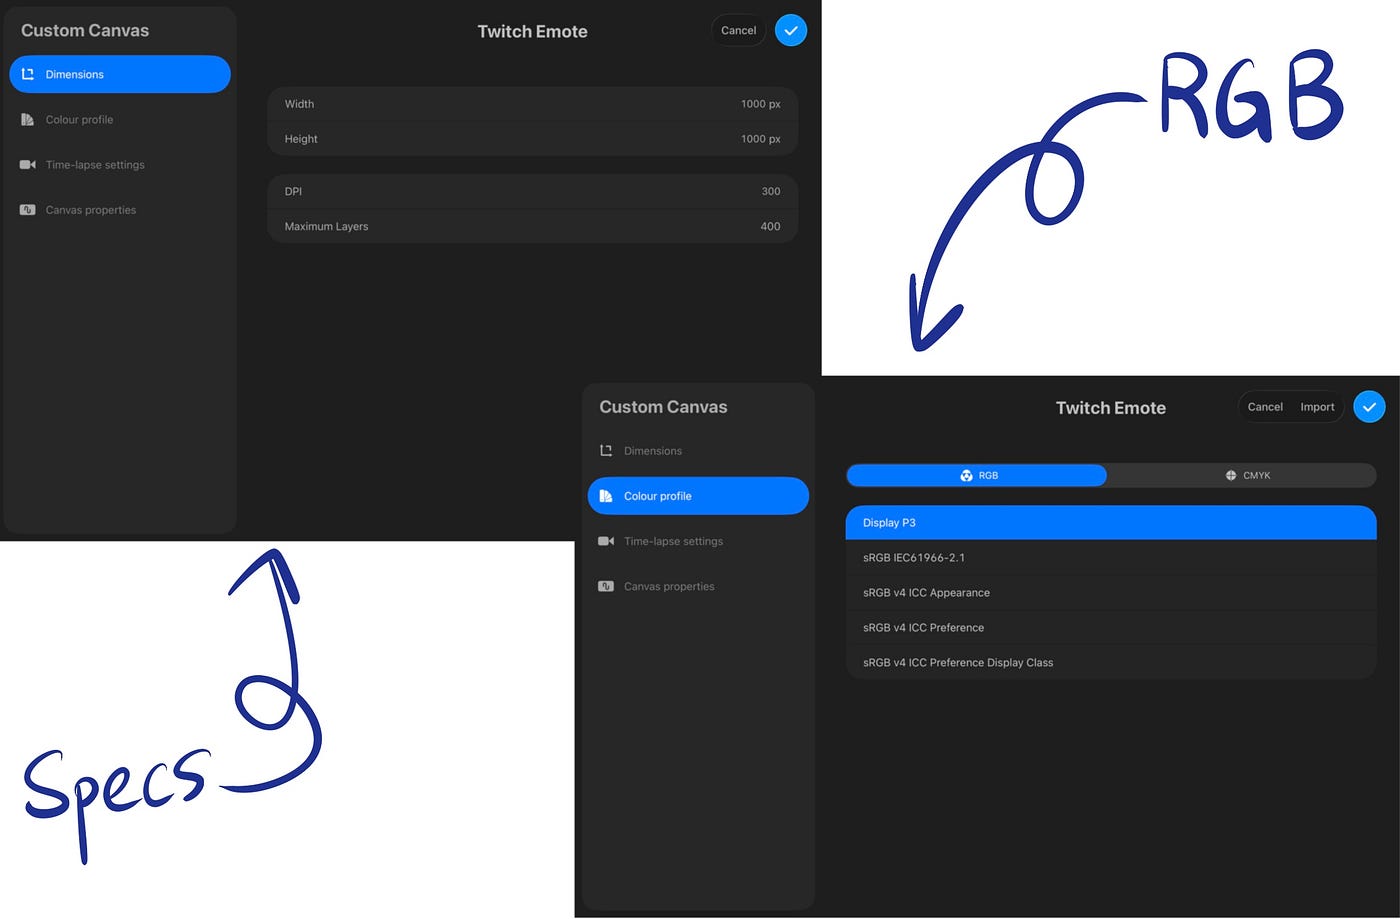
Here’s how i set mine on Procreate (iPad Mini 6th Gen)
5. Don’t Start From Scratch — Use References
Emote proportions are different from standard character art. Heads are large, features are exaggerated, and bodies (if visible) are usually minimal. If you’re used to drawing in a more realistic style, emote proportions can feel unnatural at first. Don’t be afraid to reference (do NOT copy) other artworks. Having a point of reference makes it easier to create your own emotes.

My own free pack of 6 emotes to get you started on Twitch (or if you just love goblins)
👉**If you need references, try downloading my FREE starter pack here!**
Ready to Create?
You now have everything you need to draw your first Twitch emote: the right canvas, the right lines, the right expressions, and the right tools.
Drop your first emote in the comments — I’d love to see what you make. And if you want a head start, grab the free Goblin Mode Emote Pack to see these principles in action.
메타데이터
- post_id
- a28c973feec6
- slug
- how-to-draw-your-own-twitch-emotes-5-easy-tips-for-beginners-a28c973feec6
- url
- https://medium.com/@qosmicquill/how-to-draw-your-own-twitch-emotes-5-easy-tips-for-beginners-a28c973feec6
- canonical_url
- https://medium.com/@qosmicquill/how-to-draw-your-own-twitch-emotes-5-easy-tips-for-beginners-a28c973feec6
- author_url
- https://medium.com/@qosmicquill
- status
- ok
- fetched_at
- 2026-06-23 17:05:31