สอน EEZ Studio บทที่ 3 ESP32 แสดงสถานะ Switch
📺 📟 🌏ในบทนี้จะนำเสนอการออกแบบ EEZ Studio แสดงสถานะ Switch ด้วยบอร์ด ESP32–2432S028 หรือที่นิยมเรียกกันว่า “Cheap Yellow Display” (CYD)…
สอน EEZ Studio บทที่ 3 ESP32 แสดงสถานะ Switch
📺 📟 🌏ในบทนี้จะนำเสนอการออกแบบ EEZ Studio แสดงสถานะ Switch ด้วยบอร์ด ESP32–2432S028 หรือที่นิยมเรียกกันว่า “Cheap Yellow Display” (CYD) ซึ่งเหมาะสำหรับผู้เริ่มต้นพัฒนา
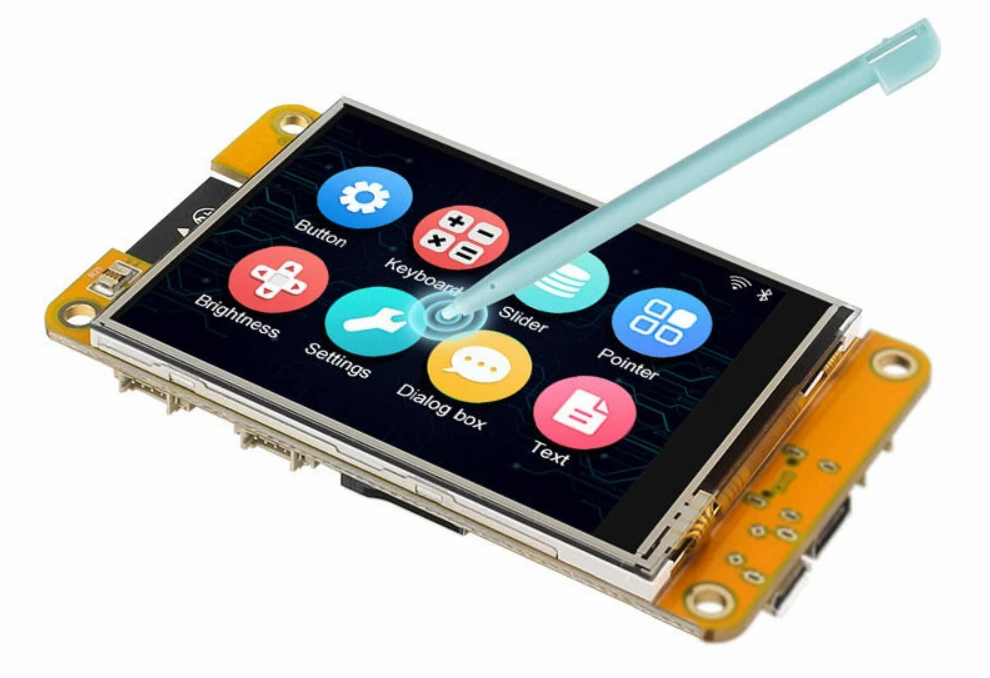
บอร์ด ESP32–2432S028 หรือที่นิยมเรียกกันว่า “Cheap Yellow Display” (CYD)

1.เริ่มต้น เปิดโปรแกรม Arduino IDE แล้วสร้างโปรเจคใหม่ชื่อ EEZ_Switch ดังภาพ

2.สร้างโปรเจ็ค EEZ Studio ตั้งค่าตามภาพได้เลย ตรงช่อง Name คือ EEZ_Switch ส่วน Location ให้เลือก Folder ที่อยู่เดียวกับโปรเจค Arduino ที่สร้างในหัวข้อก่อนหน้า เอาเครื่องหมายถูกหน้า Create directory ออก เมื่อตั้งค่าเสร็จกดปุ่ม Create Project ได้เลย

เมื่อ Create Project เสร็จจะได้หน้าจอดังภาพ ต่อไปมาตั้งค่ากันก่อนครับ

เริ่มต้นไปที่เมนู Setting ไอคอนรูปฟันเฟือง

กำหนดขนานหน้าจอตามภาพ 320 x 240

ต่อไป ไปที่เมนู Build ตั้งค่าตามภาพ

ไปที่เมนู Files ให้กดเพิ่มไฟล์ที่ ปุ่ม +

ตั้งชื่อไฟล์ vars.c แล้วกด OK

กลับมาที่เมนู Main ไปที่ POSITION AND SIZE แล้วกำหนดค่าหน้าจอเป็น 320x240

จัดตำแหน่ง Label ใหม่


เสร็จแล้วเปลี่ยนข้อวามเป็น Switch Status

ต่อไปนำ Widget Label มาวาง

ต่อไปสร้างตัวแปรเพื่อส่งค่าไปยัง ESP32 กดที่เครื่องหมาย + ตั้งชื่อตัวแปร และกำหนดค่าดังภาพ แล้วกด OK

จะเห็นตัวแปรดังภาพ จากนั้นกดปุ่ม คัดลอกโค้ด ไปวางในไฟล์ vars.c

ไปที่เมนู Setting เลือกไฟล์ vars.c แล้วนำโค้ดที่คัดลองมาวาง ดังภาพ

กลับไปที่เมนู Main เลือก Widget Label ไปที่ Properties SPECIFIC ไปที่ Text แล้วเลือก Expression

กดปุ่ม 3จุด เพิ่มคำสั่ง String.format(“SW0 = %d”, ST_Switch) เพื่อแสดงค่าจากตัวแปร ST_Switch แล้วกด OK

เพิ่มคำสั่ง SW0 = 0 ใน Preview value

กด Save และกด Build Project

7.ต่อไปเปิดโปรแกรม Arduino IDE ขึ้นมา แล้วเพิ่มคำสั่งต่อไปนี้
#include <lvgl.h>
#include "ui.h"
#include <TFT_eSPI.h>
#include <XPT2046_Touchscreen.h>
#define XPT2046_IRQ 36
#define XPT2046_MOSI 32
#define XPT2046_MISO 39
#define XPT2046_CLK 25
#define XPT2046_CS 33
#include "vars.h"    //นำเข้าไฟล์ vars.h
unsigned long t = 0;
const int sw0 = 0;  //กำหนดขา PIN Switch = 0 ของบอร์ด CYD
SPIClass touchscreenSpi = SPIClass(VSPI);
XPT2046_Touchscreen touchscreen(XPT2046_CS, XPT2046_IRQ);
uint16_t touchScreenMinimumX = 200, touchScreenMaximumX = 3700, touchScreenMinimumY = 240, touchScreenMaximumY = 3800;
/*Set to your screen resolution*/
#define TFT_HOR_RES 320
#define TFT_VER_RES 240
/*LVGL draw into this buffer, 1/10 screen size usually works well. The size is in bytes*/
#define DRAW_BUF_SIZE (TFT_HOR_RES * TFT_VER_RES / 10 * (LV_COLOR_DEPTH / 8))
#if LV_USE_LOG != 0
void my_print(lv_log_level_t level, const char *buf) {
  LV_UNUSED(level);
  Serial.println(buf);
  Serial.flush();
}
#endif
/* LVGL calls it when a rendered image needs to copied to the display*/
void my_disp_flush(lv_display_t *disp, const lv_area_t *area, uint8_t *px_map) {
  /*Call it to tell LVGL you are ready*/
  lv_disp_flush_ready(disp);
}
/*Read the touchpad*/
void my_touchpad_read(lv_indev_t *indev, lv_indev_data_t *data) {
  if (touchscreen.touched()) {
    TS_Point p = touchscreen.getPoint();
    //Some very basic auto calibration so it doesn't go out of range
    if (p.x < touchScreenMinimumX) touchScreenMinimumX = p.x;
    if (p.x > touchScreenMaximumX) touchScreenMaximumX = p.x;
    if (p.y < touchScreenMinimumY) touchScreenMinimumY = p.y;
    if (p.y > touchScreenMaximumY) touchScreenMaximumY = p.y;
    //Map this to the pixel position
    data->point.x = map(p.x, touchScreenMinimumX, touchScreenMaximumX, 1, TFT_HOR_RES); /* Touchscreen X calibration */
    data->point.y = map(p.y, touchScreenMinimumY, touchScreenMaximumY, 1, TFT_VER_RES); /* Touchscreen Y calibration */
    data->state = LV_INDEV_STATE_PRESSED;
  } else {
    data->state = LV_INDEV_STATE_RELEASED;
  }
}
lv_indev_t *indev;      //Touchscreen input device
uint8_t *draw_buf;      //draw_buf is allocated on heap otherwise the static area is too big on ESP32 at compile
uint32_t lastTick = 0;  //Used to track the tick timer
void setup() {
  //Some basic info on the Serial console
  String LVGL_Arduino = "LVGL demo ";
  LVGL_Arduino += String('V') + lv_version_major() + "." + lv_version_minor() + "." + lv_version_patch();
  Serial.begin(115200);
  Serial.println(LVGL_Arduino);
  //Initialise the touchscreen
  touchscreenSpi.begin(XPT2046_CLK, XPT2046_MISO, XPT2046_MOSI, XPT2046_CS); /* Start second SPI bus for touchscreen */
  touchscreen.begin(touchscreenSpi);                                         /* Touchscreen init */
  touchscreen.setRotation(3);                                                /* Inverted landscape orientation to match screen */
  //Initialise LVGL GUI
  lv_init();
  draw_buf = new uint8_t[DRAW_BUF_SIZE];
  lv_display_t *disp;
  disp = lv_tft_espi_create(TFT_HOR_RES, TFT_VER_RES, draw_buf, DRAW_BUF_SIZE);
  //Initialize the XPT2046 input device driver
  indev = lv_indev_create();
  lv_indev_set_type(indev, LV_INDEV_TYPE_POINTER);
  lv_indev_set_read_cb(indev, my_touchpad_read);
  //Done
  Serial.println("LVGL Setup done");
  //Integrate EEZ Studio GUI
  ui_init();
  pinMode(sw0, INPUT); //กำหนดขา Pin switch เป็น INPUT
}
//Requires LVGL 9.0+
void loop() {
  // Switch Status
  if (millis() - t >= 300) {
    t = millis();
    ui_tick(); //update UI
    if (digitalRead(sw0) == 0) { //อ่านค่าสวิตช์
      set_var_st_switch(1); //เมื่อสวิตช์ถูกกด จะส่งค่า 1
    } else {
      set_var_st_switch(0); //เมื่อปล่อยสวิตช์ จะส่งค่า 0
    }
  }
  // Update Display
  lv_tick_inc(millis() - lastTick);  //Update the tick timer. Tick is new for LVGL 9
  lastTick = millis();
  lv_timer_handler();  //Update the UI
  delay(5);
}
ทำการ Upload โค้ดลงบอร์ด จะได้ผลลัพธ์ดังภาพ

SW0 จะอยู่ที่ ปุ่ม Boot

ขอบคุณที่รับชมครับผม

สนันสนุน KruRin ในการเขียนบทความ เลี้ยงกาแฟซักแก้วครับ กดที่นี่

สนใจบอร์ด IoT Education Kit V1.1

สั่งซื้อใน Shopee ที่ลิ้งค์ด้านล่างได้เลยครับผม
หรือ กด ที่นี่
KruRin
บทต่อไป กดลิ้งค์ด้านล่างเลยครับ
메타데이터
- post_id
- a4b0629d09b6
- slug
- สอน-eez-studio-บทที่-3-esp32-แสดงสถานะ-switch-a4b0629d09b6
- url
- https://medium.com/@KruRin/%E0%B8%AA%E0%B8%AD%E0%B8%99-eez-studio-%E0%B8%9A%E0%B8%97%E0%B8%97%E0%B8%B5%E0%B9%88-3-esp32-%E0%B9%81%E0%B8%AA%E0%B8%94%E0%B8%87%E0%B8%AA%E0%B8%96%E0%B8%B2%E0%B8%99%E0%B8%B0-switch-a4b0629d09b6
- canonical_url
- https://medium.com/@KruRin/%E0%B8%AA%E0%B8%AD%E0%B8%99-eez-studio-%E0%B8%9A%E0%B8%97%E0%B8%97%E0%B8%B5%E0%B9%88-3-esp32-%E0%B9%81%E0%B8%AA%E0%B8%94%E0%B8%87%E0%B8%AA%E0%B8%96%E0%B8%B2%E0%B8%99%E0%B8%B0-switch-a4b0629d09b6
- author_url
- https://medium.com/@KruRin
- status
- ok
- fetched_at
- 2026-06-13 09:11:36
