Federation between OpenAM (IDP) and OAM (SP) & Simple Web App
Federation Lab
Federation between OpenAM (IDP) and OAM (SP) & Simple Web App
Federation Lab
Before starting this lab, follow the labs below to complete the installations and configuration of :
In this lab, we will protect a web application using OAM resource configurations and Federation Authn schema. The web application is deployed on a tomcat server.We can also deploy the web app on a separate managed server. OAM is the service provider broker that protects the web app.
To complete this tutorial, you have to complete the following installs.
Install OpenAM & OpenDJ (Identity Provider Install and Configuration) https://medium.com/@iamblockc/install-openam-and-dj-e9ccb6ec958f
- Install Oracle Infra, Oracle DB, Weblogic and OAM (Service Provider Install and Configuration)
https://iamblockc.medium.com/install-and-startup-of-oracle-db-7e69f9b6edd1
- Install and Configure Oracle Unified Directory (OUD)
https://iamblockc.medium.com/easy-install-configuration-of-oracle-unified-directory-oud-877fd7f3ab87
- Install and Configure Oracle HTTP Server (OHS) OAM Webgate will be deployed on the OHS as a PEP to protect the Webapp deployed on Tomcat.
https://iamblockc.medium.com/steps-to-install-configure-oracle-http-server-15c3355572ac
- Virtual Machine Requirements-
VM for OpenAM and DJ — (8 gb ram 50gb storage) VM for Oracle DB — (8 gb ram 50gb storage) VM for Weblogic, OAM, OHS, OUD and Tomcat. (8 gb ram 50gb storage)
OAM as Service Provider and OpenAM as an Identity provider.
[Before doing this lab, you have to follow the installation labs for Oracle DB, Weblogic, OAM infra and config, OUD, OpenAM and OpenDJ install and OHS installation. This lab integrates OpenAM as Identity provider and OAM as SP/SP broker to a simple end application on Tomcat]
In this lab, we will protect an web application on OAM with Federation Authn schema. The web application is deployed on a new app managed server. OAM is the service provider that protects the web app.
We will install and configure OpenAM and OpenDJ to be an IDP. These both run on different VMs. OpenAM will be IDP. OpenDJ is configured for identities at the IDP end. Oracle unified directory is configured for identities at the Service provider end.
We will exchange the meta data between the idp and the SP
The steps and screenshots will walk you through Exporting IDP Metadata (in our case OpenAM) and configuring OAM with that meta data.
Create a Circle of Trust on the AM console.
Choose the test key for demo purposes. Call the COT as oam-fam. In the attribute mapping session,enter email as the attribute that is send in the assertion and that maps to mail in the local repository.
The IDP metadata URL can be retrieved from the below URL.
The metadata look like the one below. The unique value of the entityID is shown in bold. The public certificate to encrypt the assertion is also embedded in the Metadata file. Save the file. This file will be used in the next lab to configure the OAM SP side of configuration.
<EntityDescriptor entityID=”http://app.example.com:8080/sso"><IDPSSODescriptor WantAuthnRequestsSigned=”false” protocolSupportEnumeration=”urn:oasis:names:tc:SAML:2.0:protocol”><KeyDescriptor use=”signing”><ds:KeyInfo><ds:X509Data><ds:X509Certificate><SAML Certificate></ds:X509Certificate></ds:X509Data></ds:KeyInfo></KeyDescriptor><ArtifactResolutionService index=”0" isDefault=”true” Binding=”urn:oasis:names:tc:SAML:2.0:bindings:SOAP” Location=”http://app.example.com:8080/sso/ArtifactResolver/metaAlias/ExternalPartners/idp"/> <SingleLogoutService Binding=”urn:oasis:names:tc:SAML:2.0:bindings:HTTP-Redirect” Location=”http://app.example.com:8080/sso/IDPSloRedirect/metaAlias/ExternalPartners/idp" ResponseLocation=”http://app.example.com:8080/sso/IDPSloRedirect/metaAlias/ExternalPartners/idp"/><SingleLogoutService Binding=”urn:oasis:names:tc:SAML:2.0:bindings:HTTP-POST” Location=”http://app.example.com:8080/sso/IDPSloPOST/metaAlias/ExternalPartners/idp" ResponseLocation=”http://app.example.com:8080/sso/IDPSloPOST/metaAlias/ExternalPartners/idp"/> <SingleLogoutService Binding=”urn:oasis:names:tc:SAML:2.0:bindings:SOAP” Location=”http://app.example.com:8080/sso/IDPSloSoap/metaAlias/ExternalPartners/idp"/><ManageNameIDService Binding=”urn:oasis:names:tc:SAML:2.0:bindings:HTTP-Redirect” Location=”http://app.example.com:8080/sso/IDPMniRedirect/metaAlias/ExternalPartners/idp" ResponseLocation=”http://app.example.com:8080/sso/IDPMniRedirect/metaAlias/ExternalPartners/idp"/><ManageNameIDService Binding=”urn:oasis:names:tc:SAML:2.0:bindings:HTTP-POST” Location=”http://app.example.com:8080/sso/IDPMniPOST/metaAlias/ExternalPartners/idp" ResponseLocation=”http://app.example.com:8080/sso/IDPMniPOST/metaAlias/ExternalPartners/idp"/><ManageNameIDService Binding=”urn:oasis:names:tc:SAML:2.0:bindings:SOAP” Location=”http://app.example.com:8080/sso/IDPMniSoap/metaAlias/ExternalPartners/idp"/><NameIDFormat>urn:oasis:names:tc:SAML:2.0:nameid-format:persistent</NameIDFormat><NameIDFormat>urn:oasis:names:tc:SAML:2.0:nameid-format:transient</NameIDFormat><NameIDFormat>urn:oasis:names:tc:SAML:1.1:nameid-format:emailAddress</NameIDFormat><NameIDFormat>urn:oasis:names:tc:SAML:1.1:nameid-format:unspecified</NameIDFormat><NameIDFormat>urn:oasis:names:tc:SAML:1.1:nameid-format:WindowsDomainQualifiedName</NameIDFormat><NameIDFormat>urn:oasis:names:tc:SAML:2.0:nameid-format:kerberos</NameIDFormat><NameIDFormat>urn:oasis:names:tc:SAML:1.1:nameid-format:X509SubjectName </NameIDFormat> <SingleSignOnService Binding=”urn:oasis:names:tc:SAML:2.0:bindings:HTTP-Redirect” Location=”http://app.example.com:8080/sso/SSORedirect/metaAlias/ExternalPartners/idp"/> <SingleSignOnService Binding=”urn:oasis:names:tc:SAML:2.0:bindings:HTTP-POST” Location=”http://app.example.com:8080/sso/SSOPOST/metaAlias/ExternalPartners/idp"/> <SingleSignOnService Binding=”urn:oasis:names:tc:SAML:2.0:bindings:SOAP” Location=”http://app.example.com:8080/sso/SSOSoap/metaAlias/ExternalPartners/idp"/> <NameIDMappingService Binding=”urn:oasis:names:tc:SAML:2.0:bindings:SOAP” Location=”http://app.example.com:8080/sso/NIMSoap/metaAlias/ExternalPartners/idp"/> <AssertionIDRequestService Binding=”urn:oasis:names:tc:SAML:2.0:bindings:SOAP” Location=”http://app.example.com:8080/sso/AIDReqSoap/IDPRole/metaAlias/ExternalPartners/idp"/> <AssertionIDRequestService Binding=”urn:oasis:names:tc:SAML:2.0:bindings:URI” Location=”http://app.example.com:8080/sso/AIDReqUri/IDPRole/metaAlias/ExternalPartners/idp"/> </IDPSSODescriptor> </EntityDescriptor>
Configure OAM & import AM IDP metadata
On the OAM (SP) end, you need to configure the IDP. Click on the Federation tab -> choose Service provider configuration. In the Create Identity provider page.
Leave the check box on Load from provider metadata,(OpenAM metadata you have downloaded from the previous step). Click on Load MetaData button. Once you load the metadata, if it is successfully loaded you will see the screenshot as shown.
In the Map assertion Name ID to User ID store attribute, enter mail as the local attribute name to configure.
The completed screen is shown Identity provider Partner created successfully.
For this lab, we dont do any changes to the Attribute Mapping — the default IDP-attribute-profile.
Now to configure the IDP end, Export OAM SP Metadata. Login into OAM, Choose Configuration -> Federation.
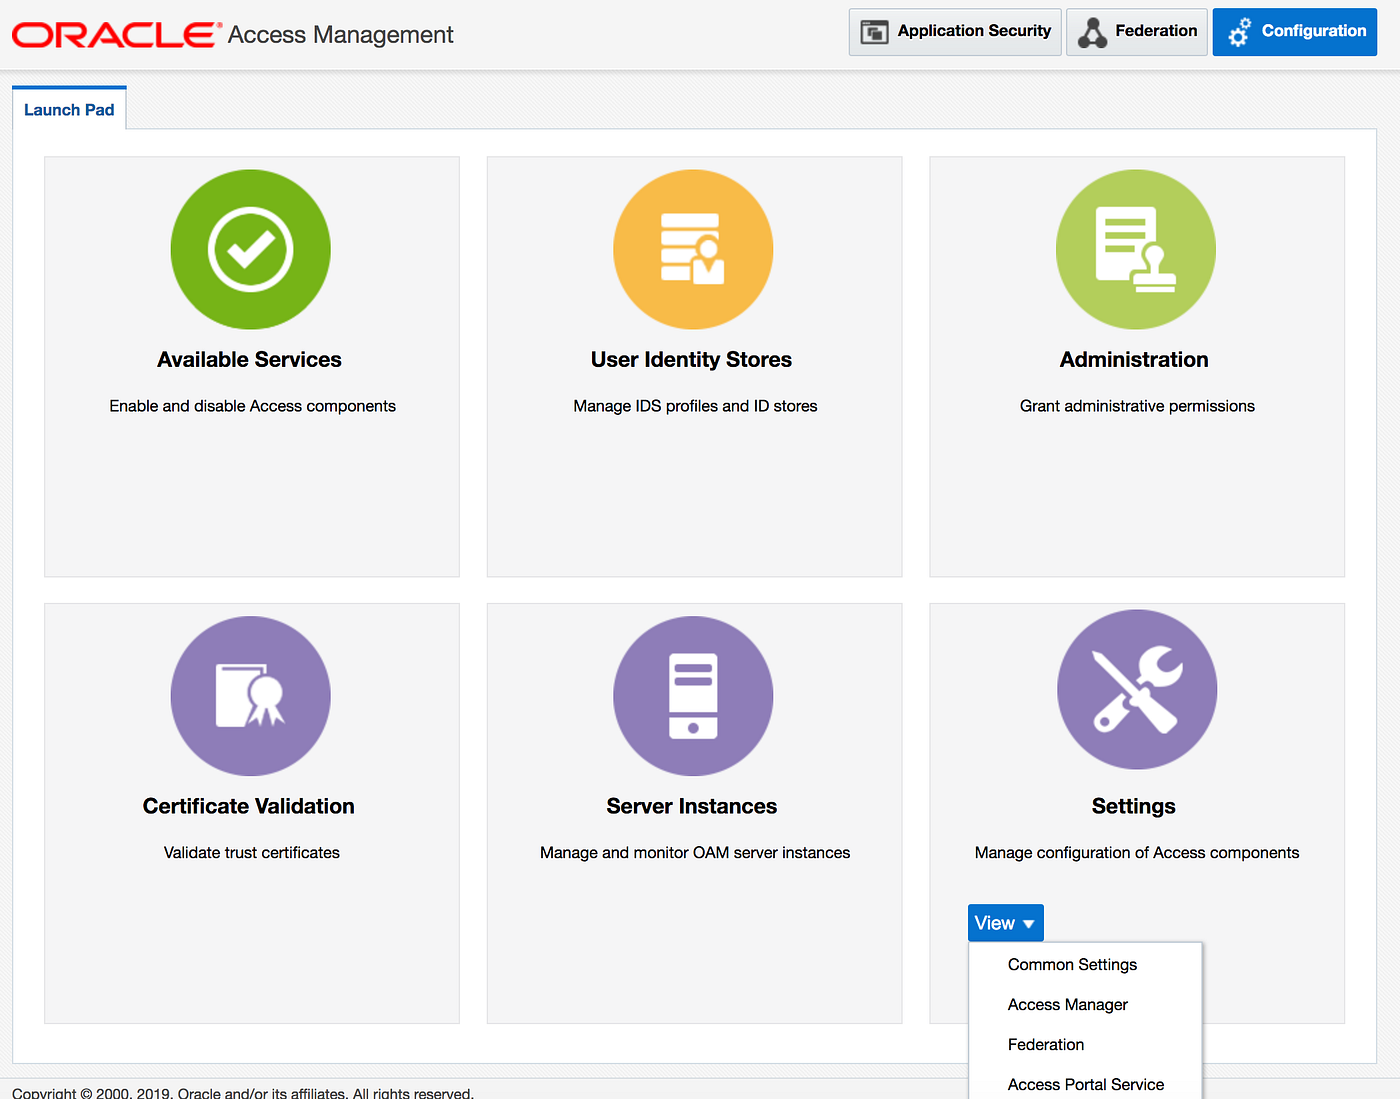
Export the metadata by clicking the Export SAML 2.0 metadata. Save it to a file.

Modify the Original metadata to the format matching one below so that can be successfully uploaded to OpenAM.
<md:EntityDescriptor xmlns:md=”urn:oasis:names:tc:SAML:2.0:metadata” xmlns:xsi=”http://www.w3.org/2001/XMLSchema-instance" ID=”id-DpkVD7cMbRb9YaMj9HY5OK9c9-BcmAJbS8mGe3yX” cacheDuration=”P30DT0H0M0S” entityID=”http://deviam.com:14100/oam/fed" validUntil=”2031–03–01T22:25:30Z”><md:SPSSODescriptor AuthnRequestsSigned=”true” WantAssertionsSigned=”true” protocolSupportEnumeration=”urn:oasis:names:tc:SAML:2.0:protocol”><md:KeyDescriptor use=”signing”><dsig:KeyInfo xmlns:dsig=”http://www.w3.org/2000/09/xmldsig#"><dsig:X509Data><dsig:X509Certificate><OAM SAML Certificate></dsig:X509Certificate><dsig:X509IssuerSerial><dsig:X509IssuerName>CN=ec2-54-93-180-111.eu-central-1.compute.amazonaws.com</dsig:X509IssuerName><dsig:X509SerialNumber>10</dsig:X509SerialNumber></dsig:X509IssuerSerial><dsig:X509SubjectName>CN=ec2-54-93-180-111.eu-central-1.compute.amazonaws.com</dsig:X509SubjectName></dsig:X509Data></dsig:KeyInfo></md:KeyDescriptor><md:KeyDescriptor use=”encryption”><dsig:KeyInfo xmlns:dsig=”http://www.w3.org/2000/09/xmldsig#"><dsig:X509Data><dsig:X509Certificate><OAM SAML Certificate> </dsig:X509Certificate><dsig:X509IssuerSerial><dsig:X509IssuerName>CN=ec2-54-93-180-111.eu-central-1.compute.amazonaws.com</dsig:X509IssuerName><dsig:X509SerialNumber>10</dsig:X509SerialNumber></dsig:X509IssuerSerial><dsig:X509SubjectName>CN=ec2-54-93-180-111.eu-central-1.compute.amazonaws.com</dsig:X509SubjectName></dsig:X509Data></dsig:KeyInfo><md:EncryptionMethod Algorithm=”http://www.w3.org/2001/04/xmlenc#rsa-1_5"/><md:EncryptionMethod Algorithm=”http://www.w3.org/2001/04/xmlenc#aes128-cbc"/><md:EncryptionMethod Algorithm=”http://www.w3.org/2001/04/xmlenc#aes192-cbc"/><md:EncryptionMethod Algorithm=”http://www.w3.org/2001/04/xmlenc#aes256-cbc"/><md:EncryptionMethod Algorithm=”http://www.w3.org/2001/04/xmlenc#tripledes-cbc"/></md:KeyDescriptor><md:SingleLogoutService Binding=”urn:oasis:names:tc:SAML:2.0:bindings:HTTP-Redirect” Location=”http://deviam.com:14100/oamfed/sp/samlv20" ResponseLocation=”http://deviam.com:14100/oamfed/sp/samlv20"/><md:SingleLogoutService Binding=”urn:oasis:names:tc:SAML:2.0:bindings:HTTP-POST” Location=”http://deviam.com:14100/oamfed/sp/samlv20" ResponseLocation=”http://deviam.com:14100/oamfed/sp/samlv20"/><md:AssertionConsumerService Binding=”urn:oasis:names:tc:SAML:2.0:bindings:HTTP-Artifact” Location=”http://deviam.com:14100/oam/server/fed/sp/sso" index=”0" isDefault=”true”/><md:AssertionConsumerService Binding=”urn:oasis:names:tc:SAML:2.0:bindings:HTTP-POST” Location=”http://deviam.com:14100/oam/server/fed/sp/sso" index=”1"/></md:SPSSODescriptor></md:EntityDescriptor>
To import SP metadata in the IDP end. Login into OpenAM,click on ExternalPartners, then Federation and choose the oam-fam COT. Once imported you can see the entity ID as shown in the screenshot below.

Click on Configure Remote Service Provider.

Choose oam-fam COT.

Choose File -> Upload.

Choose the modified OAM metadata file. Click Upload File button.

Once it is successfully uploaded, you can edit the COT and move the new SP to the right as shown below. Choose the entityID from the Available column, and move it to the right side. Click the Save button
Circle Of Trust profile updated.
The COT is active. The entityIDs are seen in the Entity Providers.
This step we will login back into OAM and the authentication schemes. Configure OAM Fed authN scheme to protect resources that was created with the imported entity. The FR IDP scheme screen is shown below:
Click on the Create Authentication Scheme and Module.
Once the Auth schema is created, you need to
- Create the webgate.
- Application Domain.
- Configure the resource with the AuthN scheme and AuthZ schema.
- To protect the webapp, we need to deploy the web application as well (This is done towards end of this lab).
Let’s complete those. First lets protect OHS default public.html page.
Test Federation between IDP and SP
Deploy webgate, copy the configuration,start OHS and test.
Deploy Webgate
To deploy a webgate, we need to configure the webgate artifacts and edit the http conf file to
include the webgate conf.
Use the command below to deploy the webgate. The -w points to the OHS component directory. The -oh tag points to the middleware home directory. Depending on your deployment path, export the middleware home and domain home as shown.
export MW_HOME=/<pathto>/middleware/ export DOMAIN_HOME=$MW_HOME/user_projects/domains/oam_domain /<pathto>/middleware/webgate/ohs/tools/deployWebGate/deployWebGateInstance.sh -w /<pathto>/middleware/user_projects/domains/oam_domain/config/fmwconfig/components/OHS/ohs1/ -oh /u01/app/oracle/product/middleware/
Edit HTTP Conf file
/<pathto>/middleware/webgate/ohs/tools/setup/InstallTools/EditHttpConf -w /<pathto>/middleware/user_projects/domains/oam_domain/config/fmwconfig/components/OHS/ohs1 -oh /u01/app/oracle/product/middleware/
Once the http.conf file is edited, cat the file to confirm the webgate.conf file is included.
cat /<pathto>/middleware/user_projects/domains/oam_domain/config/fmwconfig/components/OHS/ohs1/httpd.conf
IncludeOptional “moduleconf/*.conf” include “webgate.conf” ** To disable the webgate interception, comment the
Include “webgate.conf”
Webgate Configuration
Now deploy the downloaded webgate to the OHS server config folder as shown. The ObAccessClient.xml is seen as bold.
ls -latr /<pathto>/middleware/user_projects/domains/oam_domain/config/fmwconfig/components/OHS/ohs1/webgate/config/
total 32
drwxrwxr-x. 2 oracle oracle 6 Apr 23 09:12 simple drwxrwxr-x. 4 oracle oracle 33 Apr 23 09:12 .. -rw-rw-r — . 1 oracle oracle 3313 Apr 23 17:29 ObAccessClient.xml -rw-rw-r — . 1 oracle oracle 0 Apr 23 17:29 cwallet.sso.lck -rw-rw-r — . 1 oracle oracle 5077 Apr 23 17:29 cwallet.sso drwxrwxr-x. 2 oracle oracle 48 Apr 23 17:30 wallet -rw-r — — -. 1 oracle oracle 15026 Sep 5 18:16 oblog_config_wg.xml drwxrwxr-x. 4 oracle oracle 4096 Sep 5 18:21 .
To stop OHS server
/<pathto>/middleware/user_projects/domains/oam_domain/bin/stopComponent.sh ohs1 To start OHS server /<pathto>/middleware/user_projects/domains/oam_domain/bin/startComponent.sh ohs1
Enable JIT on OAM
Execute the following commands to enable JIT in OAM. JIT creates a user profile if there is not a matching profile.
[oracle@deviam bin]$ /<pathto>/middleware/wlserver/common/bin/wlst.sh WARNING: This is a deprecated script. Please invoke the wlst.sh script under oracle_common/common/bin. Initializing WebLogic Scripting Tool (WLST) … [oracle@deviam bin]$ /<pathto>/middleware/oracle_common/common/bin/wlst.sh Initializing WebLogic Scripting Tool (WLST) … Welcome to WebLogic Server Administration Scripting Shell Type help() for help on available commands
wls:/offline> connect() Please enter your username :weblogic weblogic Please enter your password : Please enter your server URL [t3://localhost:7001] :t3://<ipaddress>:7001 t3://<ipaddress>:7001 Connecting to t3://<ipaddress>:7001 with userid weblogic … Successfully connected to Admin Server “AdminServer” that belongs to domain “oam_domain”. Warning: An insecure protocol was used to connect to the server. To ensure on-the-wire security, the SSL port or Admin port should be used instead. wls:/oam_domain/serverConfig/> domainRuntime() Location changed to domainRuntime tree. This is a read-only tree with DomainMBean as the root MBean. For more help, use help(‘domainRuntime’) wls:/oam_domain/domainRuntime/> putBooleanProperty(“/fedserverconfig/userprovisioningenabled”, “true”); Command was successful. wls:/oam_domain/domainRuntime/>
This should redirect to the OpenAM authentication page as shown below:
Login screen for OpenAM
- Enter Credentials for AM user configured in the DJ user store. This user should exist in the DJ Identity store. (Refer Openam/DJ guide, which shows how to load a test user profile)
- Click submit, upon successful authentication, you should redirect to the OHS page.
- Users can see the OHS index.html.
Change password OUD:
Ahall.ldif
dn: uid=ahall,ou=People,dc=deviam,dc=com changetype: modify replace: userPassword userPassword: ***
/<path toOUD>/asinst_1/OUD/bin/ldapmodify -h deviam.com -p 1389 -D “cn=Directory Manager” -w ***** -f ahall.ldif Processing MODIFY request for uid=ahall,ou=People,dc=deviam,dc=com
MODIFY operation successful for DN uid=ahall,ou=People,dc=deviam,dc=com
- Enter Credentials for AM user configured in the DJ user store. Successful authentication. User can see the OHS index.html.
Configure authorization and headers
Use SAML tracer to confirm the flow.
- Deploy the Web Application on Tomcat and Federate with OpenAM
- Federation with OpenAM(IDP) and OAM (SP)
This lab walks through the steps on how to configure federation between openam and OAM.
- Configure OpenAM federation
- Circle Of Trust
- Metadata import
- Export of AM metadata to be used at OAM end.
- Create identity profile in OpenDJ to authenticate
- Install tomcat and start tomcat
- Configure the Mod_wls module or create proxy passes
- In this part of the tutorial, we will deploy a simple webapp on aTomcat server. Access it through OHS and check the results.
To deploy and access webapp, Create a proxy file on OHS for Tomcat
To access webapp deployed on Tomcat, we need to add a proxy file to the OHS. Once the proxy is deployed, you can access the webapp with the OHS default URL. We will deploy a webgate to the OHS.After the webgate is deployed,Invoking the below URL will be intercepted by the Webgate and the AuthN scheme takes effect.
http://deviam.com:7777/simpleapp
- Modify the config to proxy to the web application
Add a new proxy pass for tomcat (Vi and add the content in bold, modify the URL to match your environment. cat /<pathto>/middleware/user_projects/domains/oam_domain/config/fmwconfig/components/OHS/ohs1/moduleconf/tomcat-proxy.conf
ProxyPass /oberr.cgi ! ProxyPass /simpleapp http://deviam.com:8080/simpleapp ProxyPassReverse /simpleapp http://deviam.com:8080/simpleapp
- Deploy the Web Application on Tomcat
Unzip tomcat. The tomcat software was downloaded to the following folder in my lab. Move to the folder where you want to software to be installed and execute the following command.
Download mybank.war from the link https://www.oracle.com/webfolder/technetwork/tutorials/obe/fmw/identity%20management%2012c/oam%2012c%20(12.2.1.3)/getting_started_series/8-protectwebapps/files/mybank.war
unzip /home/oracle/apache-tomcat-8.5.70.tar.gz cd <path>/apache-tomcat-8.5.70/bin/ [oracle@deviam bin]$ ./startup.sh Using CATALINA_BASE: <path>/apache-tomcat-8.5.70 Using CATALINA_HOME: <path>/apache-tomcat-8.5.70 Using CATALINA_TMPDIR: <path>/apache-tomcat-8.5.70/temp Using JRE_HOME: /<pathto>/jdk18 Using CLASSPATH: /u01/apache-tomcat-8.5.70/bin/bootstrap.jar:/u01/apache-tomcat-8.5.70/bin/tomcat-juli.jar Using CATALINA_OPTS: Tomcat started.
- Deploy web app on tomcat. After deploying the webapp. Access it using the URL.
- Mv the simplewebapp.war to the webapp folder under tomcat as shown. The moved file deploys itself.
ls -ltr /u01/apache-tomcat-8.5.70/webapps/
total 196 drwxr-x — -. 3 oracle oracle 4096 Sep 5 19:55 ROOT drwxr-x — -. 15 oracle oracle 4096 Sep 5 19:55 docs drwxr-x — -. 7 oracle oracle 99 Sep 5 19:55 examples drwxr-x — -. 6 oracle oracle 79 Sep 5 19:55 host-manager drwxr-x — -. 6 oracle oracle 4096 Sep 5 19:55 manager -rw-r — r — . 1 oracle oracle 182997 Sep 5 19:56 simpleapp.war drwxr-x — -. 6 oracle oracle 4096 Sep 5 19:56 simpleapp The deployed app is accessible with URL http://deviam.com:8080/simpleapp/login.jsp
- Federation with OpenAM(IDP) and OAM (SP) (Since you have already completed it for the previous exercise, you don’t have to redo these steps). This lab walks through the steps on how to configure federation between openam and OAM.
- Configure OpenAM federation Circle Of Trust Metadata import / Export of AM metadata to be used at OAM end. Create identity profile in OpenDJ to authenticate Prerequisite checks Access the application to check (prerequisite checks) Configure IDP metadata in OAM. Service provider configuration. Enable JIT in OAM (required for dynamic provisioning.) Configured OAM Webgate (PEP), HostIdentifier, Application Domain and AuthN /AuthZ policy. (Screen shots of all) We need to update the host identifier to add a new port 8080.
Follow the steps in the previous lab to complete the configuration. The Host Identifier artifact of the Application domain, holds the configs of different hostname and port combinations. The URI in the resource and the host combination make the full URL.
In this Host Identifier config, deviam.com is accessible over 7777 and 8080 (Tomcat Port )
The Resource artifact or configuration shows the web application URIs, protected by OAM. The webgates intercepts the URLs check for the OAM for the resource policy configs.
The authN policy should be configured with the correct AuthN scheme, before assigning the AuthN policy to the resource. The below AuthN policy is configured with the Federation authN scheme. The new resources to protect are :
/simpleapp /simpleapp/…/*
The authentication scheme is AMFed scheme which is configured with FRIDP Schema.
The Resource artifact or configuration shows the web application URIs, protected by OAM. The webgates intercepts the URLs check for the OAM for the resource policy configs.
The authN policy should be configured with the correct AuthN scheme, before assigning the AuthN policy to the resource. The below AuthN policy is configured with Federation authN scheme.
The screen shot shows the resources are protected by an AuthN policy.
- Screenshots of Url invoke on tomcat http://deviam.com:7777/simpleapp Redirect to OpenAM for authN. Enter user credentials Show SAML response. XML file. Show the DJ screen shot of the profile.
- We will add authz headers, so that those values can be seen in the headers JSP. The completed headers screenshot.
The Rule is added and is shown in the screenshot
Add the attributes in the response tab. Two attributes send through SAML is shown. Click on Add button and choose, Header-> enter mail and the values attrb is set by the $user.attr.mail. And $user.attr.uid respectively. Click Apply to save all changes.
Apply and save all the configurations, then test. (Give a few minutes for the changes to take effect)
- Screenshots of Url invoke on tomcat http://deviam.com:7777/simpleapp
- Redirect to OpenAM for authN. Enter user credentials.

- Show SAML response. XML file.
- Screenshot of testheader.jsp
메타데이터
- post_id
- a7f9f91aaa2b
- slug
- federation-between-openam-idp-and-oam-sp-simple-web-app-a7f9f91aaa2b
- url
- https://medium.com/@iamblockc/federation-between-openam-idp-and-oam-sp-simple-web-app-a7f9f91aaa2b
- canonical_url
- https://medium.com/@iamblockc/federation-between-openam-idp-and-oam-sp-simple-web-app-a7f9f91aaa2b
- author_url
- https://medium.com/@iamblockc
- status
- ok
- fetched_at
- 2026-07-27 23:07:57





