Looking Beyond Hyperscalers: A quick guide to Nebius AI Cloud
If you are a DevOps professional or sysadmin, you are likely experienced in navigating at least one of the ‘Big Three’ hyperscalers: AWS…
Looking Beyond Hyperscalers: A quick guide to Nebius AI Cloud
If you are a DevOps professional or sysadmin, you are likely experienced in navigating at least one of the ‘Big Three’ hyperscalers: AWS, Azure, or GCP. However, as generative AI workloads scale, the high and often complex pricing of these traditional clouds can become a heavy financial burden. This has led many teams to look toward Nebius AI Cloud — a challenger platform designed to offer a more cost-effective alternative for high-end compute capacity.
While Nebius features massive GPU superclusters for AI, it is important to note that as a challenger, its feature set is currently more focused and limited compared to the sprawling service catalogs of mainstream hyperscalers. Transitioning from a mature cloud like AWS or GCP always requires some adjustment and a learning curve. However, to help ease this transition, Nebius relies on the essential, standard cloud primitives you already know — VMs, block storage, VPCs, and Kubernetes — rather than proprietary, complex tools.
Here is a quick guide on how to get started
Accessing the interface
You can access the Nebius AI Cloud interface using your web browser like any other cloud. It’s URL is https://console.nebius.com/, but you can also manage your resources with the nebius CLI tool or the terraform (discussed later).
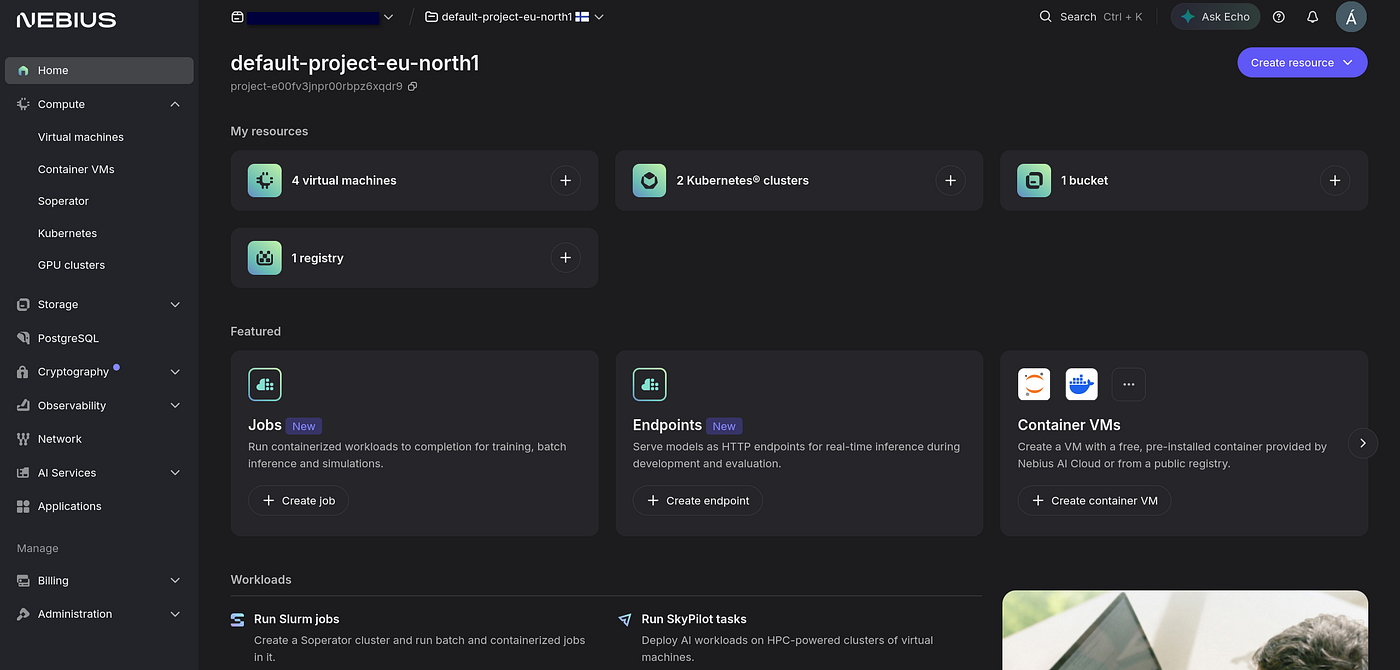
The Web UI of Nebius AI Cloud
VMs
Within Nebius AI Cloud you can create a VM like in an other cloud provider. The VM’s are called Compute Instances and can be customized to your needs. A cool feature of Nebius is that you can create a VM with GPUs easier then in many other cloud providers.
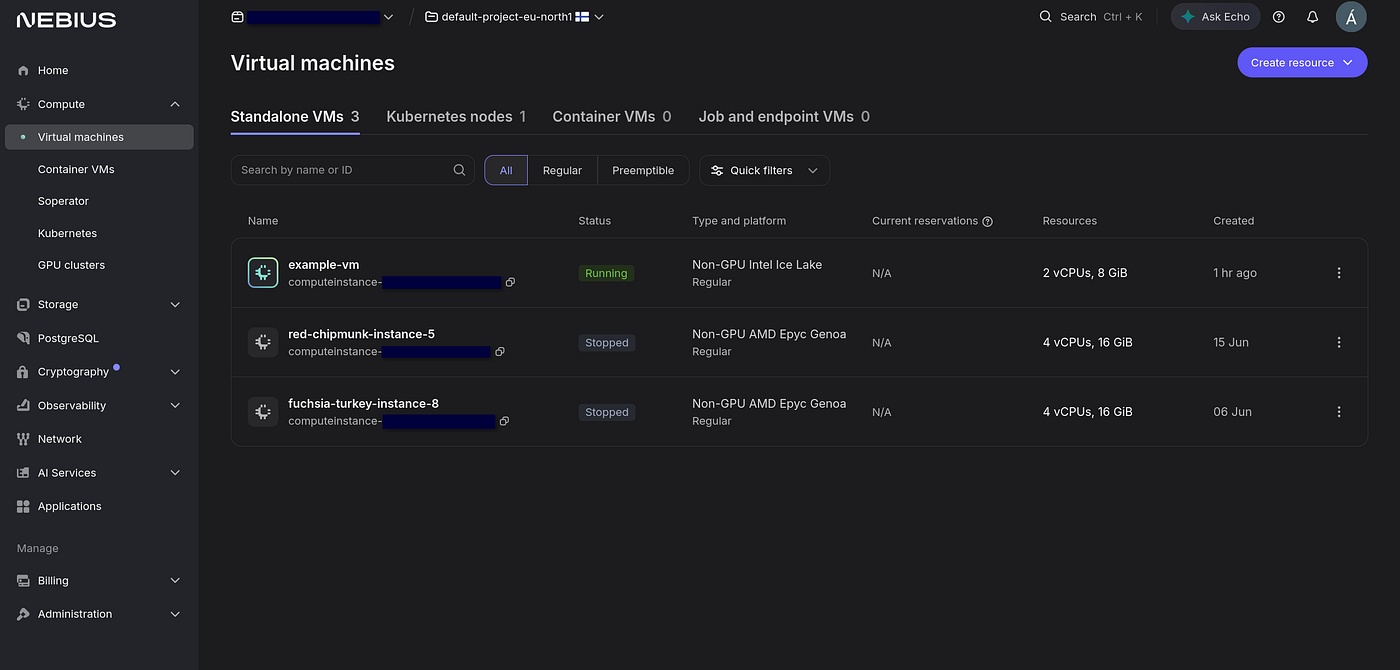
The interface of the Instances in Nebius AI Cloud
To create a VM in Nebius AI Cloud head over to the Compute / Instances section. Here you can see all of your previously created VMs and on the top right corner you can create a new instance. If you click that button a new window will appear where you can customize your configuration. You need to specify your region as well as the name of the VM. You can define whether you want to create a VM with a GPU or not. You must also input your SSH key, otherwise you will be unable to SSH into the VM. After creating your VM it will appear in the list.
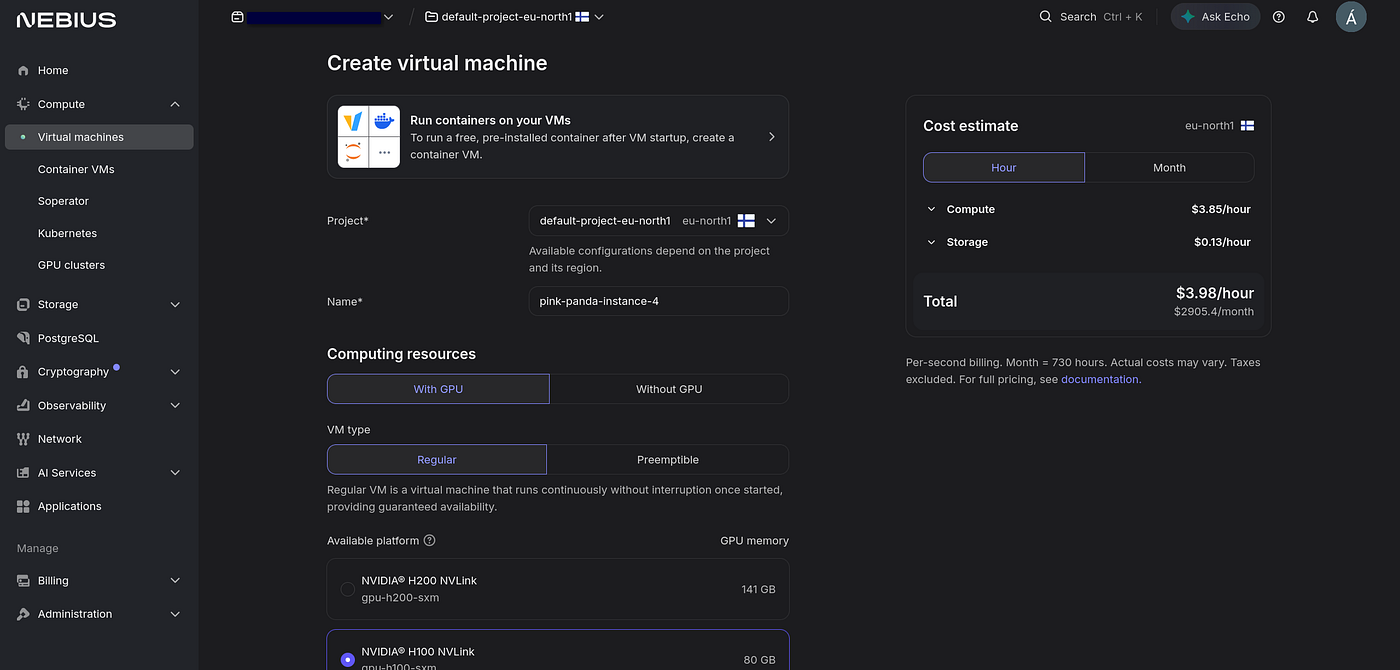
The instance creation wizard in Nebius — With GPU

The instance creation wizard in Nebius — Without GPU
To connect to the VM you can use ssh, where ip_address is the external IP address of the VM:
ssh [username]@[ip_address]K8s
Within Nebius AI Cloud you can also create a K8s cluster easily. In this cloud provider K8s work similarly to the mainstream cloud providers (like EKS, AKS, GKE).
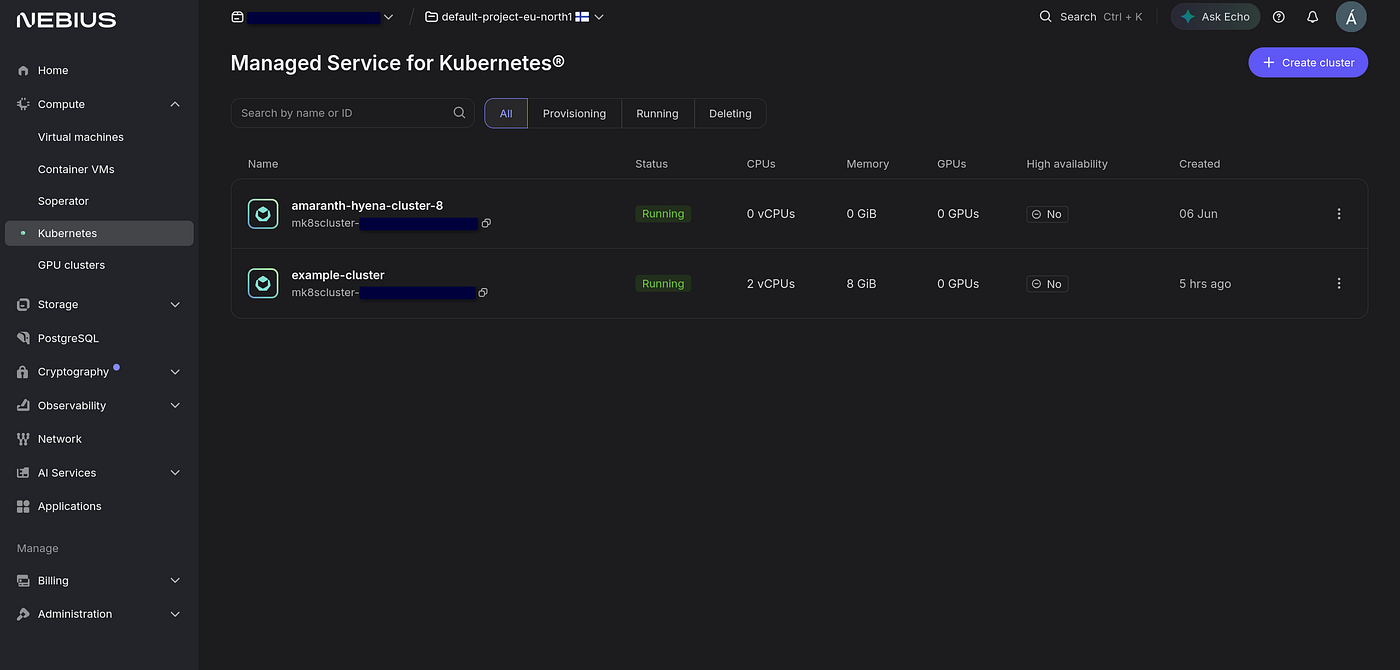
The interface of Managed Kubernetes in Nebius
To create a K8s cluster head over to Compute / Kubernetes. Here click on the Create Cluster button, and fill in the details as you feel like it. Then create the cluster. Cluster creation takes a few minutes. To access the cluster after it have been created, click on the cluster that you have just created and click on the How to connect box near the top of the page. You will see a nebius CLI command that you can use to setup the context to access the cluster. This command looks like this:
nebius mk8s cluster get-credentials --id [cluster_id] --externalCopy this command and run it (Note: You will need Nebius CLI to be installed on the machine).
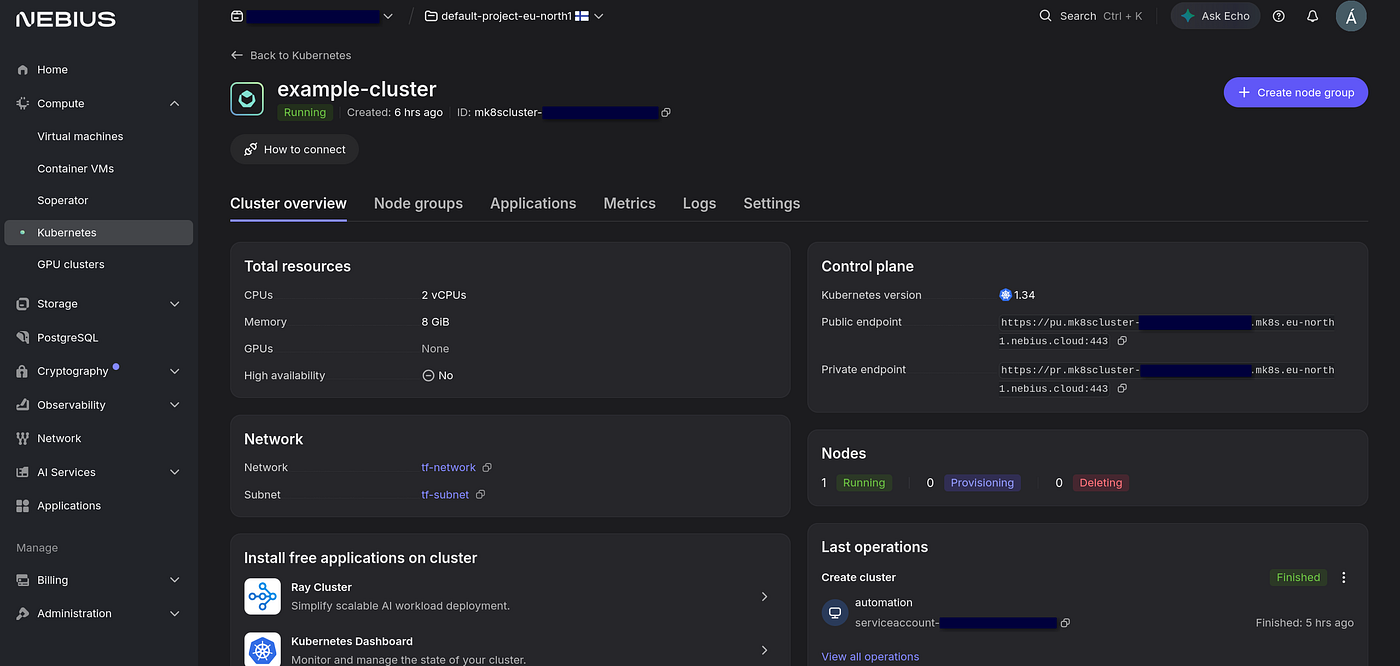
The interface of a managed Kubernetes cluster in Nebius AI Cloud
If everything is setup correctly and working fine, kubectl will work fine, and after running kubectl get pods -A, you will see something like:
$ kubectl get pods -A
NAMESPACE     NAME                                        READY   STATUS    RESTARTS   AGE
kube-system   cilium-9mzs4                                1/1     Running   0          32m
kube-system   cilium-envoy-4bncj                          1/1     Running   0          32m
kube-system   cilium-operator-5b7d5b676b-9npcz            0/1     Pending   0          39m
kube-system   cilium-operator-5b7d5b676b-jhvqd            1/1     Running   0          39m
kube-system   compute-csi-node-qvvnm                      2/2     Running   0          32m
kube-system   container-runtime-monitor-installer-l4zrs   1/1     Running   0          32m
kube-system   coredns-545f47cdc8-sb9sl                    1/1     Running   0          39m
kube-system   coredns-autoscaler-7c4cc5cd9f-jzrzw         1/1     Running   0          39m
kube-system   coredns-autoscaler-7c4cc5cd9f-w2s7d         1/1     Running   0          39m
kube-system   hubble-relay-786669b5f-vpxtj                1/1     Running   0          39m
kube-system   hubble-ui-6794c6d785-74dx6                  2/2     Running   0          39m
kube-system   metrics-server-945bf8b78-2z9xr              1/1     Running   0          39m
kube-system   metrics-server-945bf8b78-jpbjg              1/1     Running   0          39m
kube-system   nebius-node-problem-detector-cpu-lr6gw      1/1     Running   0          31m
Nebius’s K8s cluster supports all major features of K8s, including:
- Services (Including Load Balancer service with External IP address)
- PV/PVC (With a default storage class, that can create RWO PVC)
- Pods/Deployments/Statefulsets/etc.: They are a core component in modern K8s
Storage options
In Nebius AI Cloud there are three types of storage options for different use-cases. All of these options are available in the storage section in the UI.
- Disks: These are used as a VM’s storage. All of the files within a VM is stored in a disk. They can be from 1 GiB to 8192 GiB. You can specify a disks type: SSD (For general tasks), SSD NRD (High speed but no redundancy), SSD IO (High performance, triple replicated SSD). You can also specify it’s block size. A disk can be turned into an image, which can be later used as base for new disks.
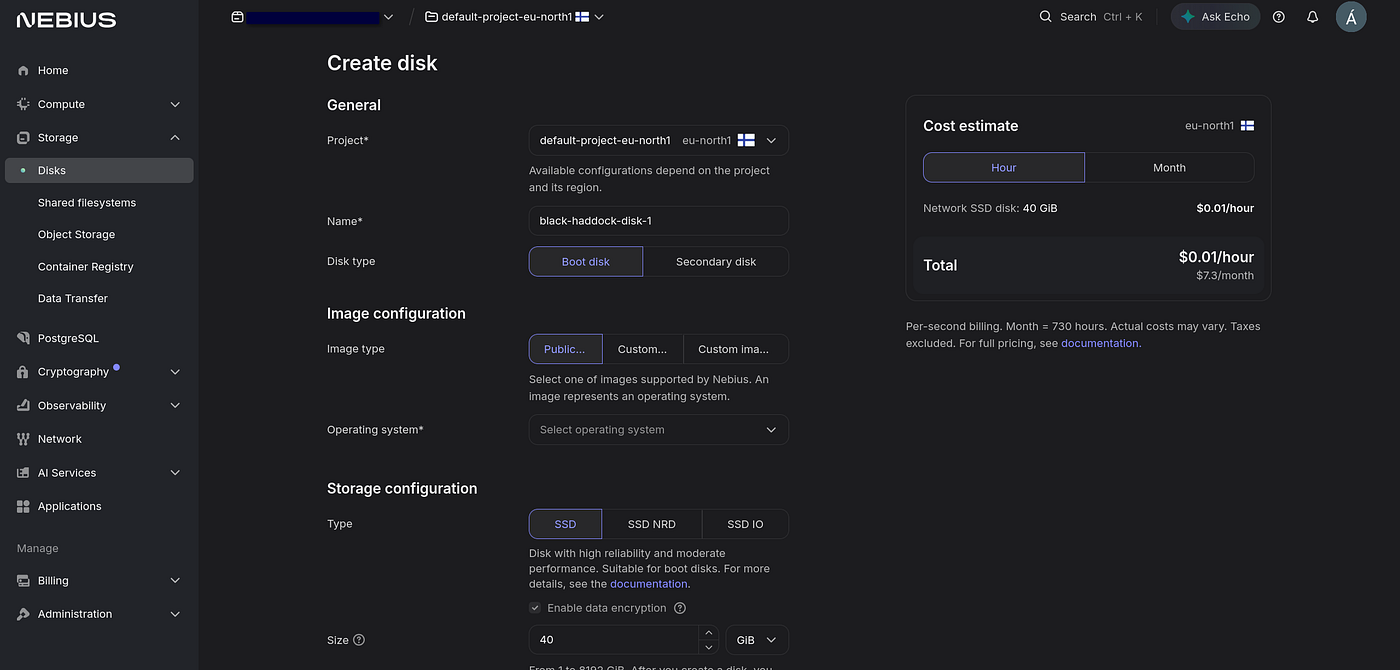
Disk creating wizard
- Shared Filesystems: A shared filesystem in Nebius AI Cloud is used as a shared filesystem between virtual machines. They can be between 1 GiB and 5242880 GiB (5 PiB). These are in practice a virtiofs file system and they can be mounted as such. To mount a virtiofs file system you can use the following command, after finding out it’s id, creating a partition and formatting:
cfdisk /dev/disk/by-id/virtio-disk-0 #(Select GPT, create new partition, set partition size, run write, and exit)
mkfs.ext4 /dev/disk/by-id/virtio-disk-0-part1
mkdir /mnt/disk-0
mount /dev/disk/by-id/virtio-disk-0-part1 /mnt/disk-0
chmod a+w /mnt/disk-0
Shared filesystem creating wizard
- Object Storage: Object storage is widely used in every major cloud providers (like AWS’s S3, Azure’s Blob storage or GCP’s GCS) and Nebius isn’t an exception, here it is called Object Storage. In an Object Store you can store artifacts, files, etc. When you create a “Bucket” you have to specify its name, you can specify its maximum size, storage class (You only have 2 options), you can enable versioning and audit logs. A cool feature of Nebius’s Object Store implementation is that it is compatible with AWS’s S3, so most of the library based implementation already works out of the box.
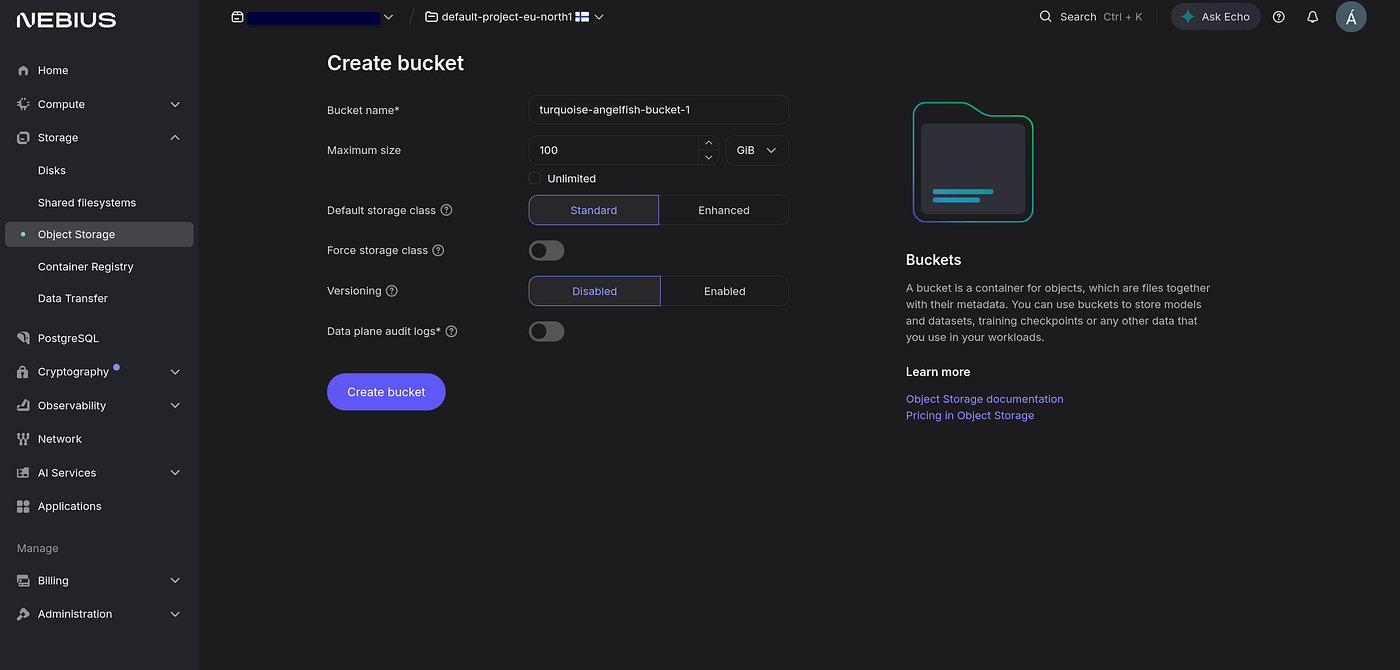
Bucket creating wizard
Our experiences with Nebius AI Cloud
Firewall
By default on the web user interface there is no option for setting up a firewall, or anything related to it.
By default if you create a VM with a public IP, every port on the VM is accessible to the outside world and can be accessed. For most of the use cases this is undesired, setting a firewall up is necessary, but there is no such option. To setup a firewall you either have to do it via terraform or the nebius cli tool.
To setup a firewall rule with terraform you can do so like this, note that by default you everything not matched by a rule as ALLOW will get DENY:
resource "nebius_vpc_v1_security_group" "default" {
  parent_id  = var.project_id
  name       = "web-security-group"
  network_id = [network_id]
}
resource "nebius_vpc_v1_security_rule" "allow_http_https" {
parent_id = nebius_vpc_v1_security_group.default.id
name = "allow-http-https"
access = "ALLOW"
protocol = "TCP"
priority = 101
type = "STATEFUL" ingress = {
source_cidrs = ["0.0.0.0/0"]
destination_ports = [80, 443]
}
}To mount a security group to a VM, you can append to it in the VM’s network_interfaces.security_groups array, like this:
resource "nebius_compute_v1_instance" "vm" {
  parent_id = var.project_id
  name      = "example-vm"
resources = [...] boot_disk = [...] network_interfaces = [
{
name = "eth0"
subnet_id = nebius_vpc_v1_subnet.default.id
ip_address = {
allocation_id = ""
}
public_ip_address = {}
security_groups = [{ # These 3 lines needs to be added
id = nebius_vpc_v1_security_group.default.id
}]
}
]
}Load Balancer
There is no option to create a dedicated Load Balancer for VMs, you can only create on for Kubernetes.
When creating a load balancer type service in K8s inside of Nebius, the service will be created and the service will have a publicly available address, where you can communicate with the service. When the IP address gets created it is not easily viewable in the UI, however in IP address reservations inside the VPC it is viewable. Another thing to note is that if you setup security groups inside of the K8s node groups those rules will also apply to the Load Balancer service (therefore port 80 and/or 443 must be allowed in the security group). In Network/networkname/Allocations, the service’s IP address will look something like this:

Load Balancer ip allocation
Logging
Logging in Nebius is not like in any other cloud provider. Nebius has by default 3 types of logs:
- User logs,
- Managed Kubernetes control planes and
- Compute serial logs.
Managed Kubernetes control plane logs contain logs from the Kubernetes cluster control plane, like etcd logs, API server logs and scaling logs. Compute serial logs contain logs from the VM’s serial port. And user logs contains logs that the user have configured. To configure a user log from a VM to these log you can configure for example journald logs to this logging service in order to do that you need to configure the following labels to the VM. These options are not available for mk8s node groups:
labels = {
    "nebius.o11y.systemd-logs-collection.enabled" = "true"
    "nebius.o11y.systemd-logs-collection.units"   = "sshd.service;docker.service" # List systemd services here that you want to log.
  }
After applying these changes under Observability/Logs there will be the logs from the VM(s), for example:
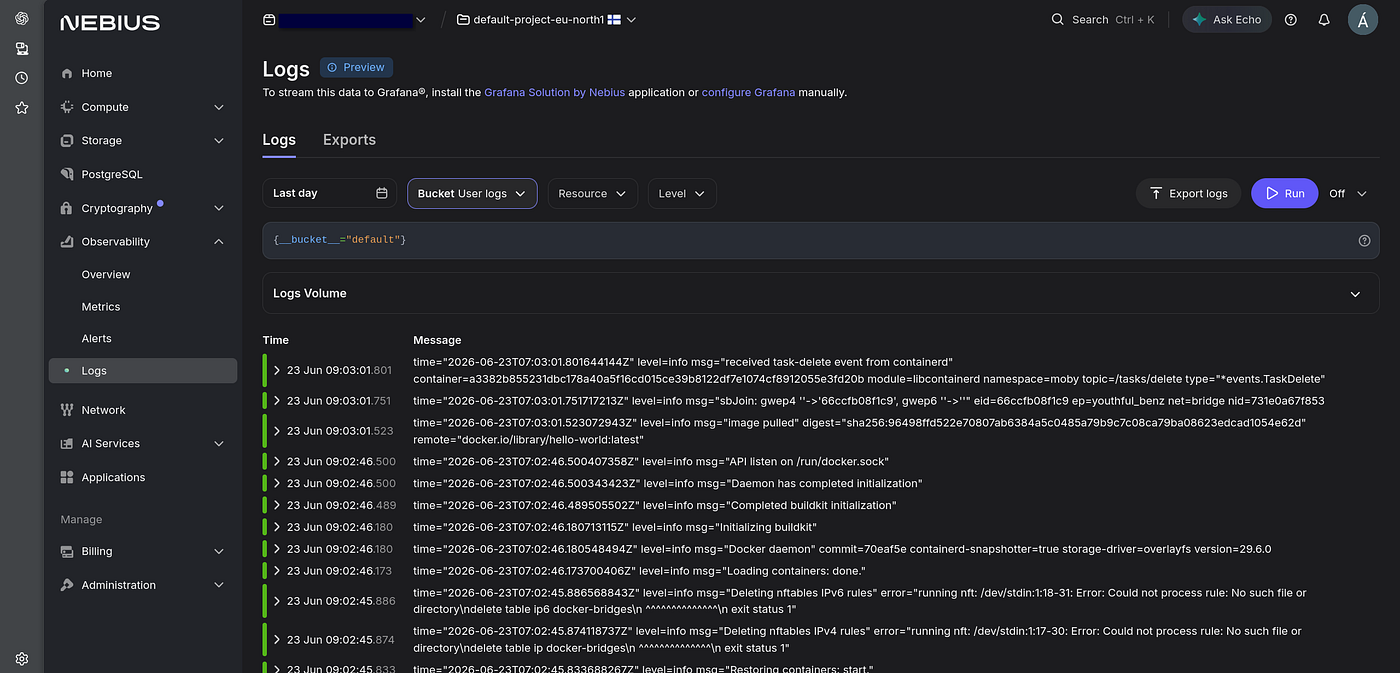
Log console view
Summary
All-in-all the Nebius sign-up flow and the web UI is pretty straightforward. It was easy to setup VMs and k8s clusters following the UI and the linked documentation. We are going to run more thorough testing in the next months to validate performance and gain confidence about their system reliability, but so far we happily recommend the platform.
The content was written by Adam Kovago, DevOps engineer at Ypsilon Systems
메타데이터
- post_id
- a8822fc0cdab
- slug
- looking-beyond-hyperscalers-a-quick-guide-to-nebius-ai-cloud-a8822fc0cdab
- url
- https://medium.com/@ysys-hu/looking-beyond-hyperscalers-a-quick-guide-to-nebius-ai-cloud-a8822fc0cdab
- canonical_url
- https://medium.com/@ysys-hu/looking-beyond-hyperscalers-a-quick-guide-to-nebius-ai-cloud-a8822fc0cdab
- author_url
- https://medium.com/@ysys-hu
- status
- ok
- fetched_at
- 2026-07-13 06:23:13