Amazing Guide to fine tune ConvNeXT Quickly
Introduction
Amazing Guide to fine tune ConvNeXT Quickly

Introduction
The term fine tune ConvNeXT refers to the process of adapting a powerful, pre-trained ConvNeXt model to excel at a specific task such as classifying dog breeds in your custom dataset. ConvNeXt itself is a modern convolutional neural network architecture that reimagines classic CNN designs using insights from Vision Transformers, giving it strong performance on visual recognition tasks while remaining efficient and scalable.
Fine-tuning starts with a model that has already learned general visual features — often trained on large datasets like ImageNet — and then continues its training on a smaller, task-specific dataset. This approach enables the model to build upon its broad understanding of images to learn the subtler patterns that distinguish, for example, different dog breeds. By doing so, it achieves better accuracy and faster convergence than training a model from scratch, especially when your dataset is limited in size.
Using fine tune ConvNeXT for image classification tasks harnesses the strengths of deep convolutional layers, which efficiently extract hierarchical features such as edges, textures, and shapes. Modern variations of ConvNeXt incorporate design improvements inspired by Vision Transformer architectures, helping the model balance performance with computational efficiency. This makes it a compelling choice for real-world applications where accuracy, speed, and resource constraints all matter.
In practice, fine-tuning involves careful preparation of your dataset, application of appropriate image transformations, and training the model with a suitable optimizer. The goal is to refine the weights of the ConvNeXt model so that it becomes highly specialized at distinguishing the unique classes — in your case, identifying and classifying different dog breeds. Done correctly, this strategy results in a robust model capable of reliable predictions across varied and unseen samples.
What It Means to Fine Tune ConvNeXT for a Custom Task
Fine-tuning ConvNeXt is about customization — taking a strong visual recognition model that’s already learned general image features and tailoring it for a specific classification problem like dog breeds. Instead of training a network from scratch, which demands vast amounts of data and computational power, fine-tuning starts with a pretrained ConvNeXt model and continues training it on your labeled dataset. This process adjusts the model’s internal representations so it becomes more sensitive to the nuances of your particular task.
The model you begin with has seen millions of images from broad datasets such as ImageNet. It has learned to recognize universal visual features like edges and object parts. When you fine-tune ConvNeXT for your dog breed classification dataset, you essentially guide the model to focus more on breed-specific characteristics, such as fur patterns, ear shapes, and facial features, while retaining the general image understanding it already possesses.
At a high level, fine-tuning involves loading one of the pretrained ConvNeXt variants, replacing or adapting its classification head to match the number of classes in your dataset, and then continuing the training process with your custom data. During this training, the model’s earlier layers may change very little or be frozen, while later layers undergo larger updates to refine task-specific decision boundaries.
The target of fine-tuning is two-fold: achieve high accuracy on your custom dataset and ensure that the trained model generalizes well to new, unseen images. By leveraging the initial learning embedded in ConvNeXt’s pretrained weights and focusing additional learning on your specific classification categories, fine tuning provides an efficient and effective path to building a high-performing image classifier for tasks like dog breed recognition.

Building a Practical Dog-Breed Classifier with ConvNeXt
This tutorial walks you through a complete, end-to-end workflow to fine tune ConvNeXT for a real-world image classification task: recognizing different dog breeds from photos. Instead of training a deep learning model from scratch, the code shows how to start from a powerful pretrained ConvNeXt model and adapt it to your custom dataset. The result is a model that learns to accurately distinguish between breeds while being efficient to train — even on relatively small datasets.
The process begins with setting up the environment and loading the dataset into a structure the model can use. You’ll see how the dataset is split into training and validation sets, as well as how image transformations such as resizing, normalization, and augmentation are applied. These steps are essential to ensure that the model sees consistent input and learns to generalize rather than memorize specific images.
Next, the tutorial demonstrates how to load a pretrained ConvNeXt model and connect it to your custom labels. The final classification layer is adapted to match the number of dog breeds in your dataset. From there, the training loop handles forward passes, loss calculation, backpropagation, and optimization. You’ll also monitor accuracy and validation loss, implement early stopping, and save the best checkpoint — all the practical elements you’d expect in a production-ready workflow.
Finally, the code shows how to reload the best saved model and run predictions on new images. This step completes the journey from raw dataset to working classifier. By the end, you’ll understand not just the theory behind transfer learning, but also the concrete, repeatable steps needed to build a custom ConvNeXt classifier that performs reliably on new dog breed images.
[embed]
Link for the video tutorial : https://youtu.be/8Ma4RfMTnkU
Link to the code : https://eranfeit.lemonsqueezy.com/checkout/buy/1a8f80e0-6a66-4c1d-a36f-2256048fbec0 or here : https://ko-fi.com/s/9ad6a94c13
Link for the full post : https://eranfeit.net/amazing-guide-to-fine-tune-convnext-quickly/
You can follow my blog here : https://eranfeit.net/blog/
Want to get started with Computer Vision or take your skills to the next level ?
Great Interactive Course : “Deep Learning for Images with PyTorch” here : https://datacamp.pxf.io/zxWxnm
If you’re just beginning, I recommend this step-by-step course designed to introduce you to the foundations of Computer Vision — Complete Computer Vision Bootcamp With PyTorch & TensorFlow
If you’re already experienced and looking for more advanced techniques, check out this deep-dive course — Modern Computer Vision GPT, PyTorch, Keras, OpenCV4

Fine Tune ConvNeXT for Custom Dog Breed Classification
Training a deep learning model from scratch can be slow, difficult, and very data-hungry. That’s why transfer learning — and specifically the ability to fine tune ConvNeXT — is such a powerful approach. Instead of starting from zero, we begin with a pretrained ConvNeXT model that already understands general visual features and then refine it on a custom dog-breed dataset.
In this tutorial, we’ll walk step-by-step through the entire pipeline. You’ll see how to prepare the dataset, apply image transformations, build dataloaders, configure ConvNeXT for your number of classes, train the model, monitor performance, save the best checkpoint, and finally test the model on new images.
Everything is written in clear Python using PyTorch and Hugging Face libraries, so you don’t just learn the theory — you get a working, practical solution you can adapt to your own projects.
Whether you’re exploring computer vision for fun, research, or production-grade work, this guide gives you a real-world, repeatable workflow you can trust.
Setting Up the Environment and Installing the Required Libraries
Before we can fine tune ConvNeXT, we first prepare a clean Conda environment and install the required frameworks. This ensures that all dependencies are aligned and avoids conflicts with other projects. Creating a dedicated environment is a best practice when working with deep learning libraries.
Next, we install PyTorch with CUDA support, along with libraries like transformers, timm, matplotlib, and opencv-python. These tools power our data loading, model building, training, visualization, and Hugging Face integrations.
### Create a new Conda environment named ConvNeXt with Python 3.11
conda create -n ConvNeXt python=3.11

### Activate the environment so all installs go inside it
conda activate ConvNeXt

### Check your CUDA version so you install a compatible PyTorch build
nvcc --version

### Install PyTorch 2.5.0 with CUDA 12.4 support and essential vision/audio extras
conda install pytorch==2.5.0 torchvision==0.20.0 torchaudio==2.5.0 pytorch-cuda=12.4 -c pytorch -c nvidia

### Install SymPy which is used internally by several frameworks
pip install sympy==1.13.1

### Install Hugging Face Transformers to load ConvNeXT and processors
pip install transformers==4.46.2

### Install the torch extras for Transformers
pip install transformers[torch]==4.46.2

### Install OpenCV for image handling
pip install opencv-python==4.10.0.84

### Install timm which contains model architectures including ConvNeXT
pip install timm==1.0.12

### Install Matplotlib for visualizations
pip install matplotlib==3.10.0

### Install HuggingFace Hub to interact with pretrained models
pip install huggingface_hub
Summary: This section ensures your system is ready with a clean, GPU-enabled PyTorch environment and all the tools needed to fine tune ConvNeXT smoothly.
Working With the Dog Breed Dataset
Before we can fine tune ConvNeXT, we need a clean and well-structured dataset. In this tutorial, we use a dog breed image dataset containing folders of images — one folder per breed — which makes it perfectly suited for image classification and transfer learning workflows.
Where to Download the Dataset
You can download the dataset here:
Kaggle — 9 Dog Breeds Identification / Classification Dataset https://www.kaggle.com/datasets/muhammadhananasghar/9-dogs-breeds-identification-classification
Once downloaded, extract the dataset to a local directory on your machine. In the code example, the dataset path is:
D:/Data-Sets-Image-Classification/9 dogs BreedsYou can change this path based on where you store your files.
Dataset Folder Structure
The dataset must be organized in a simple ImageFolder-style structure. That means each dog breed has its own folder, and inside that folder are all the images for that breed.
Your directory should look like this:
9 dogs Breeds/
│
├── Beagle/
│   ├── img001.jpg
│   ├── img002.jpg
│   └── ...
│
├── Bulldog/
│   ├── img001.jpg
│   ├── img002.jpg
│   └── ...
│
├── Chihuahua/
│   ├── img001.jpg
│   └── ...
│
├── Doberman/
│   └── ...
│
├── German Shepherd/
│   └── ...
│
├── Golden Retriever/
│   └── ...
│
├── Husky/
│   └── ...
│
├── Labrador/
│   └── ...
│
└── Poodle/
    └── ...
Each folder name becomes the class label, and the datasets library automatically detects this when we load it using:
dataset = load_dataset("imagefolder", data_dir="D:/Data-Sets-Image-Classification/9 dogs Breeds")Loading and Preparing the Dog Breed Dataset
In this part, we load the dog-breed dataset from a directory using the Hugging Face datasets library. We split it into training and testing subsets and print useful metadata to understand its structure. This helps ensure the dataset is correctly recognized and balanced.
We also visualize one sample image and inspect the label mappings. This mapping converts numeric IDs into human-readable class names and is later passed to the model so it knows what each output index
### Import PyTorch which powers deep learning operations
import torch
### Import load_dataset to read image folders as datasets
from datasets import load_dataset

### Load the dataset from a local directory of labeled folders
dataset = load_dataset("imagefolder", data_dir="D:/Data-Sets-Image-Classification/9 dogs Breeds")

### Print dataset metadata
print("Dataset : ")
print(dataset)

### Split the dataset into train and test sets (80/20)
split_dataset = dataset["train"].train_test_split(test_size=0.2,  seed=42)
### Store training subset
train_dataset = split_dataset["train"]
### Store test subset
test_dataset = split_dataset["test"]

### Output dataset sizes
print("Train dataset size: ", len(train_dataset))
print("Test dataset size: ", len(test_dataset))

### Print details for inspection
print("Train dataset : ")
print(train_dataset)
print("Test dataset : ")
print(test_dataset)

### Print the feature keys available
print("****************************************************")
print("Train dataset keys : ")
print(dataset["train"].features)

### Import PIL for image handling
from PIL import Image

### Grab one example from the dataset
exmple = dataset["train"][0]
### Extract the image
first_image = exmple["image"]
### Extract its numeric label
first_lebel = exmple["label"]

### Display type
print(type(first_image))
print("Label value of the first image : ", str(first_lebel))

### Show the image
first_image.show()

### Get class names from the dataset metadata
labels = dataset["train"].features["label"].names
print("Labels - list of the class names : ")
print(labels)

### Build mapping dictionaries
id2label = {k:v for k,v in enumerate(labels)}
label2id = {v:k for k,v in enumerate(labels)}
print("id2label : ")
print(id2label)

### Print first sample label name
print("Label of the first image : ", labels[first_lebel])
Summary: Here we successfully load the dataset, split it into train/test sets, explore its structure, and prepare readable label mappings.
Applying Image Transformations and Building DataLoaders
To fine tune ConvNeXT effectively, images must be resized, normalized, and sometimes augmented. This section uses Hugging Face’s image processor and PyTorch transforms to prepare input tensors in the exact format ConvNeXT expects.
We then wrap everything into PyTorch DataLoader objects, which efficiently batch and shuffle data during training. This keeps GPU utilization high and training smooth.
### Import AutoImageProcessor to get preprocessing config for ConvNeXT
from transformers import AutoImageProcessor
### Load the image processor from a pretrained ConvNeXT model
image_processor = AutoImageProcessor.from_pretrained("facebook/convnext-base-224")

### Print processor details
print("Image processor : ")
print(image_processor)

### Import PyTorch vision transforms
from torchvision.transforms import ( Compose , Normalize, RandomHorizontalFlip, RandomResizedCrop, ToTensor)

### Create a normalization transform based on model expectations
normalize = Normalize(mean=image_processor.image_mean, std=image_processor.image_std)

### Define a composed transform pipeline including resize, flip, tensor conversion, and normalization
transform = Compose([
    RandomResizedCrop(image_processor.size["shortest_edge"]),
                      RandomHorizontalFlip(),
                      ToTensor(),
                      normalize
])

### Define function to apply transform to each image
def data_transform(examples):
    examples["pixel_values"] = [transform(image.convert("RGB")) for image in examples["image"]]
    return examples

### Apply transforms to train and test splits
processed_train_dataset = train_dataset.with_transform(data_transform)
processed_test_dataset = test_dataset.with_transform(data_transform)

### Confirm transformation output
print("Processed train and test dataset : ")
print(processed_train_dataset[[0]])

### Import DataLoader for batching
from torch.utils.data import DataLoader

### Create a function to collate batches into tensors
def collate_fn(examples):
    pixel_values = torch.stack([example["pixel_values"] for example in examples])
    labels = torch.tensor([example["label"] for example in examples])
    return {"pixel_values": pixel_values, "labels": labels}

### Build training dataloader
train_dataloader = DataLoader(dataset=processed_train_dataset, collate_fn=collate_fn, batch_size=8, shuffle=True)
### Build validation dataloader
val_dataloader = DataLoader(dataset=processed_test_dataset, collate_fn=collate_fn, batch_size=8, shuffle=False)

### View the first batch structure
batch = next(iter(train_dataloader))
for k, v in batch.items():
    print(f"{k}: {v.shape}")
Summary: We now have fully prepared, batched, and normalized image tensors ready to be passed into ConvNeXT during training.
Defining and Training the ConvNeXT Model
Here we load a pretrained ConvNeXT model and adapt it to our number of dog-breed classes. We configure the optimizer, set up the training loop, calculate accuracy, and implement early stopping to prevent overfitting.
We also save the best model checkpoint automatically so you always keep the strongest version of your classifier.
### Import ConvNeXT classification model
from transformers import AutoModelForImageClassification

### Load pretrained ConvNeXT with custom label mappings
model = AutoModelForImageClassification.from_pretrained(
    "facebook/convnext-base-224",
    id2label=id2label,
    label2id=label2id,
    ignore_mismatched_sizes=True,
)

### Import tqdm for progress bars
from tqdm import tqdm
### Import OS for saving checkpoints
import os

### Define checkpoint directory
save_dir = "d:/temp/models/convnext-dogs-classification/checkpoints"
os.makedirs(save_dir, exist_ok=True)

### Create AdamW optimizer
optimizer = torch.optim.AdamW(model.parameters(), lr=5e-5)

### Select GPU if available
device = "cuda" if torch.cuda.is_available() else "cpu"
model.to(device)

### Put model into train mode
model.train()

### Initialize tracking variables
best_loss = float("inf")
epochs_without_improvement = 0
patience = 10
max_epochs = 100

### Start training loop
for epoch in range(max_epochs):
    print(f"Epoch {epoch + 1} / {max_epochs}")
    train_loss = 0.0
    train_correct = 0
    train_total = 0

    model.train()

    ### Loop over training batches
    for batch in tqdm(train_dataloader , desc = "Training"):
        batch = {k: v.to(device) for k, v in batch.items()}

        optimizer.zero_grad()
        outputs = model(pixel_values=batch["pixel_values"], labels=batch["labels"])
        loss , logits = outputs.loss, outputs.logits
        loss.backward()
        optimizer.step()

        train_loss += loss.item()
        train_total += batch["labels"].shape[0]
        train_correct += (logits.argmax(-1) == batch["labels"]).sum().item()

    train_accuracy = train_correct / train_total
    avg_train_loss = train_loss / len(train_dataloader)
    print(f"Train Loss: {avg_train_loss:.4f}, Train Accuracy: {train_accuracy:.4f}")

    model.eval()
    val_loss = 0.0
    val_correct = 0
    val_total = 0

    with torch.no_grad():
        for batch in tqdm(val_dataloader, desc="Validation"):
            batch = {k: v.to(device) for k, v in batch.items()}
            outputs = model(pixel_values=batch["pixel_values"], labels=batch["labels"])
            loss , logits = outputs.loss, outputs.logits

            val_loss += loss.item()
            val_total += batch["labels"].shape[0]
            val_correct += (logits.argmax(-1) == batch["labels"]).sum().item()

    val_accuracy = val_correct / val_total
    avg_val_loss = val_loss / len(val_dataloader)
    print(f"Validation Loss: {avg_val_loss:.4f}, Validation Accuracy: {val_accuracy:.4f}")

    ### Save best model
    if avg_val_loss < best_loss :
        best_loss = avg_val_loss
        epochs_without_improvement = 0
        checkpoint_path = os.path.join(save_dir , "best_model.pth")
        torch.save(model.state_dict(), checkpoint_path)
        print(f"New best model saved with validation loss: {best_loss:.4f}")
    else:
        epochs_without_improvement += 1
        print(f"No improvement in validation loss for {epochs_without_improvement} epochs")

    ### Early stopping rule
    if epochs_without_improvement >= patience:
        print(f"Early stopping after {patience} epochs without improvement.")
        break
Summary: Your ConvNeXT model is now fully trained using transfer learning, and the best-performing version is safely stored.
Loading the Trained Model and Preparing for Inference
Now that the model is trained, we load the saved checkpoint back into ConvNeXT. This restores the trained weights so the model can be used for real-world predictions without needing to retrain.
We also reload the dataset metadata so we can map predicted class IDs back to meaningful dog breed names.
### Import PyTorch again for inference operations
import torch
### Import dataset loader for class names
from datasets import load_dataset
### Import transforms for preprocessing
from torchvision.transforms import Compose, Normalize , ToTensor, Resize
### Import Matplotlib for visualization
import matplotlib.pyplot as plt
### Import PIL Image to process input image
from PIL import Image

### Reload dataset to fetch labels
dataset = load_dataset("imagefolder", data_dir="D:/Data-Sets-Image-Classification/9 dogs Breeds")

### Detect GPU availability
device = "cuda" if torch.cuda.is_available() else "cpu"

### Get class names list
labels = dataset["train"].features["label"].names
print("Labels - list of the class names : ")
print(labels)

### Build conversion dictionaries
id2label = {k:v for k,v in enumerate(labels)}
label2id = {v:k for k,v in enumerate(labels)}
print("id2label : ")
print(id2label)

### Load image processor again
from transformers import AutoImageProcessor
image_processor = AutoImageProcessor.from_pretrained("facebook/convnext-base-224")

### Create preprocessing transform pipeline
transform = Compose([
    Resize(image_processor.size["shortest_edge"]),
    ToTensor(),
    Normalize(mean=image_processor.image_mean, std=image_processor.image_std)
])

### Import the classification model
from transformers import AutoModelForImageClassification

### Load pretrained ConvNeXT with label mappings
model = AutoModelForImageClassification.from_pretrained(
    "facebook/convnext-base-224",
    id2label=id2label,
    label2id=label2id,
    ignore_mismatched_sizes=True,
)

### Path to saved best model
checkpoint_path = "D:/Temp/Models/convnext-dogs-classification/checkpoints/best_model.pth"

### Load state dictionary
state_dict = torch.load(checkpoint_path)

### Apply trained weights to model
model.load_state_dict(state_dict)

### Switch to evaluation mode
model.eval()

### Move model to device
model.to(device)
Summary: The trained ConvNeXT model is restored and ready to classify new dog images.
Test Images :

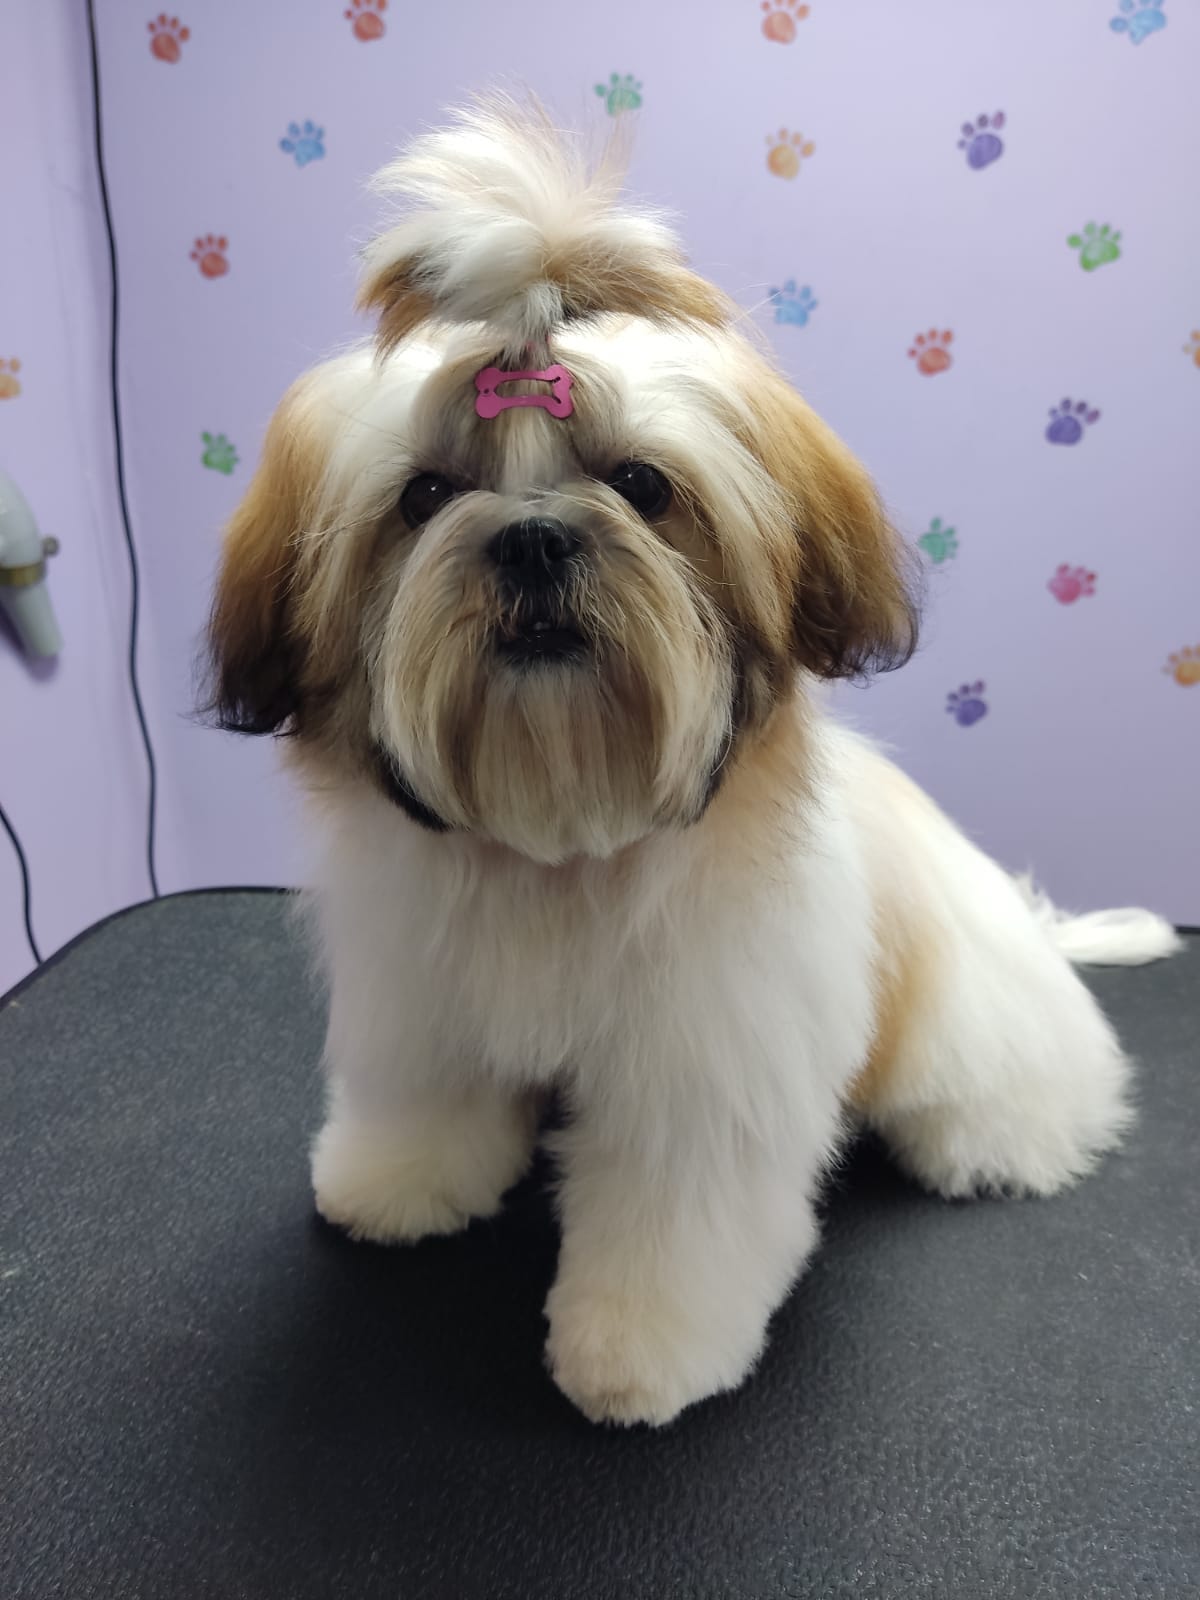
### Path to test image
image_path = "Visual-Language-Models-Tutorials/Fine tune Image Classificatrion using ConvNext for custom dataset/Dori.jpg"

### Read the image with Matplotlib
image = plt.imread(image_path)

### Preprocess and add batch dimension
input_image = transform(Image.fromarray(image).convert("RGB")).unsqueeze(0).to(device)

### Disable gradient tracking
with torch.no_grad():
    ### Run forward pass
    outputs = model(pixel_values=input_image)
    logits = outputs.logits
    ### Get predicted class ID
    predicted_class_id = logits.argmax(-1).item()
    print(f"Predicted class id: {predicted_class_id}")
    ### Convert ID to label name
    predicted_label = id2label[predicted_class_id]

### Show image with title
plt.imshow(image)
plt.title(f"Predicted label: {predicted_label}")
plt.axis("off")
plt.show()
FAQ — Fine Tune ConvNeXT for Dog Breed Classification
Q: What does it mean to fine tune ConvNeXT? A: It means taking a pretrained ConvNeXT model and continuing its training on a custom dataset so it specializes in your task.
Q: Why not train from scratch? A: Fine tuning is faster, requires less data, and often achieves higher accuracy.
Q: Do I need a GPU? A: A GPU is highly recommended because training ConvNeXT on CPU is slow.
Q: What dataset format is required?
A: The dataset should be arranged in class-labeled folders so it can be read by imagefolder.
Q: What does ignore_mismatched_sizes do?
A: It allows replacing the original classification head with one matching your number of classes.
Q: Why normalize images? A: Normalization helps stabilize training and match the model’s pretrained expectations.
Q: What is early stopping? A: It stops training when validation loss no longer improves to prevent overfitting.
Q: Can I use more than 9 dog breeds? A: Yes, just ensure your dataset folders match the class names.
Q: Where is the best model saved?
A: It’s stored as best_model.pth in your checkpoints folder.
Q: Can I use this workflow for other image tasks? A: Absolutely — simply replace the dataset and labels.
Conclusion
Fine tuning ConvNeXT gives you the best of both worlds — the strength of a pretrained, state-of-the-art architecture and the flexibility to adapt it to your own custom dog-breed dataset. In this post, you learned how to prepare data, build dataloaders, adapt the model head, train with early stopping, save the best checkpoint, reload the trained model, and finally make real predictions.
This workflow is powerful, repeatable, and efficient. You can now confidently apply the same structure to other datasets and image-classification challenges. As you continue experimenting, you’ll discover how small adjustments in transforms, batch sizes, or learning rates can further improve accuracy and generalization.
If you’re passionate about computer vision, this fine-tuning approach unlocks a world of opportunities for building practical, high-performing models without needing massive data or compute.
Connect :
☕ Buy me a coffee — https://ko-fi.com/eranfeit
🖥️ Email : feitgemel@gmail.com
🤝 Fiverr : https://www.fiverr.com/s/mB3Pbb
Enjoy,
Eran
메타데이터
- post_id
- a98c6c70aac5
- slug
- amazing-guide-to-fine-tune-convnext-quickly-a98c6c70aac5
- url
- https://medium.com/vision-transformers-tutorials/amazing-guide-to-fine-tune-convnext-quickly-a98c6c70aac5
- canonical_url
- https://medium.com/vision-transformers-tutorials/amazing-guide-to-fine-tune-convnext-quickly-a98c6c70aac5
- author_url
- https://medium.com/@feitgemel
- status
- ok
- fetched_at
- 2026-06-26 06:47:43