How to choose cabinet pulls: the complete guide for 2026
From the 1/3 sizing rule to finish durability rankings, here’s everything you need to choose cabinet pulls that look great and last.
How to choose cabinet pulls: the complete guide for 2026
From the 1/3 sizing rule to finish durability rankings, here’s everything you need to choose cabinet pulls that look great and last.
Quick answer
Cabinet pulls are the most-touched hardware in your home — most kitchens log 50+ interactions per day — yet most people choose them by scrolling photos and guessing sizes. The result: hardware that looks a bit off, wears out in two years, or requires re-drilling. Here’s what actually matters: size by the 1/3 rule (pull length = roughly one-third the drawer width), measure center-to-center not total length, choose PVD or solid brass for anything that gets daily use, and don’t be afraid to mix metals — the Rule of 3 makes it look deliberate. If you’re upgrading existing cabinetry, JRM Accessories has solid brass and alloy options from $1.39 per piece with a sample program that lets you try before committing to a full order.
Cabinet pulls seem simple until you’re standing in the hardware aisle holding two identical-looking bar handles that cost $4 and $40 respectively, and you have no idea whether the difference matters.
It does. And so does the measurement you’re about to get wrong.
We spent time with the research — ranking guides, professional kitchen designers, and a lot of candid community feedback from people who got it wrong the first time — to put together the clearest guide we could. Here’s what you actually need to know.
Start with the type: knobs vs. pulls vs. hybrid
Before you think about finish or size, you need to decide on the basic hardware type. This is a functional decision as much as an aesthetic one.
Knobs need a single screw hole and cost less. They work well on upper cabinet doors where you want a lighter visual presence. The trade-off: they require a fingertip grip, which is harder on high-use drawers and for anyone with weaker hands or arthritis.
Pulls use two screw holes and engage your full hand, making them significantly more comfortable on heavy drawers — the kind you open 15 times a day with wet hands. They also reduce how often your fingertips touch the cabinet face itself, which keeps cabinetry cleaner over time.
The hybrid approach — pulls on lower drawers, knobs on upper doors — is the most popular choice for good reason. It solves the ergonomics problem at the bottom where it matters most, and keeps visual lightness at eye level where you notice it. We’d reach for this by default.
If accessibility is a consideration for anyone in your household (arthritis, grip weakness, young children), pulls on everything is the right call. Knobs exclude people with limited fine motor control in a way that’s easy to overlook during a renovation and annoying to live with for years.

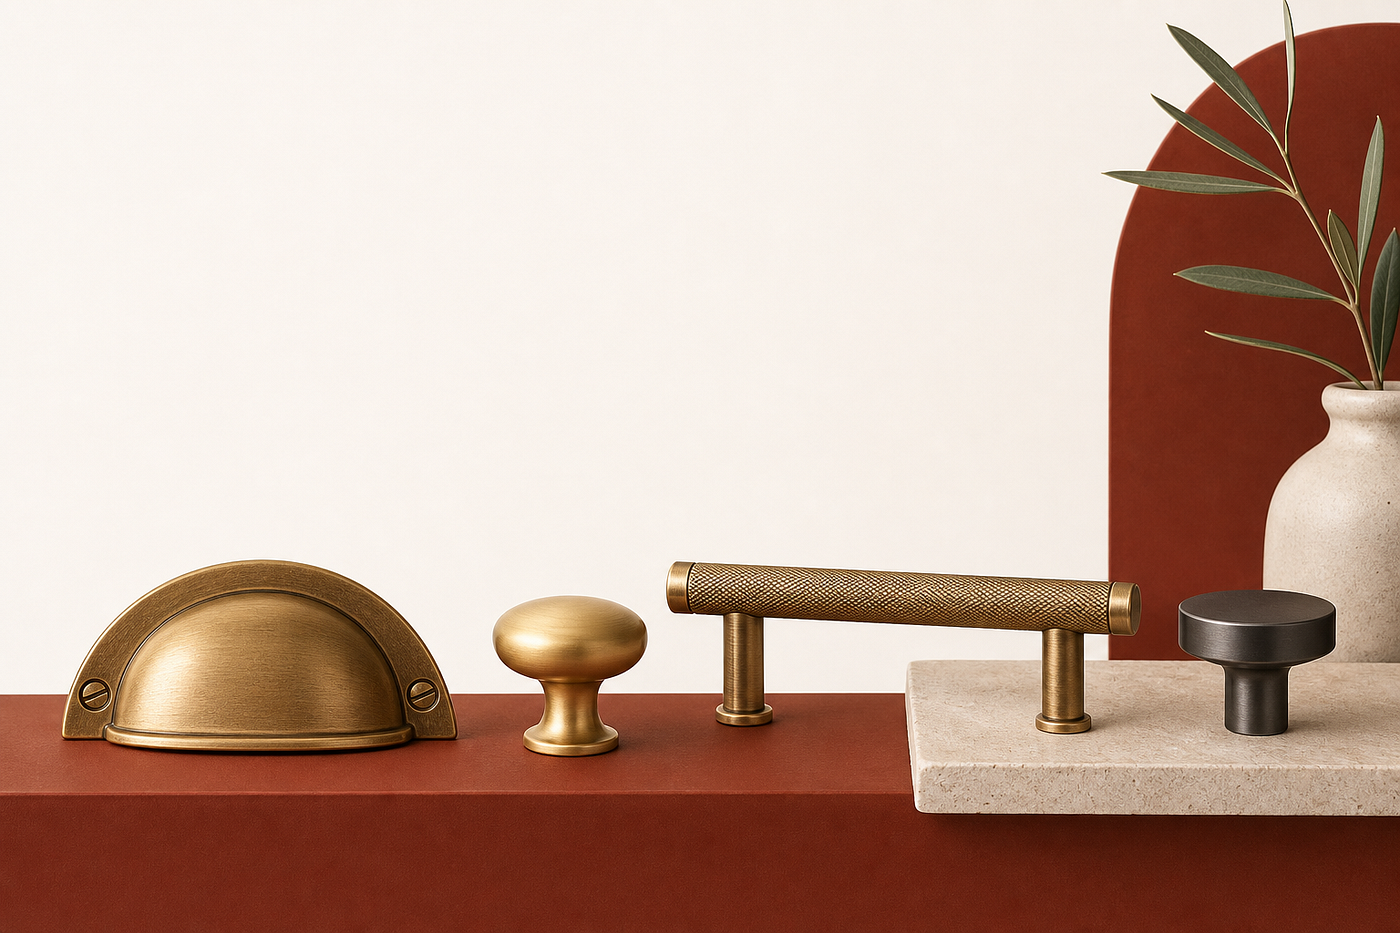
Collection of solid brass drawer pulls and knobs showing variety of styles and finishes
There’s also a category of specialty hardware worth knowing about: cup pulls (recessed cups that work beautifully on Shaker-style cabinetry), appliance pulls (long horizontal bars for panel-ready fridges and dishwashers), and edge pulls (flush-mount pulls for drawers with no room for a protruding handle). These serve specific aesthetic functions, but for most kitchens, the knob/pull/hybrid decision is the one that matters.
The 1/3 rule: how to size cabinet pulls correctly
The single most reliable sizing guide across professional kitchen design and the DIY community is the one-third rule. A pull should span approximately one-third the total width of the drawer front.

The 1/3 Rule for Cabinet Pull Sizing — three drawer fronts showing how pull length scales with drawer width
In practice:

The direction most people err in is undersizing. “Your expensive cabinets look cheap with tiny pulls” is a repeated observation from designers. If you’re on the fence between two sizes, go larger.
For big modern drawers (30–36" wide), a single long pull — 10–12 inches — is usually better than two shorter ones. It can be operated with one hand, reduces stress on drawer glides, and reads as more contemporary.
The measurement mistake everyone makes
Always measure center-to-center (C2C), not total pull length.
Center-to-center is the distance between the centers of the two screw holes — not the full bar length. These numbers can differ by an inch or more. Order by C2C when you’re replacing existing hardware or need to match an existing hole pattern, and you’ll avoid re-drilling entirely.
The community feedback on this is consistent: people measure the bar, order by that number, receive pulls with different C2C spacing, and spend an afternoon filling old holes and re-drilling. JRM Accessories lists C2C measurements on all pull product pages, which makes cross-referencing straightforward.
Before you drill anything, use painter’s tape to mock up hardware placement on your cabinet faces. Move it around until you like what you see. This takes 20 minutes and has prevented a lot of regret.
Finish and material: where the real money decision lives
This is where most people spend too little time — and where they regret it most.
Finishes vary enormously in how long they actually hold up. The durability hierarchy, from longest-lasting to shortest:

Hardware Finish Durability Hierarchy — four-tier ranking from PVD coating at top to powder-coated at bottom
PVD (Physical Vapor Deposition) finishes are at the top. The coating is molecularly bonded to the metal — it doesn’t chip, scratch, or tarnish the way surface platings do. In high-use kitchens, PVD hardware holds up for 10+ years. The premium is real, but so is the math: replacing plated hardware across 30 cabinets after 2–3 years costs more than buying right once.
Solid brass and bronze are the natural alternative. Unlacquered brass in particular is having a genuine moment in 2026 — it develops a patina over time that many people actively want. Early darkening (within the first 1–2 months) surprises some buyers, but that’s the design intent: a living finish that ages into something richer than it started. JRM Accessories’ solid brass range includes everything from brushed gold to antique bronze, and solid brass looks better at year five than year one.
Plated finishes are beautiful initially and cost less, but show wear at 2–3 years on frequently used drawers. Plating is a surface layer — it wears off wherever your hands contact it most. Fine for low-traffic areas; problematic for the pot drawer you open 10 times a day.
Powder-coated finishes are cost-effective and typically last 4–6 years before showing chips. Good for secondary cabinetry or rentals; not the right choice for a renovation you’re planning to live with for a decade.
The 2026 finish landscape
A few things worth knowing about what’s actually trending in 2026, rather than what’s being marketed as trending:
Brushed and matte finishes are winning over polished. Brushed gold and satin nickel hide fingerprints better than their high-shine counterparts and feel warmer in person. Polished chrome, which dominated a decade ago, reads as cold and dated in most kitchens now.
Matte black is still strong — particularly as a contrast to white or warm-grey cabinetry, paired with quartz countertops. It’s a safe choice that photographs well and ages without showing wear the way lighter finishes do.
Unlacquered brass and oil-rubbed bronze are the more interesting choice if you want hardware that develops character rather than just holding its initial finish. Both are genuine long-term investments rather than trend-chasing.

Solid brass lotus cabinet pulls in bronze finish — an example of decorative hardware with warm patina appeal
Mixing metals: why the “everything must match” rule is outdated
The kitchen design convention of the early 2000s — match everything, faucet to pulls to lighting — has quietly retired. Professional kitchens now mix metals intentionally, and the result is usually more interesting than the alternative.
The practical guide is the Rule of 3: one dominant metal for 60–70% of hardware, then two accent metals in smaller supporting roles.
A few combinations that work in practice:
- Matte black drawer pulls + unlacquered brass knobs + stainless appliances — the black grounds the space, the brass warms it, and stainless is neutral enough to bridge them
- Brushed gold pulls + matte black faucet + satin nickel lighting — warm cabinet hardware, matte contrast at the sink, cooler tone overhead
- Satin nickel pulls + antique bronze knobs + chrome faucet — works in kitchens with cool-grey cabinetry and stone countertops
The mistake to avoid is “close but not quite.” Brushed gold and polished brass are both gold until they’re installed three feet apart, at which point the difference is obvious and jarring. Check undertones: warm brass has yellow-orange undertones, while satin nickel has cool blue-grey ones. Mixing within a temperature (all warm, or all cool) is easier than crossing the line.
If you’re matching hardware to existing fixtures, take a sample piece to the store rather than going by memory or photos. Artificial and natural light both read finishes differently.

Solid brass knurled cabinet pulls in matte gold finish — a texture-forward choice that pairs well with minimalist cabinetry
Hardware placement: the technical rules
Once you’ve chosen the hardware, placement is the remaining variable — and it’s where misaligned installations happen.

Cabinet hardware placement guide — upper door, lower door, and drawer placement with measurements
The standard conventions, as documented by Schoolhouse:
Upper cabinet doors: Place knobs or pulls 2.5–3 inches from the bottom edge of the door. This positions the hardware at a natural reach point when the cabinet is closed.
Lower cabinet doors: Place hardware 2.5–3 inches from the top edge. Reaching down to a lower point feels awkward; the top edge is ergonomically better.
Drawers: Center horizontally on the drawer face. Vertical position varies by drawer height — typically centered for shallow drawers, positioned slightly above center for taller ones.
Tall pantry doors: Hardware at elbow height (36–42 inches from the floor) is the most comfortable for all household members regardless of height.
Style-specific notes:
- Shaker-style cabinets: The contemporary placement is centered on the top rail rather than centered on the recessed panel. It reads cleaner.
- Slab doors and drawers: Hardware 2 inches from the bottom or side edges works well — equidistant from nearby edges gives a deliberate look rather than a careless one.
- Inset cabinets: Hardware on the face frame rail, not the door face itself, is the traditional placement.
One practical thing: check that drawer pulls don’t interfere with adjacent drawers opening. This is a surprisingly common installation problem — a 3-inch pull on a small drawer can block the drawer above it from fully extending. Pull location affects clearance, not just aesthetics.
Matching hardware to your cabinet style
The broad principle: hardware should either match the style vocabulary of the cabinetry or deliberately contrast it. What doesn’t work is neutrally ignoring the relationship.

A few specific materials worth considering:
Ceramic knobs are underused and genuinely charming on farmhouse or cottage kitchens. They add texture and a handmade quality that metal pulls don’t replicate. They’re also more fragile — worth knowing before putting them on a cabinet that sees daily heavy use.
Wood-combined pulls — brass or alloy bases with wood inserts — are a good bridge between warm and natural aesthetics. They work particularly well in Japandi or Scandinavian-influenced spaces where the material palette matters as much as the color palette.

Solid brass round cabinet knobs in brushed gold finish installed on cabinetry, as taken from JRM Accessories
Practical tips before you buy
Order samples first. This is more important than most guides acknowledge. A pull that looks warm gold in a product photo can read as pale or cold in your actual kitchen lighting. JRM Accessories offers a sample program — you can try pieces before committing to a full order, which removes most of the guesswork.
Count carefully. It’s common to undercount, especially in kitchens where some drawers need two pulls (large drawers often look better with two shorter pulls rather than one oversized one). Count each door and drawer face separately, note which need knobs vs. pulls, and add 10% for breakage or measurements that don’t work out.
Buy extras. Hardware styles get discontinued. If you love a particular pull, buy three or four more than you need. Matching hardware five years later, after a minor ding or replacement, is much harder than having a small reserve.
Install with a template. Painter’s tape mockups before drilling are worth the extra 30 minutes. Hardware that’s even slightly misaligned across a row of drawers is visually obvious — and fixing it means filling holes and re-drilling.
Frequently Asked Questions
- What is the 1/3 rule for cabinet pulls?
The 1/3 rule says your cabinet pull should span roughly one-third the total width of the drawer front. So a 12-inch drawer gets a 3–4 inch pull, a 24-inch drawer gets an 8-inch pull, and a 36-inch drawer ideally gets a 12-inch pull. It’s the most reliable sizing guide across professional kitchen design and DIY communities alike. You can browse pulls by length at JRM Accessories to find the right match.
- What is center-to-center measurement for cabinet pulls?
Center-to-center (C2C) is the distance between the center of the two screw holes on a pull — not the total length of the handle itself. It’s the critical number when ordering replacement hardware or matching existing hole patterns. Always measure C2C, not the full bar length, to avoid re-drilling. JRM Accessories lists C2C measurements on all pull product pages.
- Which finish is most durable for cabinet pulls?
PVD (Physical Vapor Deposition) coatings are the most durable — the finish is molecularly bonded to the metal and resists scratching and wear for 10+ years in high-traffic kitchens. Solid brass and bronze age gracefully if unlacquered. Plated finishes typically show wear after 2–3 years on frequently used drawers. If you’re investing in a full kitchen renovation, PVD or solid brass from a supplier like JRM Accessories is worth the extra cost upfront.
- Should I use knobs or pulls on kitchen cabinets?
The most popular approach in 2026 is a hybrid: pulls on all lower drawers (easier to grip, especially for heavy pots-and-pans drawers) and knobs on upper cabinet doors (lighter visual weight). Pulls are ergonomically superior for high-use drawers since they engage your full hand rather than just your fingertips — which also matters for accessibility. If anyone in your household has arthritis or weak grip, pulls everywhere is the right call.
- How do I mix metal finishes without it looking like a mistake?
The Rule of 3 works well: pick one dominant metal for 60–70% of your hardware (say, matte black on drawer pulls), then two accent metals for supporting elements (unlacquered brass on cabinet knobs, satin nickel on the faucet). The key is making the mixing look deliberate — matching undertones matters more than matching base colors. Warm-toned brass and cool-toned nickel can clash even if both look ‘gold’ in store lighting.
메타데이터
- post_id
- a9fbf933e71b
- slug
- how-to-choose-cabinet-pulls-the-complete-guide-for-2026-a9fbf933e71b
- url
- https://medium.com/@contact_63347/how-to-choose-cabinet-pulls-the-complete-guide-for-2026-a9fbf933e71b
- canonical_url
- https://medium.com/@contact_63347/how-to-choose-cabinet-pulls-the-complete-guide-for-2026-a9fbf933e71b
- author_url
- https://medium.com/@contact_63347
- status
- ok
- fetched_at
- 2026-08-04 21:08:18