How to Use Aeroponic Cloner Machine for Plant Propagation.
Plant propagation is an essential technique for growers and gardeners looking to expand their collection or replicate high-quality…
How to Use Aeroponic Cloner Machine for Plant Propagation.
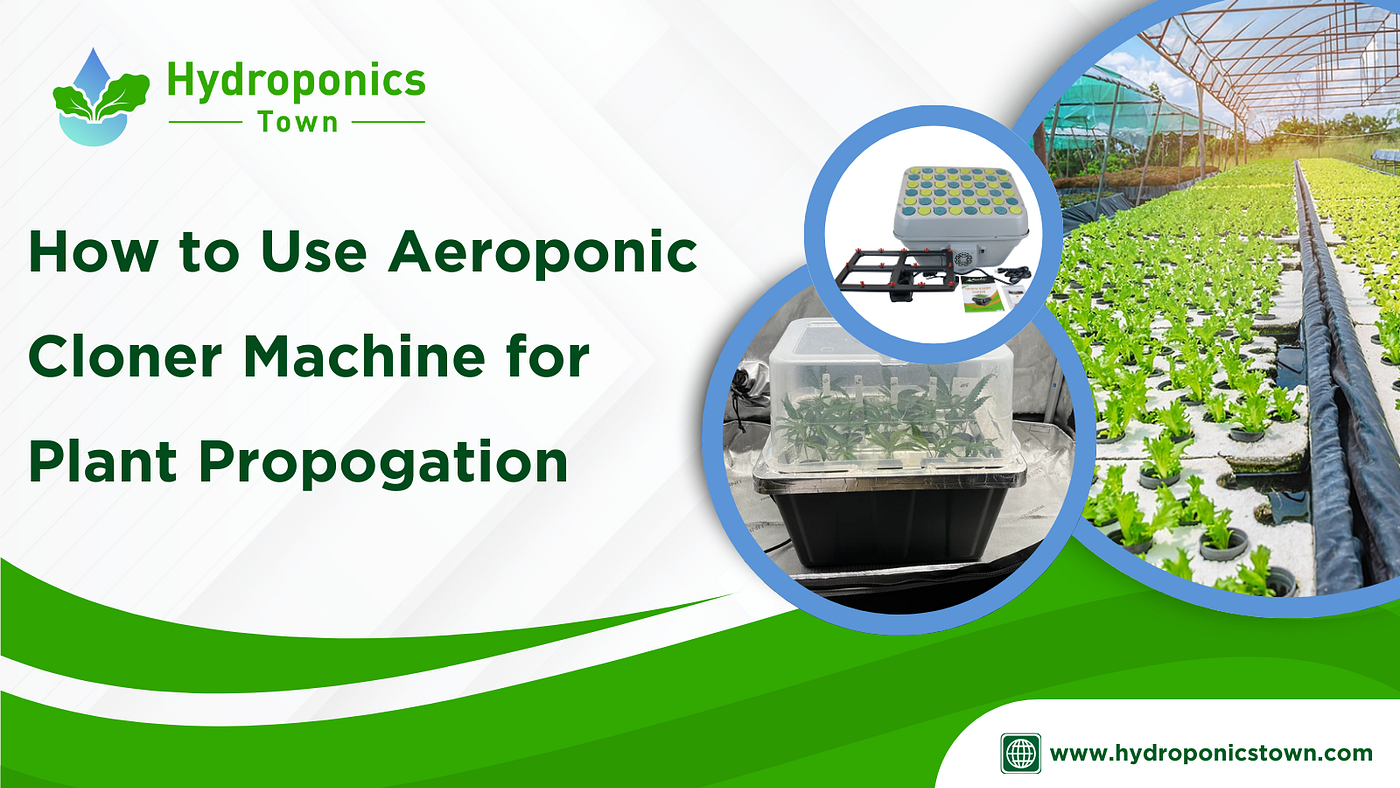
Aeroponic Cloner Machine
Plant propagation is an essential technique for growers and gardeners looking to expand their collection or replicate high-quality specimens. One of the most efficient modern methods available today is aeroponic cloner, a technique that uses air and mist to stimulate root growth. If you’re searching for faster rooting, reduced transplant shock, and higher success rates, an aeroponic cloner machine may be your ideal solution. This article will walk you through everything you need to know about using one effectively.
What is an Aeroponic Cloner Machine?
Aeroponics is a technique for growing plants without soil in which a nutrient-rich solution is misted over roots that are suspended in the air. Aeroponic cloners are perfect for propagation because they provide the right conditions for cuttings to grow robust, healthy roots quickly.
Components of a Typical Aeroponic Cloner Machine
The components of a typical aeroponic cloner are rather basic and consist of
- Reservoir: Holds the water and nutrient solution.
- Pump: Circulates water and drives misting action through spray nozzles.
- Spray Nozzles: Spray a fine mist directly onto the plant cuttings’ stems and root zones.
- Lid: Usually holds net pots or neoprene collars to support the plant cuttings.
- Net Pots/Collars: Secure the cuttings and suspend them above the misting area while allowing stems to remain exposed
Key Advantages of Aeroponic Cloning
Aeroponic cloning machines offer a number of advantages over conventional propagation techniques like soil or water cloning.
- Faster Rooting: Direct exposure to nutrients and oxygen speeds up root development.
- Higher Success Rates: Multiple cuttings produce more consistent outcomes when the circumstances are uniform.
- Reduced Risk of Disease: Exposure to infections and soil-borne pests is reduced in the sterile environment.
- Scalability: Cloners are appropriate for both commercial growers and hobbyists since they may process several cuttings at once.
Benefits of Using an Aeroponic Cloner Machine for Plant Propagation
Let’s look at some of the primary advantages of using an aeroponic cloning technology.
Speed and Efficiency:
Cuttings in aeroponic cloners often develop roots in 5–10 days — much quicker than in soil or other media. This is ideal for growers who want to scale their operations or cycle through plant generations faster.
Cleaner and Easier Maintenance:
There is no soil mess to deal with, and cleaning the machine is simple. Many systems are modular and easily disassembled for full sanitation in between cloning rounds.
High Oxygen Levels:
Roots require oxygen to grow efficiently. Because the roots are suspended in air and misted rather than wet, they get enough oxygen, which promotes stronger and healthier growth.
Uniform Results:
With precise control over the environment, nutrient distribution, and misting cycles, you can expect more predictable and consistent root development across all of your cuttings.
Best Plants for Aeroponic Cloning
Aeroponic cloning is most effective with soft-stemmed and fast-growing plants, but it can be applied to a wide range of species. The following plants are particularly well-suited for this method:
- Herbs: Basil, mint, rosemary, oregano, and thyme.
- Leafy greens: lettuce, kale, and spinach.
- Vegetables: Tomatoes, peppers and cucumbers
- Flowers: Geraniums, petunias, impatiens
Steps on How to Use an Aeroponic Cloner
Once you understand how to use an aeroponic cloner machine, it’s really straightforward. Here’s step-by-step instructions:
Step 1: Clean and Set Up the Machine
To prevent bacteria buildup, sanitize all components (reservoir, pump, lid, and collars) using a moderate bleach or hydrogen peroxide solution.
Step 2: Prepare Your Cuttings
- Using sterilized scissors or a razor, remove 4–6 inch cuttings from a healthy parent plant.
- Trim the leaves to reduce transpiration and eliminate extra foliage.
- Make a clean 45-degree cut right below a node, and optionally dip the stem in rooting hormone.
Step 3: Insert Cuttings into the Cloner
- Place each cut into a net pot or neoprene collar.
- Secure them in the lid so that the cut end is suspended above the misting zone rather than submerged in water.
- Ensure that each cutting has adequate air and mist coverage.
Step 4: Start the Cloner
- Turn on the pump and ensure that the mist is uniformly distributed throughout all of the cuttings’ stems.
- If your system uses intermittent misting cycles, set a timer (often 5 minutes on and 5 minutes off).
- Maintain a water temperature of 65°F-75°F (18°C-24°C) and utilize a humidity dome if necessary in drier locations.
Step 5: Monitor and Maintain
- On a daily basis, check the water level and cleanliness.
- Water and nutrients should be replaced or replenished every 5–7 days.
- Look for the first evidence of root growth (white root tips should appear within a week).
Step 6: Transplant Rooted Cuttings
- When the roots reach 2–3 inches, transfer the new plants into soil, coco coir, or a hydroponic system.
- Introduce them to light and nourishment gradually to help them adjust to their new surroundings.
Troubleshooting Common Issues
Even though aeroponic cloners are dependable, problems can still occur. Here are some frequent issues and ways to resolve them:
Roots Not Developing:
- Causes: Water temperature is excessively high, cutting quality is poor, and nozzles are clogged.
- Solutions: Maintain appropriate temperatures, utilize healthy donor plants, and clean spray nozzles on a frequent basis.
Stem Rot or Mold:
- Causes: Excess moisture or standing water.
- Solutions: Use a timer for occasional misting to avoid oversaturation and maintain proper ventilation.
Pump or Nozzles Failing:
- Causes: Mineral accumulation or detritus.
- Solutions: Following each cycle, use vinegar or a specialist cleaner to clean the pump and nozzles.
Wilting or Drooping Cuttings:
- Causes: Excessive light, low humidity, or stressed cuttings.
- Solutions: Use a humidity dome, provide indirect light, and take cuttings during the vegetative stage of the plant.
A hydroponics aeroponic cloner machine is a powerful, efficient, and clean means to propagate plants, with extremely high success rates. Whether you’re a home gardener experimenting with herbs or a commercial producer trying to expand your operation, aeroponic cloning produces consistent, high-quality results with little effort. Understanding how the system works, selecting the ideal plants, and following proper setup and maintenance methods will allow you to profit from faster root growth, healthier plants, and a more efficient propagation process.
At HydroponicsTown we offer a variety of clone machine setups, including reservoirs, pumps, lids, collars and more from different brands like Psycloner, TurboKlone and more.
FAQ’s
What temperature should the water be for aeroponic cloner?
The optimal water temperature for an aeroponic cloner is 68–72°F (20–22°C).
How often should I change the water in EZ Cloner?
Change your EZ Cloner’s water every 5–7 days to maintain it clean and prevent root rot.
What pH should aeroponic cloners have?
The ideal pH for aeroponic cloners is 5.5 to 6.0.
메타데이터
- post_id
- abec73062ca4
- slug
- how-to-use-aeroponic-cloner-machine-for-plant-propagation-abec73062ca4
- url
- https://medium.com/@hydroponicstown/how-to-use-aeroponic-cloner-machine-for-plant-propagation-abec73062ca4
- canonical_url
- https://medium.com/@hydroponicstown/how-to-use-aeroponic-cloner-machine-for-plant-propagation-abec73062ca4
- author_url
- https://medium.com/@hydroponicstown
- status
- ok
- fetched_at
- 2026-06-09 15:37:30