Checking Visual Studio Code From the Ubuntu Terminal
Before installing Flutter, I check whether Visual Studio Code is ready to open projects from the Ubuntu terminal.
Checking Visual Studio Code From the Ubuntu Terminal
Before installing Flutter, I check whether Visual Studio Code is ready to open projects from the Ubuntu terminal.

Terminal first, VS Code ready — preparing the workspace on Ubuntu LTS.
Episode 5 — Checking the First Tool in the Workflow
In the previous episode, I decided to use a terminal-first workflow for this season.
Now it is time to check the first real tool in that workflow: Visual Studio Code.
I am not installing Flutter yet. Flutter can wait outside for a minute with its tiny blue toolbox.
Before I bring Flutter into the room, I want to make sure my code editor is ready.
Visual Studio Code will be the place where I open the Flutter project, read files, edit code, and slowly shape the Offline Product Catalog App.
But because this season is terminal-first, I do not want to open VS Code only by clicking an icon.
I want to make sure Ubuntu can recognize VS Code from the terminal.
This matters because later, after I create the Flutter project, I want to open the project folder with one simple command:
code .
So in this episode, I will start small.
One command.
One result.
One clear check.
Check VS Code From the Terminal
The first check is simple.
I want to know whether Ubuntu can call Visual Studio Code from the terminal.
So I open the terminal and run this command:
code --versionThis command asks the system to show the installed version of Visual Studio Code.
If VS Code is installed correctly and the terminal can recognize it, the terminal should print a version number.
On my laptop, the result looks like this:

Screenshot: The Ubuntu terminal showing the result of the code — version command.
This result is good news.
It means Visual Studio Code is already installed, and Ubuntu can open it from the terminal.
I do not need to guess. The terminal gives me a clean answer.
VS Code is ready for the next step.
Open Visual Studio Code From the Terminal
After checking the version, I want to make sure VS Code can actually open from the terminal.
Checking the version is useful, but opening the editor is the real “okay, this works” moment.
So I run this command:
codeThis command opens Visual Studio Code.
It does not open a project folder yet. It simply launches the editor from the terminal.
If VS Code opens on the screen, that means the terminal can talk to the editor properly.
On a terminal-first workflow, this is important.
Later, I will use a slightly different command:
code .
That small dot matters.
The command code opens VS Code.
The command code . opens the current folder in VS Code.
So if I am inside a Flutter project folder later, code . will open that project directly in the editor.
Tiny command. Big convenience. The dot is small, but it knows where the door is.
Now I want to open the actual project folder.
I already have a folder for this season called offline_product_catalog, so I move into that folder first:
cd ~/offline_product_catalogAfter that, I open the current folder in Visual Studio Code:
code .This is the workflow I want to use later in the season.
The terminal brings me to the right folder, and Visual Studio Code opens that folder as a project.
Now I am not just opening an empty editor. I am opening the workspace for the Offline Product Catalog App.

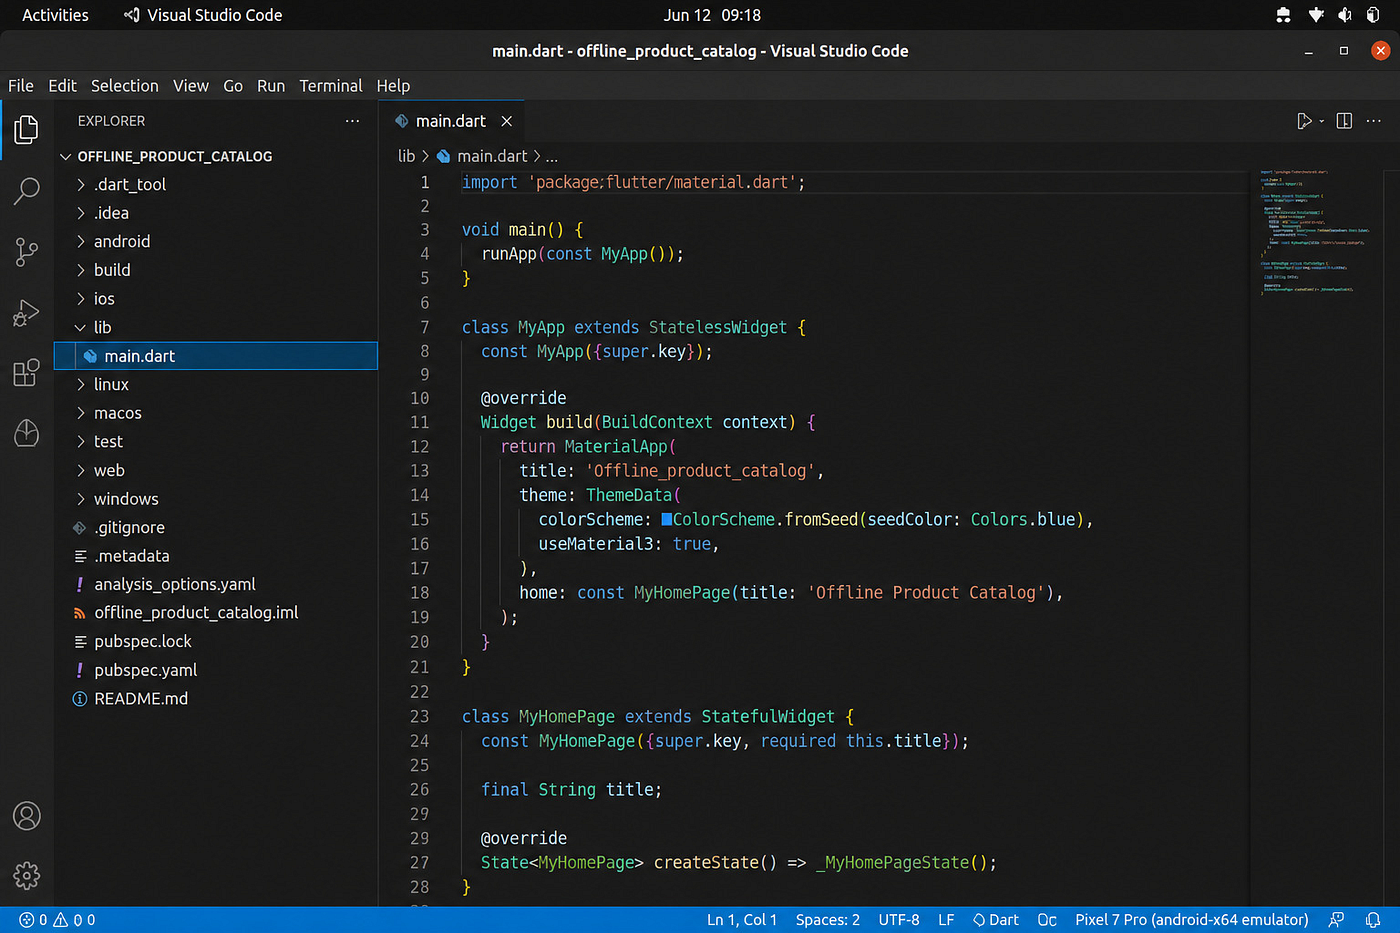
Screenshot: The Offline Product Catalog project opened in Visual Studio Code from the Ubuntu terminal.
This confirms that the editor is ready for the next stage.
Visual Studio Code can open from the terminal, and it can open the project folder I want to use for this Flutter journey.
What I See Inside the Project Folder
When Visual Studio Code opens the project folder, I can see the Flutter project structure on the left side.
At first, it looks like a lot.
There are folders for android, ios, linux, macos, web, windows, test, and lib. There are also files like pubspec.yaml and analysis_options.yaml.
For a beginner, this can feel like opening a toolbox and finding thirty tools you did not know existed.
But for now, I do not need to understand every folder.
The most important folder for me is lib.
That is where the main Dart code will live.
Later, when I start building the Offline Product Catalog App, I will spend a lot of time inside the lib folder.
Another important file is pubspec.yaml.
That file will become useful when I need to add assets, such as product images and local JSON data.
For this episode, I only want to confirm one thing:
The project folder can be opened from the terminal, and Visual Studio Code can show the files clearly.
That is enough for this step.
If the code Command Does Not Work
On my laptop, the code command works.
But on another Ubuntu machine, someone might see a message like this:
code: command not foundThat usually means one of two things.
Either Visual Studio Code is not installed yet, or the terminal does not know where to find the code command.
If VS Code is not installed, I can install it from Ubuntu Software or use the terminal method.
One common terminal method on Ubuntu is:
sudo snap install code --classicI am not running this command on my laptop because VS Code is already installed.
I only include it here as a note for readers who do not have VS Code yet.
After installing it, the same check can be repeated:
code --versionIf the terminal prints the VS Code version, then the editor is ready.
The goal is simple: before Flutter enters the story, I want the editor to answer from the terminal.
Closing
At this point, the first tool in my workflow is ready.
Visual Studio Code is installed, and the Ubuntu terminal can recognize it.
That may sound like a small step, but it matters.
Later, when I create the Flutter project, I do not want to waste time wondering how to open the project folder. I want to move into the folder from the terminal and open it directly with:
code .
That is the kind of workflow I want for this season.
Small command.
Clear result.
Less guessing.
Now the editor is ready.
In the next episode, I can finally start preparing Flutter itself on Ubuntu LTS.
The terminal has opened the door. Flutter is waiting outside with its little blue toolbox.
메타데이터
- post_id
- ae9ba6779d04
- slug
- checking-visual-studio-code-from-the-ubuntu-terminal-ae9ba6779d04
- url
- https://medium.com/@lenakendari/checking-visual-studio-code-from-the-ubuntu-terminal-ae9ba6779d04
- canonical_url
- https://medium.com/@lenakendari/checking-visual-studio-code-from-the-ubuntu-terminal-ae9ba6779d04
- author_url
- https://medium.com/@lenakendari
- status
- ok
- fetched_at
- 2026-07-17 17:19:20