To What Extent and How Can Transparent PETG Parts Be Achieved?
Printing transparent parts with PETG on an FDM printer is a pursuit many makers undertake, often with mixed results. I’ve been there myself…
To What Extent and How Can Transparent PETG Parts Be Achieved?
Printing transparent parts with PETG on an FDM printer is a pursuit many makers undertake, often with mixed results. I’ve been there myself — hoping for a glass-like finish, only to end up with something closer to a hazy plastic cup. So, how transparent can PETG really get, and what steps can we take to maximize its clarity? In this article, we’ll delve into the material’s limitations, the quirks of the FDM process, and the practical techniques that can help, drawing on reliable insights and my own experiences. Let’s explore what’s possible with this versatile filament.
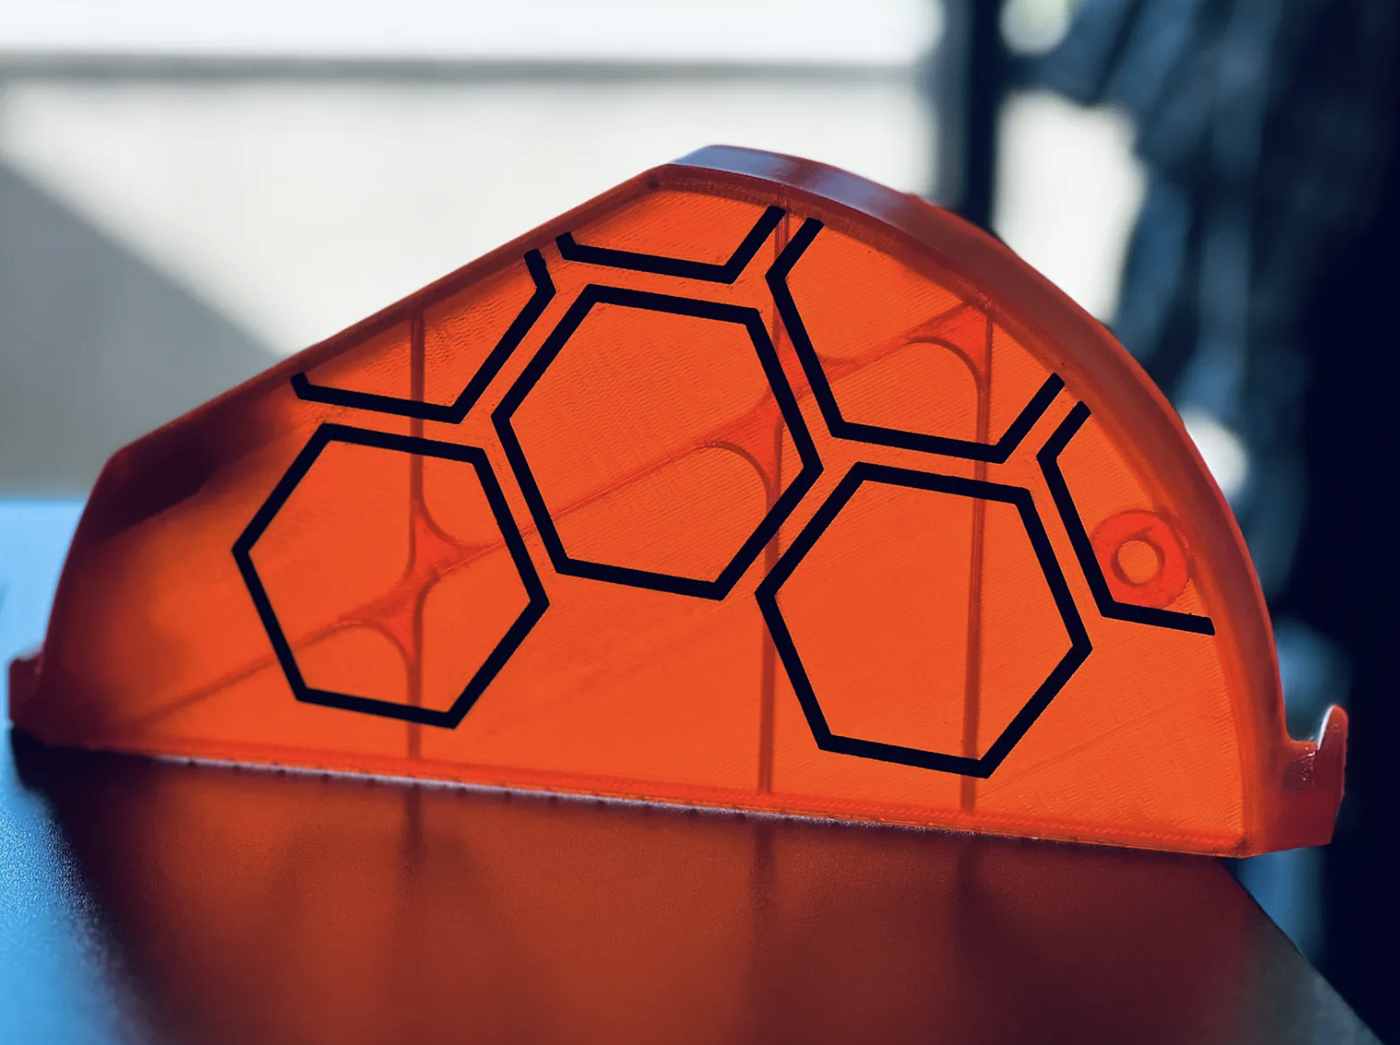
SpoolBox 4 all Brands with Filament Feed by Jorge Rui — MakerWorld
The Inherent Limits of PETG’s Polymer Structure
To begin with, it’s worth noting that PETG isn’t designed to rival the clarity of glass. This stems from its molecular makeup. As a crystalline polymer polymer, PETG lacks the random, disordered molecular arrangement of Amorphous polymer structure that allows light to pass through unimpeded. Picture a tangled web rather than a neatly aligned grid. By contrast, materials like polycarbonate and acrylic perform better — acrylic, in particular, has a molecular arrangement that allows light to pass through with minimal scattering, while polycarbonate follows closely behind. In PETG, however, light encounters a more ordered structure that makes it difficult for light to pass through, resulting in a milky appearance. This is a fundamental property, and no amount of tweaking can fully overcome it.
Key Differences between Amorphous and Crystalline Polymer:
Amorphous Polymer:
- Has a random, disordered molecular arrangement.
- No distinct melting point (softens over a temperature range).
- Typically, transparent (e.g., polycarbonate, polystyrene).
- Lower density and more flexible.
Crystalline Polymer:
- Has a highly ordered molecular structure in specific regions (crystalline domains).
- Has a sharp melting point.
- Often opaque due to light scattering from crystalline regions.
- Higher density and typically stronger and more rigid (e.g., polyethylene, polypropylene, nylon).

This is the normal outcome from clear PETG (default settings) — Ergo Capsule A1 by Jorge Rui — MakerWorld
The FDM Process as a Barrier to Clarity
Beyond the material itself, the FDM printing process poses its own challenges. FDM works by extruding molten filament layer by layer, with each layer cooling before the next is applied. This creates subtle seams and imperfections — think of stacking slightly misaligned sheets of clear film. Light passes through but gets refracted and reflected at these boundaries, muddying the transparency. Resin-based SLA printing, on the other hand, cures layers in a liquid medium, ensuring seamless bonding akin to a single “molded” piece.
As Wallerwilly rightly said on Reddit, an excellent alternative would be — Make 3D printed epoxy molds if you really want high transparency and stronger parts.
In FDM, the cold layer-to-layer adhesion introduces optical distortions that are hard to avoid. Print a thin PETG part, and you’ll see these layer lines for yourself — it’s a limitation we must work around.
Moisture: A Hidden Foe of Transparency
Another critical factor I’ve encountered is the condition of the PETG filament. This material is hygroscopic, meaning it readily absorbs moisture from the air. Printing with damp filament leads to bubbles and internal flaws that ruin any chance of clarity — I’ve seen promising parts turn cloudy due to poor storage. Drying the filament beforehand, ideally at 65°C for 8 hours in a dehydrator, is essential (as recommended by Bambu Lab’s wiki: Transparent PETG Guide). Even then, while a dry filament yields a more translucent finish, it won’t approach the pristine clarity of glass...
Key Printing Parameters and Their Impact
Achieving the best possible transparency with PETG hinges on fine-tuning your printer settings. Temperature, speed, cooling, and flow rate all play pivotal roles.
- Higher temperatures — between 260°C and 270°C — enhance filament flow and layer adhesion, minimizing visible seams.
- A slower print speed, around 20–50 mm/s, allows the material to settle evenly, while reducing cooling (or turning it off entirely) prevents rapid shrinkage that can crack the layers.
- Additionally, opting for a larger nozzle, such as 0.6 or 0.8 mm, produces thicker layers, reducing the number of interfaces where light scatters. I’ve tested this myself, and the improvement is noticeable — though it’s still not a crystal-clear outcome.
Here are some parameters to experiment with; this is not an exhaustive list, and I prefer not to provide exact settings due to the many variables involved — the first being the material itself. And believe it or not, new filament can arrive with a lot of moisture, which may stem from the production process — where water is used for cooling and dimensional stabilization — or from inadequate drying and storage thereafter.

Best Parameters for Printing PETG as Clearly as Possible with FDM
Additional Recommendations:
- Dry the Filament: Dry at 65°C for 8 hours to remove moisture and prevent bubbles.
- Vase Mode: Use for single-wall objects to eliminate seams and infill.
eliminating the back-and-forth motion that leaves lines — fewer seams mean better clarity
- Aligning infill in straight, 100% rectilinear patterns can also help light pass through without scattering off erratic shapes
- Post-Processing: Sand with 1000–2000 grit paper and apply clear varnish for a smoother surface.
Stefan Hermann from cnckitchen.com explores the challenges of achieving transparent parts with FDM 3D printing. Inspired by a Printables.com post by user Rygar1432, Hermann experiments with specific settings — such as higher extrusion multipliers (above 100%), slow print speeds (15 mm/s), no cooling, and aligned rectilinear infill with no top or bottom layers — to create nearly clear PETG parts. His tests reveal that these adjustments not only enhance transparency by filling voids and reducing layer lines but also improve layer adhesion, a common weak point in FDM prints.
Beyond aesthetics, Hermann’s mechanical testing shows a surprising bonus: the “transparent parameters” increase part strength. Horizontal specimens printed with these settings reached an average tensile strength of 59 MPa! Compared to 52 MPa with standard settings. These findings suggest that optimizing for transparency can also produce denser, stronger parts, challenging the notion that FDM prioritizes either looks or durability. For a deeper dive into the settings, test results, and practical applications, Stefan Hermann’s article is a must-read resource.
Transparent FDM 3D Prints are Clearly Stronger! — CNC Kitchen
Conclusion
So, how transparent can PETG get? With the right approach, you can achieve a respectable level of translucency, but don’t expect glass-like clarity — the polymer’s nature and FDM’s constraints set firm boundaries. Drying the filament, optimizing temperature and speed, using larger nozzles, and designing thin walls are your best bets for success. It’s a process of experimentation, but the results can be rewarding. For truly transparent parts, SLA might be the answer. For FDM users, PETG offers a practical compromise — handled well, it’s more than fit for purpose.
Some references:
- Material Comparisons | Eagle Performance Plastics, Inc.
- Polycarbonate vs. PETG: Material Differences and Comparisons ❘ Xometry
- Comparison of See-Through Plastics | Cope Plastics, Inc.
- Transparent FDM 3D Prints are Clearly Stronger! — CNC Kitchen
- Printing tips for transparent PETG | Bambu Lab Wiki
- Transparent PETG Basic — Any tips? — Bambu Filament and Accesories / Filament — Bambu Lab Community Forum
- Transparent PETG — How do I print this? (Printing help) — Prusa3D Forum
- Printing Glass (Transparent PETG) — My findings : r/BambuLab
- Guia definitivo para suavização de vapor PETG para peças impressas em 3D brilhantes — Goldsupplier
메타데이터
- post_id
- b2633bce9ae8
- slug
- to-what-extent-and-how-can-transparent-petg-parts-be-achieved-b2633bce9ae8
- url
- https://medium.com/@jorge.rui.machado/to-what-extent-and-how-can-transparent-petg-parts-be-achieved-b2633bce9ae8
- canonical_url
- https://medium.com/@jorge.rui.machado/to-what-extent-and-how-can-transparent-petg-parts-be-achieved-b2633bce9ae8
- author_url
- https://medium.com/@jorge.rui.machado
- status
- ok
- fetched_at
- 2026-07-08 02:49:32






