I Created a Simple AI Prompt That Turns Any Resume Into a Portfolio Website
Build and deploy your personal portfolio website for free no coding, no design stress, and no extra cost
I Created a Simple AI Prompt That Turns Any Resume Into a Portfolio Website
Build and deploy your personal portfolio website for free no coding, no design stress, and no extra cost
Hey everyone,
I’m honestly excited to share this one with you.
Nonmembers click here
Today, we are living in a time where AI can build websites, write code, design layouts, create images, and even help us turn rough ideas into real projects. A few years ago, creating a personal portfolio website felt like a big task. You needed coding knowledge, design sense, hosting setup, and a lot of patience.
But now things are changing fast.
And because of that, I started thinking about one simple thing:
If AI can help us build websites so easily, then why doesn’t every student, fresher, freelancer, creator, or job seeker have their own portfolio website?
Because let’s be honest a resume is useful, but it is still limited. It shows your details on one page, but it does not always show your personality, your projects, your work style, or your real effort.
A portfolio website feels different.
It gives people one clean place to see who you are, what you know, what you have built, and how they can contact you. It can be added to your LinkedIn, resume, GitHub, Instagram bio, job applications, freelance profile, or even your email signature.
And the best part?
You don’t need to spend money. You don’t need to be a professional designer. You don’t even need to know advanced coding.
You just need your resume and the right prompt.
So I created a simple AI prompt that can help beginners turn their resume into a clean, modern, minimal portfolio website. The idea is very simple:
Upload your resume. Upload your photo if you want. Let AI create your portfolio website.
That’s it.
In this story, I’ll share the full prompt with you. You can use it in any AI website builder and create your own portfolio website for free.
I’m really happy to share this because I feel this can genuinely help students, freshers, developers, freelancers, designers, creators, and anyone who wants to build a better online identity without feeling confused or stuck.
You are an expert UI/UX designer, frontend developer, personal branding strategist, and portfolio website architect.

Your task is to create a modern, clean, minimal, beginner-friendly personal portfolio website using only the information provided by the user.

The website should feel premium, professional, simple, trustworthy, and easy to navigate. It should not look overdesigned, crowded, generic, or template-like.

The main goal of this website is to help a beginner, student, fresher, freelancer, developer, designer, creator, or working professional build a strong online identity from their resume.

====================================
USER INPUT REQUIRED
====================================

Ask the user for only these two inputs:

1. Upload your resume
   - Required
   - Extract all useful information from the resume automatically.
   - Use the resume to understand the user’s name, role, education, skills, projects, experience, achievements, certifications, contact details, social links, and career direction.

2. Upload your image
   - Optional
   - If the user uploads an image, use it in the hero section and about section.
   - If the user does not upload an image, create a clean professional placeholder avatar using initials or a minimal abstract profile illustration.

Do not ask the user too many questions in the beginning. The purpose is to make the process beginner-friendly and almost automatic.

====================================
MAIN WEBSITE GOAL
====================================

Build a complete personal portfolio website that works like a digital identity page.

The website should clearly show:

- Who the person is
- What they do
- What skills they have
- What projects they have built
- What experience or education they have
- Why someone should trust them
- How to contact them

The website should be suitable for job applications, internships, freelancing, networking, personal branding, LinkedIn profile links, and resume sharing.

====================================
INFORMATION EXTRACTION FROM RESUME
====================================

Carefully analyze the uploaded resume and extract:

- Full name
- Current title or best suitable professional title
- Short professional summary
- Email
- Phone number, if available
- Location, if available
- LinkedIn link
- GitHub link
- Portfolio link, if already available
- Other social links
- Education details
- Work experience
- Internships
- Projects
- Technical skills
- Soft skills
- Tools and technologies
- Certifications
- Achievements
- Languages
- Interests, only if relevant
- Career objective or professional direction

If any section is missing from the resume, do not show an empty section. Only show sections that have useful content.

If the resume has weak or unclear wording, improve it into clear, professional, simple website copy without changing the truth.

Do not invent fake experience, fake projects, fake companies, fake certifications, fake links, or fake achievements.

====================================
WEBSITE STYLE DIRECTION
====================================

Create a website with this design style:

- Modern
- Minimal
- Clean
- Premium
- Beginner-friendly
- Mobile-first
- Lightweight
- Fast loading
- Professional but not boring
- Soft visual design
- Clear spacing
- Simple animations
- Easy readability

The design should feel like a high-quality personal brand website, not a basic resume page.

Avoid heavy gradients, too many colors, unnecessary 3D elements, messy animations, and crowded layouts.

====================================
COLOR SYSTEM
====================================

Use a clean and professional color palette.

Default palette:

- Background: soft off-white, very light gray, or clean white
- Text: deep charcoal or near black
- Secondary text: muted gray
- Primary accent: modern blue, purple, emerald, or black
- Cards: white or slightly tinted background
- Borders: soft gray
- Buttons: strong accent color with clean hover effect

The website should support both light and dark mode if possible.

Light mode should feel clean and editorial.

Dark mode should feel premium, calm, and modern.

Use color carefully. Do not make the website look childish or overly colorful.

====================================
TYPOGRAPHY
====================================

Use beautiful, readable, modern fonts.

Recommended font combinations:

Option 1:
- Headings: Inter, Satoshi, Manrope, or Plus Jakarta Sans
- Body: Inter, Manrope, or Source Sans 3

Option 2:
- Headings: Space Grotesk or Sora
- Body: Inter or Manrope

Font rules:

- Hero heading should be bold, clean, and visually strong.
- Body text should be easy to read.
- Do not use more than two font families.
- Use proper line height.
- Avoid very tiny text.
- Avoid decorative fonts.
- Use font weights carefully: regular, medium, semibold, bold.
- Make the website readable on mobile screens.

Suggested typography scale:

- Hero title: 48px to 72px on desktop, 34px to 44px on mobile
- Section headings: 32px to 44px on desktop, 26px to 32px on mobile
- Body text: 16px to 18px
- Small text: 14px to 15px
- Buttons: 15px to 16px, medium weight

====================================
LAYOUT STRUCTURE
====================================

Create the website with these sections:

1. Navbar
2. Hero Section
3. About Section
4. Skills Section
5. Projects Section
6. Experience Section
7. Education Section
8. Certifications / Achievements Section
9. Resume Download Section
10. Contact Section
11. Footer

Only include sections that are supported by the resume data.

For example:
- If there is no work experience, show projects and education more strongly.
- If there are no certifications, remove that section.
- If there are no projects, create a “Work Highlights” or “Learning Journey” section using available resume information.
- If the person is a fresher, position the website around potential, skills, projects, and learning mindset.

====================================
SECTION DETAILS
====================================

1. Navbar

Create a simple sticky navbar.

Navbar should include:

- Name or initials on the left
- Menu links on the right
- Resume button
- Contact button
- Dark/light mode toggle if possible

Menu links:

- Home
- About
- Skills
- Projects
- Experience
- Contact

On mobile:

- Use a clean hamburger menu
- Keep it simple
- Menu should open smoothly
- Buttons should be easy to tap

Navbar style:

- Transparent or slightly blurred background
- Soft border at bottom
- Smooth scrolling
- Active link highlight if possible

2. Hero Section

The hero section is the most important part.

It should immediately tell the visitor who this person is and what they do.

Use resume information to create:

- Name
- Professional title
- Short powerful headline
- 2 to 3 line intro
- Primary CTA button
- Secondary CTA button
- Profile image or placeholder

Hero content example structure:

“Hi, I’m [Name]”

A [Role] focused on [main skill/field].

Short intro:
“I build simple, useful, and user-friendly digital experiences using [skills/technologies]. I’m currently looking for [internship/job/freelance/opportunities] where I can learn, contribute, and grow.”

CTA buttons:

- View Projects
- Download Resume
- Contact Me

Hero design:

- Large clean heading
- Good whitespace
- Left text and right profile image on desktop
- Stacked layout on mobile
- Add subtle background pattern, soft gradient glow, or minimal grid background
- Avoid loud design

If image is uploaded:

- Use circular or rounded rectangle frame
- Add soft shadow
- Keep professional crop
- Do not distort the face

If no image is uploaded:

- Use initials avatar
- Or create a minimal abstract illustration
- Or use a clean card with name initials

3. About Section

Create a warm, human, professional about section.

Do not copy resume summary directly. Rewrite it into natural portfolio-style language.

Include:

- Who they are
- What they are learning or building
- What type of work they enjoy
- Their career direction
- A few personal strengths from the resume

Tone should be simple and real, not corporate.

For beginners/freshers, use confident but humble language.

Example style:

“I’m a [role/student/professional] with an interest in [field]. I enjoy turning ideas into practical projects and learning by building. My current focus is on improving my skills in [technologies] and working on projects that solve real problems.”

Also add 3 small highlight cards if data is available:

- Projects completed
- Technologies learned
- Certifications
- Internship/experience
- Education
- Years of learning/experience

4. Skills Section

Create a clean skills section from the resume.

Group skills into categories automatically.

Possible categories:

- Programming Languages
- Frontend
- Backend
- Databases
- Tools
- Frameworks
- Design Tools
- Cloud / DevOps
- AI Tools
- Soft Skills

Use clean skill chips, cards, or grouped columns.

Do not show skills as a boring long paragraph.

Use simple hover animation.

If skill level is not mentioned, do not create fake percentages. Avoid fake progress bars unless the resume clearly provides skill levels.

Preferred style:

- Skill tags
- Soft cards
- Category headings
- Clean grid

5. Projects Section

Create a strong projects section.

For each project from the resume, include:

- Project name
- Short description
- Problem it solves
- Technologies used
- Key features
- GitHub link, if available
- Live demo link, if available

If project descriptions are weak, rewrite them in a better way.

Project card structure:

- Project title
- One-line summary
- 3 key features
- Tech stack chips
- Buttons: GitHub / Live Demo / View Details

Design:

- Use modern cards
- Add hover lift effect
- Use soft borders
- Keep layout clean
- 2 or 3 column grid on desktop
- 1 column on mobile

Important:
Do not invent project links.
If no link is available, do not add fake buttons.

6. Experience Section

If experience exists in the resume, create a timeline layout.

Include:

- Job/internship title
- Company name
- Duration
- Location, if available
- Responsibilities
- Achievements

Rewrite bullet points into clear result-focused language.

Use a clean vertical timeline or cards.

If there is no experience, replace this section with:

“Learning & Practice”

Show:

- Relevant coursework
- Self-learning
- Projects
- Hackathons
- open-source work
- practice areas

Only use what is available from the resume.

7. Education Section

Create an education section.

Include:

- Degree/course
- Institution name
- Duration/year
- CGPA/percentage, if available
- Relevant subjects, if useful

Design:

- Clean cards
- Minimal layout
- Optional timeline style

For students and freshers, education should be visually important but not too large.

8. Certifications / Achievements Section

If the resume contains certifications or achievements, show them in a separate section.

Include:

- Certification name
- Issuing organization
- Date, if available
- Credential link, if available

Achievements can include:

- Awards
- Competition results
- Hackathons
- Academic achievements
- Published work
- Leadership roles

Use small elegant cards or badges.

9. Resume Download Section

Create a simple section encouraging visitors to download the resume.

Content:

“Want the full resume?”

Short line:
“Download my resume to see my complete education, skills, projects, and experience in one place.”

Button:

- Download Resume

Make sure the uploaded resume remains available as a downloadable file.

10. Contact Section

Create a clean contact section.

Include:

- Email
- Phone, if available
- Location, if available
- LinkedIn
- GitHub
- Other links
- Contact form

Contact form fields:

- Name
- Email
- Message

Add a professional CTA:

“Have an opportunity, project, or collaboration in mind? Feel free to reach out.”

If backend is not available, make the contact form UI ready and include mailto fallback.

11. Footer

Create a simple footer.

Include:

- Name
- Short tagline
- Social links
- Copyright text
- Back to top link

Example:

“Built with care by [Name].”

====================================
COPYWRITING STYLE
====================================

Write the website content in a simple, human, professional tone.

The content should be:

- Clear
- Honest
- Beginner-friendly
- Confident
- Not overhyped
- Not robotic
- Not too corporate
- Easy to understand

Avoid phrases like:

- “Highly motivated individual with excellent skills”
- “Passionate and dynamic professional”
- “Results-driven self-starter”
- “Seasoned expert” if the user is beginner

Use natural lines like:

- “I enjoy building practical projects and learning by doing.”
- “I’m focused on improving my skills in real-world development.”
- “I like creating simple, useful, and clean digital experiences.”

====================================
VISUAL DETAILS
====================================

Use these visual rules:

- Maximum width: around 1120px to 1280px
- Section padding: generous spacing
- Cards: rounded corners, soft shadow, subtle border
- Buttons: rounded, clear hover effect
- Icons: simple line icons
- Background: clean with subtle decorative elements
- Spacing: consistent
- Alignment: clean and balanced
- Animation: smooth but minimal

Use subtle animations:

- Fade in on scroll
- Slight card lift on hover
- Smooth button hover
- Smooth section transitions

Do not use too many animations. The website should feel calm and professional.

====================================
RESPONSIVE DESIGN
====================================

The website must be fully responsive.

Desktop:

- Spacious layout
- Hero can use two columns
- Projects can use grid layout
- Skills can use category cards

Tablet:

- Balanced spacing
- Cards in 2 columns where possible

Mobile:

- Single column layout
- Large readable text
- Easy tap buttons
- Sticky navbar or simple top nav
- No horizontal scrolling
- Profile image should scale properly
- Contact form should fit perfectly

====================================
ACCESSIBILITY
====================================

Follow accessibility best practices:

- Proper color contrast
- Semantic HTML
- Clear heading hierarchy
- Alt text for images
- Focus states for buttons and links
- Keyboard-friendly navigation
- Proper labels for forms
- Readable font sizes

====================================
SEO REQUIREMENTS
====================================

Make the website SEO-friendly.

Add:

- Proper page title using the user’s name and role
- Meta description
- Open Graph title
- Open Graph description
- Open Graph image if possible
- Clean URL structure
- Semantic headings
- Structured content

Example title:

“[Name] — [Role] Portfolio”

Example meta description:

“Portfolio of [Name], a [Role] skilled in [main skills]. Explore projects, experience, education, and contact information.”

====================================
PERFORMANCE REQUIREMENTS
====================================

The website should be fast and lightweight.

Optimize:

- Images
- Font loading
- Code structure
- Reusable components
- Lazy loading where needed
- No unnecessary libraries
- No heavy animations
- Clean CSS

====================================
TECHNICAL REQUIREMENTS
====================================

Build the website using modern frontend best practices.

If using React/Next.js:

- Use clean components
- Use reusable section components
- Use responsive Tailwind CSS
- Use accessible buttons and links
- Use clean data structure extracted from resume
- Keep the code easy to edit later

If using plain HTML/CSS/JS:

- Use semantic HTML
- Use clean CSS variables
- Use modular sections
- Use simple JavaScript for menu, theme toggle, and animations

If the platform supports CMS or database:

- Store extracted resume data in a clean structure
- Make content editable
- Allow future updates

====================================
EXTRA FEATURE IDEAS
====================================

Add these only if they fit naturally:

- Dark/light mode toggle
- Smooth scroll
- Resume download button
- Copy email button
- Social link icons
- Project filter by technology
- “Currently learning” section
- “Available for opportunities” badge
- Simple testimonial placeholder only if testimonials exist
- Floating contact button on mobile
- Back-to-top button

Do not add fake testimonials.

====================================
BEGINNER-FRIENDLY EDITING
====================================

Make the final website easy for a beginner to edit.

Create clear content sections.

Use readable naming:

- HeroSection
- AboutSection
- SkillsSection
- ProjectsSection
- ExperienceSection
- EducationSection
- ContactSection
- Footer

Keep all extracted user data in one editable file or object if possible.

Add comments where useful.

====================================
FINAL OUTPUT EXPECTATION
====================================

Create a complete, polished, production-ready personal portfolio website.

Before building, silently analyze the uploaded resume and decide the best structure.

Then generate the website automatically.

The final result should feel like a premium portfolio website that a beginner can proudly share on LinkedIn, job applications, freelance profiles, email signatures, and social media.

Remember:

- Required input: resume
- Optional input: image
- Do not ask unnecessary questions
- Extract everything useful from the resume
- Improve wording but do not fake information
- Keep design modern, clean, minimal, responsive, and professional
How to Use This Prompt in Lovable AI
Now let me show you how you can actually use this prompt and create your own portfolio website.
For this example, I used **Lovable AI** because it is simple for beginners and you can generate a website just by giving a proper prompt.
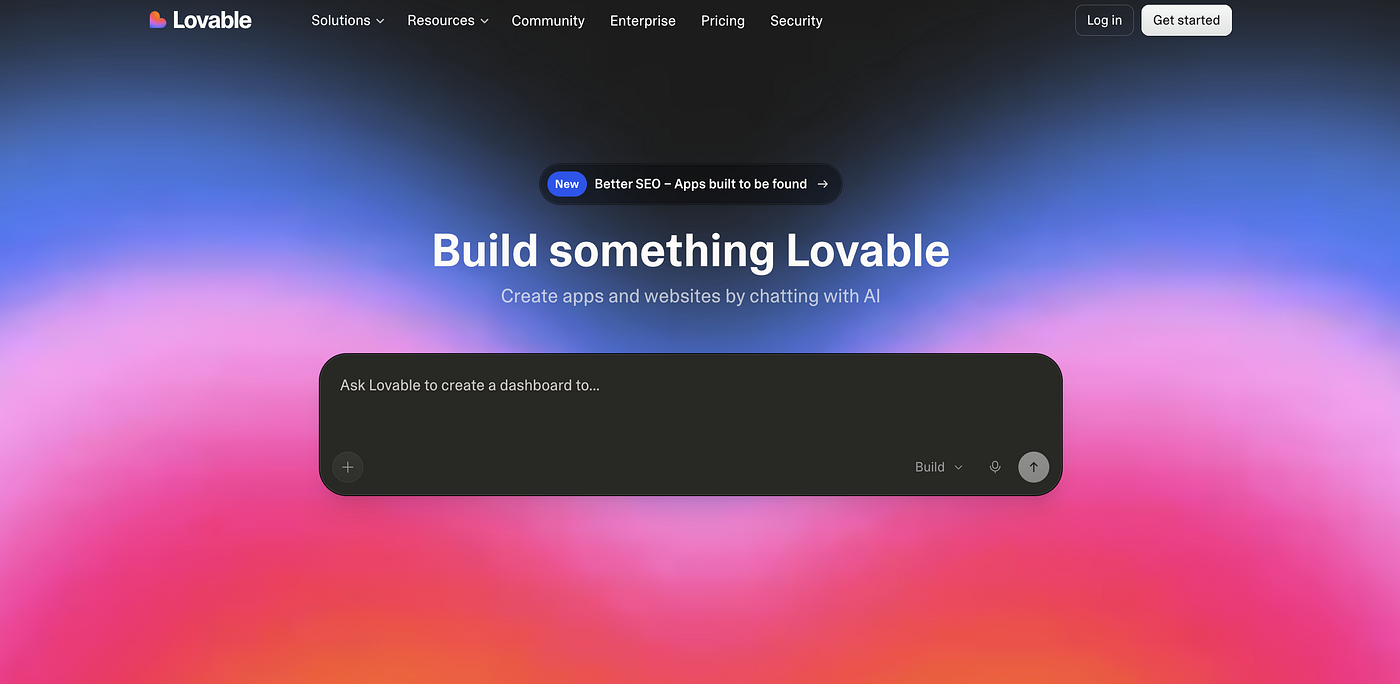
The process is very easy.
First, go to Lovable AI and create your account.
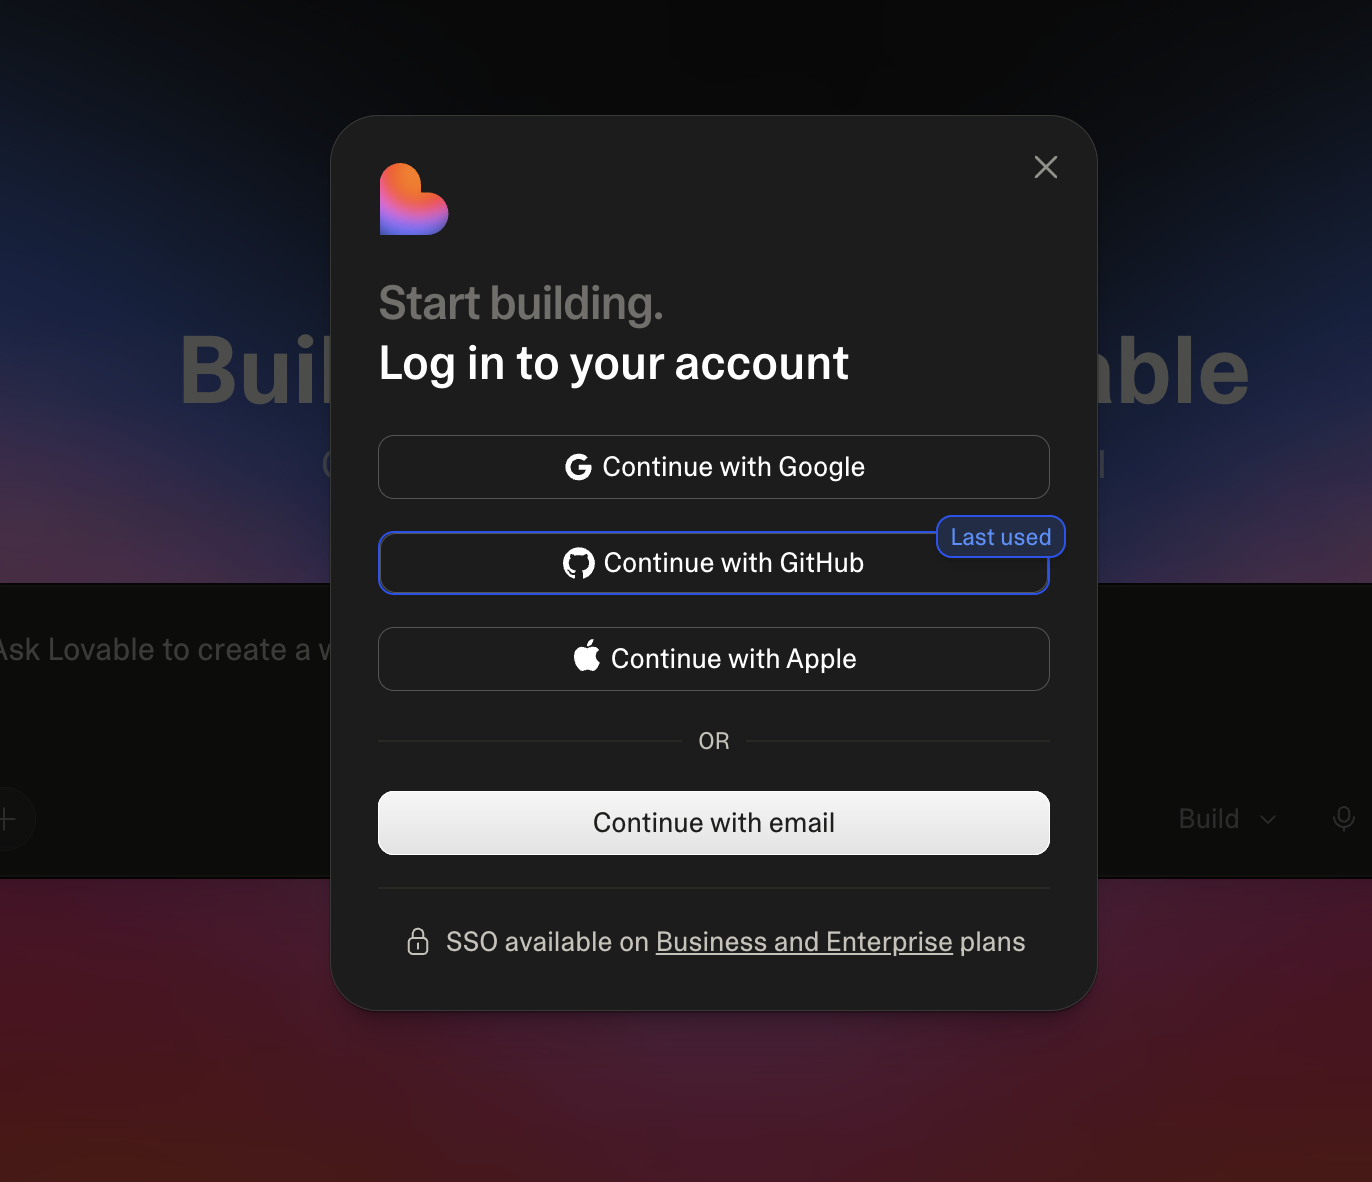
After creating your account, copy the portfolio prompt that I shared in this article and paste it into Lovable.
Then upload your resume. This is the most important part because the AI will read your resume and collect your name, skills, projects, education, experience, contact details, and other important information from it.
You can also upload your image if you want. This is optional. If you upload your photo, AI can use it in your portfolio website. If you don’t want to upload your photo, that is also completely fine.
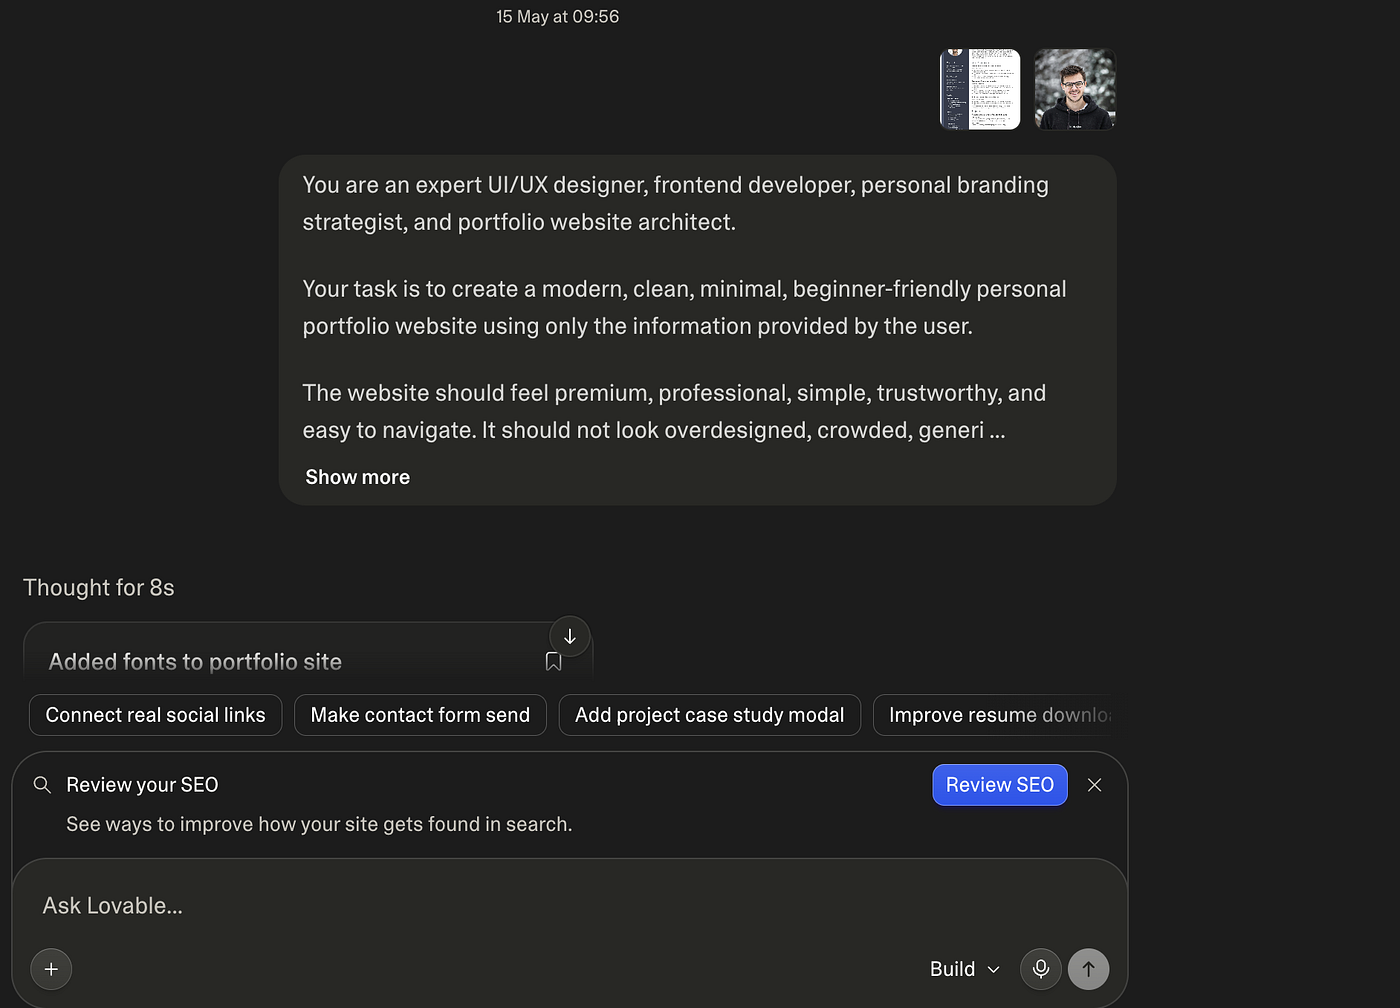
After that, simply hit enter and let Lovable generate your portfolio website.
In a few moments, your website will start taking shape. It will create sections like hero, about, skills, projects, experience, education, resume download, contact section, and footer.
And the best part is, you don’t have to stop there.
If you want to change anything, you can continue chatting with Lovable. For example, you can say:
Make the design more minimal. Change the color theme to black and white. Make the hero section more modern. Add more spacing between sections. Make the website more professional for job applications. Improve the mobile layout.
So basically, you can keep improving the website by simply giving small instructions.
Once you are happy with the design, click on Publish.
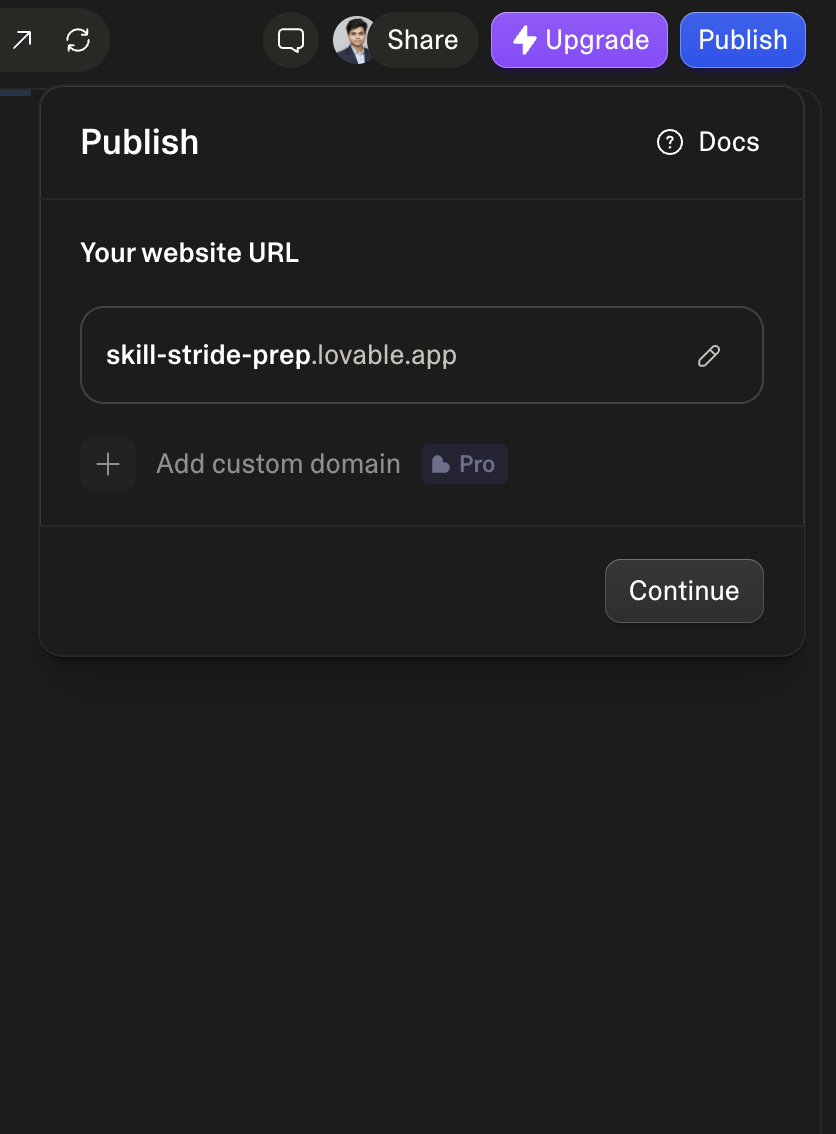
After clicking publish, Lovable will ask you to add some basic project details like your website title, description, and image. Fill those details properly because they make your project look more complete and professional.
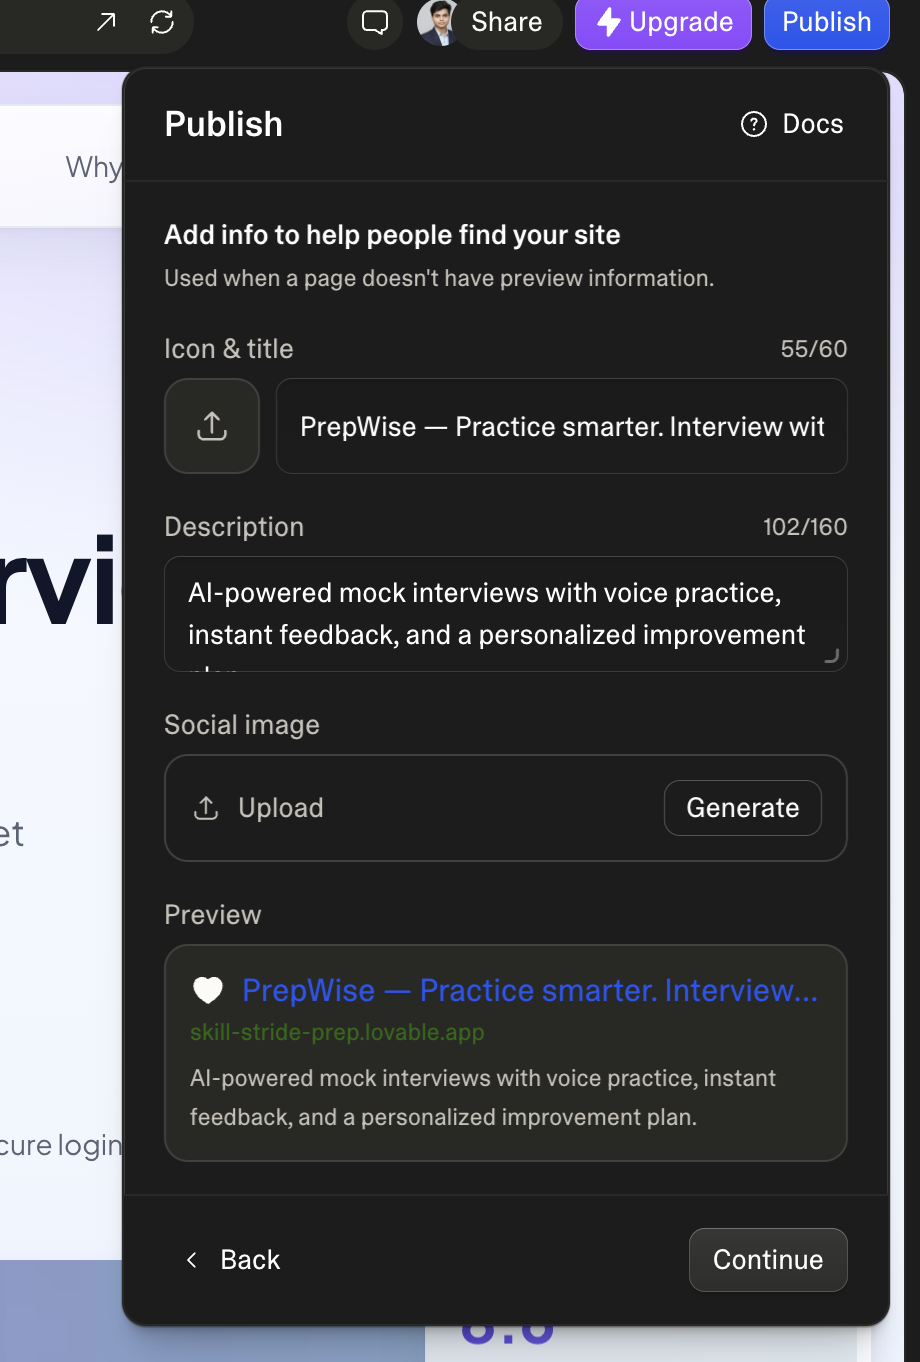
Then click Continue.
After that, click Publish again.
And that’s it.
Congratulations your personal portfolio website is live.
You can now copy your website link and add it to your resume, LinkedIn profile, GitHub bio, Instagram bio, email signature, freelance profile, or job applications.
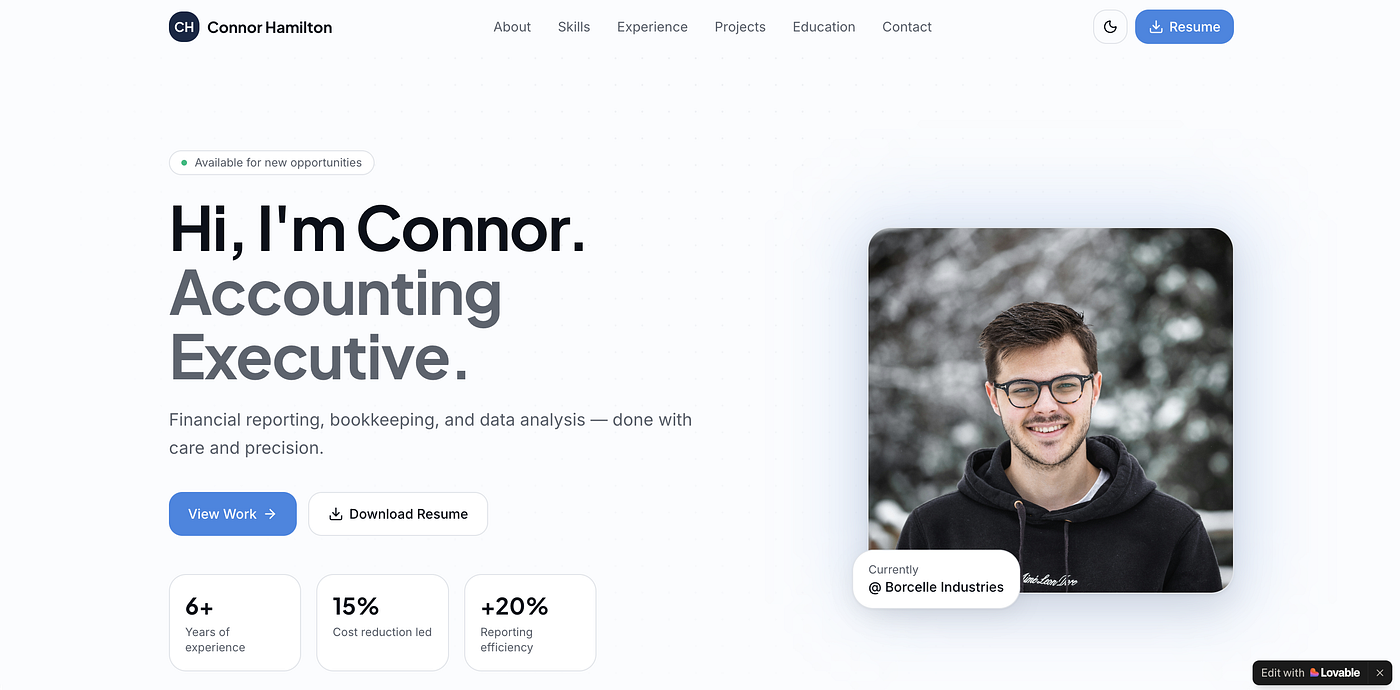
For example, here is a portfolio website I created using this same idea: ***https://profile-craft-77.lovable.app/***
And that’s it
Nothing too hard. Nothing too confusing. And definitely nothing like rocket science.
You don’t need to be a professional developer. You don’t need to be a UI/UX expert. You don’t need to spend money just to create your own digital identity.
You just need your resume, the right prompt, and a little excitement to try something new.
In today’s digital world, having your own portfolio website is not only for developers or designers anymore. It is useful for students, freshers, freelancers, creators, job seekers, and almost anyone who wants to show their work in a better way.
So what are you waiting for?
Create your portfolio website, publish it, and share the link in the comment section. I genuinely want to see what you create. I can’t wait to check your portfolios.
And if this story helped you even a little, please clap for it and share it with your friends, classmates, or anyone who needs their own digital recognition.
Because honestly, everyone deserves a small space on the internet that says:
“This is me. This is what I do. And this is what I’m building.”
Editor’s Note : This story includes AI-generated content such as prompt templates and AI-generated images used for demonstration and creative experimentation. The prompts shared in this story were developed through my own testing and exploration . And there is no any affiliate or promotional links. Everything based on personal experience and research🤗.
메타데이터
- post_id
- b3ff6f5e88ea
- slug
- i-created-a-simple-ai-prompt-that-turns-any-resume-into-a-portfolio-website-b3ff6f5e88ea
- url
- https://medium.com/lets-code-future/i-created-a-simple-ai-prompt-that-turns-any-resume-into-a-portfolio-website-b3ff6f5e88ea
- canonical_url
- https://medium.com/lets-code-future/i-created-a-simple-ai-prompt-that-turns-any-resume-into-a-portfolio-website-b3ff6f5e88ea
- author_url
- https://medium.com/@Deep-concept
- status
- ok
- fetched_at
- 2026-06-09 15:37:30