Using Forge Dynamics in Cavalry to create text-based animations — Part One
Motion Design Starter Series
Using Forge Dynamics in Cavalry to create text-based animations — Part One
Motion Design Starter Series
In this tutorial, we’ll dive into the Forge Dynamics functionality of Cavalry using text as the foundation for our animation.
Example 1: a brief intro
- Create a composition at your desired dimensions. For this tutorial, I am using a canvas of 1920 x 1080.
- Alt-Click on the text tool, and after selecting the text layer in the scene window, go over to the Attribute Editor and apply some basic formatting, alignment and so on.
- Paste in a paragraph of text. I am using some copied Lorem Ipsum dummy text in this example:
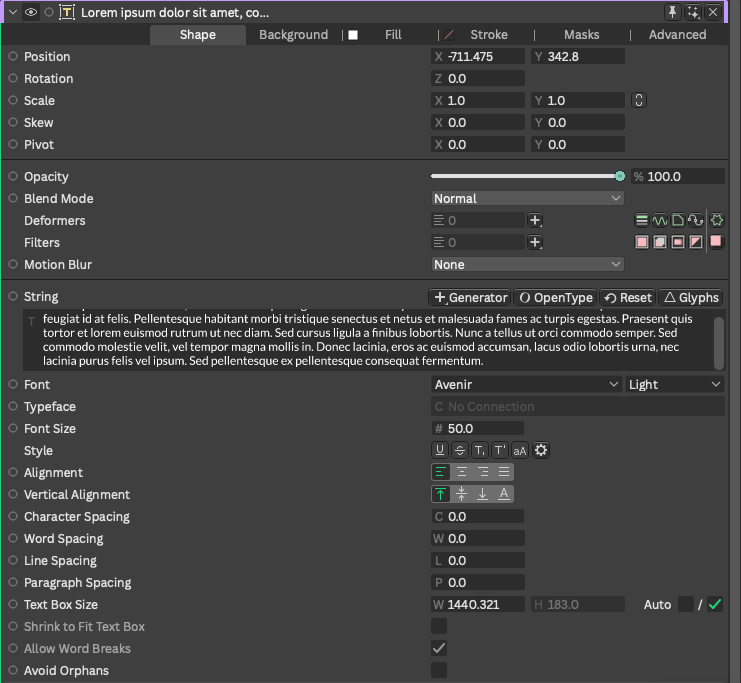
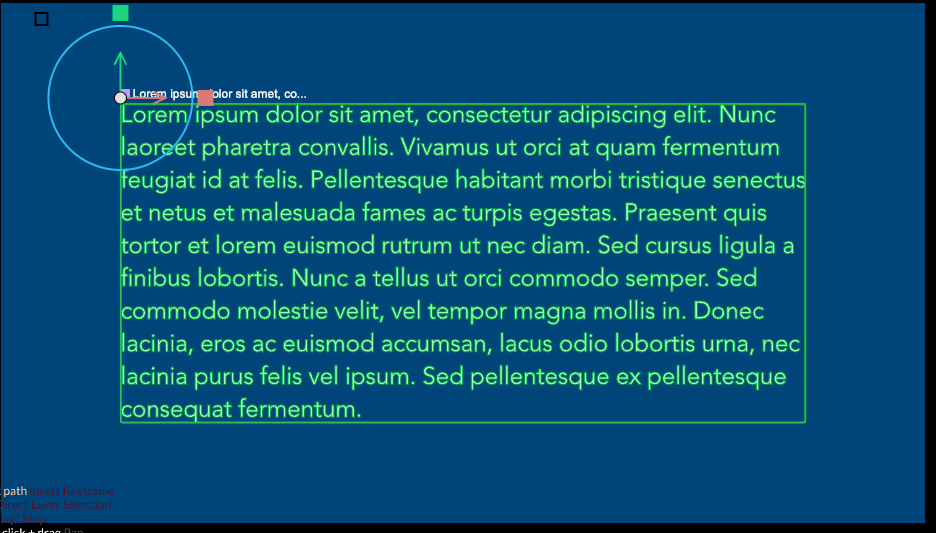
Note: to resize your text box, deselect the “Auto” checkmark in the “Text Box Size” attribute, which will then enable you to drag the handles around your text box in the viewport. I am using Avenir Regular font at a size of 50, which I have set to a fill colour of white.
- Once you are happy with the formatting, select the text layer in the scene window and alt-click on Forge Dynamics in the shelf (or call it up via the ‘+’ menu) and add it as a layer.
When you now hit playback, you will get a simple (but arguably quite nice animation) of your letters falling into a pile. And that’s without even changing any of the Forge Dynamics parameters!
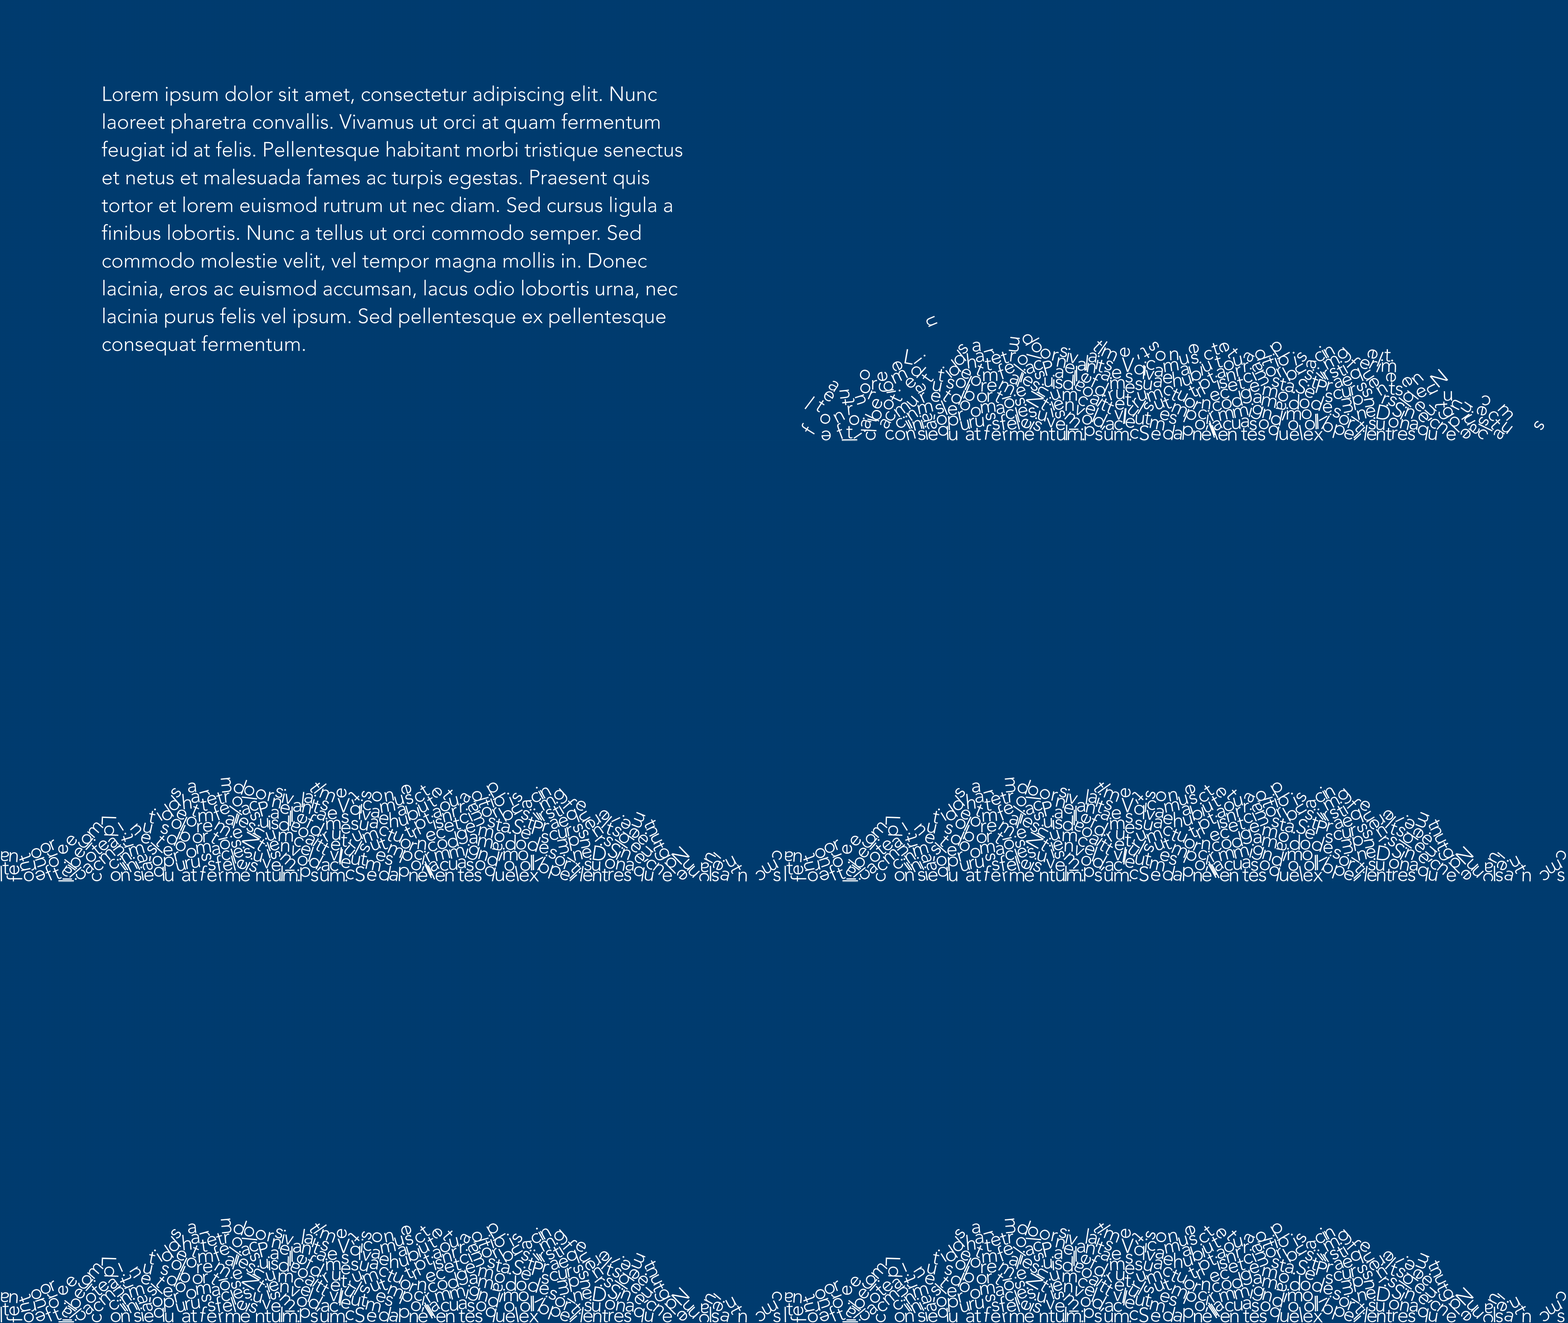
As you might have guessed, the Forge Dynamics function uses various settings to influence the behaviour of the object it is animating (in this case, our text block). Here, we see that it has a setting for “gravity” and therefore it calculates the trajectories of our individual letters if they were to fall straight down from their original position.
Fun as this might be, we can, of course, do a lot more, as we shall see in the next section.
Adjusting parameters in Forge Dynamics
Moving on from our previous example, let’s take a look at some things we can change to affect our animation.
- With the Forge Dynamics layer selected in the scene window, go over to the Attribute Editor and select the “Bodies” tab:
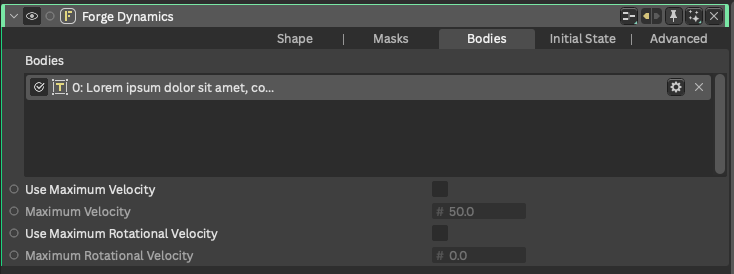
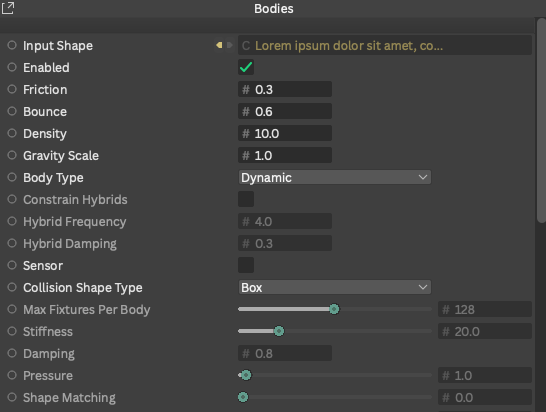
Here you can see the objects (bodies) that Forge Dynamics is acting on. In our case, just the text paragraph we created earlier. On the right, you will see a small cogwheel which you can click to open additional settings.
In the upper section of the settings popup, you can make small adjustments to parameters like the friction and bounce which can help to subtely render a scene in a dynamic and interesting way.
With the changes below, our composition becomes:
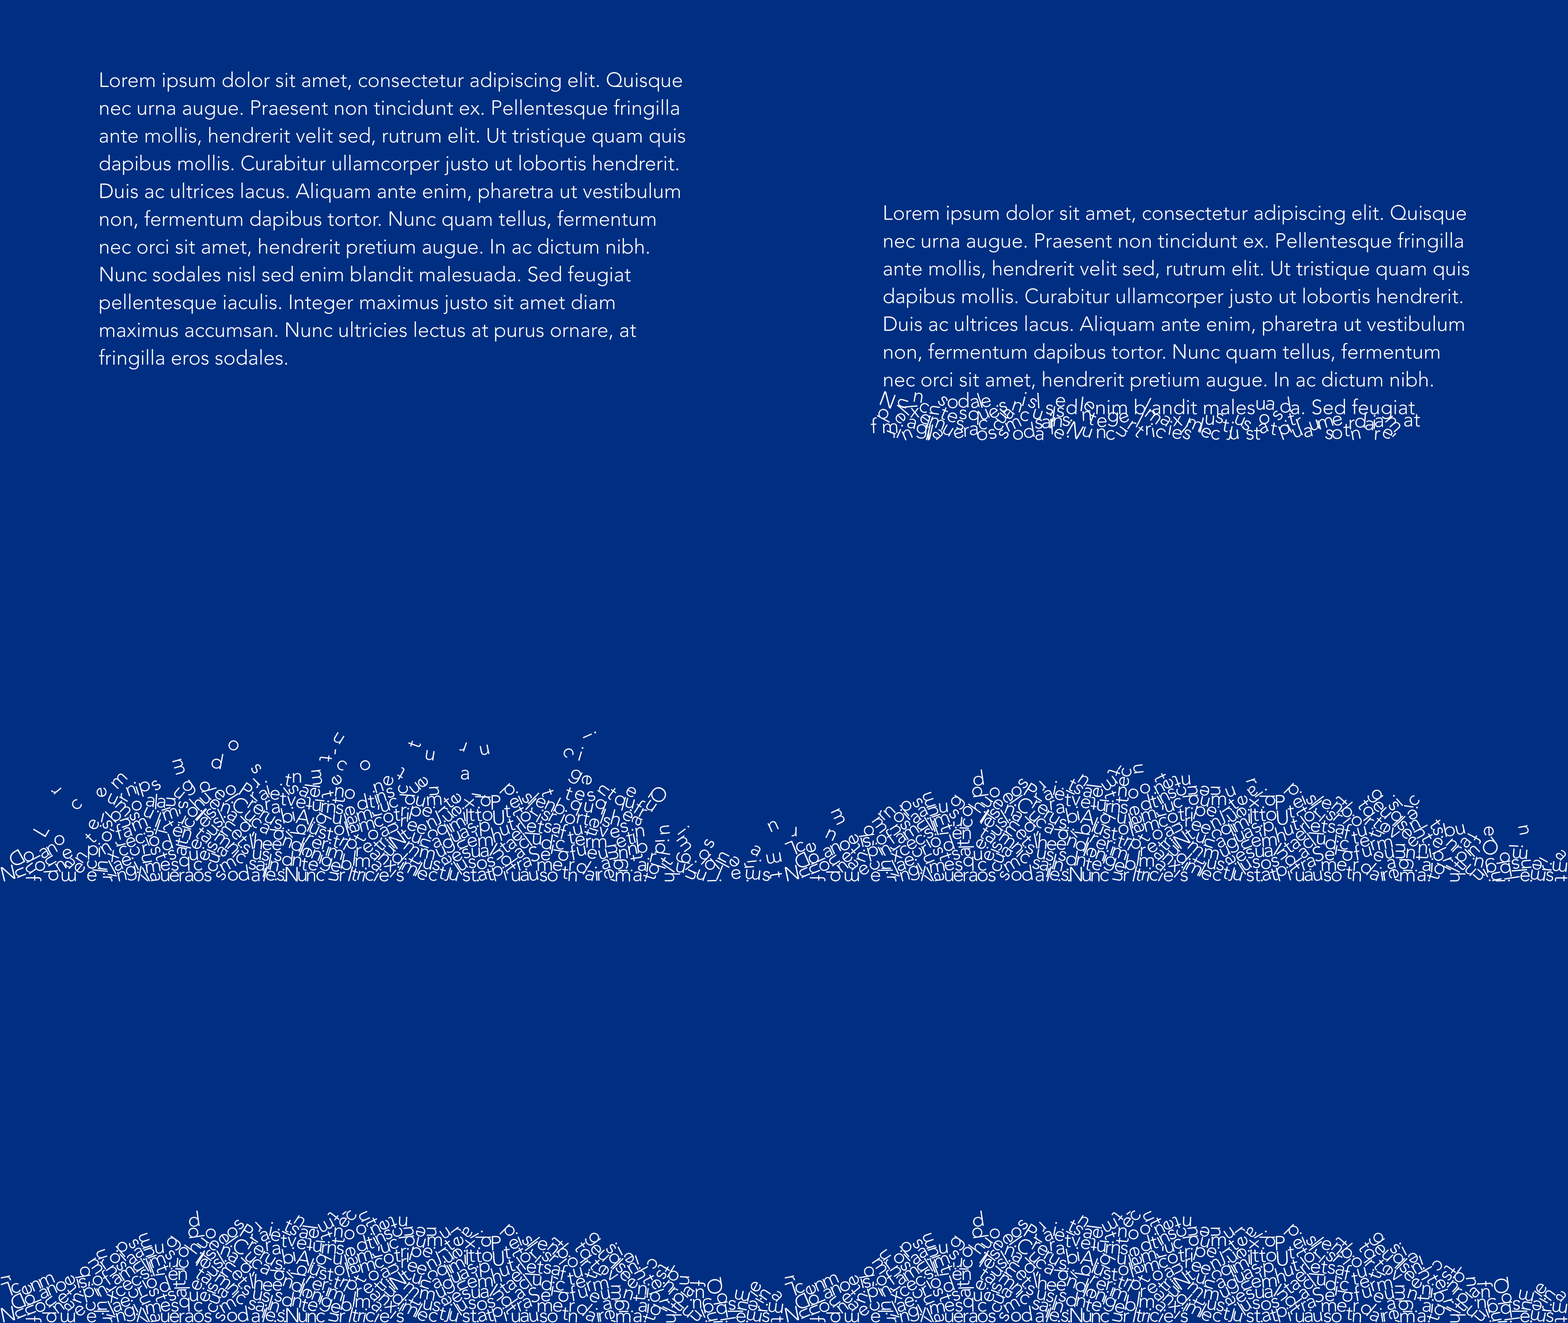
You can also scroll further down in the settings and change the “Level Mode” to act on whole words, instead of individual characters:
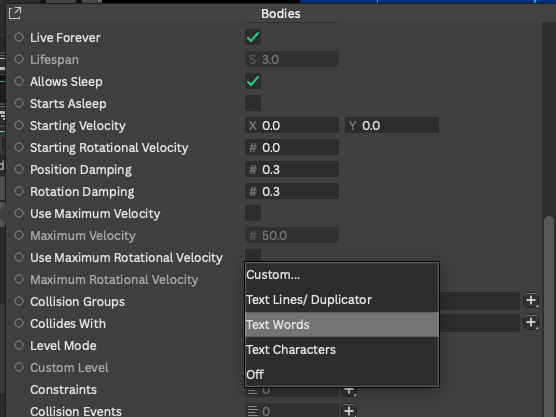
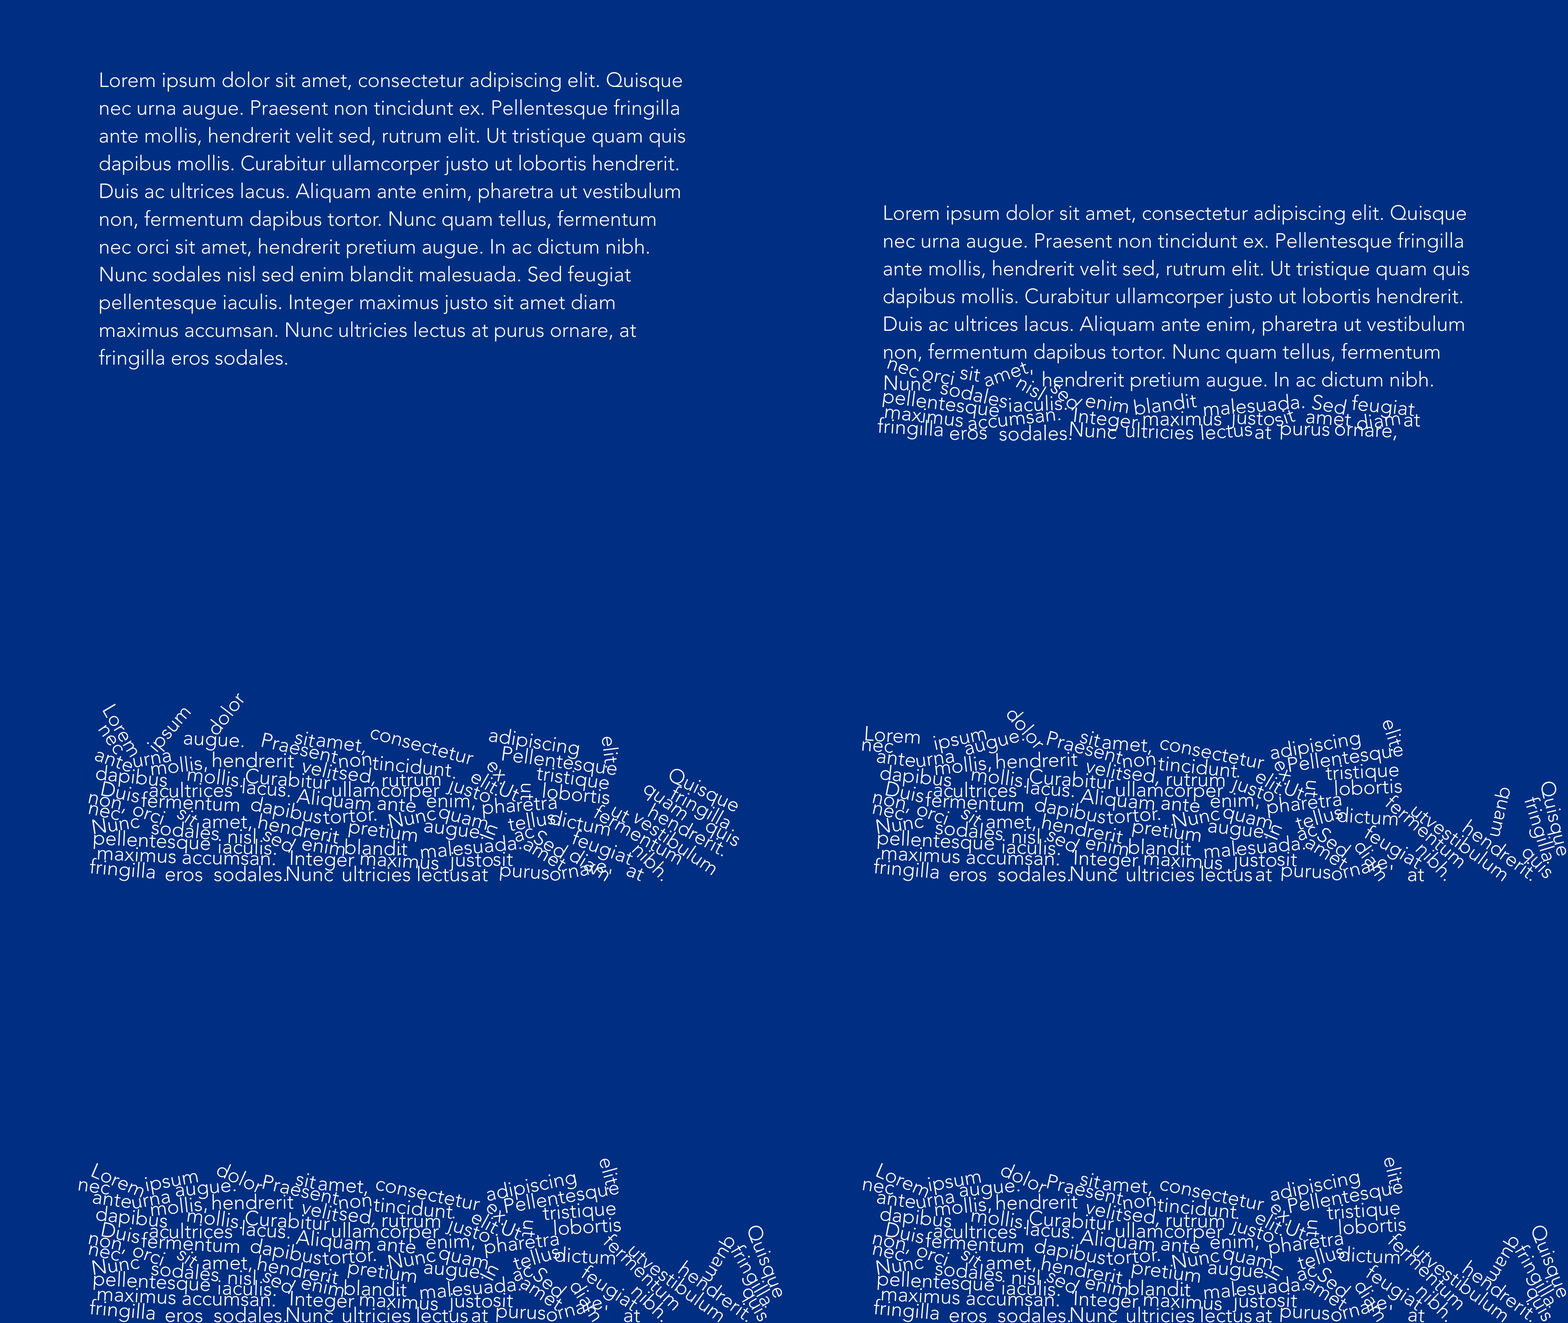
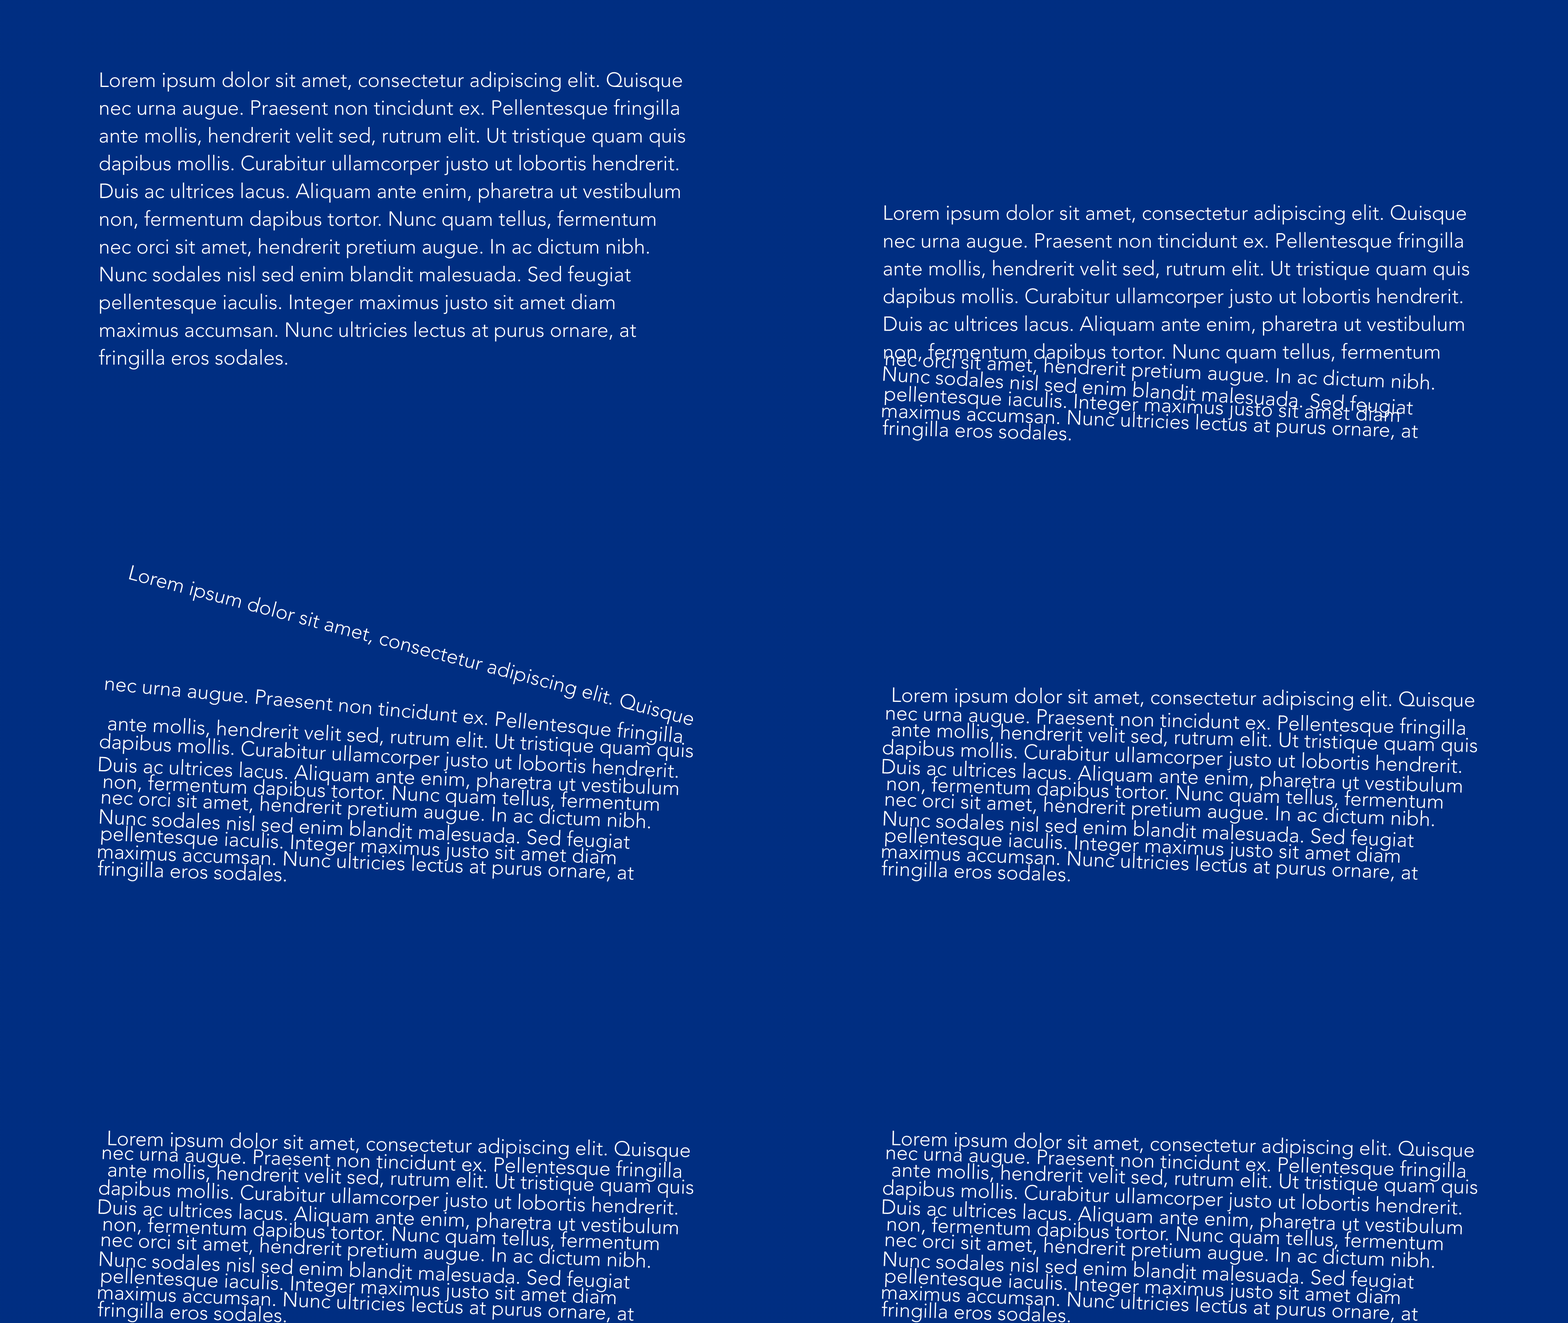
Similarly, you can select the level “Text Lines”, and your paragraph will fall and stack as if each line was a single continuous object:
Advanced interactions
- Still using the same composition, I set the level of the interactions back to individual “text characters” and added a triangle to the composition by alt-clicking on the Polygon tool and changing its sides to 3.
- I then repositioned this to one side below the text:
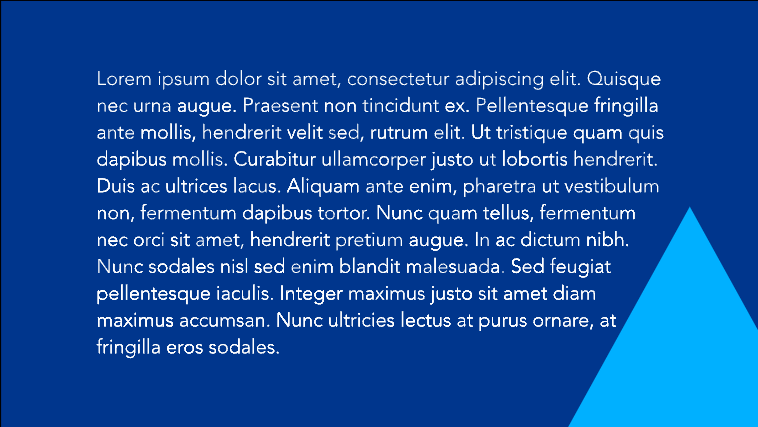
- In the Scene Window, select the Forge Dynamics layer, and go to the Bodies tab in the Attribute Editor:
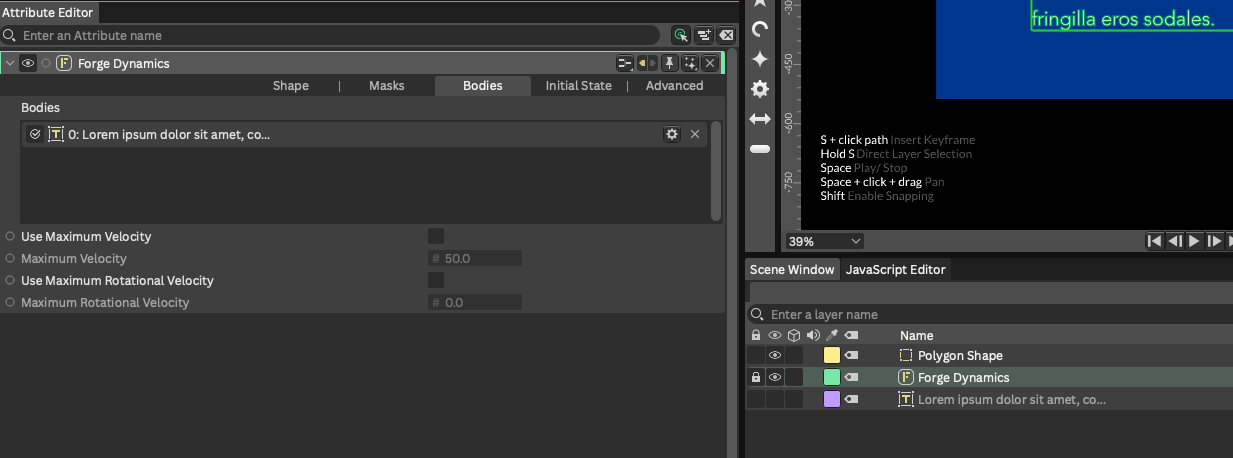
- Next, drag the Polygon shape layer to the Bodies tab, and, clicking on its corresponding cogwheel to access its settings, select “Still” as the “Body Type”:
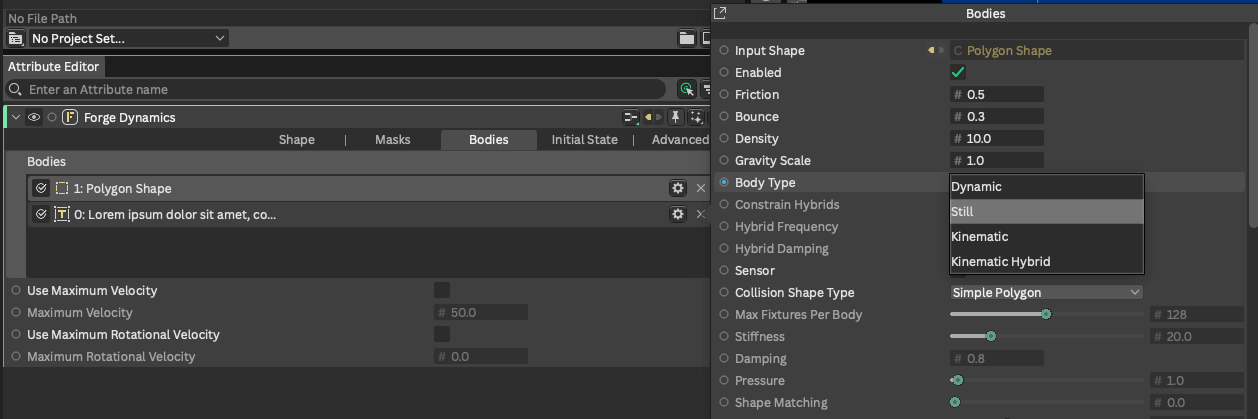
This allows us to create a kind of “obstacle” in our composition, which will affect how the letters react and interact:
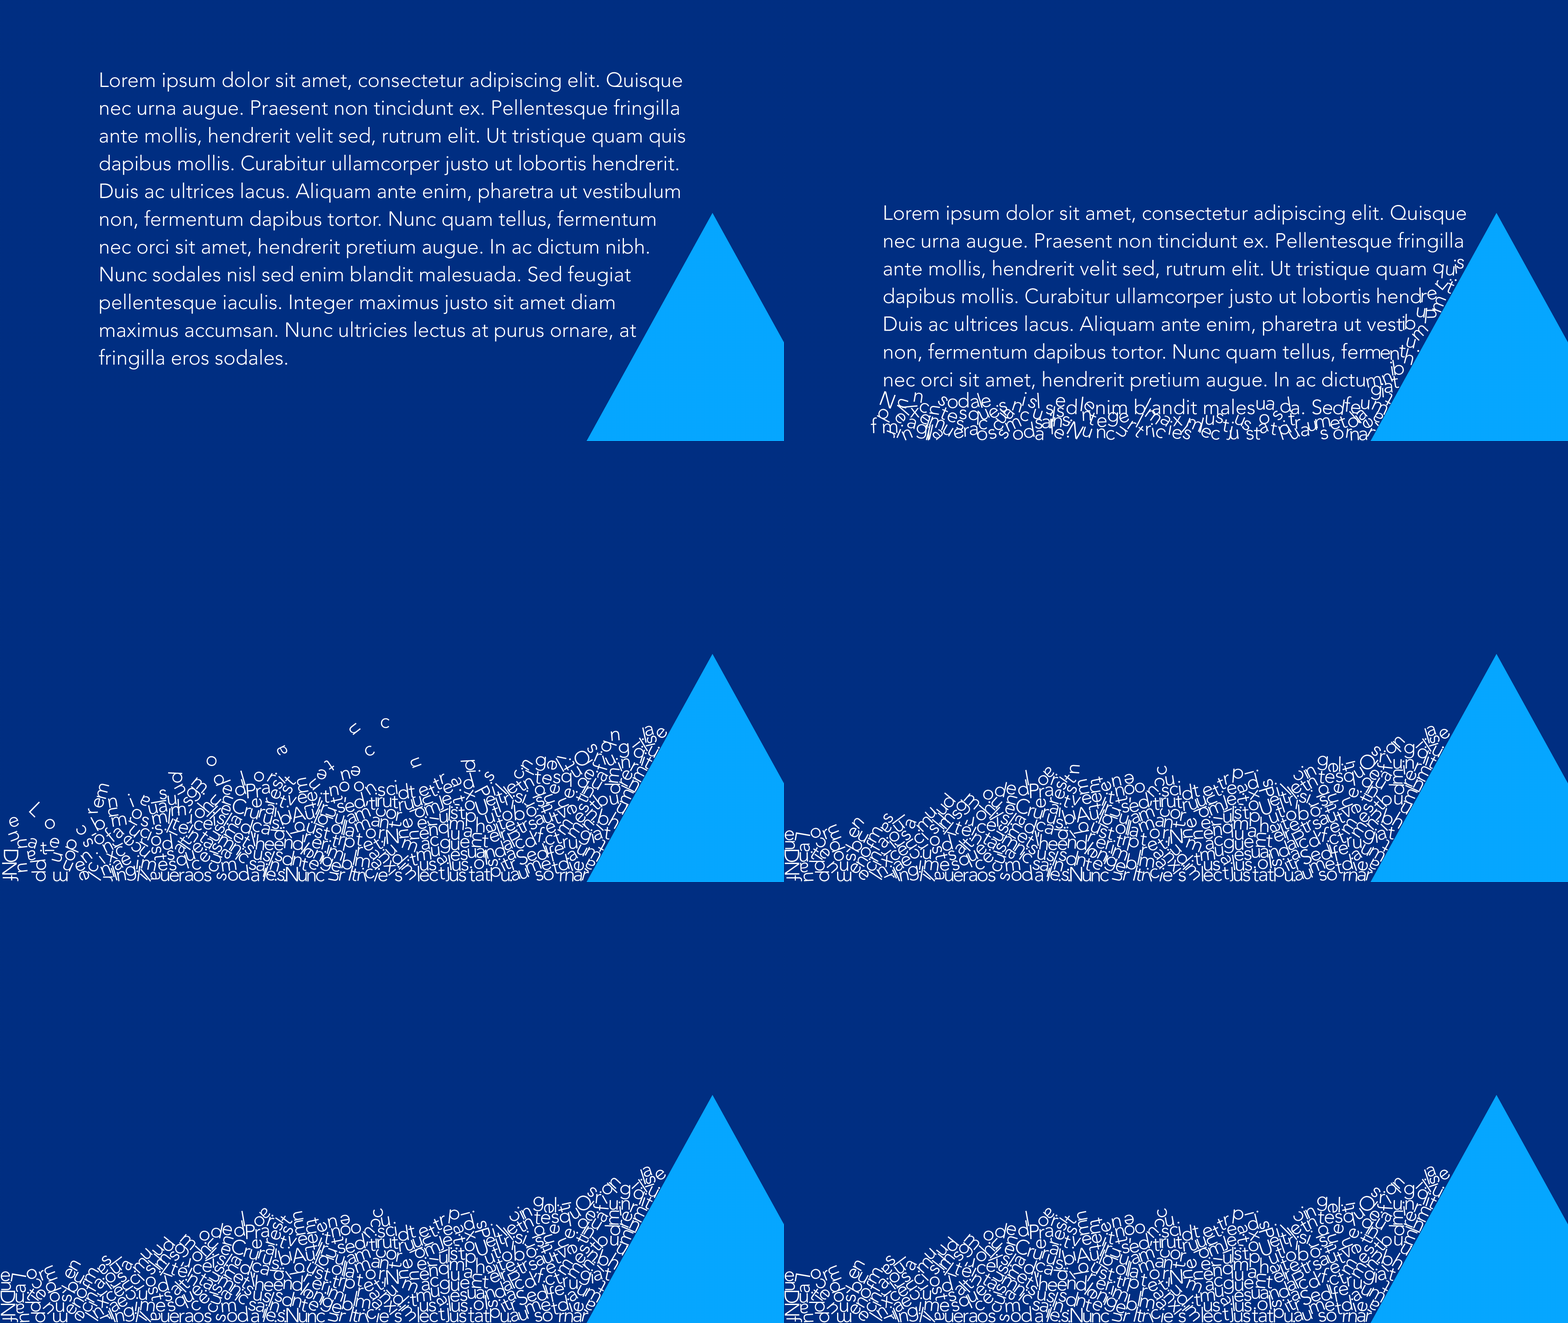
Note: This method can be used with multiple objects in the composition.
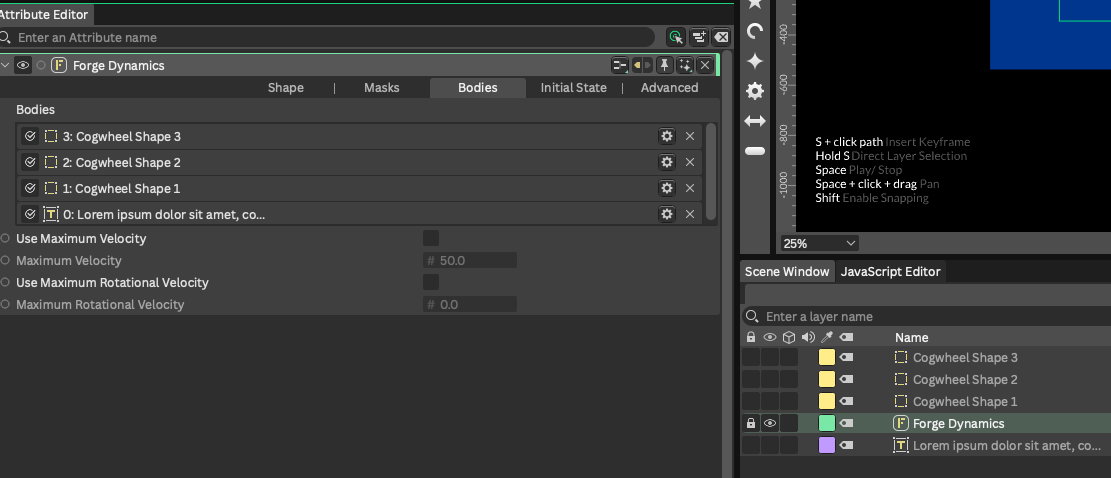
- Instead of the triangle, I added several cogwheel/star shapes at different locations in the scene. I also adjusted the text paragraph length and position so that the paragraph falls from above, onto the shapes:
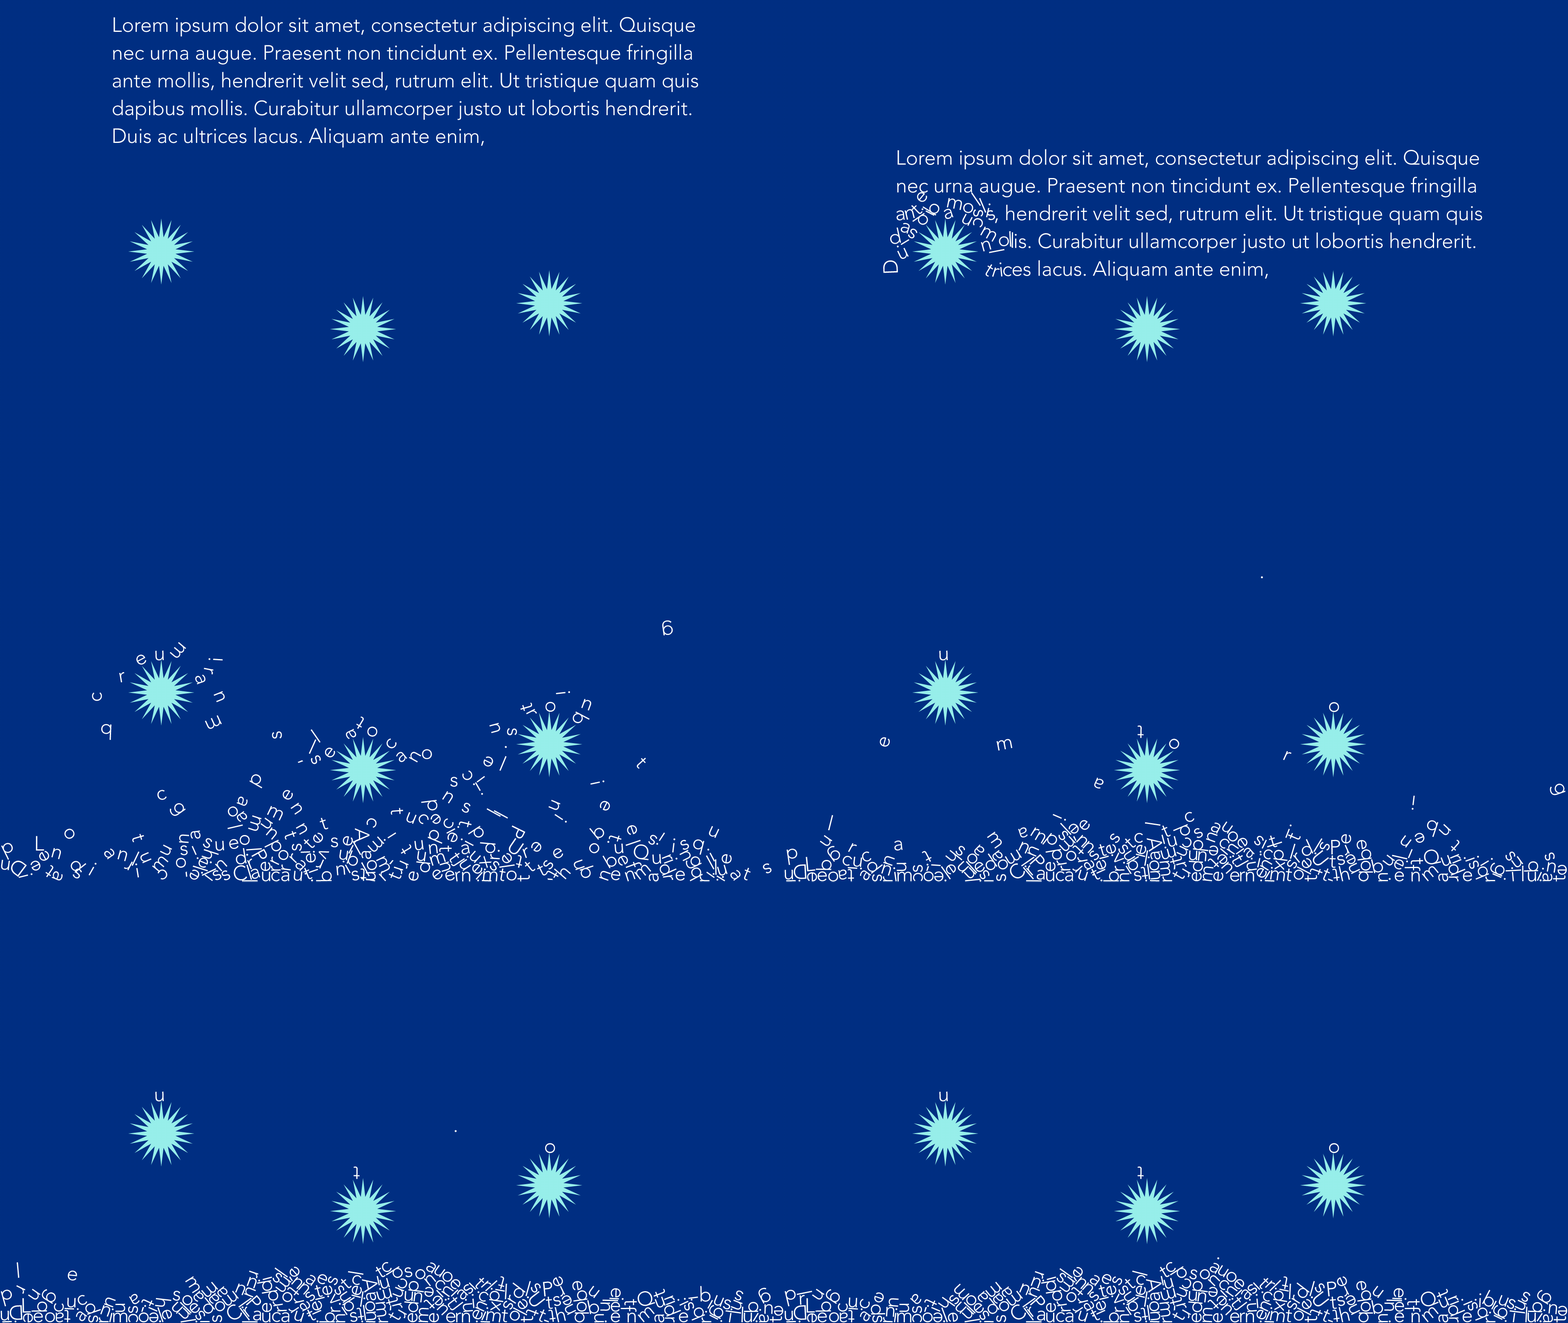
The important thing to remember is that each static shape needs to be added to the “bodies” tab of the Forge Dynamics attributes, and its body type set to “Still”:
In an upcoming tutorial, we’ll look at more creative ways to animate our text paragraph in Cavalry using Forge Dynamics.

Grab it here: https://medium.com/@nigel_reyes/using-forge-dynamics-in-cavalry-to-create-text-based-animations-part-two-f3e60b26f070
You may also like:
[embed]Using the Pathfinder to animate text in Cavalry Motion Design Starter Seriesmedium.com
[embed]Create a Twist and Spin animation in Cavalry Motion Design Starter Seriesmedium.com
[embed]Simple 2.5 Text Animation in Cavalry Motion Design Starter Seriesmedium.com
[embed]Build and animate a complex shape quickly in Cavalry Motion Design Starter Seriesmedium.com
[embed]Easy string-stretch effect in Cavalry Motion Design Starter Seriesmedium.com
메타데이터
- post_id
- b446729cabb2
- slug
- using-forge-dynamics-in-cavalry-to-create-text-based-animations-part-one-b446729cabb2
- url
- https://medium.com/brandmanagementdesign/using-forge-dynamics-in-cavalry-to-create-text-based-animations-part-one-b446729cabb2
- canonical_url
- https://medium.com/brandmanagementdesign/using-forge-dynamics-in-cavalry-to-create-text-based-animations-part-one-b446729cabb2
- author_url
- https://medium.com/@nigel_reyes
- status
- ok
- fetched_at
- 2026-06-14 16:15:44