OWC StudioStack Review
Why Compromise Between Speed and Capacity?
OWC StudioStack Review
Why Compromise Between Speed and Capacity?
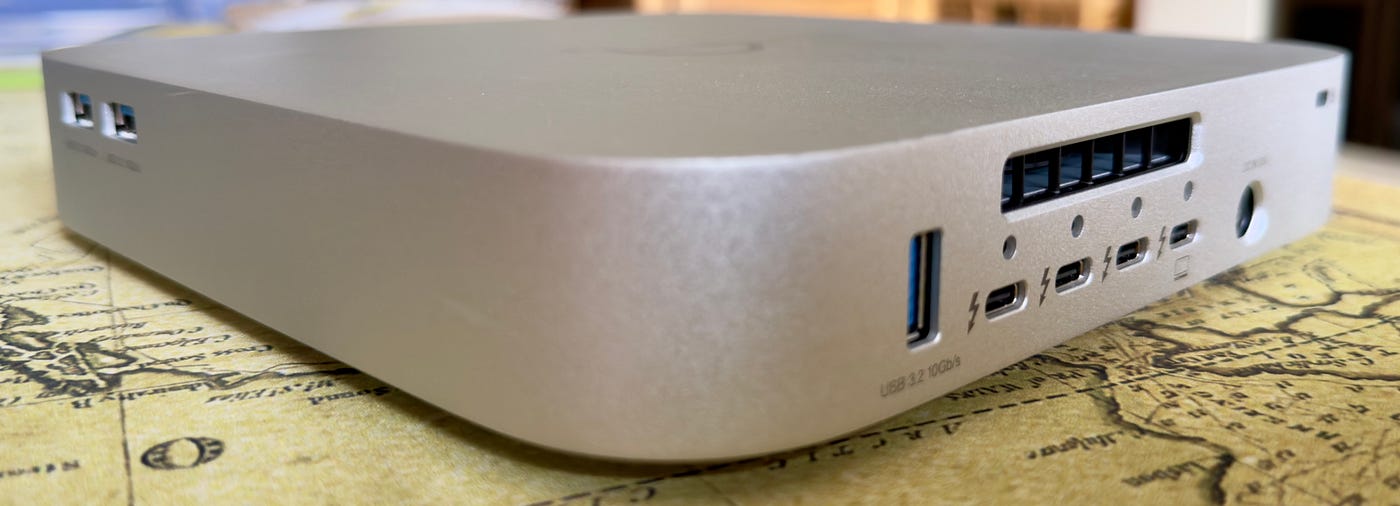
This is a review of my new OWC StudioStack, a Thunderbolt 5 hub and storage designed for the Mac Studio, but with advantages for many Thunderbolt-equipped devices.
My M4 Mac Mini Pro setup is continuing to evolve. I have added many different peripherals and reviewed them in articles for Live View.
Some of these peripherals were specifically designed for the tiny proportions of the Mac Mini, turning it into my tiny tower of power. It still amazes me what the Mac Mini can deliver from 800cc of aluminium.
There is a downside to this compactness. Any storage device that shares this form factor is limited in terms of capacity. Whether going with NVMe or 2.5” drives, then 8TB is about the limit. You could squeeze in a couple of NVMe drives into a device, perhaps, but thermals may become an issue.
I was looking for a solution to let me move my main photo and video libraries off a NAS and make them local to my Mac Mini. This was to gain performance and make cloud backup more affordable. I go into my decision process a lot more in this article:
[embed]My Big Storage Choice for 2026 NAS, DAS or External Drive?medium.com
Buying the StudioStack meant a diversion from building my tiny tower of power any higher. It has a form factor meant to fit the Mac Studio. That footprint is shared with the previous-generation Mac Mini, so it is still far from being large. I think many people would think the StudioStack is an older Mac Mini if they didn’t study the subtle branding too closely.
What you get
The box opens to reveal the StudioStack enclosure and an accessory box. In the accessory box is an 180W power supply. It resembles a thin paperback in size, which makes it relatively easy to slide down behind my desk. It has a captive cable that goes to the StudioStack and a separate AC cord, which should match your power system — a UK plug in my case. There is enough cable length to suit most installations.
The same cannot be said for the Thunderbolt 5 cable. The 0.3m (12”) cable is designed to link the unit when stacked with a Mac Studio. The short length keeps things neat for that application. I am not stacking, and I needed to use my own Thunderbolt 5 cable in order to reach.

You will also find some screw sets, handily separated into screws for 2.5” and 3.5” installation, and a getting-started guide.
Installation
I found the installation pretty straightforward. I watched OWC’s own video guide and then made a start. You will need a small Phillips’ head screwdriver, and I recommend a pair of tweezers or long-nose pliers and something to organise the screws.
Access is via the underside and requires the removal of four corner screws. There are two short and two long screws. OWC helpfully labels the corners with the screw size. Lifting the base plate reveals the interior. Much of the internal space is taken up with the bracket for the 3.5” or 2.5” drive. There is a board at one end with the mounting point for the NVMe drive. The underside of the baseplate has a thermal pad prepositioned.

The NVMe Drive
The unit requires an M.2 2280 drive. It will accept double-sided drives, but not drives with a heatsink. I bought a Samsung 9100 Pro 8TB drive. This is a Gen 5 drive with a 14,800 MBps read speed. This is beyond the speed even Thunderbolt 5 can deliver. This might seem a waste, but in the crazy storage market of 2026, Gen 4 drives are just as expensive and difficult to find in stock. I had checked in advance with OWC that there would be no compatibility issues. The drive fits into the socket and is secured by a locator screw at the opposite end. There are no alternative screw positions, so it does need to be of 2280 size.

HDD Bracket with NVMe slot on the circuit board above it
The Hard Drive
I had chosen a Seagate Skyhawk AI 32TB 3.5” hard drive. Normally, I would have gone for an enterprise or NAS drive for RAID (Exos or Iron Wolf in the Seagate range). The Skyhawk is optimised for surveillance applications. There were a few reasons that I chose it:
- It was the largest capacity available to fill my single slot.
- It was available.
- It was better value (cost per terabyte) than the alternatives.
- Capacity was my priority over performance optimisation.
Installing the hard drive required four small screws to be removed to release the bracket. This is where the tweezers come in handy as there is not much space for fingers. Check that you have the drive oriented correctly to match the SATA connection. Then you use the screws in the packet marked 3.5” to secure the drive to the bracket. You can then slide the bracket in to connect the drive to the SATA port and screw the bracket back onto the enclosure.
With the two drives installed, the base plate can be screwed back into place, making sure the thermal pad is sitting over the NVMe drive and that you put the right length screws in the corner holes. The whole process only took about 20 minutes.
Introducing the StudioStack to the Mac Mini
I had a little preparatory work to do with my existing Thunderbolt and USB devices to make sure I could plug the StudioStack straight into the Mac mini. I then found a free plug for the power supply — always a challenge in my office. There is no power switch on the unit itself. It turns on and off with the host computer.
As soon as the Thunderbolt plug went in, the NVMe drive popped up in Disk Utility, and I got the “Do you want to initialise message?” The HDD took a bit longer before it made its appearance as I waited nervously. Both drives show up as their advertised capacity.
Performance
Once I had formatted them, I ran tests on the drives. As well as the Blackmagic tests I ran in earlier reviews, I have added Aja’s test tool for a second opinion.
The Samsung drive did not disappoint. In Blackmagic with a 5TB test file, it was posting figures around 6000 Mbps for read and write, which is maxing out Thunderbolt 5 bandwidth.

Samsung 9100 Pro 8TB
The Seagate drive posted times of 270 MBps read and write on a 1GB test. Write performance seemed to take a bit more time to get into its stride. I have a suspicion that the performance differences between the drives from the different Seagate product lines are less marked in these big capacities.

Skyhawk 32TB
For Aja System Test, I tested based on 64GB of 4K footage in Apple ProRes for the Samsung and 4GB of 4K ProRes for the Seagate. The overall write speed was 5750 MBps write and 5590 Mbps read for the NVMe. This is equivalent to more than 2000 frames per second of 4K ProRes or about 80 concurrent streams for UK PAL.

Samsung 9100 Pro 8TB Read Speeds
The Seagate managed 227 MBps write and 270MBps read. Slightly surprising, as recording video streams is the Skyhawk’s forte. For editing, reading is actually more important, and this is about 4 streams. Not bad, but I will be editing new projects on the SSD, where I will have a ridiculous amount of headroom for what I film.

Skyhawk 32TB Read Speeds
Other benefits of the StudioStack
The StudioStack is a Thunderbolt 5 hub, not just an enclosure. That part of its repertoire competes with the Caldigit Element 5 Hub (£249) I already had deployed. How do the two compare?
The Thunderbolt side of things is the same. Both offer three Thunderbolt 5 80 Gbps ports with the same display support. Both offer three USB-A 10 Gbps ports. The Caldigit then pulls ahead with two USB-C 10 Gbps ports. I am really trying to move away from USB-A, so it is a shame the StudioStack does not offer them. The Caldigit also offers 90W charging to the host device compared to the OWC’s 60W. To be fair, the StudioStack is not designed for laptops.
Conclusion
The total cost for my new addition was £323 for the StudioStack, £1040 for the Samsung 9100, and £710 for the Skyhawk 32TB — £2,073 in all. For this investment, I have added 40TB of capacity with a max speed of 6000 GBps, along with three additional Thunderbolt 5 ports. It is not a small investment, but to give some context, it costs £2,400 to upgrade from 8TB to 16TB on a Mac Studio.
Like all devices, it’s not perfect. The form factor difference is a niggle, but I don’t have a “Honey, I shrunk the enclosure” ray gun. The Skyhawk drive makes some really retro startup chirps at times of its own devising. It’s quiet once it is spooled up, though, and I haven’t heard the fan. The top of the enclosure was just above room temperature after running all the tests. The lack of USB-C ports and an SD card reader would have been a downside if I hadn’t added them already.
If you don’t need as much capacity and want a more flexible set of ports to expand your Mac Mini Pro, then you might want to take a look at the Satechi Cubedock. It is looking pricey in the UK, though, at £475 with the only vendor I could find listing it. If you have an M4 Mac Mini with Thunderbolt 4, then there are many more options at a lower cost.
For now, I am happy with my new purchase, and I will do an update sometime in the future on how my data re-organisation has worked out and how well the StudioStack has performed long-term.
All images ©Andrew Howe
Live View features authors from a variety of backgrounds who share their passion for photography. You can meet them all, read their stories, and follow them by visiting the Live View About page.
메타데이터
- post_id
- b47ea087776f
- slug
- owc-studiostack-review-b47ea087776f
- url
- https://medium.com/live-view/owc-studiostack-review-b47ea087776f
- canonical_url
- https://medium.com/live-view/owc-studiostack-review-b47ea087776f
- author_url
- https://medium.com/@amckinlayh
- status
- ok
- fetched_at
- 2026-07-11 22:26:39