Internationalization (i18n) in Next.js App Router | Setup & Usage | With i18n routing.
Why Internationalization
Internationalization (i18n) in Next.js App Router | Setup & Usage | With i18n routing.
Why Internationalization
Internationalization is crucial for creating a globally accessible, user-friendly, and competitive application. It enhances user experience, meets legal requirements, improves SEO, and supports business growth by reaching a wider audience.
How to get started with Internationalization in Next.js with i18n routing.
To support unique pathnames for each language in your application, next-intl can manage the following routing configurations: Prefix-based routing: For example, /en/about. Domain-based routing: For example, en.example.com/about.
In both scenarios, next-intl integrates seamlessly with the App Router by utilizing a top-level [locale] dynamic segment, enabling the delivery of content in multiple languages.
This is the easiest way to setup i18n with the Next App Router.
Let’s start with the first step.
- installing the next-intl package in our project.
Command: npm install next-intl
Installing next-intl package
- Create messages folder at the root level of your directory.
Messages are basically the translations that are available for each language.
As you can see below, I have created the messages folder at the root level of the project. Inside this folder, I am including two JSON files: hi.json for Hindi and en.json for English. These files will help manage translations for the respective languages.
Note: This json can be provided locally or loaded from a remote data source as well.
If you want to know the the country locale code for the choice of your language you can visit https://saimana.com/list-of-country-locale-code/ and create the json for respective language(localecode.json).
Created en.json file for english translation
Created hi.js (for hindi translation).
For now Ignore the “lang” object.
Now since we are done with the translation part let’s move on to the next step.
- Configuring next.config.mjs file.
Now, let’s set up the plugin to create an alias that provides a request-specific i18n configuration to Server Components (as specified in the next step).
Configuring next.config.mjs
The above code sets up the next-intl plugin for a Next.js application to handle internationalization, and exports the enhanced configuration.
- Now create an i18n folder in the same root directory and inside that create two files with name request.ts and routing.ts.
- request.ts: This file will set up internationalized routing and navigation for our application, supporting English and Hindi locales, and provides wrappers around Next.js’ navigation APIs to handle locale-specific routing.
- routing.ts: This file set up a server-side request handler for our application to handle internationalization. It validates the incoming locale, triggers a 404 response if the locale is invalid, and loads the appropriate localized messages if the locale is valid. The configuration is then exported as the default export.
request.ts file
routing.ts file
- Now we will create a middleware. The middleware will apply to the root path and any paths that start with /hi or /en, ensuring that the application correctly handles requests for different locales based on the routing configuration.
middleware.ts file
- Configuring the slug and layout
Now, In the src/app folder create a slug that will get the locale and inside that a layout file. Create the structure in the following format “src/app/[locale]/layout.tsx.”
laypout.tsx
Once the layout file is created. The layout will be responsible for the below things
- Fetching Messages: It fetches the i18n messages for the current locale using getMessages.
- Providing Messages: It uses NextIntlClientProvider to make these messages available to client-side components.
- Setting HTML Language Attribute: It sets the lang attribute of the HTML element to the current locale.
- The layout.tsx fetches and provides the necessary i18n messages to the client-side components based on the locale determined by the middleware.
- Using the translation on our page.
Below is the code with proper explanation for translating a small piece of information on the page.
Page.tsx
Code explained
- useRouter:
Purpose: The useRouter hook from Next.js provides access to the router object, which allows us to programmatically navigate between pages and manipulate the URL.
Usage: We use useRouter to get the router object, which is then used to change the locale in the URL when the language is switched.
- useTranslations: This is used for accessing the translations in the code
Purpose: The useTranslations hook from next-intl provides access to the translation function t, which is used to fetch translated strings based on the current locale.
Usage: We use useTranslations to get the t function, which allows us to retrieve the appropriate translations for the current locale.
- changeLanguage Function:
Purpose: The changeLanguage function is designed to change the application’s language by updating the locale in the URL.
Usage: This function takes a locale string as an argument and uses the router.replace method to update the URL with the new locale.
How router.replace Triggers the Event That Changes the Language
- The router.replace method is used to update the URL with the new locale. This method replaces the current URL in the browser history with the new URL that includes the specified locale.
- When router.replace updates the URL, Next.js detects the change in the URL and triggers a re-render of the page.
- The new URL includes the updated locale, which causes the application to fetch the appropriate i18n messages for the new locale.
- During the re-render, the useTranslations hook fetches the new set of translation strings for the updated locale. The component then uses the “t” function to display the translated content based on the new locale.
- The “lang” object that we used in the hi.json/en.json is used to convert the text of the button to the respective language.
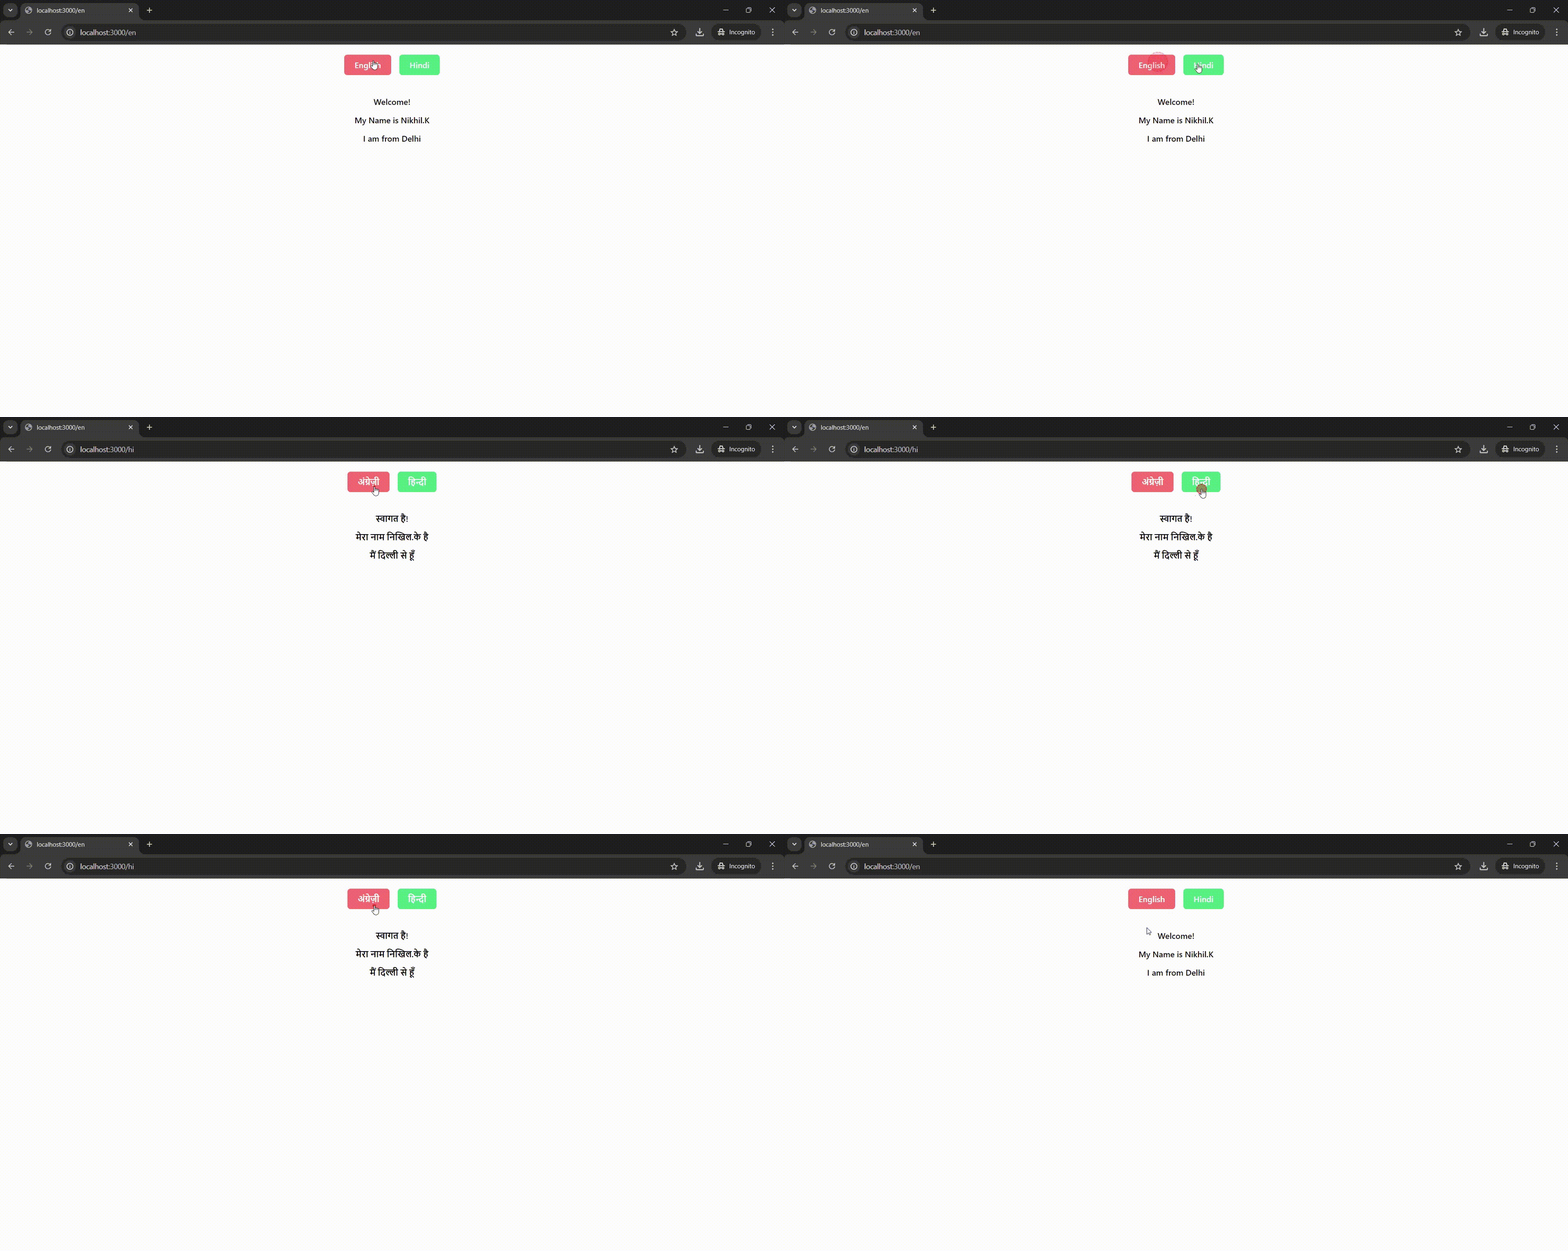
When English/Hindi button is clicked, the application updates the URL with the selected locale and re-renders the content in the chosen language. The translated text is dynamically fetched and displayed based on the current locale.json file.
Conclusion
In this blog, we explored the importance of internationalization and demonstrated how to implement it in a Next.js application using next-intl. We covered key concepts such as setting up middleware for locale validation, fetching and providing translation messages, and dynamically switching languages in the UI.
By following these practices, you can ensure that your application is well-prepared to serve a diverse user base, comply with regional regulations.
Project Configuration used Node version: 20.11.1 Next Version: 14.2.13
메타데이터
- post_id
- bb4da904f5c4
- slug
- internationalization-i18n-in-next-js-app-router-setup-usage-with-i18n-routing-bb4da904f5c4
- url
- https://medium.com/@nikhil.k_70356/internationalization-i18n-in-next-js-app-router-setup-usage-with-i18n-routing-bb4da904f5c4
- canonical_url
- https://medium.com/@nikhil.k_70356/internationalization-i18n-in-next-js-app-router-setup-usage-with-i18n-routing-bb4da904f5c4
- author_url
- https://medium.com/@nikhil.k_70356
- status
- ok
- fetched_at
- 2026-07-18 05:46:27