A Guide to Cross-Platform Success: Bringing Your VR Escape Room from Oculus Quest to HTC Vive
Building a VR Escape Room experience on the Oculus Quest is rewarding, but expanding it to another platform, like the HTC Vive, opens up…
A Guide to Cross-Platform Success: Bringing Your VR Escape Room from Oculus Quest to HTC Vive
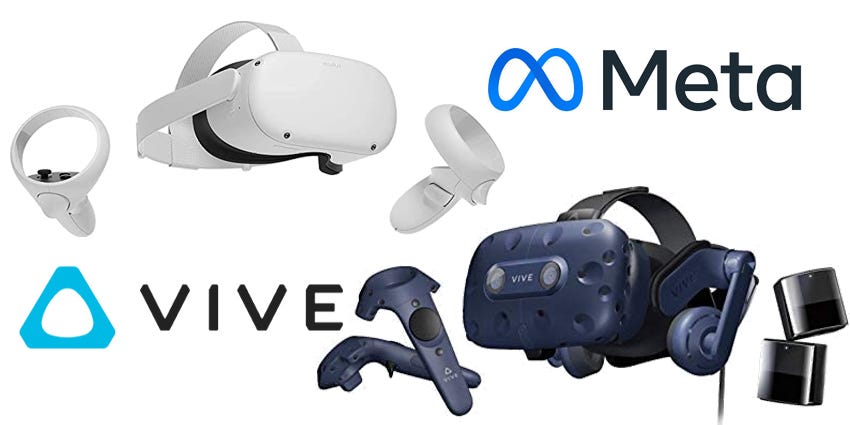
Building a VR Escape Room experience on the Oculus Quest is rewarding, but expanding it to another platform, like the HTC Vive, opens up your project to a whole new audience. With each VR headset bringing its own strengths (and quirks), porting a VR app from one platform to another isn’t just a matter of copy-pasting code. Each device has its own SDK, controller design, tracking capabilities, and graphics power. This post dives into the main points to consider when translating your Oculus Quest VR Escape Room to the HTC Vive in a way that keeps it engaging, immersive, and optimized.
1. Getting to Know the New Platform
Degrees of Freedom (DOF)
The Oculus Quest and HTC Vive both support 6 degrees of freedom (6DOF), which means they can track movement forward, backward, up, down, and side-to-side, as well as pitch, yaw, and roll. This is fantastic news for a VR Escape Room experience because 6DOF allows users to freely explore the room, interact with objects, and immerse themselves in the environment just as they did on the Oculus Quest. If you had to adjust for a headset with only 3DOF, you’d face some interaction limitations, but thankfully, both Quest and Vive provide the freedom needed for realistic, room-scale experiences.
2. SDK Switch-Up: Moving from Oculus to SteamVR
Oculus SDK vs. SteamVR SDK
One of the biggest transitions you’ll make is moving from Oculus’s SDK to SteamVR’s. The SteamVR SDK, which powers HTC Vive applications, is a bit more generalized to work with different VR devices. It’s flexible, but you may need to make a few changes to get your interactions working smoothly.
For example:
- Interaction Coding: Quest’s Oculus SDK has specific interaction systems that might not align perfectly with SteamVR’s. If you built interactions with Oculus in mind, you may need to adjust how your objects respond in the Vive environment. Modularizing your code — so that your interaction methods aren’t hardwired to one SDK — can help a lot.
- Locomotion and Teleportation: If your VR room uses teleportation or snap-turning, these functions will likely need some tweaks to fit the Vive’s setup. Both SDKs support these features, but small differences can impact user experience.
- Tracking Adjustments: The Vive’s base stations provide highly accurate tracking within larger play spaces, compared to Quest’s internal cameras. This may mean adjusting some interactions if your Escape Room has any large-scale or room-scale puzzles.
Unity Compatibility
If you’re building in Unity, take advantage of the XR Interaction Toolkit. This tool helps you manage interaction logic across VR devices, saving you the headache of recreating controls from scratch. Just plug in some device-specific adaptations, and you’re set for a more seamless port.
3. Vive Wands vs. Quest Touch Controllers
Controller Differences
This is where things get interesting: the Oculus Touch controllers and Vive wands have different button layouts, input styles, and general ergonomics. Touch controllers have joysticks and thumb buttons, while Vive wands use a trackpad with grip and trigger buttons. You’ll need to consider how to remap functions for each controller layout in a way that feels natural and intuitive on the Vive.
- Button Mapping: In your VR Escape Room, if a player picks up or interacts with objects, make sure these actions map comfortably to the Vive’s grip and trigger buttons. Unity’s input mapping system can help here by allowing you to create different mappings for each device.
- Haptic Feedback: While both controllers support haptic feedback, the Vive’s haptics may feel slightly different. Take time to tweak the haptics for the Vive to keep the feedback responsive and immersive without going overboard.
- Form Factor and Ease of Use: The Vive wands are a little bulkier than the Touch controllers, which might affect user comfort when interacting with smaller, detailed items. Test the ergonomics of your interactions to avoid causing fatigue or frustration when players are manipulating objects or solving puzzles.
4. Graphics Power Play: Visual Enhancements for Vive
Comparing Performance and Graphics
The Oculus Quest is a standalone VR headset, meaning it has to balance power, battery, and graphics capability to give users the best mobile VR experience possible. On the other hand, the HTC Vive relies on a connected PC, offering a much stronger graphics pipeline that can handle higher resolution textures, lighting effects, and rendering.
To make the most of the Vive’s capabilities, consider these improvements:
- Textures and Lighting: With the extra power, you can increase the resolution of textures and add richer lighting effects, like real-time shadows. This adds a depth to your Escape Room that might not have been feasible on the Quest.
- Refined Shaders: Enhanced shaders, reflections, or environmental effects can now make your virtual room feel more lifelike. Just be mindful of performance — you don’t want these enhancements to slow down gameplay or cause frame drops.
- Performance Balance: While the Vive can handle more, you still want to optimize your assets. Reducing polygon counts where possible, baking lighting, and combining meshes will help ensure smooth performance, especially if your VR experience involves high-detail rooms or multiple rooms in a single scene.
5. User Interface Tweaks for FOV Differences
Adjusting UI Placement and Interaction
The Quest and Vive may have slightly different fields of view (FOV), which can impact the placement and size of your in-game UI elements. Your goal is to ensure that menus, hints, and interactive buttons are all clearly visible and easy to access, regardless of which headset a player is using.
- UI Placement and Scaling: Make sure your UI components aren’t getting cut off or pushed too far to the edges. It’s worth testing placement and scaling to make sure they remain comfortably within view on both devices.
- Interaction Tweaks: If your UI uses laser pointers or gaze-based selection, double-check that everything works well with the Vive’s wands, especially when switching from the Quest’s joystick-based UI navigation.
6. Testing and User Feedback: The Final Touches
When you’re porting VR experiences, thorough testing on both devices is essential. Even small issues can significantly impact immersion, so the time spent here will pay off in user experience.
- Interaction and Usability: Test each interaction in your VR Escape Room to ensure that picking up objects, navigating menus, and solving puzzles feel intuitive on the Vive. Run tests to verify that controller tracking works consistently and smoothly.
- Performance Check: While the Vive’s PC-driven graphics power is a step up, VR still demands high frame rates for comfort. Aim for at least 90 FPS on the Vive, and test across different PC specs to get a good feel for how the game runs on lower-end systems as well.
- User Insights: Collect feedback from Vive users, especially those who are familiar with the Quest, to get fresh perspectives on how intuitive the interactions feel. Insights from actual users will help uncover any remaining hiccups, and allow you to polish your app before release.
Wrapping It Up: Why Cross-Platform Development is Worth It
Porting your VR Escape Room from Oculus Quest to HTC Vive isn’t just about expanding your audience — it’s also about refining and future-proofing your application. By optimizing interactions, enhancing graphics, and testing for comfort, you’re opening up your VR experience to a wider range of users while maintaining the immersive atmosphere you originally designed.
Cross-platform VR development can feel like a lot of extra work, but it’s also incredibly rewarding. Embracing these different platforms helps you create a richer, more flexible VR experience that remains engaging and fun, no matter the hardware. So go ahead — dive into the world of cross-platform VR, and let your Escape Room bring the same thrill to players on both Oculus Quest and HTC Vive.
메타데이터
- post_id
- bb7371c1d435
- slug
- a-guide-to-cross-platform-success-bringing-your-vr-escape-room-from-oculus-quest-to-htc-vive-bb7371c1d435
- url
- https://medium.com/@d.ntwari/a-guide-to-cross-platform-success-bringing-your-vr-escape-room-from-oculus-quest-to-htc-vive-bb7371c1d435
- canonical_url
- https://medium.com/@d.ntwari/a-guide-to-cross-platform-success-bringing-your-vr-escape-room-from-oculus-quest-to-htc-vive-bb7371c1d435
- author_url
- https://medium.com/@d.ntwari
- status
- ok
- fetched_at
- 2026-07-29 05:12:40




