Why Most Developers Today Are Building the Wrong Way.
Why the most important part of the stack is the documentation.
Why Most Developers Today Are Building the Wrong Way.
Why the most important part of the stack is the documentation.
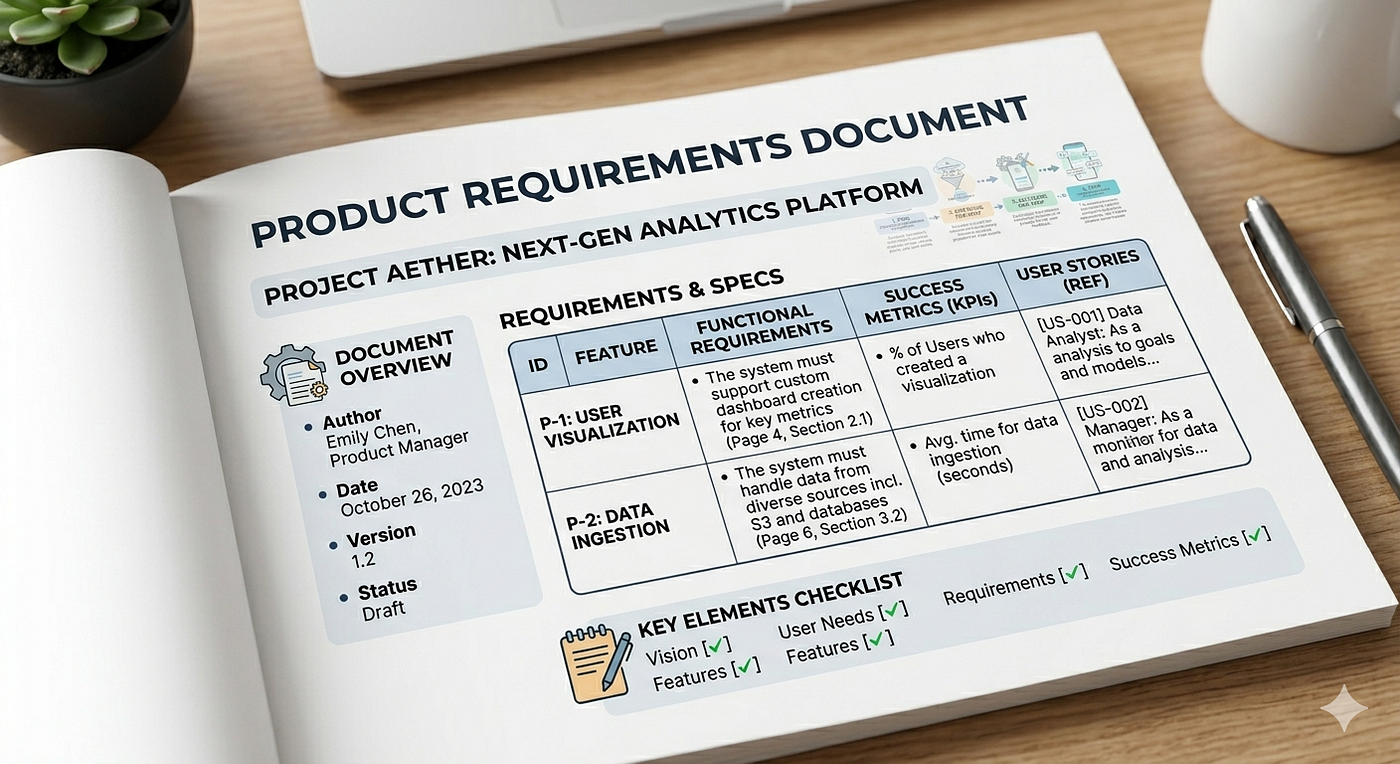
An extra epilogue blog of my DEVCON Jumpstart Internship series — and the one I wish someone handed me in my first year.
“If I had an hour to solve a problem, I’d spend 55 minutes thinking about the problem and 5 minutes thinking about solutions.” — Albert Einstein
There is a huge difference between a novice who can build and a professional who can ship. It’s not the way they code, the technology stack they use, or the team they’re developing with. It’s them skipping the planning phase.
They open their IDE. They start writing code. The first few hours feel incredible — features are appearing, components are mounting, the app is taking shape. Then, somewhere around Day 3 or Week 2, something quietly breaks. A feature that made perfect sense in their head collides with a feature they added yesterday. The database schema they threw together in twenty minutes doesn’t support the user flow they just realized they need. A stakeholder asks a question — “what happens when a user does X?” — and the answer is a three-second silence followed by “I’ll have to check the code.” By the time the project limps to a demo, it is a patchwork of good intentions held together by duct tape and late nights. The developer looks at it and thinks: I need to get better at coding. Wrong diagnosis. The problem was never the code. The problem was that they built without a blueprint.
I made that mistake more than once before this internship. Game jams trained me to move fast and build first — the format rewards shipping over planning because the window is 48 hours and the judging is subjective. But software built for organizations, for real users, for systems that will be handed off to other developers and maintained for years — that software demands something different before the first line of code is written. It demands a Product Requirement Document. And the longer I’ve worked in this industry, the more I’ve come to believe that the PRD is the most underrated, most consistently skipped, and most consequentially misunderstood artifact in the entire software development lifecycle.
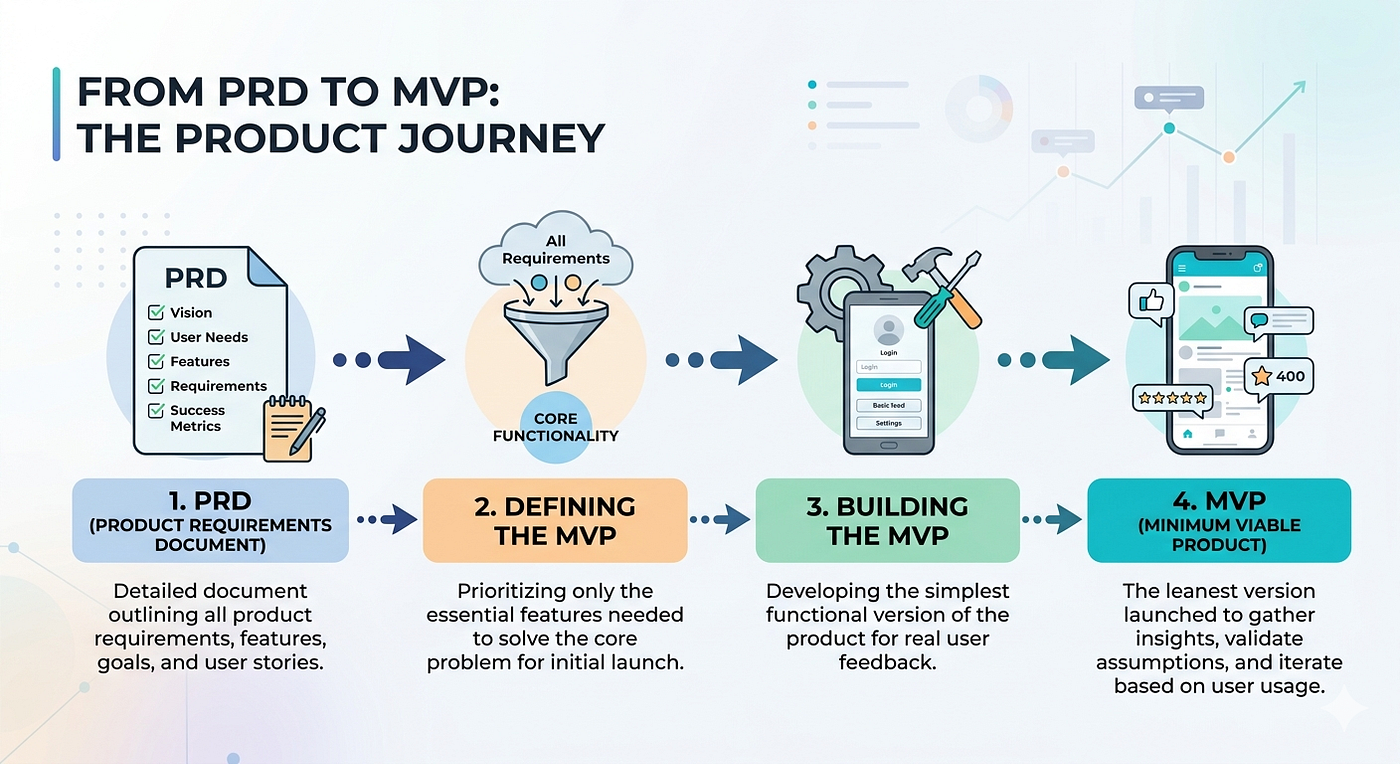
What Even Is a PRD?
A Product Requirement Document is not a design mockup. It is not a project proposal. It is not a list of features scribbled in a Notion page that gets ignored by Tuesday.
A PRD is a formal, structured contract between what a product needs to do and how the team building it will know when it’s done. Think of it as the single source of truth that every discipline on a product team — engineering, design, QA, product management — can point to and trust. It lives before the Figma file. It lives before the database schema. It lives before the first git init. When a PRD is written correctly, two developers who have never spoken can build adjacent parts of the same system and have them fit together on the first merge. That is not an accident. That is the document working.
A complete PRD covers more than most developers expect. At its top level, it defines the product’s Vision and Scope — the why before the what, the specific problem being solved and the boundaries of what this version of the product is and isn’t responsible for. Below that, it documents every Feature and its Sub-Features with enough specificity to remove interpretation from the engineering process. It contains User Stories — behavioral descriptions of what each user type needs to accomplish, written in the format: “As a [user type], I want to [action], so that [outcome]” — each paired with Acceptance Criteria that define in testable, unambiguous terms exactly what “done” means for that story. Without acceptance criteria, done is a feeling. With them, it is a contract.
What a PRD also captures — and what most junior developers don’t know to include — is everything that lives beneath the feature surface. Business Rules: the conditional logic that governs how the system behaves in specific states, independent of any UI. Role Definitions: a precise permission matrix mapping every user type to what they can see, do, and are explicitly prohibited from doing. API Contracts: the agreed-upon shape of data flowing between your frontend and backend, defined before either is built so both can be developed in parallel without integration surprises. Product-Specific Rules: domain logic unique to your product’s context that cannot be templated. Market Content and Product Positioning: a clear articulation of who this product is for, what problem it solves that existing solutions don’t, and why someone would choose it. And finally, Future Enhancements: the features deliberately out of scope for this version, documented so they don’t creep in mid-sprint and so the architecture is designed to accommodate them when the time comes. These sections aren’t supplementary. They are load-bearing. A PRD without them is a building without a foundation — it stands until it doesn’t.
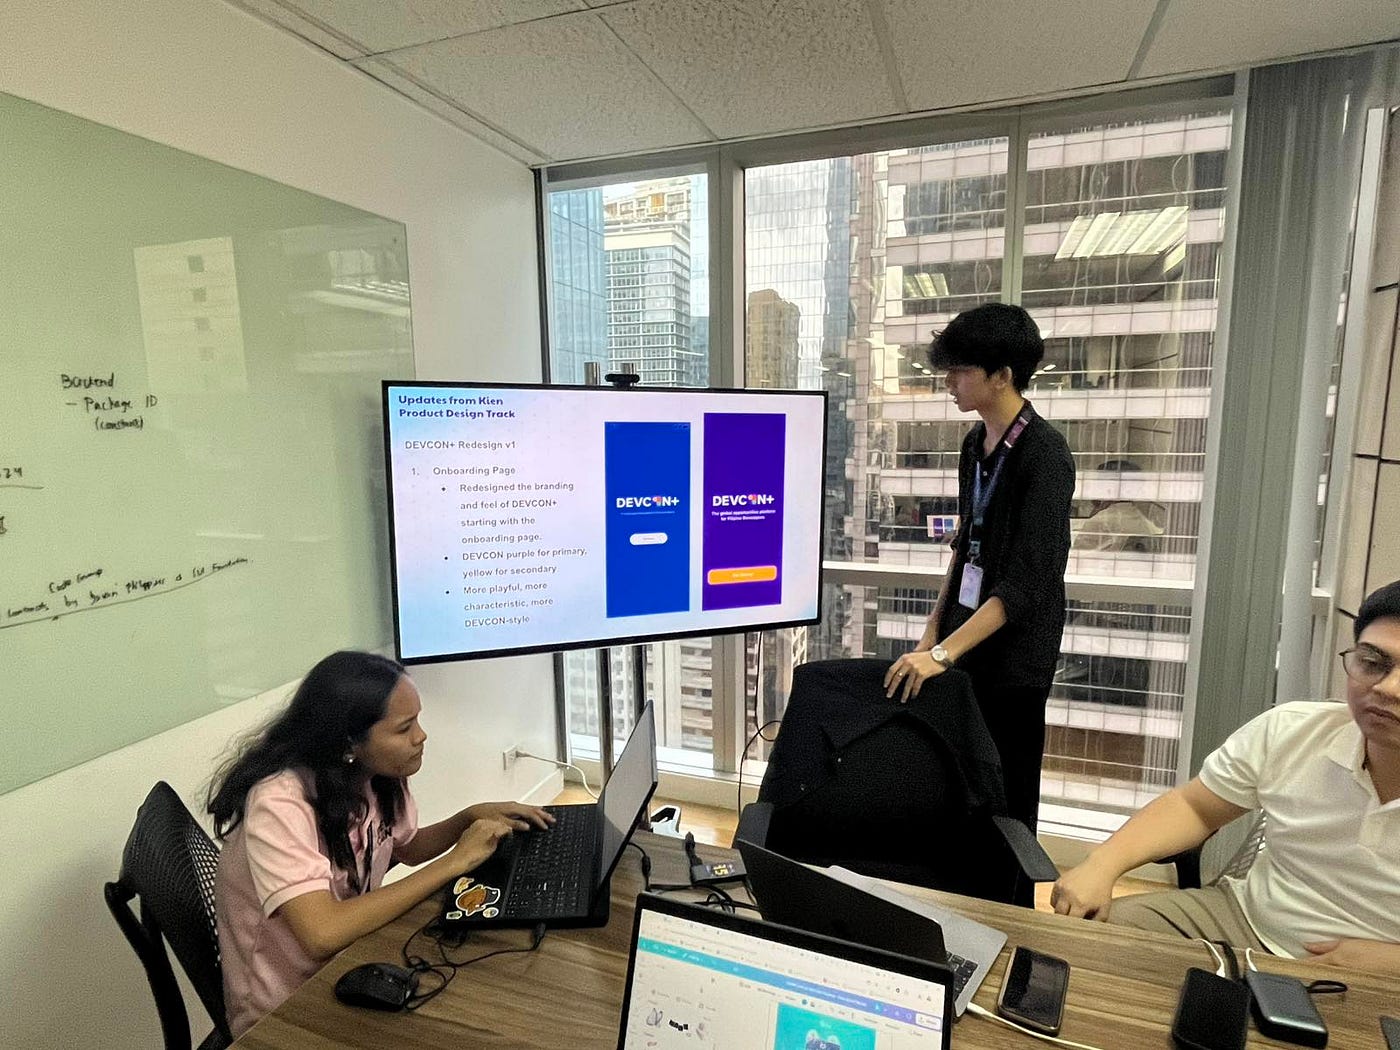
Why It Matters More Than You Think
Here is the uncomfortable truth about most student and early-career projects: they are built backwards.
The typical flow is:
have an idea → open Figma → start designing → open VSCode → start coding → realize the data model doesn’t support the design → redesign → recode → run out of time → submit something that works but doesn’t make sense.
Every rework cycle in that process is expensive. Every schema migration after data is already in production is painful. Every UI redesign after a component library has been built is demoralizing. The PRD eliminates the majority of those cycles by forcing the hardest questions to the surface before any of that work begins. What does this product actually need to do? Who are the people using it and what are their specific constraints? What does success look like for each of them? What are the edge cases, and how does the system behave when it hits them?
The professional software development world has a phrase for this: shifting left. The further left in the development timeline you catch a problem — the earlier in the process — the cheaper it is to fix. A wrong assumption caught in the PRD costs you a paragraph revision. The same wrong assumption caught after the frontend is built costs you a week. Caught after the backend is in production, it costs you a migration, a hotfix, and potentially a broken user experience that erodes trust before the product has even found its audience. Writing a PRD is one of the highest-leverage activities in the entire development process precisely because it is the cheapest possible moment to be wrong.
There is also a career dimension to this that nobody talks about in school. When you walk into a technical interview and a hiring manager asks you to describe your development process, the developers who can articulate what they do before they write code are immediately distinguishable from those who can’t. The ability to scope, document, and plan a product before building it is a signal of engineering maturity. It tells a hiring team that you understand software development as a system — not just as the act of typing code into a file. That signal is rare at the student and early-career level. It is also exactly what gets people hired.
[embed]
Step-by-Step: How to Write Your First PRD
This is the process I followed for the DEVCON+ Beta build during my internship, adapted into a framework any developer can use regardless of team size or project scope.
Step 1 — Define the Problem. Write one paragraph, maximum. Articulate what currently exists, what is broken or insufficient about it, and what the world looks like when your product solves it. Be specific and ruthless. “Users need a better experience” is not a problem statement. “Chapter coordinators at DEVCON currently manage event check-ins via physical sign-in sheets, resulting in attendance data that is unstructured, unverifiable, and unavailable for post-event analysis” is a problem statement. The difference between those two sentences is the difference between a project that drifts and one that ships.
Step 2 — Build Your User Personas. Not demographic sketches — behavioral profiles. For each persona, document: who they are in the context of your product, what task they are trying to accomplish, what level of technical comfort they bring to the interface, what device and environment they are likely using, and what they absolutely cannot afford to have go wrong. These personas become the subjects of every User Story you write. If a feature doesn’t serve at least one persona, it has no business being in the PRD.
Step 3 — Write User Stories with Acceptance Criteria. For each persona, write User Stories covering every significant interaction they’ll have with the system. Immediately after each story — not later, not in a separate pass — write the Acceptance Criteria. Use the INVEST framework as a quality check: every story should be Independent (deliverable without requiring another story to be done first), Negotiable (a starting point, not a rigid spec), Valuable (serves a real user need), Estimable (specific enough that a developer can size the work), Small (completable in a sprint), and Testable (the criteria are verifiable by a QA process). If a story fails any of those tests, rewrite it before moving on.
Step 4 — Document Functional and Non-Functional Requirements. Functional requirements describe what the system does. Non-functional requirements describe how well it does it — response time targets, concurrent user capacity, security standards, accessibility compliance (WCAG 2.1 AA is the minimum bar for any product serving a broad public audience), and browser or device compatibility. Non-functional requirements are where most student projects have their most significant gaps. A check-in system that works beautifully in Chrome on a MacBook and fails silently on a mid-range Android phone at an event is not a working product. Specifying the performance and compatibility envelope in the PRD forces those constraints into the architecture before they become production incidents.
Step 5 — Define Business Rules and Role Definitions. Write out the conditional logic that governs system behavior: if a participant has already checked in, what happens? If a volunteer coordinator tries to create a duplicate event, does the system block, warn, or allow? If a user’s session expires mid-check-in, what is the recovery path? Then define every user role in the system and produce a permissions matrix — a table where the rows are user types and the columns are actions, and every cell contains either “allowed,” “denied,” or “allowed with condition.” This matrix becomes the direct specification for your backend Row Level Security policies and your frontend conditional rendering logic.
Step 6 — Specify API Contracts. Before writing a single API route, define the shape of every significant data exchange in the system. For each endpoint: the HTTP method, the path, the expected request payload shape (with field names, types, and validation rules), the expected success response shape, and the possible error states with their corresponding status codes. This can be written as a simple table or as an OpenAPI specification. The format matters less than the discipline. Defining contracts before building means your frontend and backend can be developed concurrently with confidence that the integration will work.
Step 7 — Document Future Enhancements. Write a section at the end of the PRD that explicitly parks the features you are choosing not to build in this version. This accomplishes two things: it gives stakeholders visibility into the product’s intended trajectory so they don’t feel their ideas are being discarded, and it forces you to design the current architecture with awareness of what it will eventually need to support. A database schema designed for v1 that makes v2 impossible is a technical debt time bomb. The Future Enhancements section is how you defuse it before it’s ever built.

Tips Before You Start Writing
Writing a PRD feels slow when you’re doing it for the first time. It isn’t. It is the fastest way to build correct software. Keep these principles close.
Write for the developer who will join the project six months after you’ve left. If a new engineer can’t understand what a requirement means without asking you, rewrite it. Ambiguity in a PRD compounds through every layer of implementation below it.
Separate what from how. A PRD defines what the system must do, not how the engineering team will implement it. If you find yourself writing implementation details — specific library choices, database query patterns, component architecture — you have crossed the line from requirements into design. Pull back. The how belongs in the technical design document that the PRD feeds into, not inside the PRD itself.
Prioritize ruthlessly. Use a P0/P1/P2 labeling system for every requirement. P0 means the product cannot launch without it. P1 means it should be in the launch version but workarounds exist. P2 means it’s desirable but can be deferred. Every project has a deadline and every deadline will compress scope. Knowing which requirements are non-negotiable before the crunch comes is the difference between a principled decision and a panicked one.
Review the PRD with someone who isn’t you. Specifically, review it with someone who will use the product or who represents the user base. The assumptions that feel most obvious to the developer who wrote the document are almost always the ones most likely to be wrong.
Sample Prompts for AI-Assisted PRD Generation
During my internship, I used NotebookLM and Claude to generate the initial PRD draft for DEVCON+. NotebookLM is a grounded AI reasoning tool — unlike a generic language model, it synthesizes exclusively from the source documents you upload rather than from parametric training data. This distinction is critical for requirements engineering. A model generating requirements from nothing produces hallucinated features that sound plausible and serve no one. A model grounded in your actual organizational data, user research, and legacy documentation produces requirements that reflect operational reality. Here are the exact prompts I used.
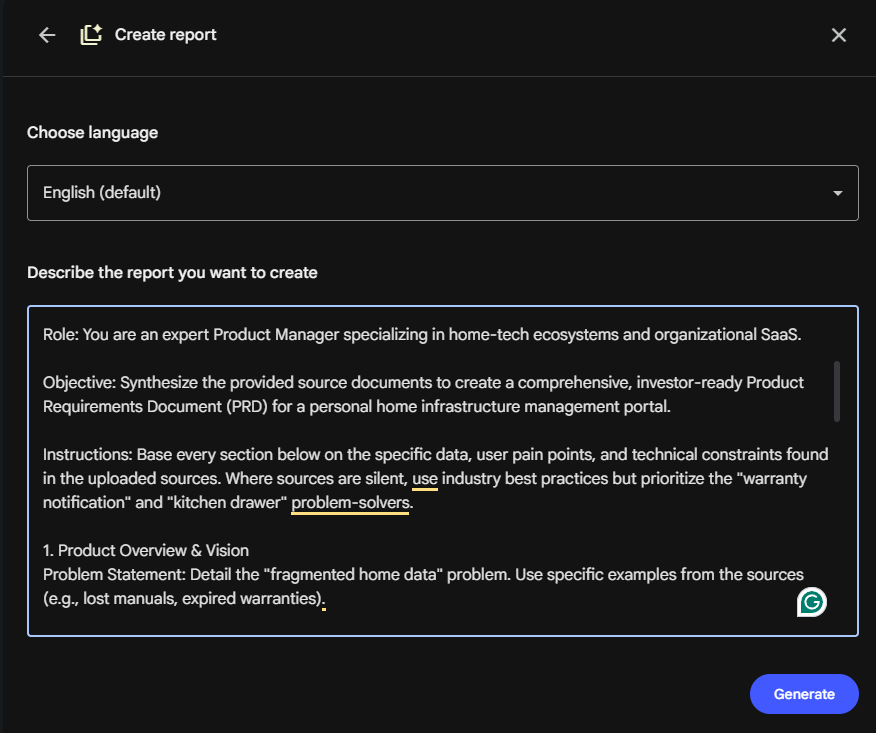
Example of NotebookLM Prompt
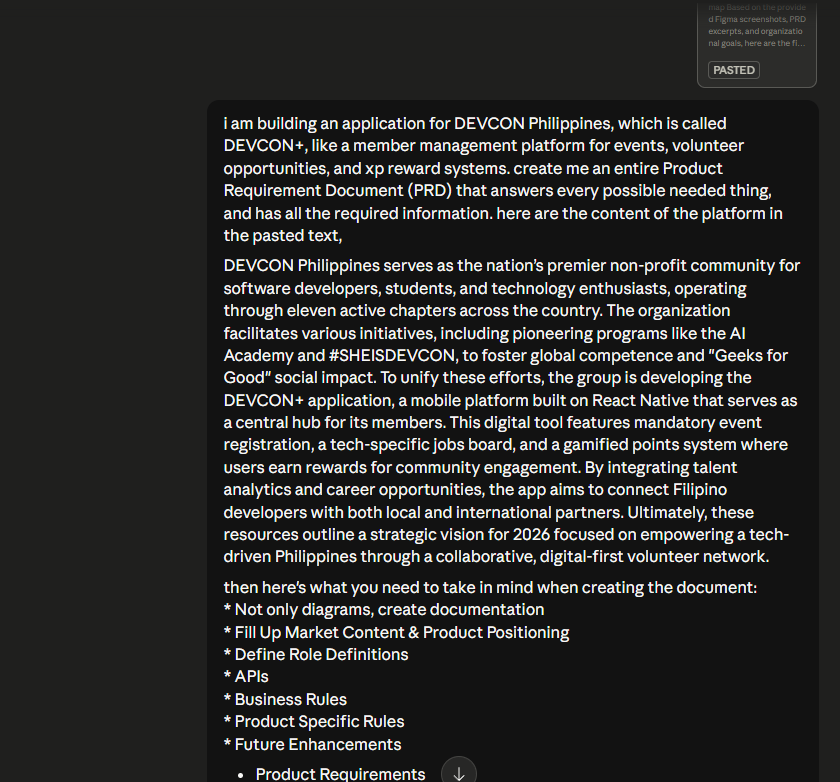
Example of Claude Prompt for PRD File Generation
Prompt 1 — Problem Discovery (use after uploading all source documents) for NotebookLM:
“Based on the provided documents, identify the top five user pain points this product needs to address. For each pain point, describe: (1) the affected user type, (2) the specific friction or failure they experience in the current system, and (3) the outcome they are trying to achieve that the current system prevents or complicates. Be specific. Do not generalize.”
Prompt 2 — Full PRD Generation for Claude/NotebookLM:
“Generate a Product Requirements Document for [product name]. Structure it with the following sections in order: (1) Executive Summary — one paragraph stating the product’s purpose and the problem it solves. (2) Problem Statement — specific, observable, and scoped. (3) User Personas — behavioral profiles, not demographics, for each user type. (4) User Stories with Acceptance Criteria — organized by persona, written in ‘As a / I want / So that’ format, each story followed immediately by numbered, testable acceptance criteria. (5) Functional Requirements — labeled P0, P1, or P2 by priority. (6) Non-Functional Requirements — including performance benchmarks, security standards, accessibility requirements, and compatibility targets. (7) Business Rules — conditional logic governing system behavior. (8) Role Definitions — a permissions matrix for every user type. (9) API Contracts — request/response shapes for key data flows. (10) Future Enhancements — explicitly deferred features. Avoid generic language. Every requirement must be specific, testable, and traceable to a user need.”
Prompt 3 — Review and Gap Analysis:
“Review the PRD you just generated. Identify: (1) any requirements that are ambiguous or untestable, (2) any user personas whose needs are underserved by the current feature set, (3) any business rules that could produce conflicting system behaviors, and (4) any non-functional requirements that are missing given the product’s intended scale and user population.”
Use that third prompt before you close the tab. The gap analysis almost always surfaces at least one thing you missed.
Sample Output: A Real Acceptance Criteria in Practice
To make this concrete rather than theoretical, here is a User Story and its Acceptance Criteria from the actual DEVCON+ PRD — the check-in feature built for volunteer coordinators managing event entry.
User Story: “As a chapter volunteer coordinator, I want to confirm a participant’s registration status by scanning their QR code at the event entrance, so that I can process check-ins in under five seconds without requiring manual list verification or administrative access to the full attendee database.”
Acceptance Criteria:
- The system decodes the QR payload and validates the JWT signature against the Supabase project secret within 500ms of a successful scan, measured from the moment the scan is registered to the moment the confirmation state renders on screen.
- If the participant is registered for the event and has not yet checked in, the system displays the participant’s full name and membership tier and writes a CheckIn record to the database with a server-generated UTC timestamp. The coordinator sees a clear visual confirmation state within the 500ms window.
- If the participant has already checked in, the system renders an “Already Checked In” state that displays the timestamp of their original check-in. No duplicate CheckIn record is created. The system is fully idempotent for repeat scans of the same QR code.
- If the QR payload is malformed, the JWT signature is invalid, or the encoded event ID does not match the active event session, the system renders a specific error state that describes the failure type. No database write is performed.
- If the participant’s registration exists but their membership is expired or unverified, the system renders a distinct warning state that flags the membership status without blocking check-in. The coordinator has the final decision on entry.
- The confirmation and error states are fully legible on a mobile device with a screen size of 5 inches or larger, in outdoor lighting conditions, at normal reading distance.
Notice what those criteria do: they eliminate interpretation entirely. A developer who has never spoken to a coordinator can implement that feature correctly. A QA engineer who wasn’t in any planning meeting can write a complete test suite from that list. An architect reviewing the schema can see immediately that the CheckIns table needs a unique constraint on (event_id, user_id) and that the JWT validation must happen server-side to prevent client-side forgery. Every downstream decision is made easier by the precision of the criteria. That precision is the point.
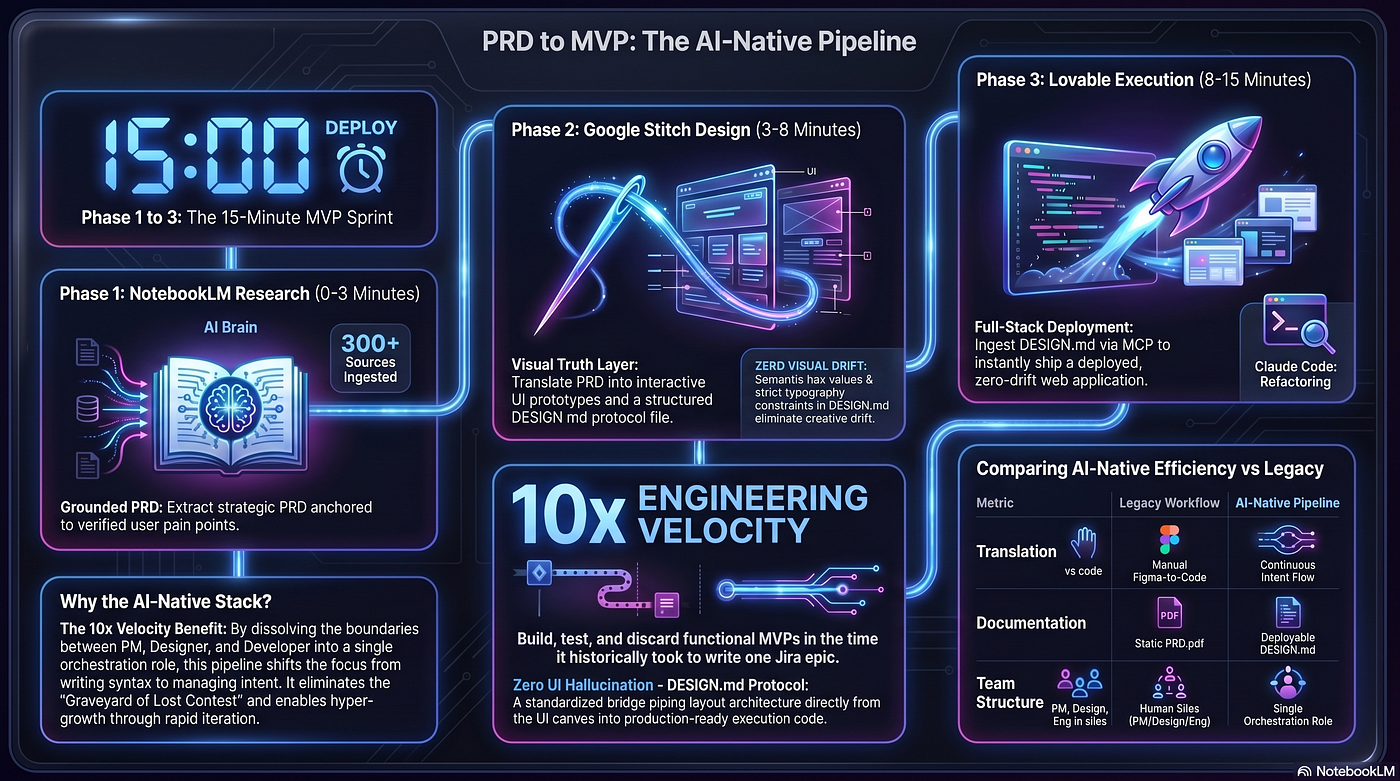
Developing From PRD to MVP: The AI Workflow
Here is where most tutorials stop. They teach you how to write a PRD and leave you at the edge of a cliff, staring down at “now build the product.” What I want to show you — what I actually used during my internship — is what happens when a well-structured PRD is fed into a modern, AI-native development pipeline. Because the PRD doesn’t just inform the build. In 2026, when it’s written correctly, it drives the build.
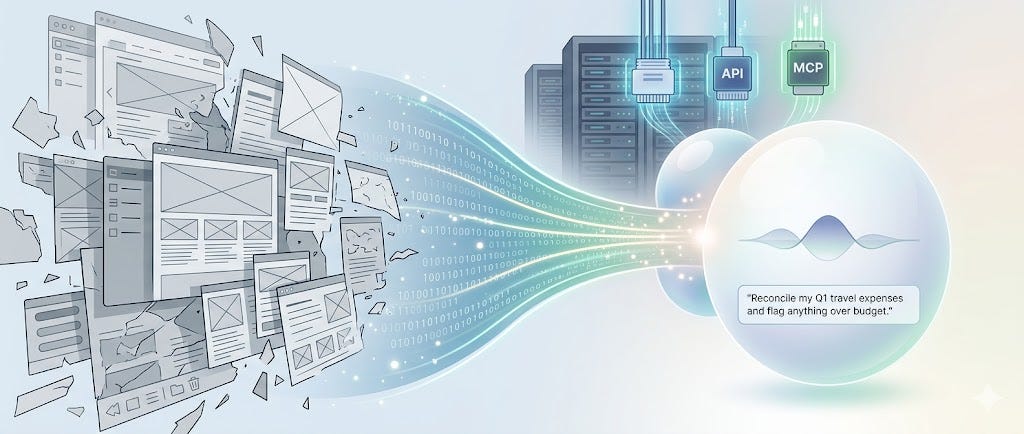
The shift I’m describing is the move from what the industry now calls Static Docs to Deployable Specs. A static doc is a PRD that sits in a Google Drive folder, gets referenced at kickoff, and is never looked at again. A deployable spec is a machine-readable source of truth that feeds directly into a generative toolchain — one where every subsequent layer (design, logic, code, infrastructure) is synchronized to the original intent rather than drifting away from it with each hand-off. The “Telephone Game” of traditional development — where intent is progressively lost between the product manager’s vision, the designer’s Figma file, the developer’s interpretation, and the final deployed app — is the exact problem this pipeline eliminates.
The pipeline has three phases, and your PRD is the thread that runs through all of them.
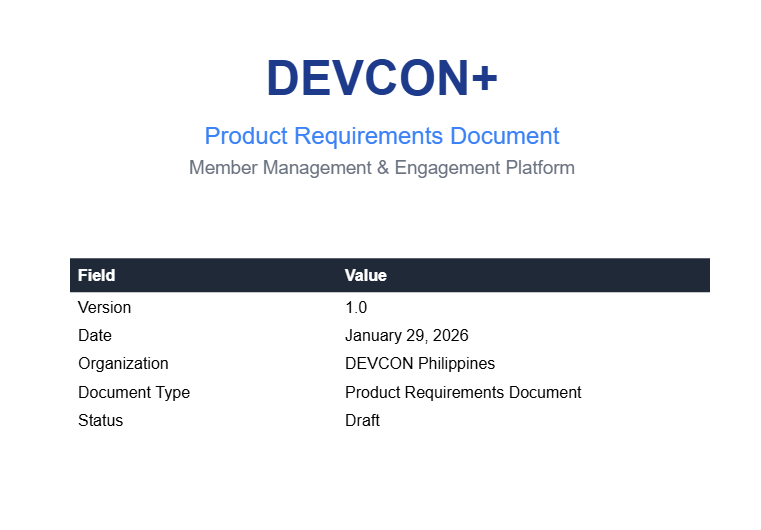
Phase 1 — Grounded Research and PRD Generation (NotebookLM)
The pipeline begins not with a blank prompt to a generic chatbot, but with a deliberate grounding step. NotebookLM functions as a Retrieval-Augmented Generation (RAG) system — it generates from the specific sources you provide, not from its general training data. This is the architectural distinction that makes it the right tool for requirements engineering. When you feed NotebookLM your user research, competitor analyses, legacy documentation, stakeholder interview transcripts, and post-event feedback, the PRD it helps you generate is grounded in verifiable, specific, organizational reality. Every claim it makes can be traced back to a source. Every requirement has a citation. This auditability is what transforms an AI-generated document from a draft you have to heavily second-guess into a working spec you can confidently build from.
A few tactics that dramatically improve output quality. Upload diverse source types — written documents, research notes, even YouTube competitor analysis URLs which NotebookLM can transcribe and index as searchable text. Use the Audio Overview feature in the Studio section to generate a synthesized discussion of your research before drafting the PRD — it serves as a cognitive alignment pass that surfaces contradictions and blind spots in the source material before they reach the spec. And enforce strict grounding in every prompt: the phrase “based only on these sources” is not a politeness convention. It is an architectural constraint that prevents the model from substituting plausible-sounding generic features for the specific, verified needs of your actual user population.
The output of this phase is your Grounded PRD — complete with Problem Statement, User Personas, User Stories, Acceptance Criteria, Functional and Non-Functional Requirements, Business Rules, Negative Constraints, Role Definitions, and API Contracts. This document does not get filed and forgotten. It gets carried forward into every phase that follows.
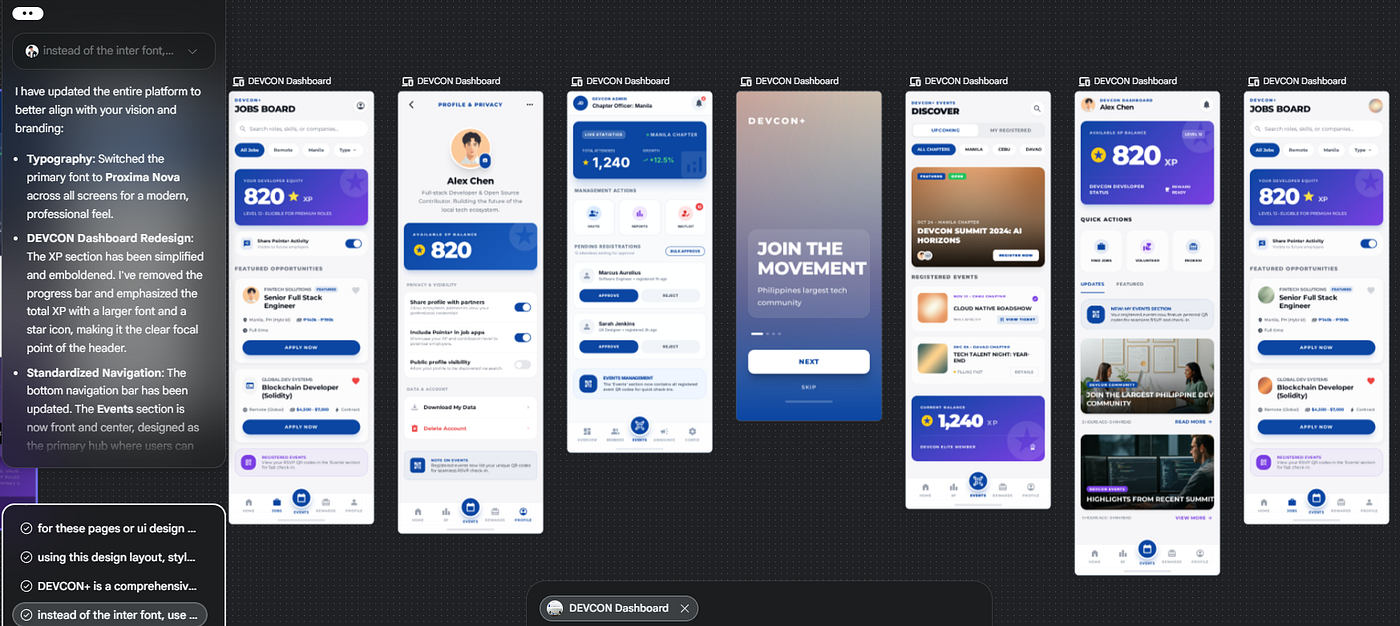
Phase 2 — Visual Logic and Architecture (Google Stitch)
With the PRD finalized, the next question is: what does the system actually look like as a user moves through it? This is where Google Stitch enters the pipeline — and where the traditional wireframing process gets replaced by something fundamentally more powerful.
Stitch operates as an AI-native infinite canvas for defining screen logic and user flow. Rather than spending days in Figma producing static wireframes that a developer will later interpret, you describe your user flows and interface goals to Stitch, which generates high-fidelity interactive canvases in real time. The key distinction between Stitch and a design tool like Figma is that Stitch thinks in logic, not just aesthetics. You are mapping the “happy path” — the exact sequence of states a user moves through from entry to goal completion — and every branch condition, every if/then transition, every error state is documented in the canvas before a single component is built. This logic mapping is what prevents the navigation failures and state-management bugs that plague AI-generated codebases. When the code generator knows exactly which screen follows every user action, it cannot hallucinate a transition that makes sense in isolation but breaks the flow.
The critical output of this phase is the DESIGN.md file — a machine-readable design system document extracted from the Stitch project. This file stores the complete visual language of your product in Markdown format: color tokens, typographic scales, spacing logic, component anatomy, and interaction behavior. It sits in the root of your project repository and functions as the single visual source of truth for every AI coding agent that touches the codebase. When Claude Code refactors a component, it reads DESIGN.md. When Lovable generates a new page, it references DESIGN.md. Design drift — the slow degradation of visual consistency that happens when developers approximate rather than implement the design system — is eliminated, because the design system is not a PDF or a Figma share link. It is a file in the repo, in a format the build tools can read directly.
If your PRD included Negative Constraints — and it should — those constraints go into DESIGN.md too. “Never use gradients on primary action buttons.” “All touch targets must meet a minimum size of 48x48 pixels.” “Body text never falls below 16px on mobile.” These are not stylistic preferences. They are architectural guardrails that the build layer enforces automatically once they are codified in the design system file.
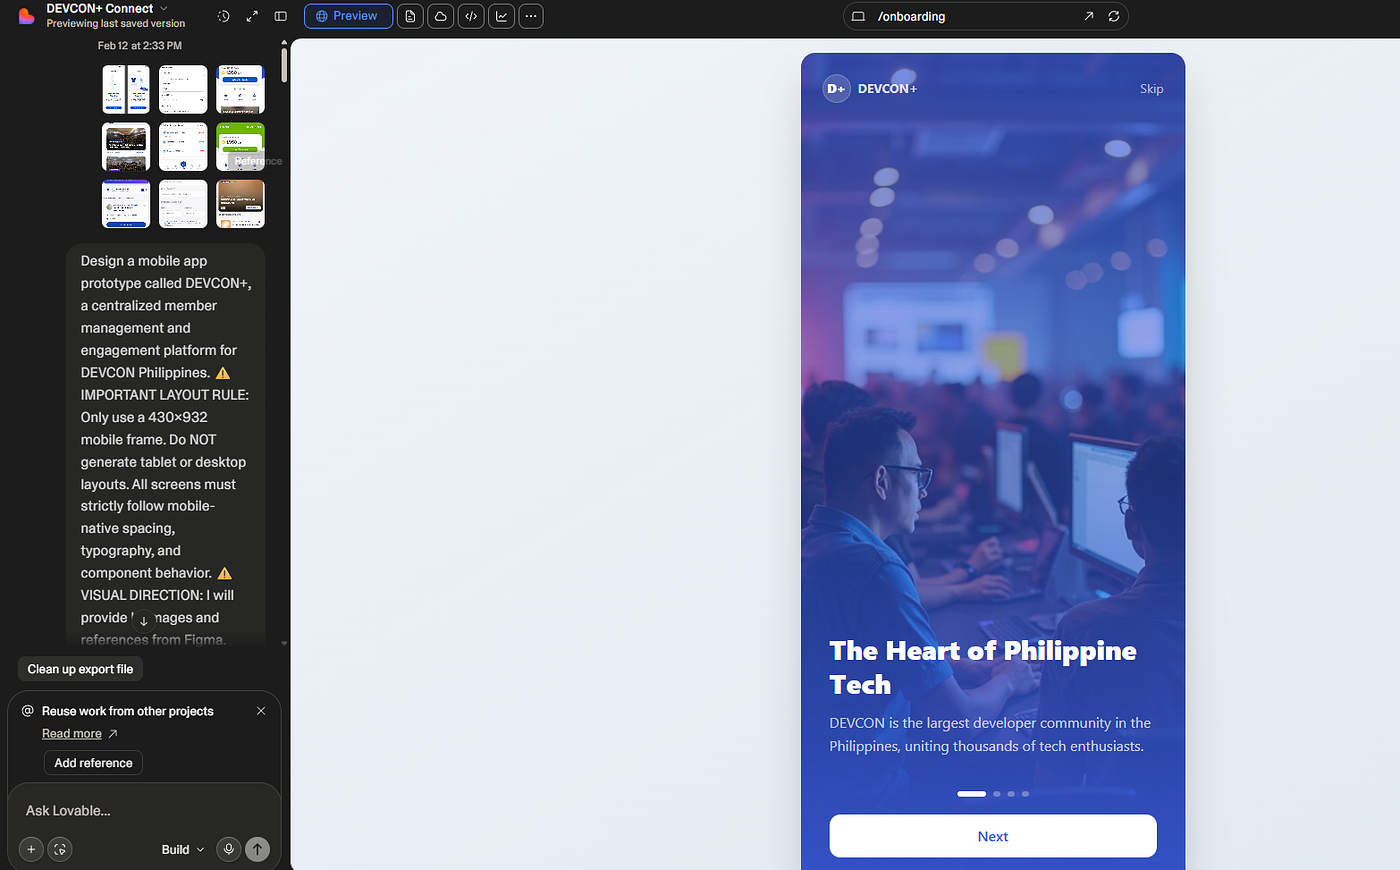
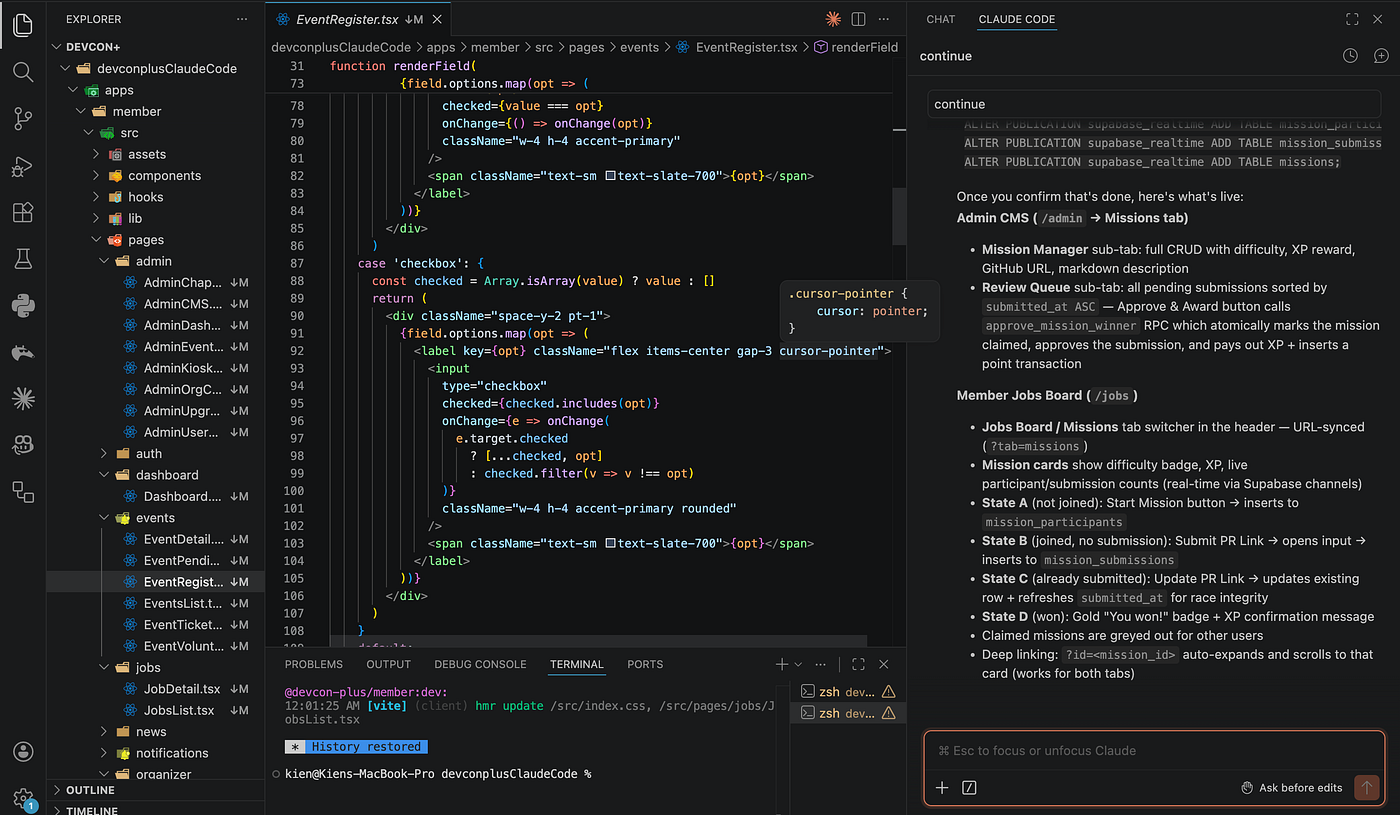
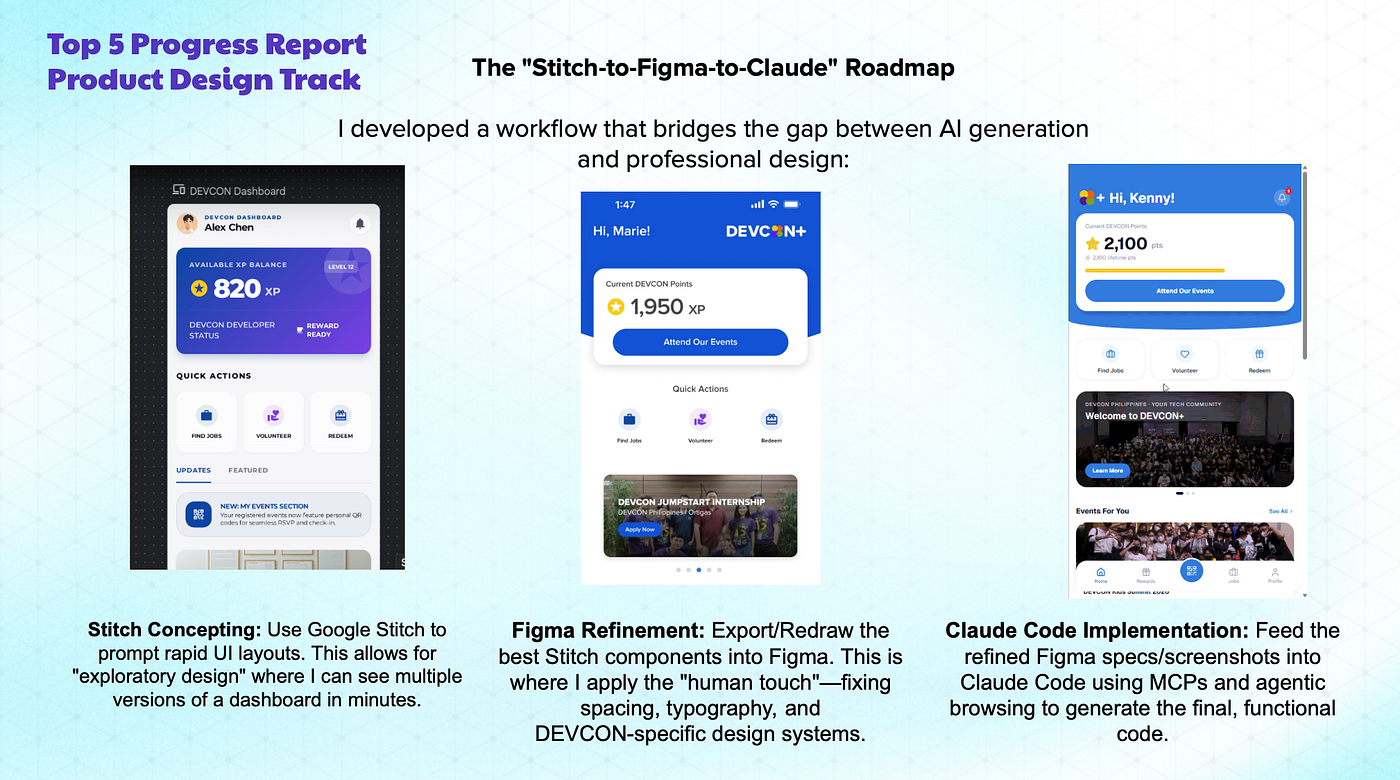
Phase 3 — Real-Time Build (Lovable + Claude Code)
The build phase is where the Grounded PRD and the DESIGN.md file become active engineering inputs rather than passive reference materials. Two tools operate in this phase, and understanding the distinction between them is important: Lovable is the building engine and Claude Code is the reasoning engine. They are not interchangeable. They are complementary.
Lovable is optimized for velocity. Given the PRD context and the DESIGN.md, it generates a full-stack React application scaffold — frontend components, routing architecture, Supabase backend integration, authentication flow — and deploys it to a live URL in a single session. This is the “concept to hosted URL in 60 minutes” capability that the pipeline makes possible. The scaffold Lovable produces is not finished software, but it is structured software — something with enough architectural shape to evaluate, critique, and refactor against the PRD’s requirements. When you super-prompt Lovable — feeding it both the PRD and DESIGN.md with explicit instructions to adhere to the design tokens and implement only the P0 and P1 requirements in the first pass — the quality of what it generates improves dramatically. The PRD is not a hint. It is the spec. Treat it that way in your prompts.
Claude Code enters the pipeline at the layer where velocity gives way to precision. The scaffold Lovable produces will have architectural choices that are structurally correct but not clean — data fetching logic embedded in component bodies instead of extracted into custom hooks, hardcoded values where CSS variables should be referenced, business logic that works for the happy path but hasn’t been designed for the edge cases documented in the Acceptance Criteria. Claude Code’s terminal-based agent mode is built for exactly this kind of systematic refactoring: multi-file codebase exploration, extraction of reusable service modules, enforcement of the separation of concerns between UI state and server state, and implementation of the security boundaries specified in the Role Definitions section of the PRD. The GitHub two-way sync between Lovable and your local environment is what makes this handoff fluid — you build at velocity in Lovable, pull to local, refactor with Claude Code to architectural depth, and push back. The PRD is what keeps both passes aligned, because every refactoring decision can be checked against a requirement that predates the code.
The final step before shipping is a structured verification pass against what I’d call the production checklist: accessibility audit (contrast ratios and touch target sizes against WCAG 2.1 AA), multi-breakpoint responsiveness testing across mobile, tablet, and desktop, a CSS variable audit to confirm zero visual drift from DESIGN.md, secrets management verification to confirm no API keys are exposed on the client side, end-to-end happy path walkthrough, database schema validation, and a performance sweep to identify unused dependencies. None of those checks are surprising if you wrote a good PRD — the non-functional requirements section should have specified every one of them. The checklist is just the PRD’s standards made executable.
This is the pipeline in full:
Idea → Grounded Research → PRD → Screen Logic → DESIGN.md → Scaffold → Refactor → Verify → Ship.
Every stage feeds the next. Every stage is anchored to the same document of intent. Nothing gets lost in translation because there is no translation — there is only a living spec that the toolchain reads directly.
Resources to Go Deeper
These are the materials that shaped how I think about this, and that I would put in the hands of every developer reading this today.
Shape Up by Basecamp — basecamp.com/shapeup — The most practically useful framework for scoping work before building it. Free to read online. Read the chapters on “Appetite” and “Breadboarding” first.
The INVEST Criteria — Search “INVEST user stories Bill Wake” — The original framework for evaluating user story quality. One page. Memorize it.
Lenny’s Newsletter — lennysnewsletter.com — Consistently the highest-signal product thinking content available. The archives on writing PRDs and scoping MVPs are required reading.
NotebookLM by Google — notebooklm.google.com — Free. Takes twenty minutes to learn. The fastest path to a grounded, AI-assisted PRD if you have source documents to upload.
Google’s Technical Writing Courses — developers.google.com/tech-writing — Free. Teaches you how to write requirements that are actually unambiguous, which is a skill that takes deliberate practice.
“Inspired” by Marty Cagan — The canonical book on how professional product teams make decisions before writing code. If you read one book this year to become a better developer, make it this one.
The barrier to writing your first real PRD is lower than you think. The cost of not writing one is higher than you know.
Before You Close This Tab
The developers who will define the next decade of the Filipino tech industry are not going to be the ones who can type the fastest or memorize the most framework APIs. They are going to be the ones who think systemically — who treat a product as a problem space to be understood before it is a codebase to be written, who can translate organizational needs into engineering specifications precise enough to drive implementation, and who know that the document they write before touching their IDE is the most important technical artifact they will produce on any project.
That document is the PRD. Write it first. Design second. Build third. The code will be better for it. The product will be better for it. And somewhere in that process, you will become a fundamentally different kind of developer — the kind who ships things that last.
If this was useful, the best thing you can do is share it with one developer who’s about to start a project without a plan. They need this more than they know.
메타데이터
- post_id
- bbbf3af459ca
- slug
- why-most-developers-today-are-building-the-wrong-way-bbbf3af459ca
- url
- https://medium.com/@kienserapio/why-most-developers-today-are-building-the-wrong-way-bbbf3af459ca
- canonical_url
- https://medium.com/@kienserapio/why-most-developers-today-are-building-the-wrong-way-bbbf3af459ca
- author_url
- https://medium.com/@kienserapio
- status
- ok
- fetched_at
- 2026-07-13 08:49:10