Part 3A: SAML Authentication Workflow: A Practical Demo
In Part 3A & 3B, I will explain how SAML login works with the help of a demo project. This part involves using PingOne as the identity…
Part 3A: SAML Authentication Workflow: A Practical Demo
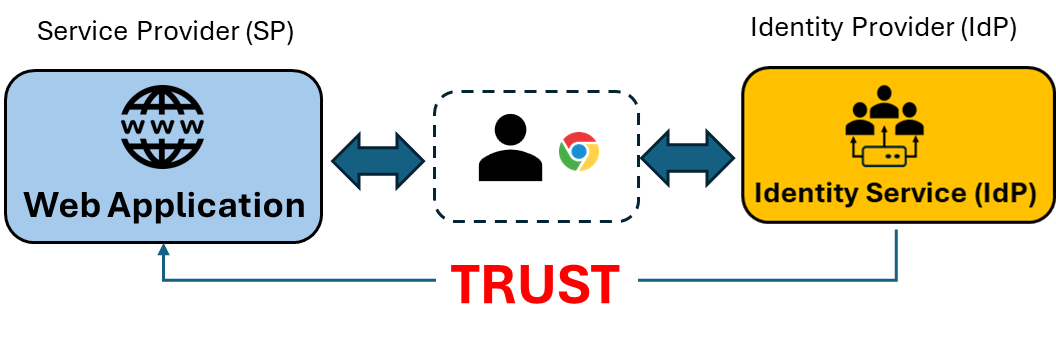
In Part 3A & 3B, I will explain how SAML login works with the help of a demo project. This part involves using PingOne as the identity provider, manually constructing and sending SAML requests, and setting up a local HTTP server with Python to handle SAML responses. The process includes creating a trust relationship between the identity provider (IdP) and service provider (SP), generating a SAML application integration, and analyzing SAML requests and responses using browser’s developer tools extension.
Pre-Requisites
Following are the prerequisites for performing the SAML demo project. Some of them are optional but beneficial to have:
- Active account with SAML identity provider (IdP) e.g. PingOne, Okta or Azure Entra ID
- Access to SAML online tool
- Python or any other tool such as Node.js to create a dummy application
- Visual Studio Code — Optional
- OpenSSL — Optional
- Chrome Browser with SAML Dev Tools extension (You can use another Browser such as Microsoft Edge with SAML Tracer extension)
SAML Demo Project Architecture
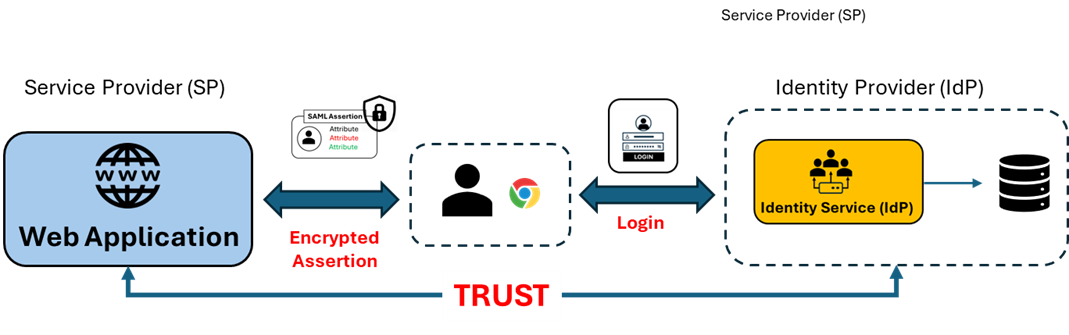
I am going to use demo project to demonstrate how SAML works. I will be using PingOne as an identity provider and will manually construct the SAML request, encode it and send it to the identity provider as if it is coming from the service provider.
For this Demo project we also need an HTTP server where application accept the SAML response. I am going to use Python to start a Web Server. It will be started at Port 8080 on a local desktop. A dummy python application will accept the SAML response and will return a SAML message indicating that the response has been received. We will inspect the SAML response that comes back using Chrome SAML Extension and analyse some of the important XML tags.
Note: PingOne identity management system is in the cloud and all other actors will be on Windows desktop.
The first step we need to do is to create a Trust relationship between the Identity Provider i.e. dummy python application and a Service Provider (SP). This Trust relationship can be established by logging into the Service Provider (PingOne) console and create a SAML application integration.
Creating the SAML integration will generate a small single sign on URL where all the SAML requests need to be sent. SAML metadata file generated by PingOne provide this piece of information (URL) along with lot more.
To explain the SAML request in detail, there is no real application. Instead, we are going to manually create and encode the SAML request and send it to Identity Provider and try to explain how the whole user interaction will work.
The SAML protocol defines how the SAML requests should look like, and a handy request template is available to fill and generate the SAML request from Service Provider to Identity Provider. I am going to use the template later in the demo.
SAML Authentication Example — SAML AuthnRequest Examples | SAMLTool.com
We will encode the URL and send it to the identity provider (PingOne). The SAML identity provider (PingOne) will return with a login screen for the user to enter the credentials. Once the user enters the credentials and submit it to identity provider, upon which the identity provider will authenticate and if successful, the IdP will send a response back to the application (dummy Python application) URL which handles the SAML assertion. In the SAML terminology, it is also called Assertion Consumer Service or ACS URL.
SAML requests and responses messages can be analysed by using the Chrome developer tools or the SAML Dev Tools extension.
let’s go ahead and create our first SAML application integration using the PingOne developer console.
SAML Demo project Steps
Preconditions
To proceed, please ensure the following preconditions are met:
- A PingOne trial account has been created using the https://www.pingidentity.com/en/try-ping.html link.
- The latest version of Python is installed and properly configured on your system.
- Optional — Visual Studio Code is installed, and the Python extension is configured.
Python Dummy Application
It is recommended to create a python virtual environment for dummy application. A Python virtual environment creates an isolated space that allows you to install Python packages separately from other projects.
Python Virtual Environments: A Primer — Real Python
This ensures that each project has its own set of dependencies, preventing conflicts with other projects or the system-wide Python installation.
Start Visual Studio Code from a directory where you want to create your project. From a 1) View → Command Palette select 2) Python: Create Environment

Figure 1: Python Virtual Environment Using VS
In the project folder create cgi-bin as subfolder and create a python file e.g. consumer.py. Add the following code to the file:
print("""Content-Type: text/html
<!doctype html>
<html>
  <title>SAML Response Handler</title>
  <body>
    <h2>SAML Assertion Received</h2>
  </body>
</html>""")
To test the response from the Service Provider (SP), we need to set up a local web server. Python includes the http.server module, which is useful for running a local HTTP server. Follow these steps to launch the server:
- Open a command prompt or the terminal in Visual Studio Code.
- Navigate to your Python project directory.
- Run the following command:
python -m http.server --cgi 8080Open the browser and type the following URL to verify that HTTP server is working:
http://localhost:8080/cgi-bin/saml-consumer.py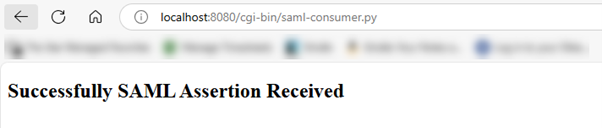
Figure 2: Response from Python HTTP Server
SAML Application
I am going to use PingOne for this demo project. You can use Okta or Entra ID as well.
Login to PingOne Platform using your trial account credentials and create a new SAML application name saml-test-project-01 and select application type as SAML and click Configure button.

Figure 3: PingOne Application
In the next SAML configuration screen select Manually Enter and enter the following values:
ACS or ACR URL = http://localhost:8080/cgi-bin/saml-consumer.py; and
Entity ID = http://localhost:8080/saml-app-project-1
I will explain both when creating SAML SSO request.

Figure 4: ACS and Entity ID
Finally create the application by clicking the Save button. Now the application is ready to be used. Before moving forward save the application Meta Data as xml file and note down Initiate Single Sign-On URL. Both of them we are going to use later in the project. The metadata file looks like as follows:

Figure 5: Meta Data File
We are going to use 1) EntityID, 2) X509 certificate and 3) SingleSignOnService URLs later in the project.
From the Attribute Mappings tab, you can add more User attributes. These attribute mappings associate PingOne user attributes to SAML attributes in the application.

Figure 6: User Attribute Mappings
PingOne application is now ready to use. In Part 3B, we’ll create a SAML request to initiate login and capture the SAML response for analysis.
Part 2: SAML Explained: Terminology and Authentication Flows
메타데이터
- post_id
- bc4e9f1204f3
- slug
- part-3a-saml-authentication-workflow-a-practical-demo-bc4e9f1204f3
- url
- https://medium.com/@shoaib.alam/part-3a-saml-authentication-workflow-a-practical-demo-bc4e9f1204f3
- canonical_url
- https://medium.com/@shoaib.alam/part-3a-saml-authentication-workflow-a-practical-demo-bc4e9f1204f3
- author_url
- https://medium.com/@shoaib.alam
- status
- ok
- fetched_at
- 2026-08-10 01:00:38