Using Terraform Alias and provisioning similar resources in multi Aws multi regions/s3 Dynamodb…
. 1 Using Terraform Alias and provisioning similar resources in multi Aws multi regions:
Using Terraform Alias and provisioning similar resources in multi Aws multi regions/s3 Dynamodb terraform remote backend deep dive
. 1 Using Terraform Alias and provisioning similar resources in multi Aws multi regions:

Overview:
Terraform is an essential tool for managing cloud infrastructure as code(Iac).However, when dealing with multiple configurations or provider instances, you might encounter challenges that can complicate your workflow. This is where Terraform alias and configuration_aliases shine. In this blog, we will dive deep into alias and configuration_aliases, explore their importance, showcase practical examples, and share tips for their effective use.
What Are Terraform Aliases in simple term:
Terraform aliases means using more than one provider configuration in the same Terraform project.
Makes more sense Right?
Let’s go further into it 👇
Key features of Terraform Aliases:
1. Multiple provider configurations
You can define more than one configuration for the same provider (like Terraform with the Amazon Web Services provider).
2. Different regions support
Deploy resources in different regions (e.g., us-east-1 and eu-west-1) in one project.
3. Multiple AWS accounts
Connect to different AWS accounts using different credentials in the same Terraform code etc.
Benefits of Terraform Aliases:
1. Better organization
Keeps infrastructure clean instead of creating separate projects for each region.
2. Improved scalability
Makes it easier to expand infrastructure across regions later.
3. More control
Reduces mistakes because you clearly specify which region/account a resource belongs to.
Basic Example of specifying a provider without Terraform Aliases:
Normally, you write one provider like this:
provider "aws" {
  region = "eu-north-1"
}
Basic Example of specifying a provider with Terraform Aliases:
Below is a straightforward example of using an alias to configure multiple AWS regions.
provider "aws" {
  region = "eu-north-1"
}

provider "aws" {
  alias  = "north"
  region = "eu-north-1"
}

provider "aws" {
  alias  = "west"
  region = "us-west-2"
}

provider "aws" {
  alias  = "central"
  region = "ca-central-1"
}

resource "aws_instance" "north" {
  count         = 1
  ami           = "ami-*********" # eu-north-1
  instance_type = "t3.micro"

}

resource "aws_instance" "west" {
  count         = 1
  provider      = aws.west
  ami           = "ami-**********" # us-west-2
  instance_type = "t3.micro"

}

resource "aws_instance" "central" {
  count         = 1
  provider      = aws.central
  ami           = "ami-********" # ca-central-1
  instance_type = "t3.micro"
Explanation:
We created a multi-region EC2 deployment using Terraform.
Using the AWS provider from the Terraform Registry, we configured Terraform to deploy servers in different AWS regions under:
👉 Amazon Web Services
👉 HashiCorp
Provider Setup
We defined:
-
Default provider → eu-north-1 (Stockholm)
-
Alias “west” → us-west-2 (Oregon)
-
Alias “central” → ca-central-1 (Canada)
-
Alias “north” → also eu-north-1 (redundant)
This means Terraform can talk to multiple AWS regions from one configuration file.
Infrastructure Created
We created 3 EC2 instances using aws_instance:
-
- North
Created in eu-north-1
Uses default provider
-
- West
Created in us-west-2
Uses aws.west provider alias
-
- Central
Created in ca-central-1
Uses aws.central provider alias
Note That:
- All instances remains the same t3.micro
- 1 instance each (count = 1) basically specifying the number of Ec2 instances I want.
In this scenario i stated it to be 1 count,you can increase your counts if you wish to.
- All (ami) for each region should be gotten manually from the console and pasted on your code depending on what region you are using . I.e No separate region has same (ami)
In Summary:
We built a single Terraform configuration that deploys infrastructure across multiple AWS regions using provider aliasing.
With all this steps shown you can now have your code up and running.
. 2. S3,Dynamodb terraform remote backend deep dive:
Overview:
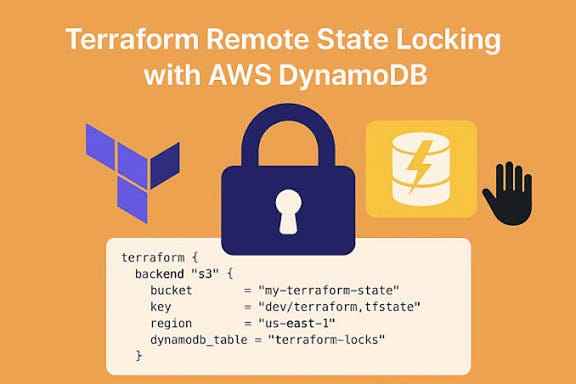
Using Amazon S3 together with Amazon DynamoDB as a Terraform remote backend,means storing Terraform’s state file securely in cloud storage (S3),while using DynamoDB to lock that state so only one person or system can modify it at a time, ensuring safe, consistent, and team-ready infrastructure management.
In simple terms:
* S3 saves the state.
* DynamoDB protects the state using (Lockfile)
Key features:
-
Everyone uses one shared state file
-
No two people can change it at the same time
-
No state corruption
-
Safe for production
-
Works with CI/CD
In other to be able to setup an S3 bucket and a Dynamodb Table, we will be basically creating 3 terraform files
👇
- Provider.tf
Used to specify the provider and configuration settings
provider "aws" {
  region = "eu-north-1" #specify your default region
}

#moving my terraform state from my local to my remote on the s3 and moving my terraform lockID to dynamodb from my Local to remote

terraform {
backend "s3" {
 bucket = "my-terraform-state" # you can specify logical name for your bucket
 key    = "global/terraform.tfstate"
 dynamodb_table = "terraform-state"
 region = "eu-north-1"
 encrypt = true
  }
}- Main.tf
Used to define the infrastructure resources that you want to create or manage,in this case we are Deploying an Ec2 instance
resource "aws_instance" "s3_demo" {
  ami           = "ami-04233b" # us-west-2
instance_type = "t3.micro"- Backend.tf
This is crucial for managing,storing,and retrieving the state file,which keeps track of the resources it manages.
#AWS BUCKET
resource "aws_s3_bucket" "terraform_state" {
  bucket = "my-terraform-state"
  force_destroy = true
}
  lifecycle {
        prevent_destroy = true
  }
}

#AWS BUCKET VERSIONING
resource "aws_s3_bucket_versioning" "terraform_state" {
  bucket = aws_s3_bucket.terraform_state.id

  versioning_configuration {
    status = "Enabled"
  }
}

#AWS BUCKET SERVER SIDE ENCRYPTION

resource "aws_s3_bucket_server_side_encryption_configuration" "terraform_state" {
  bucket = aws_s3_bucket.terraform_state.id

  rule {
    apply_server_side_encryption_by_default {
      sse_algorithm = "AES256"
    }
  }
}

#AWS PUBLIC IP BLOCK

resource "aws_s3_bucket_public_access_block" "terraform_state" {
  bucket = aws_s3_bucket.terraform_state.id

  block_public_acls       = true
  block_public_policy     = true
  ignore_public_acls      = true
  restrict_public_buckets = true
}

#AWS DYNAMODB TABLE FOR OUR LOCKIN

resource "aws_dynamodb_table" "terraform_state" {
  name         = "terraform-state"
  billing_mode = "PAY_PER_REQUEST"
  hash_key     = "LockID"

  attribute {
    name = "LockID"
    type = "S"
  }

  tags = {
    Environment = "production"
  }
}
This Terraform config creates an Amazon S3 bucket named my-terraform-state to store your Terraform remote state and protects it with prevent_destroy so it can’t be accidentally deleted.
-
It enables versioning on the bucket so every change to the state file is preserved and recoverable.
-
It configures server-side encryption (AES256) to automatically encrypt all objects stored in the bucket.
-
It blocks all forms of public access to keep the state file private and secure.
-
It creates an Amazon DynamoDB table called terraform-state for state locking.
-
The DynamoDB table uses LockID as the primary key to prevent multiple users from modifying the Terraform state at the same time.
With this Code you will be able to provision an S3 bucket and a running Dynamodb table accurately
Note:
This code basically stores your state files from your local laptop to your remote
How to migrate those state files
This can be done with just one command
terraform init -migrate-stateIn conclusion:
Terraform Aliases + Multi-Region Provisioning
Terraform provider aliases let you deploy the same resources across multiple AWS regions or accounts from one configuration, improving scalability and environment consistency.
They enable better infrastructure design by separating environments (dev, prod) or regions without duplicating code.
In short: aliases give you control, flexibility, and cleaner multi-region architecture.
S3 + DynamoDB Remote Backend
Using S3 as a remote backend securely stores Terraform state centrally, while DynamoDB provides state locking to prevent concurrent changes.
Together, they ensure safe team collaboration, prevent state corruption, and maintain infrastructure consistency.
In short: S3 stores the truth, DynamoDB protects it.
I hope this article was helpful and useful.
See you in my next project.
메타데이터
- post_id
- be2effc8dd5d
- slug
- using-terraform-alias-and-provisioning-similar-resources-in-multi-aws-multi-regions-s3-dynamodb-be2effc8dd5d
- url
- https://medium.com/@komethompson2/using-terraform-alias-and-provisioning-similar-resources-in-multi-aws-multi-regions-s3-dynamodb-be2effc8dd5d
- canonical_url
- https://medium.com/@komethompson2/using-terraform-alias-and-provisioning-similar-resources-in-multi-aws-multi-regions-s3-dynamodb-be2effc8dd5d
- author_url
- https://medium.com/@komethompson2
- status
- ok
- fetched_at
- 2026-06-22 12:55:45