Angle Iron Projects: How to Cut, Join, and Build With the Most Versatile Profile in Your Workshop
The Profile That Builds Everything
Angle Iron Projects: How to Cut, Join, and Build With the Most Versatile Profile in Your Workshop
The Profile That Builds Everything
Walk into any workshop, fabrication shop, or building site in the UK and you will find angle iron. It is the default structural profile for connecting things at right angles, bracing things that need to be rigid, framing things that need to be square, and supporting things that need to stay up. It has been doing this job for over a century, and despite the proliferation of specialist brackets, connectors, and fixing systems, angle iron remains the first thing most builders and fabricators reach for when they need a strong, simple, versatile support.
But angle iron is only as good as the way it is cut, joined, and finished. A cleanly cut, precisely drilled, properly bolted angle bracket is a thing of beauty: strong, square, and built to last. A roughly hacked, poorly aligned, loosely fastened angle bracket is an embarrassment that weakens the structure it is supposed to support and makes the person who made it look like they do not care about their work.
This guide is for anyone who works with angle iron, from professional fabricators to home improvers building their first shelving unit. It covers the practical techniques for cutting, drilling, and joining angle iron in both mild steel and aluminium, the most useful projects you can build, the common mistakes that cost time and material, and how the skills of working with angle iron translate directly to the formed aluminium profiles used in modern roofline, coping, and building envelope systems.
How to Cut Angle Iron Cleanly
A clean, accurate cut is the foundation of every angle iron project. The method depends on the material, the thickness, and the tools available.
Hacksaw
A hacksaw is the simplest and most accessible tool for cutting angle iron. Use a 24 TPI (teeth per inch) blade for thin-gauge aluminium angle (up to 3mm thick) and an 18 TPI blade for mild steel angle (up to 6mm thick). Clamp the angle securely in a vice with the cut line close to the jaws (to minimise vibration). Start the cut on the outer corner of the angle and work through both legs. A hacksaw cut is slow but accurate, and it produces a clean edge that needs only light deburring with a file.
Angle Grinder With Cutting Disc
An angle grinder with a thin cutting disc (1mm to 1.6mm) is the fastest way to cut mild steel angle on site or in the workshop. Use a metal cutting disc (not a grinding disc) for a clean, narrow cut. Clamp the angle securely, mark the cut line with a scriber or marker, and cut steadily along the line with light pressure. An angle grinder cut is fast but produces sparks, heat, and a rough edge that needs grinding or filing to clean up. Always wear eye protection, ear protection, and gloves when using an angle grinder.
Mitre Saw (Chop Saw) With Metal Cutting Blade
For repetitive, accurate cuts at consistent angles (particularly 90-degree and 45-degree cuts), a mitre saw fitted with a metal cutting blade is the best option. Specialist metal-cutting mitre saws use a carbide-tipped blade that cuts cleanly through mild steel and aluminium with minimal burr. Standard wood-cutting mitre saws should not be used for metal without the appropriate blade, as the blade speed and feed rate are different.
Bandsaw
A metalworking bandsaw provides the cleanest, most accurate cuts on angle iron. The slow blade speed and controlled feed produce a smooth, square edge with minimal heat and distortion. Bandsaws are standard equipment in professional fabrication workshops and are the preferred tool for production cutting of angle iron in both steel and aluminium.
Cutting Aluminium Angle
Aluminium is softer and more prone to clogging saw blades than steel. When cutting aluminium angle, use a blade designed for non-ferrous metals (with wider gullets to clear the swarf), apply cutting lubricant (WD-40 or a specialist aluminium cutting fluid) to prevent the blade from gumming up, and reduce the cutting speed slightly to avoid overheating. Never use a steel cutting disc on an angle grinder to cut aluminium, as the disc can load up with aluminium and shatter dangerously. Use a dedicated aluminium cutting disc instead.
How to Drill Angle Iron Without Wandering
Drilling accurate holes in angle iron is one of those skills that seems simple but trips up beginners regularly. The main challenge is that the L-shaped profile presents an angled surface to the drill bit, which causes the bit to wander off the mark when you start the hole.
Centre Punch First
Always centre punch the hole position before drilling. Place the punch exactly on the mark and strike it firmly with a hammer to create a small dimple. The dimple prevents the drill bit from skating across the surface when you start the hole. Without a centre punch, the bit will wander, and the hole will end up in the wrong position.
Start With a Pilot Hole
For holes larger than 6mm, start with a smaller pilot hole (3mm to 4mm) and then enlarge to the final size with a step drill or a larger bit. The pilot hole guides the larger bit and prevents it from grabbing or chattering. This two-step approach is particularly important on aluminium, where the softer material is more prone to bit wander.
Clamp and Support
Always clamp the angle iron securely to a drill press table or a stable workbench before drilling. If you drill with the angle held by hand, the bit can grab and spin the workpiece, which is dangerous and produces a sloppy hole. If drilling in the field (on site), clamp the angle to a stable surface and use a slow, controlled drill speed.
Use the Right Speed
Drill speed depends on the material and the hole size. As a general guide: for mild steel, use a slow to moderate speed (600 to 1,200 RPM for holes up to 10mm). For aluminium, use a moderate to fast speed (1,000 to 2,500 RPM). Drilling too fast in steel causes overheating and dulls the bit. Drilling too slowly in aluminium causes the bit to rub rather than cut, producing heat and a rough hole.
Deburr After Drilling
Every drilled hole has a burr on the exit side. Remove it with a countersink bit, a deburring tool, or a larger drill bit twisted by hand. The burr is sharp, makes assembly difficult, and can prevent bolts and brackets from sitting flat. Deburring takes seconds and makes a significant difference to the quality of the finished joint.
How to Join Angle Iron: Four Methods
Welding
Welding produces the strongest, most permanent joint. MIG welding is the fastest and most common method for joining mild steel angle in fabrication workshops. TIG welding produces a cleaner, more precise weld and is preferred for aluminium angle and for visible joints where appearance matters. Welded joints do not need bolt holes, which means less material is removed and the profile retains its full structural strength at the joint. The downside is that welding requires specialist equipment and skill, and welded joints cannot be disassembled.
Bolting
Bolting is the most common joining method for angle iron on construction sites and in DIY projects. Holes are drilled through both pieces at the joint, and bolts (with nuts and washers) clamp the pieces together. Bolted joints can be disassembled and adjusted, which makes them ideal for temporary structures, adjustable frames, and situations where the structure may need to be modified in the future. Use high-tensile bolts (Grade 8.8 for steel) with washers on both sides to distribute the load. For outdoor applications, use stainless steel bolts to prevent corrosion at the joint.
Riveting
Riveting is used for permanent joints in lighter-gauge angle iron, particularly aluminium. Pop rivets (blind rivets) are inserted through pre-drilled holes and expanded with a rivet gun to clamp the pieces together. Riveted joints are faster to make than bolted joints (no nut to tighten on the back side) but are not as strong and cannot be disassembled without drilling out the rivet. Riveting is common in sheet metal fabrication, HVAC ductwork, and lightweight aluminium framing.
Adhesive Bonding
Structural adhesives (such as two-part epoxy or methacrylate) can bond angle iron without holes or heat. Adhesive bonding distributes the load over the entire joint surface rather than concentrating it at bolt holes, which can be advantageous for thin-gauge materials. However, adhesive joints take time to cure, are difficult to disassemble, and are sensitive to surface preparation (both surfaces must be clean, dry, and lightly abraded for the adhesive to bond properly). Adhesive bonding is a specialist technique and is not commonly used for structural angle iron joints in general construction.
Angle Iron Projects: What You Can Build
Angle iron is the building block of countless projects. Here are the most common and useful applications, from simple DIY tasks to professional construction work.
Shelving and Storage
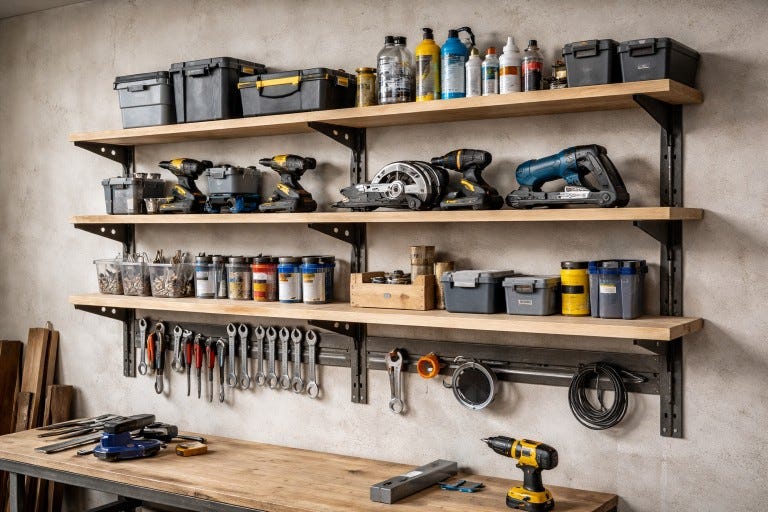
Angle iron shelving is one of the most practical projects for any workshop, garage, or storage area. Two lengths of angle iron fixed to the wall (one at each side) with the horizontal leg pointing inward create a pair of shelf brackets. A plywood, MDF, or timber shelf sits on the horizontal legs. The beauty of angle iron shelving is its adjustability: you can add as many shelves as you need at whatever spacing suits the items being stored. Use 30mm x 30mm x 3mm aluminium angle for light loads (books, small tools) and 40mm x 40mm x 5mm steel angle for heavy loads (workshop equipment, paint tins, boxes).
Workbench Frames
A workbench frame made from 50mm x 50mm x 5mm steel angle iron is one of the most useful and durable workshop projects you can build. Four legs, four horizontal rails at the top, four horizontal rails at the bottom (for stability), and a plywood or timber top. Weld or bolt the joints, add a lower shelf for storage, and you have a workbench that will outlast every other piece of equipment in the workshop.
Gate and Fence Frames
Garden gates, driveway gates, and fence panels can be framed with galvanised steel angle iron for strength and rigidity. The angle provides the framework, and the infill (timber slats, metal panels, or mesh) is fixed to the angle frame. Galvanise the steel and powder coat it for outdoor durability, or use aluminium angle for a lighter, corrosion-proof alternative that can be colour-matched to the surrounding metalwork.
Corner Protection
Aluminium angle iron is widely used as corner guards on walls, columns, and exposed edges in commercial buildings, schools, and hospitals. The L-shape sits neatly over the corner, protecting it from impact damage caused by trolleys, wheelchairs, equipment, and foot traffic. Powder-coated aluminium angle in a colour that matches the wall provides both protection and a clean aesthetic finish.
Raised Bed Frames
Angle iron makes excellent corner brackets and support frames for raised garden beds. Steel or aluminium angle bolted at each corner of the bed frame provides the structural connection between the side panels (timber, metal, or composite). For a fully metal raised bed, aluminium planters from Metal Profiles Ltd provide a ready-made solution with welded construction and smooth corners, but for a custom-sized or site-built bed, angle iron corner brackets are the traditional and effective approach.
Roofline and Building Envelope Support
In professional construction, angle iron (or more accurately, aluminium angle profiles) serves as the concealed support framework within the building envelope. Angle sections support fascia boards where the rafter ends do not provide a flat fixing surface. They form the internal bracing inside box gutters. They act as closer trims between soffit panels and walls. And they provide the structural connection within coping bracket systems. In all of these applications, the angle is doing what it has always done: connecting two surfaces at a right angle, providing rigidity, and transferring load from one component to another.
Common Mistakes When Working With Angle Iron
Cutting Without a Clamp
Angle iron is awkward to hold because of its L-shape. If you try to cut or drill it without clamping it securely, the workpiece vibrates, the cut wanders, the drill bit grabs, and the result is inaccurate and potentially dangerous. Always clamp the angle before cutting or drilling. A metalworking vice, a quick-release clamp, or a dedicated jig will save time and improve accuracy on every cut.
Ignoring Thermal Expansion on Long Runs
On long runs of aluminium angle (over 3 metres), thermal expansion must be accommodated. Aluminium expands approximately 1.2mm per metre over a 50-degree temperature swing. If a 6-metre run of aluminium angle is fixed rigidly at both ends, it will buckle in hot weather or pull the fixings out in cold weather. The solution is to slot the fixing holes at one end (allowing the angle to slide on the bolt as it expands and contracts) or to leave a small gap at joints. This principle applies to all aluminium building products, from angle trims to fascia boards and drip trims.
Using the Wrong Bolt Grade
Standard zinc-plated bolts (Grade 4.6) are adequate for light loads and indoor applications. For structural joints and outdoor use, high-tensile bolts (Grade 8.8 for steel, Grade A4–80 stainless steel for aluminium and external work) provide the clamping force and corrosion resistance needed for long-term reliability. Using weak bolts on a heavy-duty joint is a recipe for failure.
Mixing Metals Without Isolation
Bolting a galvanised steel angle to an aluminium component without an isolating washer or barrier creates a galvanic couple that will cause accelerated corrosion at the junction. Always use nylon or plastic isolation washers between dissimilar metals, or specify all components in the same material. This is particularly important in roofline and building envelope applications where the concealed brackets and the visible products must be metallurgically compatible.
Not Deburring Cut Edges
Every cut and every drilled hole produces a burr: a thin, sharp ridge of metal on the exit side. Burrs prevent surfaces from sitting flat against each other, reduce the clamping force of bolted joints, and create sharp edges that can cut hands during assembly. Deburring with a file, a countersink bit, or a deburring tool takes seconds per edge and makes a measurable difference to the strength and safety of the finished assembly.
Overdrilling the Hole
A bolt hole should be just large enough for the bolt to pass through. For a standard M10 bolt, the hole should be 11mm (1mm clearance). If the hole is drilled oversize (13mm or 14mm), the bolt cannot clamp the joint properly because the excess clearance allows the pieces to shift under load. The joint feels loose, looks sloppy, and performs poorly. Measure twice, drill once, and use the correct drill bit for the bolt size.
Finishing Angle Iron for Different Environments
Indoor (Untreated)
For indoor projects in dry, heated environments (workshop shelving, furniture frames, interior brackets), mild steel angle can be left untreated or given a light coat of clear lacquer to prevent surface rust from handling. Aluminium angle can be left in its mill finish (natural silvery-grey) for indoor use without any coating.
Outdoor (Galvanised or Powder Coated)
For outdoor projects, mild steel angle must be protected from corrosion. Hot-dip galvanising provides the most durable protection for structural applications. Powder coating provides both colour and corrosion protection and is the standard for visible applications. Aluminium angle can be used outdoors without any coating (the natural oxide layer protects the metal), but powder coating is recommended for visible applications where colour consistency and a refined appearance are important.
Building Envelope (Aluminium, Powder Coated)
For building envelope applications (fascia support, soffit closers, gutter bracing, coping brackets), aluminium angle with a polyester powder-coated finish is the standard specification. The powder coating provides colour matching with the visible products, and the aluminium substrate provides corrosion resistance and galvanic compatibility with the aluminium fascia, soffit, and gutter components above. Metal Profiles Ltd powder coats all aluminium products in-house at their Chelmsford facility in any RAL or BS colour, ensuring that every angle trim, bracket, and support component matches the visible building envelope products perfectly.
From Workshop Angle Iron to Architectural Aluminium
The skills and principles of working with angle iron, cutting accurately, drilling precisely, joining securely, finishing appropriately, are the same skills that apply to every formed aluminium profile used in modern building construction. A fascia board is a folded angle. A coping bracket is a pressed angle. A gutter cross brace is a welded angle. A drip trim is an extended angle with a drip detail. The building envelope is, at its core, an assembly of L-shaped profiles, each performing the same fundamental function as a length of angle iron on a workshop shelf bracket: connecting two surfaces at a right angle and providing the rigidity to hold everything together.
Metal Profiles Ltd manufactures the full range of aluminium building envelope profiles: fascia boards, soffit panels, copings, box gutters, downpipes, and drip trims. Every one of these products is, at its heart, a precision-formed aluminium angle, and every one benefits from the same quality principles that make a good workshop angle iron joint: accurate dimensions, clean edges, secure fixings, and the right finish for the environment.
Wrapping Up
Angle iron is the most versatile profile in any workshop or building site. It frames shelves, braces gates, supports benches, protects corners, and holds the building envelope together. The techniques for working with it, clean cuts, precise holes, secure joints, and appropriate finishes, are fundamental skills that every builder, fabricator, and serious DIYer should master.
Whether you are bolting together a storage rack in the garage, welding a frame for a garden gate, or specifying the aluminium angle profiles that support a commercial roofline, the principles are the same. Measure accurately. Cut cleanly. Drill precisely. Join securely. Finish appropriately. And choose the right material for the job: steel where strength and cost are the priorities, aluminium where corrosion resistance, light weight, and colour matching matter.
Angle iron has been doing its job for over a century. It will be doing it for the next century too. Learn to work with it well, and you have a skill that applies to every project, from the simplest shelf bracket to the most complex building facade.
Frequently Asked Questions
What is the best tool for cutting angle iron at home?
For most home workshop projects, an angle grinder with a thin metal cutting disc (1mm to 1.6mm) is the fastest and most versatile option. For cleaner, more accurate cuts, a metal-cutting mitre saw (chop saw) with a carbide-tipped blade is ideal, particularly if you are making multiple cuts at the same angle. For occasional, one-off cuts where noise and sparks are a concern, a hacksaw with a fine-toothed blade (18 to 24 TPI) works well, although it is slower. Always clamp the angle securely before cutting.
Can I use angle iron for outdoor projects without treating it?
If the angle iron is mild steel, no. Untreated mild steel will begin to rust within days of outdoor exposure in UK conditions. For outdoor use, choose galvanised steel angle (which has a protective zinc coating), powder-coated steel angle (which has a coloured protective finish), or aluminium angle (which is naturally corrosion-resistant without any coating). For the most durable outdoor solution, hot-dip galvanised steel or mill-finish aluminium are the standard choices.
How do I join angle iron without welding?
The most common non-welding method is bolting. Drill matching holes through both pieces at the joint, insert a bolt through both holes, add a washer and nut, and tighten. Use high-tensile bolts (Grade 8.8 for steel, stainless steel for aluminium and external use) with washers on both sides. For lighter applications, pop rivets provide a fast, permanent joint without the need for access to the back side of the workpiece. For non-structural applications, structural adhesive can bond angle iron without any holes or fasteners.
What size angle iron do I need for a workshop shelf?
For light to moderate loads (books, small tools, boxes), 25mm x 25mm x 3mm aluminium or 30mm x 30mm x 3mm mild steel angle is sufficient. For heavier loads (power tools, paint tins, hardware), increase to 40mm x 40mm x 5mm mild steel. The shelf brackets should be spaced at no more than 600mm centres for timber or plywood shelves, and the vertical leg of the bracket should be fixed to the wall with appropriate fixings (masonry anchors for brick, frame fixings for timber stud walls).
Is aluminium angle iron as easy to work with as steel?
Aluminium is generally easier to work with than steel for most operations. It is softer, so it cuts faster and drills more easily. It is lighter, so it is easier to handle and position. And it does not produce sparks when cut, which is a safety advantage. However, aluminium is more prone to clogging saw blades (use a non-ferrous blade and cutting lubricant), it requires TIG welding rather than MIG (a more skilled process), and it is more susceptible to denting from impact. For most DIY and light construction projects, aluminium angle is actually easier and more pleasant to work with than steel.
Further Reading
For more detail on working with angle iron and formed aluminium profiles, the following resources are recommended:
Metal Profiles Ltd — Guide to the benefits of aluminium fascia and soffit systems, showing how formed aluminium angle profiles are used throughout the building envelope: metal-profiles.co.uk
Metal Profiles Ltd — Guide to how fascia and soffit profiles work together at the eaves, demonstrating the practical application of L-shaped aluminium profiles in roofline construction: metal-profiles.co.uk
메타데이터
- post_id
- be81f4e0d2a2
- slug
- angle-iron-projects-how-to-cut-join-and-build-with-the-most-versatile-profile-in-your-workshop-be81f4e0d2a2
- url
- https://medium.com/@metalprofilesltduk/angle-iron-projects-how-to-cut-join-and-build-with-the-most-versatile-profile-in-your-workshop-be81f4e0d2a2
- canonical_url
- https://medium.com/@metalprofilesltduk/angle-iron-projects-how-to-cut-join-and-build-with-the-most-versatile-profile-in-your-workshop-be81f4e0d2a2
- author_url
- https://medium.com/@metalprofilesltduk
- status
- ok
- fetched_at
- 2026-08-10 10:00:18
