Step-by-Step Guide to Running Background Jobs in .NET Core using Hangfire
These days, on the internet, user attention is like gold — expensive and hard to get. People don’t care about how many steps your system…
Step-by-Step Guide to Running Background Jobs in .NET Core using Hangfire
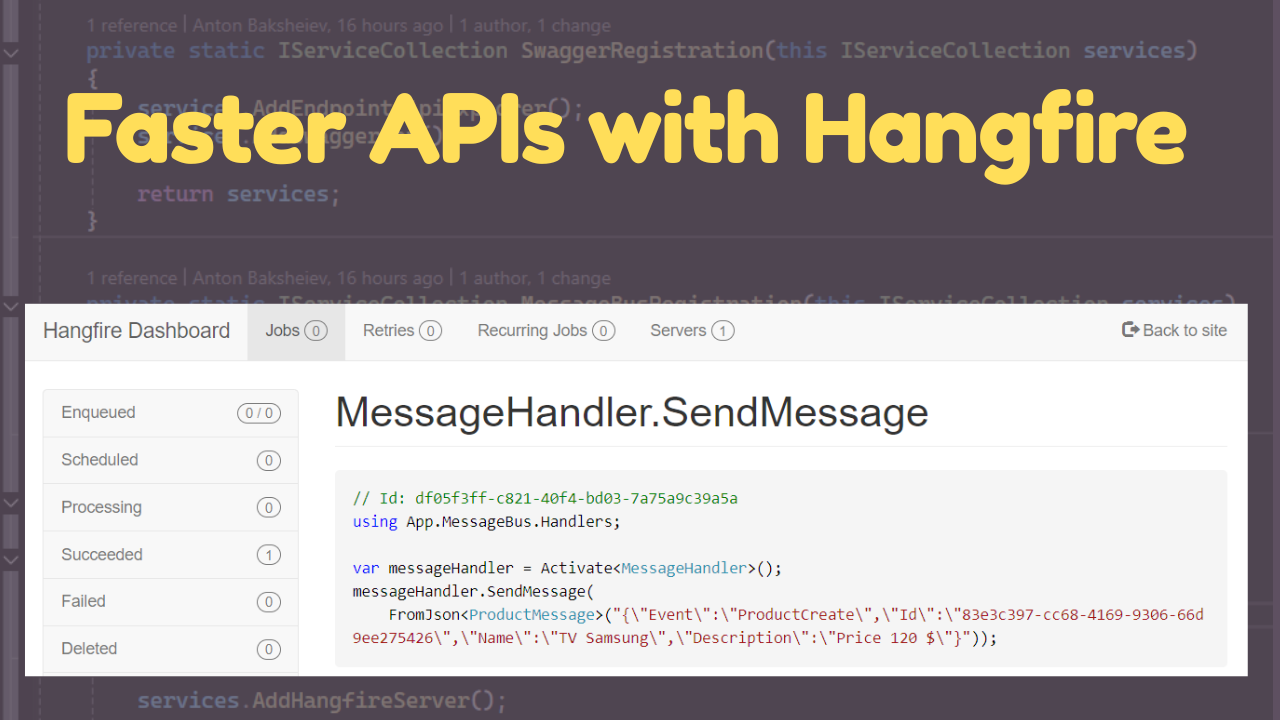
In one of our systems, a simple DELETE request was taking up to 30 seconds.
The endpoint itself was trivial, but after deleting a product we had to:
- update reports
- send notification emails
- recalculate aggregates in multiple services
Users didn’t wait. They retried requests, refreshed the page, or left — making the situation even worse.
The problem wasn’t the business logic itself, but the fact that all this work was executed synchronously inside the API request.
In this article, I’ll show how we solved this problem using Hangfire in .NET: by returning a response immediately and moving heavy operations to background jobs.
💻 Full source code: **GitHub Repository ▶️ Video tutorial: [Watch on YouTube](https://www.youtube.com/watch?v=kjyolqGLdE8)**
Why Hangfire? And When It’s Not the Right Choice
Hangfire is a solid choice when you need to execute background work reliably without introducing unnecessary complexity into your system. It fits especially well in scenarios where background jobs are tightly coupled to your API and don’t require full-blown distributed messaging infrastructure.
When Hangfire Works Well
Hangfire is a good fit when:
- You want to offload long-running or blocking operations from an API request
- Background tasks are triggered directly by user actions
- You need retries, persistence, and monitoring out of the box
- You want a simple operational model with minimal infrastructure
- Jobs can be executed independently and don’t require strict ordering
Typical examples include:
- Sending emails or notifications
- Updating reports or projections
- Recalculating aggregates
- Running cleanup or maintenance tasks
In these cases, Hangfire allows you to keep your API responsive while maintaining reliability and visibility through its dashboard.
A Real Example — Deleting a Product
Let’s say our app has a “Delete Product” feature. Sounds simple, right? The user clicks Delete, and the product disappears. But in reality, there might be a lot going on behind the scenes after that click:
- Updating reports
- Sending notification emails
- Recalculating totals in various places
In some cases, all those operations combined might take 30 seconds or more.
Now, here’s the problem — users will never wait that long. If your API endpoint takes 30 seconds to return, they’ll think something went wrong and either retry (making it worse) or just leave.
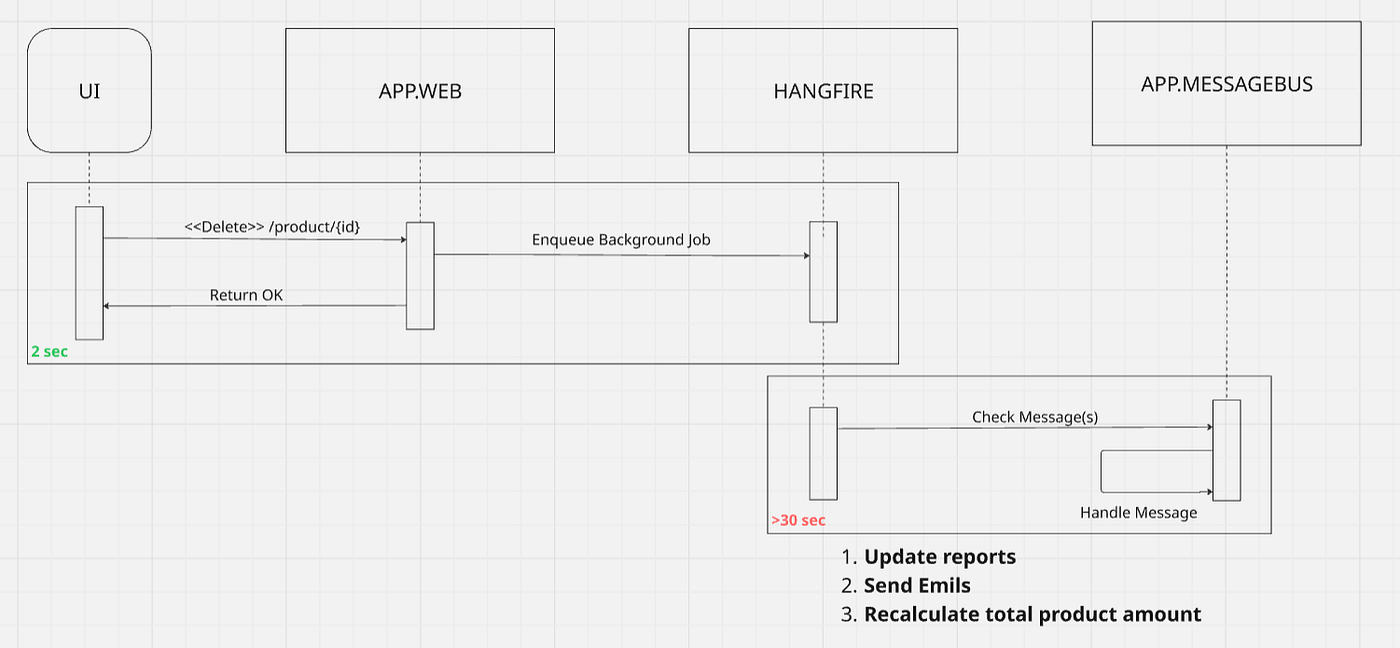
This is where Hangfire is a lifesaver. Instead of making the user wait, your API can:
- Receive the DELETE request
- Enqueue a background job in Hangfire with all the heavy-lifting work
- Return OK to the user within ~2 seconds
Then, Hangfire takes care of processing the rest in the background, without blocking the user.
How it looks in flow:
- UI → API: User clicks delete
- API → Hangfire: Queue a background job
- API → UI: Respond immediately with OK (2 seconds)
- Hangfire → Background Worker: Process the actual deletion steps
- Background Worker → Message Bus: Trigger additional actions like report updates, sending emails, and recalculating totals (>30 seconds)
Delete Product
1. Let’s start from the beginning — NuGet packages
First, add the required packages to your project:
dotnet add package Hangfire
dotnet add package Hangfire.AspNetCore
dotnet add package Hangfire.MemoryStorage
2. Register the initial setup
Database registration:
services.AddHangfire(config =>
        {
            config.UseMemoryStorage();
        });
In a real-world application, you’d register a proper database (SQL Server, PostgreSQL, etc.). For testing purposes, I’m using
MemoryStorage— it’s enough to get started quickly. Keep in mind that it doesn’t store history, so every time you restart the application, the storage will be empty.
Register the background service:
services.AddHangfireServer(); 3. Configure the Hangfire dashboard
app.UseHangfireDashboard("/hangfire");And that’s it — with these steps, Hangfire will be up and running in your project. You’ll be able to enqueue background jobs and monitor them in the dashboard. This setup is perfect for quickly prototyping or learning how Hangfire works.
4. How to enqueue message in hangfire and hadle it.
as for now we have eco system to put message that are proccessed asynchronizaly, lets do
BackgroundJob.Enqueue(
                () => messageHandler.SendMessage(ProductMessage.Create(name, description)
            )
        );
This lines directly says to hangfire:
“Hey, run the
SendMessagemethod onmessageHandler, and pass it aProductMessagecontaining thenameanddescriptionI’ve just provided.”
When Hangfire calls BackgroundJob.Enqueue, it doesn’t execute SendMessage immediately in the current thread. Instead, it stores the job information in its internal storage (usually a database) and lets a background worker pick it up and run it separately. This means your API can return a response to the user almost instantly, without waiting for the message to be processed.
In short: this one-liner is a neat way to do heavy or time-consuming work without making the user wait.
Thank you for reading! I hope you found this article helpful. If you have any questions, suggestions, or would like to discuss further, feel free to connect with me on LinkedIn. If you have any tips, experiences, or thoughts to add, I’d love to hear them in the comments below. Let’s keep the conversation going!
메타데이터
- post_id
- bfc4e4da88a9
- slug
- step-by-step-guide-to-running-background-jobs-in-net-core-using-hangfire-bfc4e4da88a9
- url
- https://itnext.io/step-by-step-guide-to-running-background-jobs-in-net-core-using-hangfire-bfc4e4da88a9
- canonical_url
- https://itnext.io/step-by-step-guide-to-running-background-jobs-in-net-core-using-hangfire-bfc4e4da88a9
- author_url
- https://medium.com/@anton.baksheiev
- status
- ok
- fetched_at
- 2026-07-13 06:23:13