OAuth 1.0 Authorization Flow Using Flickr API and Postman(3-Legged OAuth)
While technically outdated, OAuth 1.0 is still around and older applications still it. In this short tutorial, I wanted to show you how to…
OAuth 1.0 Authorization Flow Using Flickr API and Postman(3-Legged OAuth)
While technically outdated, OAuth 1.0 is still around and older applications still use it. In this short tutorial, I wanted to show you how to get an OAuth 1.0 flow to run in Postman.
Prerequisites
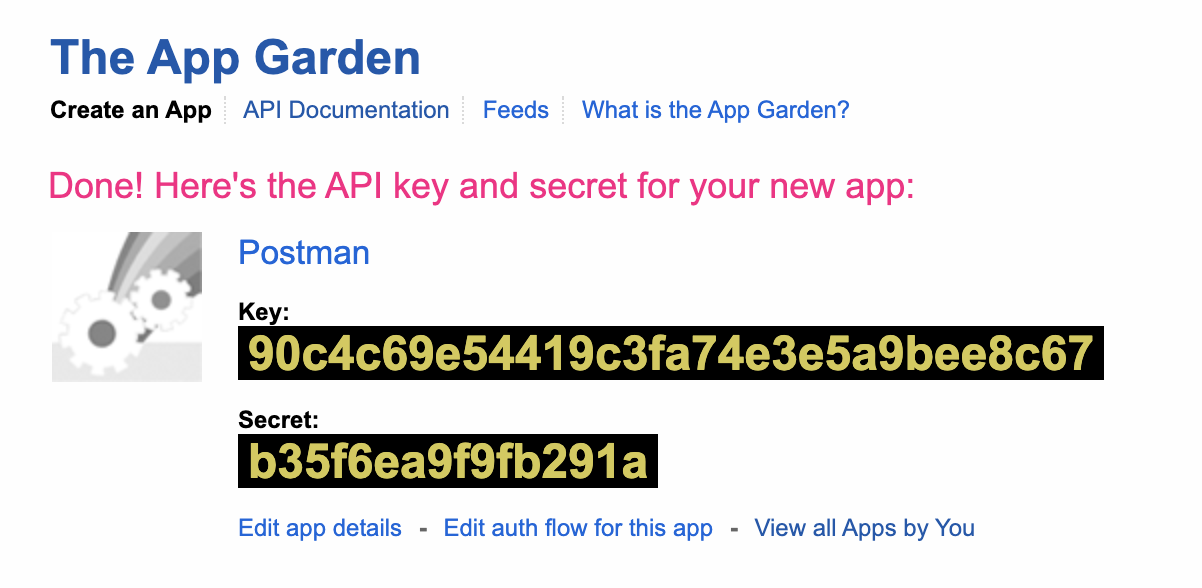
Make sure you have the consumer key and secret
-
- Open the Flickr API documentation
Overview
As you can notice from the very nice image in the documentation, there are three steps we need to perform, before we can actually use the API. These steps are:
- Getting a Request Token
- Getting the User Authorization
- Exchanging the Request Token for an Access Token
So let’s take them one by one.
Step 1 — Getting a Request Token
This is the first step in the OAuth 1.0 flow. Using your consumer key, you are requesting a Request Token which you will later exchange for an Access Token, as soon as the user has given permission.
The endpoint that you need to use is:
https://www.flickr.com/services/oauth/request_tokenSo open Postman and put that in the address. Additionally, click on the tab Authorization, select OAuth 1.0, and fill in the fields Consumer Key and Consumer Secret with the key and secret you’ve got when creating the app.

OAuth 1.0 configuration in Postman.
If you submit the request as it is, most likely you will get the error:
oauth_problem=parameter_absent&oauth_parameters_absent=oauth_callbackThis means that the oauth_callback parameter has not been provided but it is required.
Unfortunately, Postman does not have a field for the callback URL (the URL where the user is going after giving access to your app). So we have to add this manually form the Params tab. Set the value to http://example.com for now.

Postman does not have a callback URL field (oauth_callback) so we have to do this manually
Now the request should return a 200 OK status code with a response body similar to this:

Notice that now we have a Request Token
👉 Subscribe to the ***Testing and automation with Valentine*** newsletter for bi-weekly tutorials, tips, and news from the industry.
Step 2— Getting the User Authorization
This is the step where the user has to confirm that he/she wants to allow your application (in this case Postman) to access their account information.
The endpoint for this action is:
https://www.flickr.com/services/oauth/authorizeThis request does not need any additional authorization, only a query parameter called oauth_token, which is the exact token you have received in the second step.
So the URL will look like this:
https://www.flickr.com/services/oauth/authorize?oauth_token=72157714121474431-eadbb7c8b59cbee5Unfortunately, you cannot do this step directly from Postman (as you can with OAuth 2.0). Open this URL in a browser and log in to any Flickr account. You will get this screen asking you to confirm you are giving access to the application you have configured.
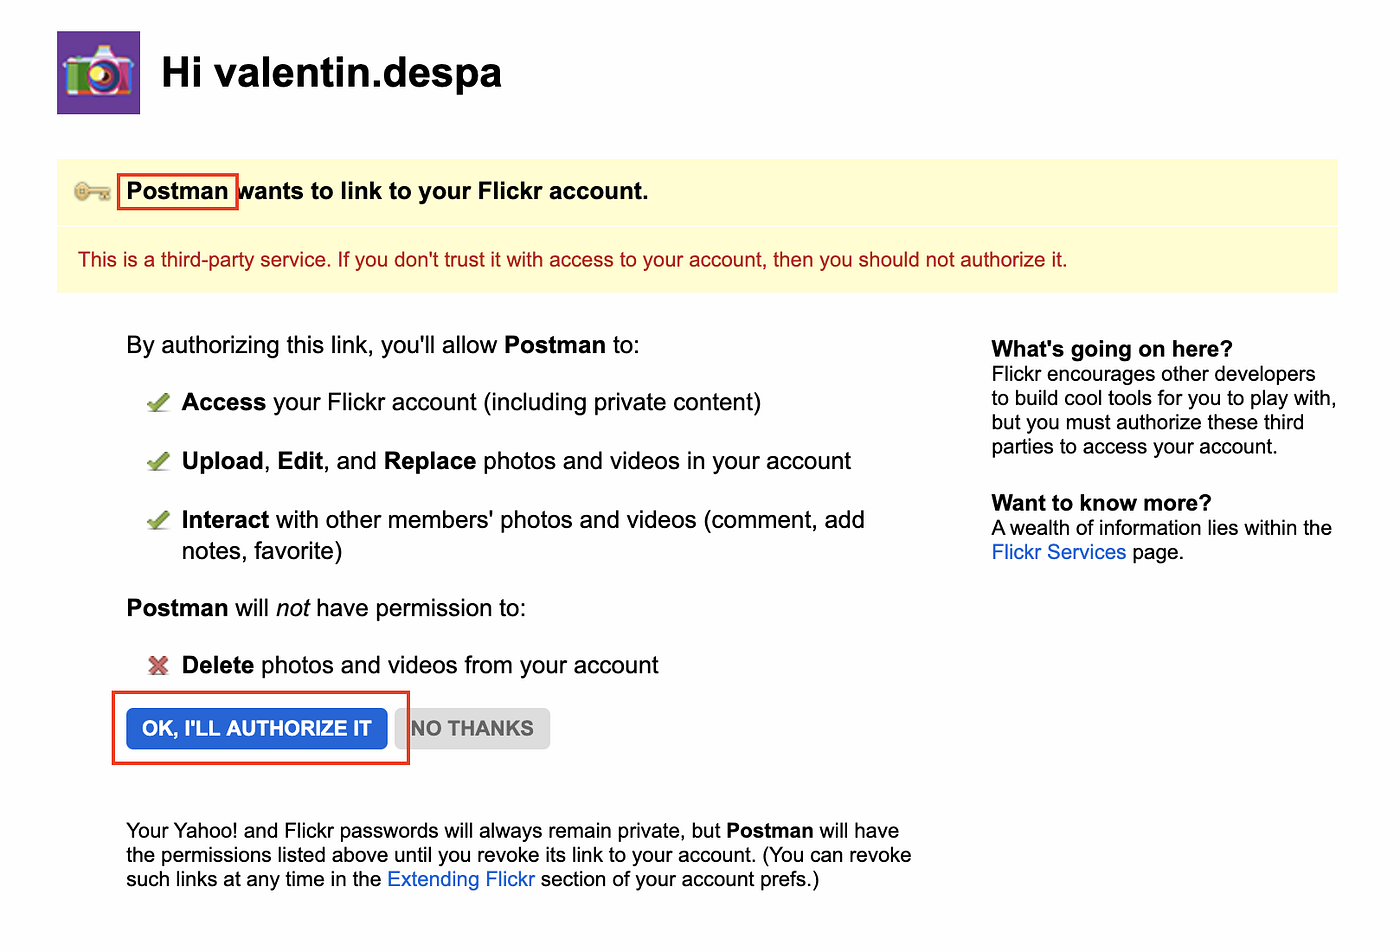
The user is asked to confirm that he/she is given access to the application
If the user clicks on OK, Flickr will redirect the user to the callback URL that was configured in the first request (Step 1 — Getting a Request Token).

The oauth_token remains the same but now we also have a piece of new information, the oauth_verifier which we will use in the 3rd step.
Step 3— Exchanging the Request Token for an Access Token
In the previous step, we have obtained the users' permission and now we can go ahead and exchange the request token for an access token that will allow us to make API requests.
The endpoint for this action is:
https://www.flickr.com/services/oauth/access_tokenThe Consumer Key and the Consumer Secret will stay the same as before. Now you need to add two additional pieces of information that you have got from the first step: the Access Token and the Token Secret.
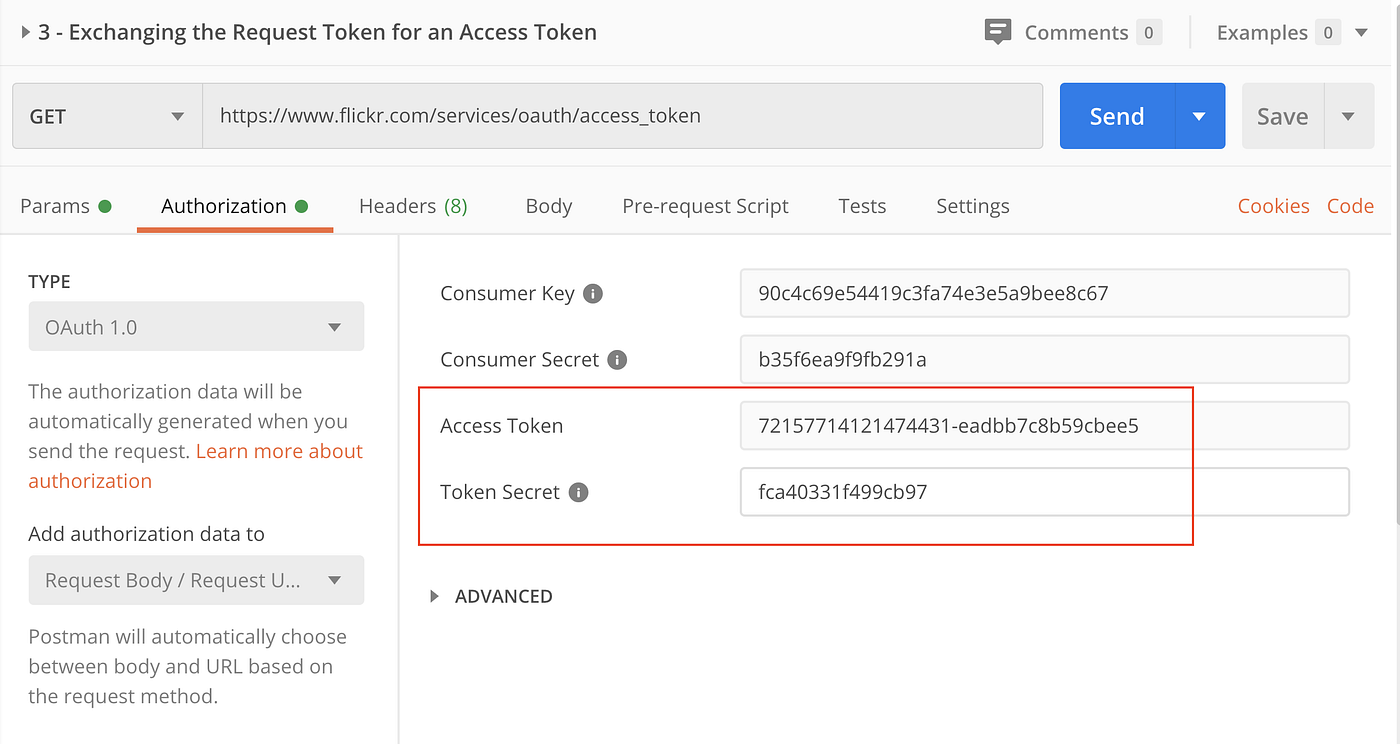
The next error you will encounter is:
oauth_problem=verifier_invalidThis is because Flickr expects you to send the oauth_verifier you have received through the callback URL.
Again, unfortunately, Postman does not have a configuration for the oauth_verifier, so we have to manually add a query parameter called oauth_verifier with the respective value from the callback URL from step 2.

Manually adding the oauth_verifier query parameter in Postman.
Now we finally have an access token and the secret that can be used in other requests.

Step 4: Verifying the access token
Use the following endpoint to check if the access token works.
https://www.flickr.com/services/rest?nojsoncallback=1&format=json&method=flickr.test.loginConfigure the authorization in Postman using the new access token and secret you have gotten in the third step.
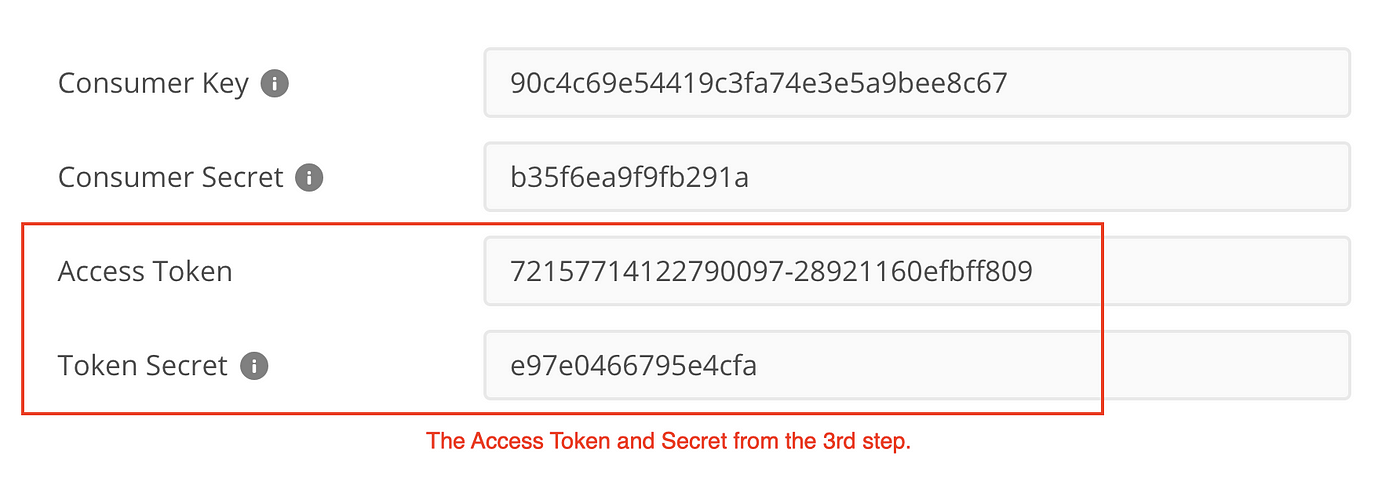
And if everything works as expected, you should get the details of the user.

Troubleshooting
The most common error I encountered while working with the Flickr API was a complaint about an invalid signature (signature_invalid):
oauth_problem=signature_invalid&debug_sbs= ...Sometimes you need to retry the exact same request a few times until the Flickr API agrees with you. I don’t know why this works like this.
Conclusion
I hope this tutorial helped you get started with performing an OAuth 1.0 authorization flow in Postman. Leave a comment in the section below if you have any questions. I would love to hear from you!
Thank you for sticking with this article until the end. If you enjoyed it, please leave a comment, share, and press that 👏 a few times (up to 50 times). It will help others discover this information and maybe it will help someone else as well.
Follow me on Medium and YouTube if you’re interested in more tutorials like this one.
Want to learn more about Postman?
I am not only writing posts but I am also an online instructor. So if you are interested in learning more about Postman, maybe you want to take a look at my **Postman: The Complete Guide to REST API Testing** online course.
메타데이터
- post_id
- c2a9b46bd8b9
- slug
- oauth-1-0-authorization-flow-using-flickr-api-and-postman-3-legged-oauth-c2a9b46bd8b9
- url
- https://medium.com/apis-with-valentine/oauth-1-0-authorization-flow-using-flickr-api-and-postman-3-legged-oauth-c2a9b46bd8b9
- canonical_url
- https://medium.com/apis-with-valentine/oauth-1-0-authorization-flow-using-flickr-api-and-postman-3-legged-oauth-c2a9b46bd8b9
- author_url
- https://medium.com/@vdespa
- status
- ok
- fetched_at
- 2026-07-29 03:06:21