How to use an ESP32-C6 as a Zigbee Coordinator for a Button
Zigbee buttons are available in many colors, shapes, sizes, and with a wide range of functions. They offer an elegant way to control other…
How to use an ESP32-C6 as a Zigbee Coordinator for a Button
Zigbee buttons are available in many colors, shapes, sizes, and with a wide range of functions. They offer an elegant way to control other devices with a simple click, without the need for wired connections, and are also relatively inexpensive. In this tutorial, I’ll show you a very simple way to detect button clicks using a Zigbee coordinator based on an ESP32-C6 microcontroller.
From a purely technical point of view, our buttons are “half” switches, because although they do not react to any switching commands (i.e., turning the lamp on or off), they do send their current “switching state” (i.e., that they have been pressed) back to the coordinator.
If you followed a previous tutorial (“**How to use an ESP32-C6 as Zigbee Coordinator or End Device for a switch or Light**”) you already know a lot about the technical data. Since we need to use a suitable Zigbee coordinator class in the Arduino Zigbee environment, I’ll use the sketch already presented in the aforementioned tutorial for the initial tests (Esp32_C6_Zigbee_On_Off_Switch_OLED_v01).
Topics of this tutorial
- Technical Environment
- Zigbee basics
- Usage of the Esp32_C6_Zigbee_On_Off_Switch_OLED_v01 sketch
- Usage of the Esp32_C6_Zigbee_Button_Switch_OLED_v01 sketch
- Summary
Technical Environment
For this tutorial, you should use Arduino IDE version 2.3.7 or later with ESP32 boards version 3.3.7 or later. In addition to an ESP32-C6 board with at least 8 MB of RAM, a commercial Zigbee button is required.
Zigbee basics
In addition to the tutorial listed above, “**How to use an ESP32-C6 as Zigbee Coordinator or End Device for a switch or Light”, I strongly recommend the overview tutorial “[How to use an ESP32-C6 as Zigbee Coordinator or End Device (overview)](https://medium.com/@androidcrypto/how-to-use-an-esp32-c6-as-zigbee-coordinator-or-end-device-overview-e70cfa7f45f9)**”, because in this tutorial I don’t want to repeat all the basic facts again.
Usage of the Esp32_C6_Zigbee_On_Off_Switch_OLED_v01 sketch
After uploading the file and running the sketch, the first step is a (one-time) bounding, which is started by pressing and holding the internal button for approximately 6 seconds. I’m referring to the pairing button that usually only becomes visible after opening the battery cover (above the battery in the image). Pressing and holding the actual (large) button will not initiate the pairing process.

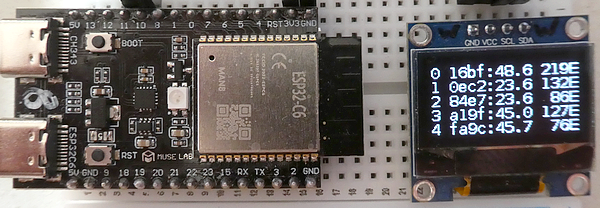
You will probably see the manufacturer and model name on the display. The Serial Monitor displays the same information, for example:
Light manufacturer: _TZ3000_b4awzgct
Light model: TS0041
After pressing the button, these lines (possibly multiple times) appear in the Serial Monitor:
[ 36386][D][ZigbeeCore.cpp:473] zb_apsde_data_indication_handler():
  APSDE INDICATION - Received APSDE-DATA indication, status: 0
[ 36387][D][ZigbeeCore.cpp:474] zb_apsde_data_indication_handler():
  APSDE INDICATION - dst_endpoint: 5, src_endpoint: 1, dst_addr_mode: 255,
  src_addr_mode: 0, cluster_id: 0x0006, asdu_length: 8
[ 36388][D][ZigbeeCore.cpp:478] zb_apsde_data_indication_handler():
  APSDE INDICATION - dst_short_addr: 0x0000, src_short_addr: 0xcbef,
  profile_id: 0x0104, security_status: 0, lqi: 163, rx_time: 0
[ 36389][V][ZigbeeHandlers.cpp:150] zb_cmd_read_attr_resp_handler():
  Read attribute response: from address(0xcbef) src endpoint(1) to
  dst endpoint(5) cluster(0x6)
[ 36390][V][ZigbeeHandlers.cpp:159] zb_cmd_read_attr_resp_handler():
  Read attribute response: status(0), cluster(0x6), attribute(0x0),
  type(0x10), value(0)
The cluster 0x0006h, which is the standard cluster for an on/off switch, appears in several places. The reference to “ZigbeeHandlers.cpp” in conjunction with “zb_apsde_data_indication_handler()” clearly indicates that an attribute has been received but not yet evaluated programmatically.

At this point, we cannot proceed further with this sketch and therefore turn to the specialized sketch for a button:
Usage of the Esp32_C6_Zigbee_Button_Switch_OLED_v01 sketch
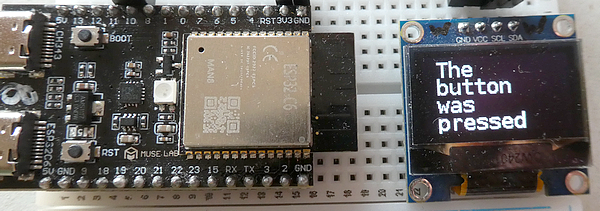
In this sketch, I’ve removed all the components needed to actuate a switch and focused on displaying a message after the button is pressed.

There was a simple reason why the previous sketch didn’t display anything, even though our program received a message from the button. This is the beginning of the callback:
static void onLightStateChange(bool state) {
  if (state != light_state) {
    light_state = state;
    Serial.printf("Light state changed to %d\r\n", state);
    onboardLedFlashBlue(1, 125); // flash the LED
    ...
  }
}
When we display the result of the “state” variable, we only see “false” as the value. However, since the default is also “false”, there is no change and therefore no feedback to the display. In the button sketch, the callback is implemented as follows:
static void onLightStateChange(bool state) {
  onboardLedFlashGreen(1, 125); // flash the LED
  if (state) {
    Serial.println("Received onLightStateChange state: true");
  } else {
    Serial.println("Received onLightStateChange state: false");
  }
  lastButtonPressDisplayMillis = millis();
  isButtonPress = true;
}
Within the callback, the green LED is made to blink and the variable “isButtonPress” is set to “true”. Within the loop() function, the variable is checked and the corresponding message appears on the display for one second.
However, there’s another stumbling block stemming from the Zigbee stack running in the background. Incoming messages are only forwarded if the switch’s status is actively queried regularly (“getLightState()”). This query is handled by a “periodicTask” that checks the status every second. Since the button itself returns to sleep mode after a message is sent, it naturally doesn’t respond to further requests. However, the first click of the button triggers the Zigbee stack to forward the messages to our Switch class.
At this point, I would like to draw your attention to the RGB blink code, which informs you about events in addition to the display:
  RGB LED flashing code

- during setup():
  Green: start of sketch
  Red:   Zigbee coordinator starting failure
  White: Device is bounded
  Blue:  The 'zbSwitch.getLightState()' was fired

- during loop():
  Green: received switch status change
  Blue:  The 'zbSwitch.getLightState()' was fired (optional)
An important note regarding so-called “scene” buttons: these are advertised as being able to distinguish between a single click, a double click, and a sustained click (lasting 3 seconds), and forward the corresponding information to the coordinator. This works flawlessly with the manufacturer’s own gateways, clouds, and apps, and the three states can also be recognized when using home automation systems. Unfortunately, this is different when using Arduino ESP32 Zigbee, as the Zigbee stack, while receiving the data, does not (yet?) forward it to the user. This means that even if you have a button with these capabilities, I haven’t found a way to process them.
Summary
With just a few lines of programming, you can receive and react to a simple click on a Zigbee button using an ESP32-C6 Zigbee coordinator.
Source code of the app
You find the complete code of the apps and additional material in my GitHub repository “**ESP32_C6_Zigbee_Coordinator**”.
Happy coding!
메타데이터
- post_id
- c2e2a767b7bb
- slug
- how-to-use-an-esp32-c6-as-a-zigbee-coordinator-for-a-button-c2e2a767b7bb
- url
- https://medium.com/@androidcrypto/how-to-use-an-esp32-c6-as-a-zigbee-coordinator-for-a-button-c2e2a767b7bb
- canonical_url
- https://medium.com/@androidcrypto/how-to-use-an-esp32-c6-as-a-zigbee-coordinator-for-a-button-c2e2a767b7bb
- author_url
- https://medium.com/@androidcrypto
- status
- ok
- fetched_at
- 2026-07-11 05:46:21