Deploy and Configure a WordPress Site Using EC2 and RDS
Create RDS Database
Deploy and Configure a WordPress Site Using EC2 and RDS
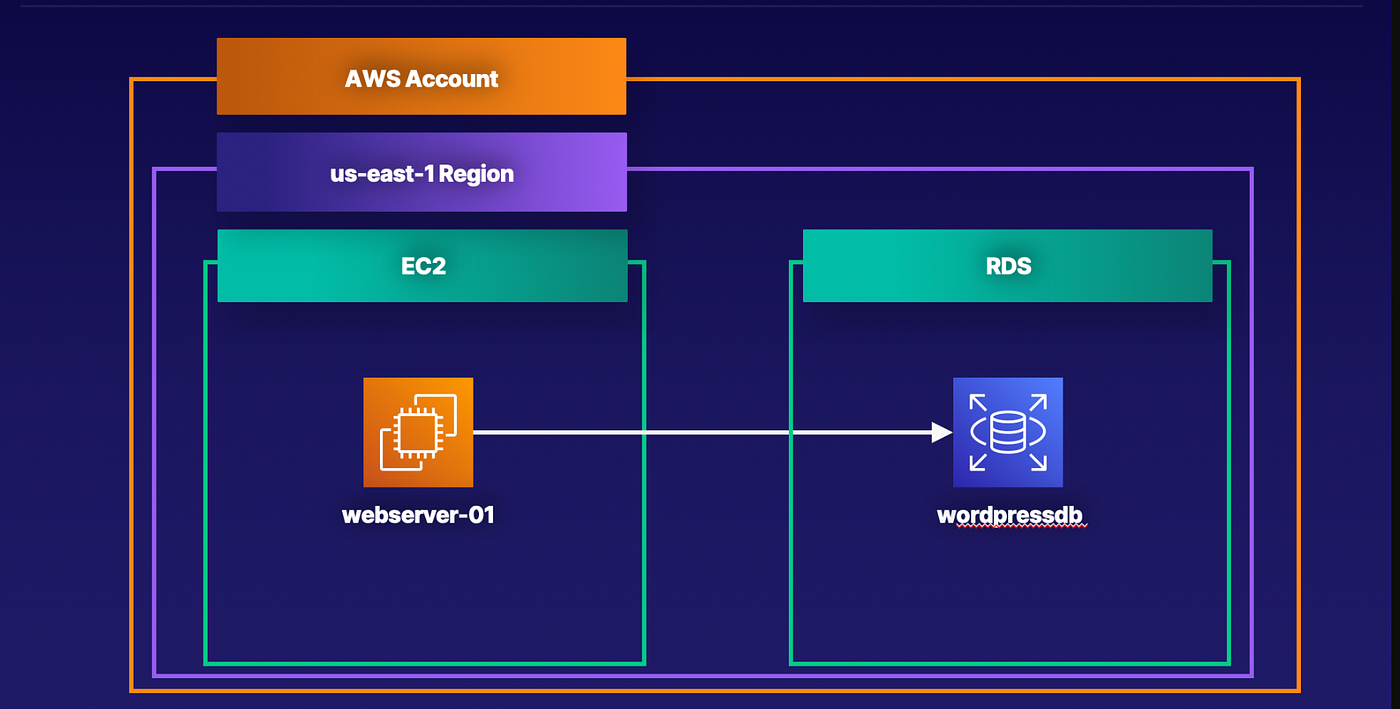
Create RDS Database
Using the AWS console, create an RDS database with the following configurations:
- Choose a database creation method:
Standard create - Engine options:
MySQL

- Edition:
MySQL Community - Version:
The current version - Templates:
Free tier

- DB instance class:
db.t3.micro - DB instance identifier:
wordpress - Master username:
wordpress - Master password:
wordpress

- Availability zone:
us-east-1a - Select the non-default security group and remove the default security group.
- Expand the Additional configuration section and, under Initial database name, enter
wordpress.

Guide to Set Up EC2 Instance webserver-01
1. Launching an EC2 Instance
Access the AWS Management Console:
- Navigate to EC2 from the list of AWS services.
- Click on “Launch Instance”:
- Find the Launch Instance button under the Instances section.
- Configure the Instance:
- Name: Enter
webserver-01as the instance name. - AMI Selection: Choose an Amazon Machine Image, such as Amazon Linux 2 or Ubuntu.
- Instance Type: Select t3.micro (free-tier eligible).
- Set Up Key Pair:
- Choose an existing key pair or create a new one for secure SSH access.
- Network Settings:
- VPC and Subnet: Use the default VPC and select a public subnet.
- Security Group:
- Create a new security group or modify an existing one to include these inbound rules:
- SSH (Port 22): Allows secure remote access.
- Protocol: TCP
- Port Range: 22
- Source: My IP (for your machine only) or Anywhere (0.0.0.0/0 for global access).
- HTTP (Port 80): Allows web traffic to the server.
- Protocol: TCP
- Port Range: 80
- Source: Anywhere (0.0.0.0/0 for IPv4, ::/0 for IPv6).
- Storage Configuration:
- Use default settings (8 GiB of EBS storage for free-tier eligible instances).
2. Launch the Instance
- Review your settings and click Launch Instance. Wait for the instance to initialize.

3.Install Apache and Dependencies
Connect to your Cloud Server webserver-01 and perform the following tasks:
- Use the apt command to install:
apache2libapache2-mod-phpphp-mysql

- Move the
/wordpressfolder into your/var/wwwdirectory - Move your
/var/www/wordpress/000-default.conffile to/etc/apache2/sites-enabled/

- Restart
apache2ctl

4. Configure WordPress
Configure wp-config.php to connect to the RDS database we created.
- Edit your
/var/www/wordpress/wp-config.phpfile and replace'localhost'by your own RDS endpoint on the linedefine('DB_HOST', 'localhost');

- Save and close the file
5. Modify Security Groups
Modify your non-default security group to allow the EC2 instance to connect to the MySQL/Aurora RDS database.
6. Complete Wordpress Installation and Test
Visit the website using EC2 instance(webserver-01) public ip and complete the installation, ensuring the website can be visited and the WordPress portal works.
Use the following information for the WordPress installation page:
- Site Title:
Awosome - Username: wordpress
- Password: Select a strong password and copy it to your clipboard for later.
- Your Email:
test@example.com

Click Install wordpress

Conclusion
In this process, we set up a MySQL database on AWS RDS, configured the necessary permissions, and connected WordPress to the database. After ensuring that the database existed, we resolved common issues like permission errors and missing databases. By updating the wp-config.php file, restarting services, and verifying security configurations, the WordPress site should now be fully functional. The process highlights the importance of proper configuration and security practices to ensure smooth communication between WordPress and the MySQL database on AWS RDS.
FAQs
1. What if the wordpress database is still not showing after creation?
- Ensure that the
wordpressuser has the necessary privileges to access and modify the database. Use theGRANT ALL PRIVILEGES ON wordpress.* TO 'wordpress'@'%'command followed byFLUSH PRIVILEGES. Double-check that you're connected to the correct RDS instance and that the database name is consistent.
2. How can I confirm that the database was successfully created?
- You can verify the creation of the database by running the
SHOW DATABASES;command in MySQL. If thewordpressdatabase is not listed, attempt to recreate it, ensuring the correct privileges are granted to thewordpressuser.
3. What should I do if WordPress can’t connect to the database?
- Check that the database connection details in your
wp-config.phpfile are accurate. Confirm that the RDS instance's endpoint, username, password, and database name are correct. Also, ensure that your security group settings allow traffic on port 3306 from the EC2 instance.
4. How do I finalize the WordPress setup after configuring the database?
- Once the database is configured, visit your WordPress site’s URL to complete the installation. During setup, you’ll configure site settings, including the site title, username, password, and email.
5. How can I secure my RDS MySQL database?
- To enhance security, ensure that only authorized users and IP addresses can access your database. Use encrypted connections, regularly audit logs, and consider setting up VPCs or additional security measures like IAM roles for tighter access control.
6. Can I use a different database engine with WordPress?
- Although MySQL is the most common database engine for WordPress, you can use MariaDB, which is fully compatible with WordPress. Just ensure that the necessary configurations are updated in the
wp-config.phpfile to match the chosen engine.
메타데이터
- post_id
- c3b8110292c6
- slug
- deploy-and-configure-a-wordpress-site-using-ec2-and-rds-c3b8110292c6
- url
- https://medium.com/@bilal325/deploy-and-configure-a-wordpress-site-using-ec2-and-rds-c3b8110292c6
- canonical_url
- https://medium.com/@bilal325/deploy-and-configure-a-wordpress-site-using-ec2-and-rds-c3b8110292c6
- author_url
- https://medium.com/@bilal325
- status
- ok
- fetched_at
- 2026-07-21 10:10:43