Build Your Own glTF Viewer with Three.js
For those new to glTF, it’s basically the JPEG of 3D models — a compact, standardized format that makes 3D assets fast to load and easy to…
Build Your Own glTF Viewer with Three.js
For those new to glTF, it’s basically the JPEG of 3D models — a compact, standardized format that makes 3D assets fast to load and easy to display on the web. It supports textures, animations, and modern materials, so your 3D models look great without weighing down your site.
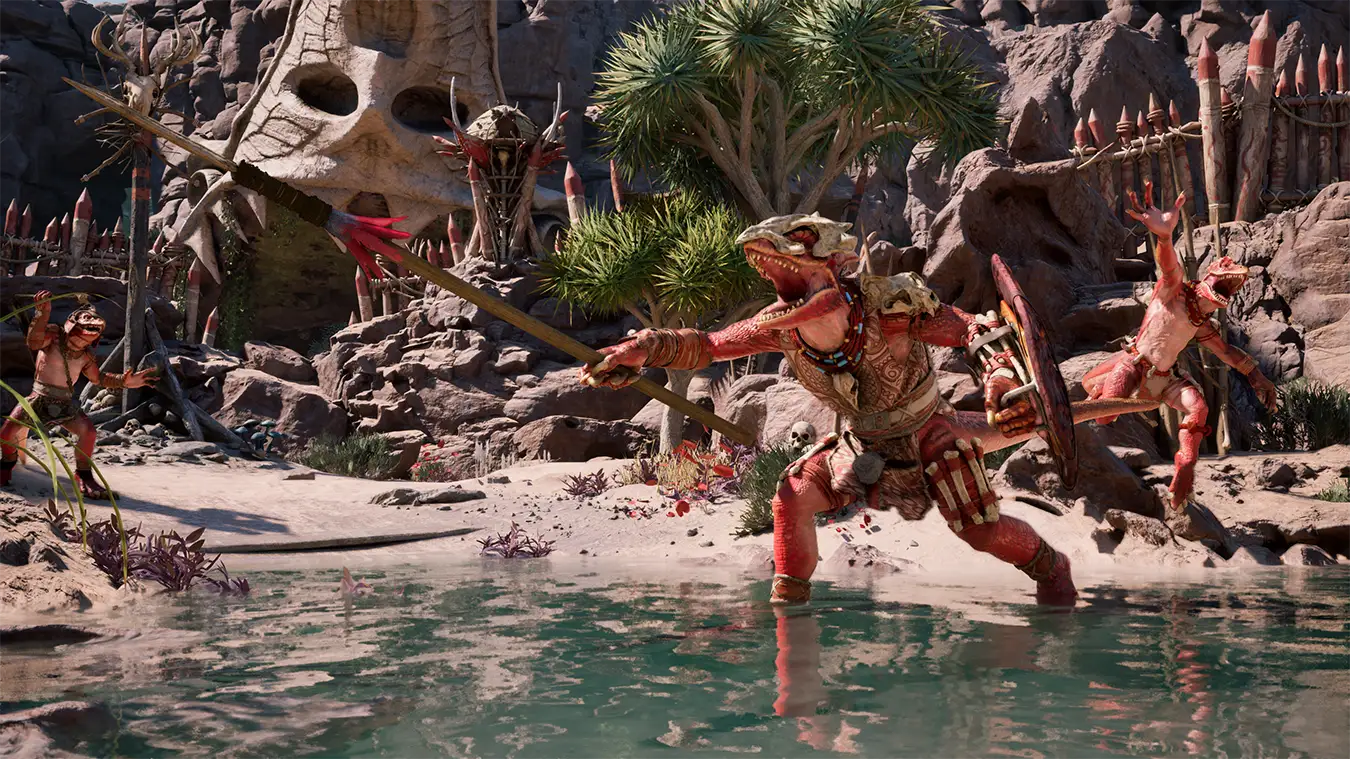
Avowed Xaurip Spear (https://avowed.obsidian.net/#media)
We’re going to take some glTF models and build our own interactive viewer with Three.js — so you can show 3D content on a website just as easily as you’d drop in an image.
Before we start experimenting with glTF viewers in Three.js, you might want to check out my previous posts: “Which Is Easier for Rendering GLB Models: Three.js or Babylon.js?” and “Loading a 3D Model in the Browser Using JavaScript FileReader”. Those articles cover the basics of loading 3D files and comparing rendering engines, which will give you some helpful background as we dive into building our own glTF viewer.
After comparing, I found that Babylon.js is actually easier to use and requires less code, but Three.js gives me more control, which lets me build a glTF viewer that’s more user-friendly. That’s why I decided to use Three.js to create this web-based glTF viewer.
The first thing I had to figure out was how to get a .gltf or .glb file into the browser so I could render it. As I explained in my previous post, “Loading a 3D Model in the Browser Using JavaScript FileReader”, I can use JavaScript’s FileReader for this.
Building the Viewer Core
With the FileReader handling the file upload, the next step is bringing that data into a 3D environment. To do this, I used Three.js to build a scene that acts like a virtual stage, a camera to act as our eyes, and a renderer to draw everything onto the screen.
Setting the Scene
This block creates the “world” where your 3D models live.
const scene = new THREE.Scene();
scene.background = new THREE.Color(0x121212);

const camera = new THREE.PerspectiveCamera(45, window.innerWidth / window.innerHeight, 0.1, 1000);
camera.position.set(0, 1.5, 12);

const renderer = new THREE.WebGLRenderer({ antialias: true });
renderer.setSize(window.innerWidth, window.innerHeight);
document.body.appendChild(renderer.domElement);

controls = new OrbitControls(camera, renderer.domElement);
controls.enableDamping = true;

// Ensure the camera is looking at the center of the scene (or slightly below)
controls.target.set(0, 1.5, 0);
controls.update(); // Required after manually changing camera/target
The Scene
The Scene is your virtual stage. We set the background to a dark color to make the models pop.
The Camera
The PerspectiveCamera mimics the human eye—objects get smaller as they move further away, which makes the 3D space feel real.
The Renderer
This is the engine that draws the pixels. Enabling antialias ensures that the edges of your models are smooth and crisp, rather than "jaggy."
Lighting and Interaction
Without light, 3D objects are just black silhouettes. Without controls, you can’t explore the model.
scene.add(new THREE.AmbientLight(0xffffff, 1.5));

const light = new THREE.DirectionalLight(0xffffff, 2);
light.position.set(5, 10, 7.5);
scene.add(light);
const controls = new OrbitControls(camera, renderer.domElement);
controls.enableDamping = true;
The Lights
I used two types: AmbientLight provides a soft glow so no part of the model is pitch black, and DirectionalLight acts like the sun to create depth, shadows, and highlights.
The Controls
OrbitControls allows the user to rotate the model by dragging and zoom in with the scroll wheel. enableDamping adds a bit of "inertia," making the movement feel smooth and professional.
The GLTFLoader and Auto-Centering
This part takes the raw file data and turns it into a visible object, ensuring it’s positioned correctly.
const loader = new GLTFLoader();

loader.parse(result, '', (gltf) => {
    currentModel = gltf.scene;
    scene.add(currentModel);
    // Center and scale model automatically
    const box = new THREE.Box3().setFromObject(currentModel);
    const center = box.getCenter(new THREE.Vector3());
    currentModel.position.sub(center);
});
The Loader
The GLTFLoader is the translator. It takes the binary data from the FileReader and builds a Three.js group of meshes.
The Bounding Box logic
Because every 3D model is built at a different scale or offset, I used Box3 to measure the model's physical dimensions. By calculating the center and subtracting it from the model's position, the code ensures the object always appears in the middle of the screen.
Bringing it to Life with Animations
glTF models often come with built-in movements. This logic detects them and lets the user play them.
if (animations.length > 0) {
    mixer = new THREE.AnimationMixer(currentModel);
    const action = mixer.clipAction(animations[0]);
    action.play();
}
The Animation Mixer
Think of the AnimationMixer as a digital DJ. It coordinates all the moving parts (the "bones") of the model according to the clock.
ClipAction
This represents a specific movement. If the loader finds animations, it creates a “player” for them and starts the first one automatically.
The Render Loop
3D isn’t a static image; it’s a series of frames updated so fast it looks like video.
const clock = new THREE.Clock();

function animate() {
    requestAnimationFrame(animate);

    if (mixer) mixer.update(clock.getDelta());
    controls.update();
    renderer.render(scene, camera);
}
The Loop
requestAnimationFrame tells the browser to run this function roughly 60 times every second. When we talk about “60 times every second,” we are describing the FPS (Frames Per Second).
Updating State
In every single frame, we tell the mixer (for movement) and controls (for mouse dragging) how much time has passed using the clock. Finally, renderer.render draws the updated view of the stage through the camera lens.
The UI Development Part
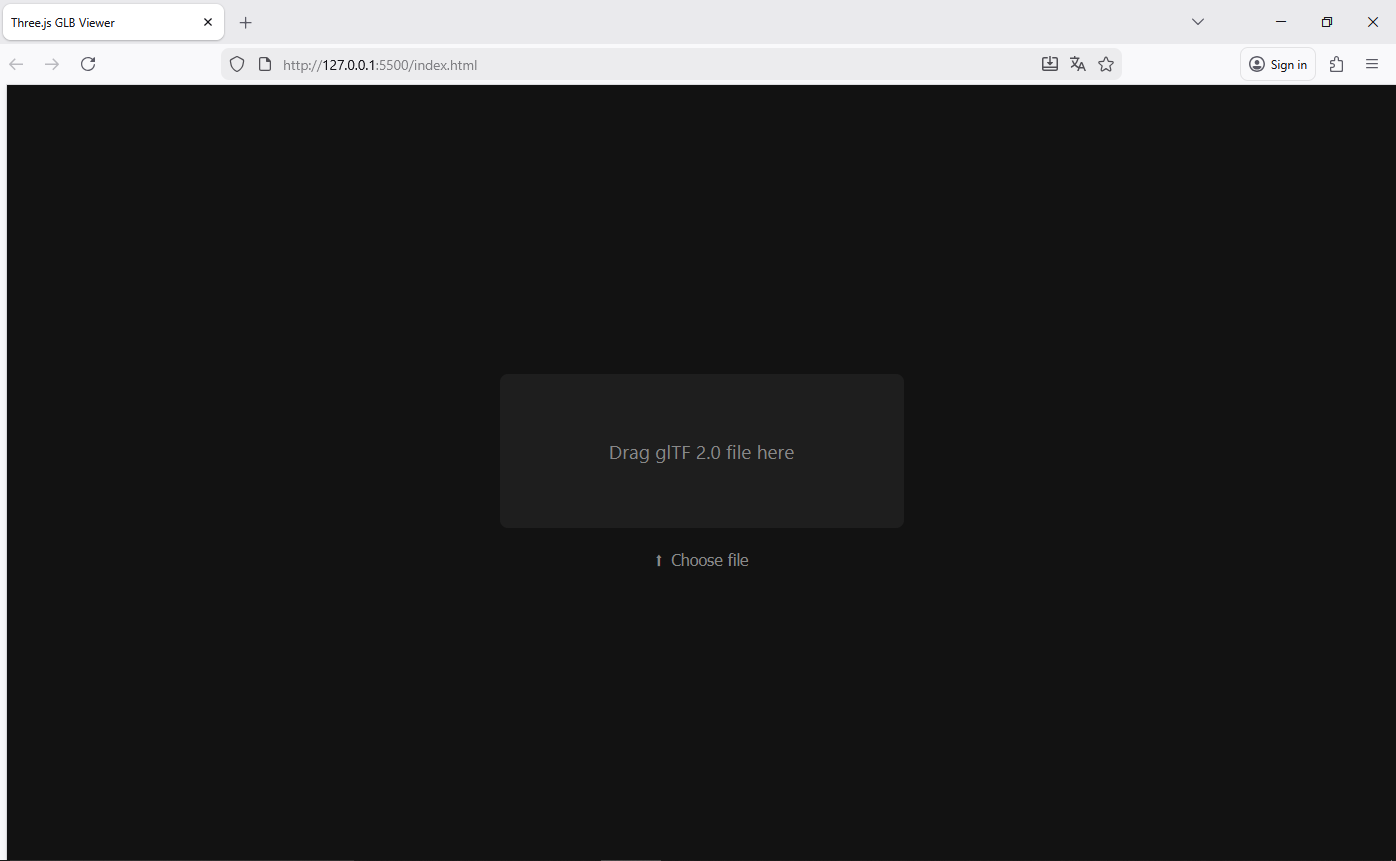
After dealing with JavaScript, let’s move on to the CSS and HTML sections. We made the UI simple, where the user is given the option to drag a glTF file or open a folder here.
The CSS code:
<style>
    html, body { width: 100%; height: 100%; margin: 0; overflow: hidden; font-family: 'Segoe UI', Tahoma, Geneva, Verdana, sans-serif; background-color: #121212; }
    canvas { width: 100%; height: 100%; display: block; }

    /* Landing Overlay (Matches your image) */
    #landing-overlay {
        position: fixed;
        top: 0; left: 0;
        width: 100%; height: 100%;
        background-color: #121212;
        display: flex;
        flex-direction: column;
        align-items: center;
        justify-content: center;
        z-index: 100;
        color: #888;
    }

    .drop-box {
        width: 400px;
        height: 150px;
        background: #1e1e1e;
        border-radius: 8px;
        display: flex;
        align-items: center;
        justify-content: center;
        font-size: 1.2rem;
        margin-bottom: 20px;
        border: 2px dashed transparent;
        transition: border 0.3s ease;
    }

    /* Visual feedback when dragging over the window */
    body.drag-active .drop-box {
        border-color: #1a73e8;
        color: #1a73e8;
    }

    .choose-file-btn {
        background: transparent;
        color: #888;
        border: none;
        cursor: pointer;
        display: flex;
        align-items: center;
        gap: 8px;
        font-size: 1rem;
    }
    .choose-file-btn:hover { color: #fff; }

    /* Controls Panel (Hidden until model loads) */
    .controls-panel {
        position: absolute;
        top: 15px; right: 15px;
        z-index: 10;
        display: none; /* Hidden initially */
        flex-direction: column;
        gap: 10px;
        align-items: flex-end;
        background: rgba(255, 255, 255, 0.9);
        padding: 15px;
        border-radius: 8px;
    }

    .anim-section { display: none; flex-direction: column; gap: 5px; border-top: 1px solid #ccc; padding-top: 10px; text-align: right; }
    select { padding: 8px; border-radius: 4px; border: 1px solid #ccc; }
    label { font-size: 11px; color: #555; font-weight: bold; }
  </style>
The HTML code:
<div id="landing-overlay">
    <div class="drop-box">
        Drag glTF 2.0 file here
    </div>
    <button class="choose-file-btn" onclick="document.getElementById('fileInput').click()">
        <span>⬆</span> Choose file
    </button>
</div>

<div class="controls-panel" id="uiPanel">
  <button style="padding: 8px 12px; background: #1a73e8; color: white; border: none; border-radius: 4px; cursor: pointer;" onclick="document.getElementById('fileInput').click()">Upload New</button>

  <div id="animContainer" class="anim-section">
    <label for="animSelect">ANIMATIONS</label>
    <select id="animSelect">
      <option value="-1">Static Pose</option>
    </select>
  </div>
</div>
When the user uploads a model with animation data, a dropdown is also shown to select the animation to play or to display the model in a static pose.
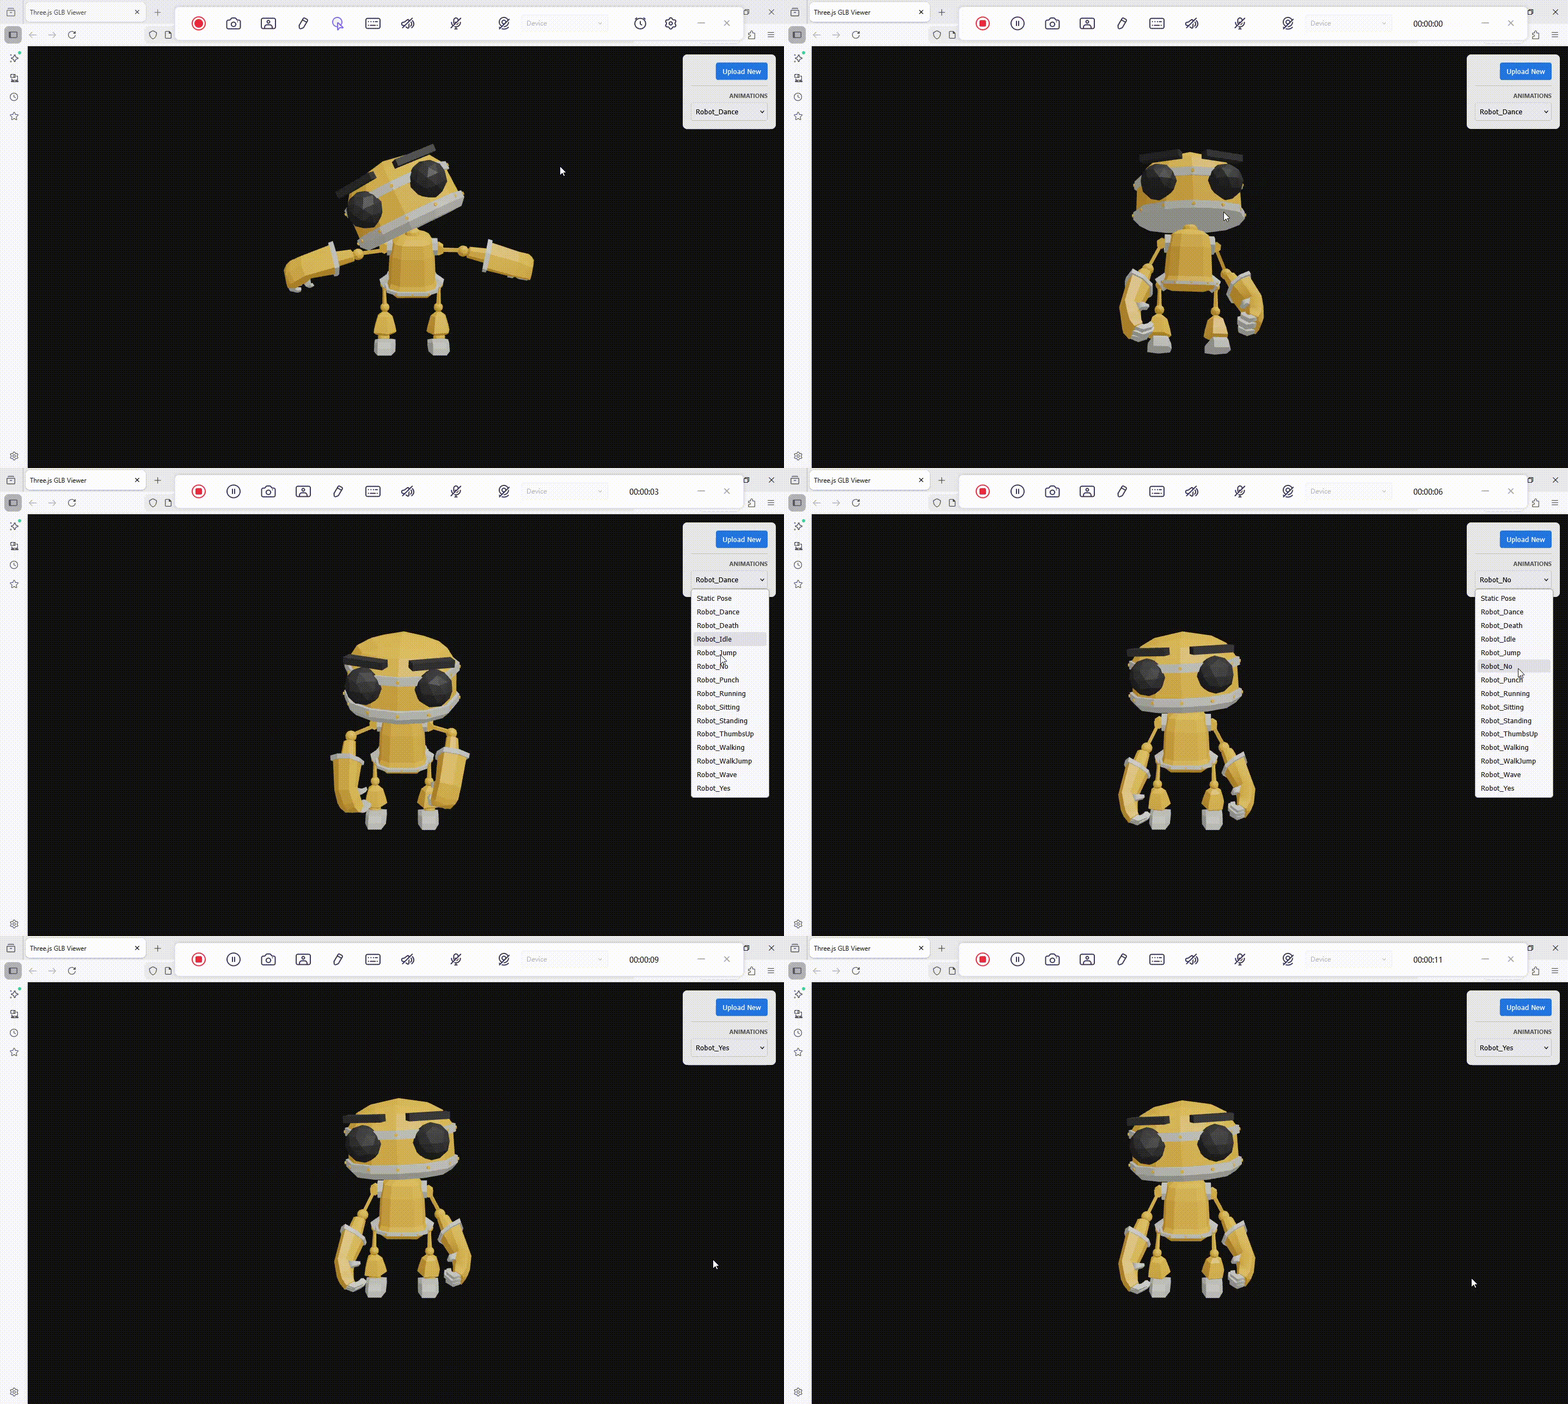
That’s it for now. Maybe you can improve the UI or fix the bug that happens when uploading a model that’s too big or something. Let’s start experimenting and make it better!
Live preview:
[embed]Three.js GLB Viewer Edit descriptionnoryx-studio.github.io
The full source code is available on my **GitHub account**, where you can explore, modify, and experiment.
For more tutorials and code examples, you can follow my GitHub account to keep learning, building your own projects, and supporting me!
Thank you for reading!
If you have any questions, feel free to ask — I’d be happy to explain more.
메타데이터
- post_id
- c7bf4bbdce0a
- slug
- build-your-own-gltf-viewer-with-three-js-c7bf4bbdce0a
- url
- https://javascript.plainenglish.io/build-your-own-gltf-viewer-with-three-js-c7bf4bbdce0a
- canonical_url
- https://javascript.plainenglish.io/build-your-own-gltf-viewer-with-three-js-c7bf4bbdce0a
- author_url
- https://medium.com/@noryx
- status
- ok
- fetched_at
- 2026-06-17 08:20:12