Valuable Basics for Your Home Assistant Smart Home
What really mattered to me after one year of daily use
Valuable Basics for Your Home Assistant Smart Home
After describing in the previous articles how smart actuators can be retrofitted cleanly and why I chose Home Assistant as my central system, I’d now like to share some valuable basics and a few of my learnings from one year of using Home Assistant in everyday life.
This article is therefore not a step-by-step guide or a tutorial. Instead, it’s a collection of points that have proven especially valuable for me in practice and that have made my smart home stable, maintainable, and truly usable on a daily basis.
Essential: HACS
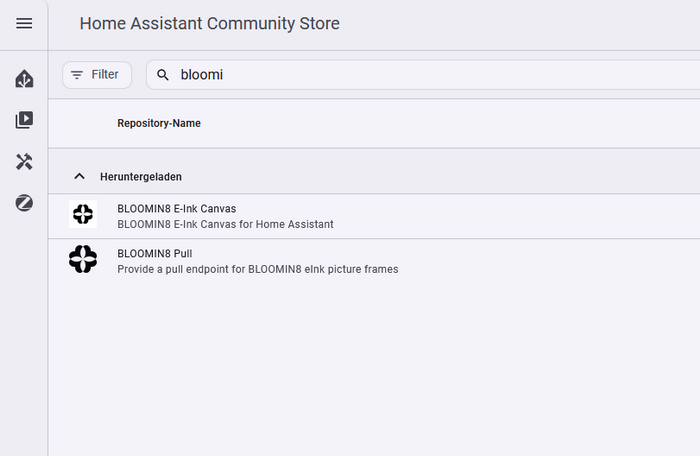
Without the Home Assistant Community Store (HACS), you won’t get very far. HACS allows you to conveniently install and update custom integrations, frontend extensions, and themes. It is so well established that virtually every relevant community integration is available there.
In short: if someone develops for Home Assistant, the integration is usually available via HACS.
HACS is set up in minutes and requires no further attention after that. A good introductory tutorial can be found here: https://www.youtube.com/watch?v=RozGUafkges
Voice Control: Integrating Alexa Properly

Voice control is an essential part of my setup. I use Alexa at home, which integrates well with Home Assistant.
Option 1: Home Assistant Cloud (paid)
A convenient and reliable solution is the Home Assistant Cloud. It also provides remote access and cloud backups and supports the continued development of Home Assistant. The downside is the monthly subscription fee.
Option 2: Home Assistant Matter Hub (local, free)
Another good and stable solution is the locally operated, free [Home Assistant Matter Hub](https://github.com/ RiDDiX/home-assistant-matter-hub) by developer RiDDiX. It allows Home Assistant devices to be exposed to Alexa via Matter — without any cloud dependency. A good tutorial can be found here: https://www.youtube.com/watch?v=yOkPzEzuVhM

Within Matter Hub, you work with entity filters to define which devices Alexa is allowed to see. I created a label called matterhub and assigned it to all entities I want to control via Alexa.

This way, you can control almost anything connected to Home Assistant via Alexa — even if no Alexa skill exists for it. For example, I made my car’s climate control, a fan, and even my “find my phone” function voice-controllable.
Using Rooms in Alexa

In the Alexa app, you can create arbitrary rooms and assign smart home devices to them. For example, if you create a room called “Bedroom” and assign the ceiling light and bedside lamps to it, you can simply say: “Alexa, turn on the bedroom light.”
Use the names you naturally use in everyday life — this makes the system immediately intuitive.
Two ideas:
- If you create a room called “House” and link either all lights or a corresponding Home Assistant group (more on that shortly), you can say: “Alexa, turn off the lights in the house.” Very handy when leaving home.
- “Alexa, turn on the basement light” switches on our entire basement floor. This is practical when you’re carrying something and don’t have a free hand for light switches.
Consistent Naming for Smart Actuators
I found it very helpful to use a consistent and intuitive naming scheme for devices I wanted to control by voice. For lights, my system is object name + “light”, for example:
- “Kitchen light”
- “Bedroom light”
- “Desk light”
- “Mirror light”
This really pays off. Only a smart home that is intuitive and easy to use is enjoyable. My family uses our smart home with virtually no learning curve, simply by following what feels natural to say: “Alexa, turn on the kids’ room light?” “Oh wow, that works!”
Backups: Mandatory, Regular, External

Home Assistant runs extremely stable for me. Still, especially during the setup phase, when experimenting or adding new integrations, things can go wrong.
That’s why I use the following simple strategy:
- Daily automatic backups
- Retention for three days, then automatic deletion — I use Home Assistant daily, so I notice issues quickly
- Additional cloud backups to stay safe in case of hardware failure
Home Assistant already provides almost everything you need: https://my.home-assistant.io/redirect/backup/
To back up directly from Home Assistant to the cloud, you can use options such as:
- OneDrive: https://www.home-assistant.io/integrations/onedrive/
- Google Drive: https://community.home-assistant.io/t/google-integration-driving-me-nuts-help-need-step-by-step-guide-for-google-drive-calendar-integration-new-ui/845571/4
Looks Matter: Use Themes

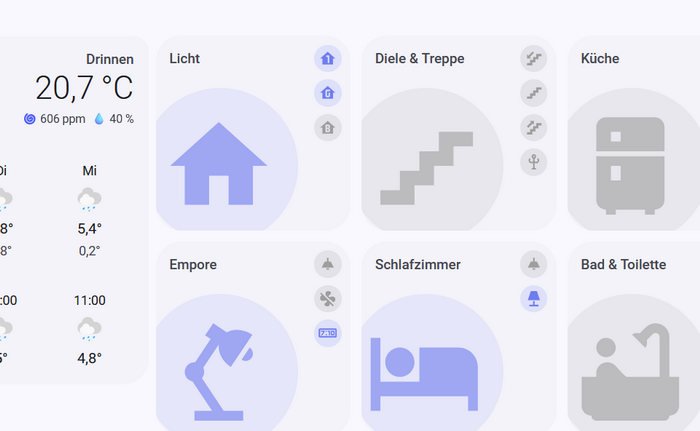
Part of my Material You-themed dashboard
If you don’t like Home Assistant’s default look, try themes. It’s quick to set up and makes a surprisingly big difference in everyday use.
A good overview of setup and current themes can be found here: https://www.youtube.com/watch?v=QYpSWaO_meQ
I personally use Material You, a pleasant theme inspired by Google’s Android design. It integrates very well and offers extensive customization options: https://github.com/Nerwyn/material-you-theme
Tips for Everyday Work with Home Assistant
Beyond the basics, there are a few small things that make daily work with Home Assistant much easier.
Use Quick Navigation
Home Assistant has deep menu structures. Since release 2025.1, you can reach almost everything much faster using Ctrl + K and the built-in search.
Once you get used to it, you won’t want to go back.
Back Up Dashboards Externally
Regularly save your dashboards outside of Home Assistant. There’s so much work in dashboards that it’s absolutely worth it.

How to do it:
- Open the dashboard
- Click “Edit dashboard” (pencil icon)
- Menu (three dots) → “Raw configuration editor”
- Copy the YAML code and save it externally, for example as a text file on your computer
Even better: store your dashboard in a code repository, for example using Git on https://github.com/. This makes it easy to revert to earlier versions.
Structure from the Very Beginning

Part of my areas
From the start, work consistently with:
- Areas (rooms) and floors
- Labels
- Groups
This not only improves clarity but also makes automations much easier later on.
Practical tip: create “House & Garden” as a separate floor and further subdivide outdoor areas (garage, garden, entrance).
When to Use Labels, When to Use Groups

Labels are tools for organization and abstraction. You can access them via Ctrl + K and then “Labels”.
Groups, on the other hand, are active building blocks in the system. You can switch them, query their state, and use them as triggers. Groups can only be created via the File Editor (Ctrl + K → File Editor → folder icon → groups.yaml).
Examples:
- All entities I want to expose to Alexa have the label
matterhub, making them easy to find - Battery sensors have the label
battery, allowing me to quickly get an overview of charge levels for all battery-powered devices - Lights in a room are grouped into a group, for example
group.bedroomfor the ceiling light and bedside lamps. This lets me switch them on/off together and display their combined state as a single button.
Declutter Dashboards

My current default dashboard
Almost everyone makes the same mistake at the beginning: showing too much information at once.
The new default dashboards in Home Assistant already help a lot: https://my.home-assistant.io/redirect/lovelace_dashboards/
This question helped me most:
Do I really need to see this information all the time — or is a notification enough when it becomes relevant?
Example: I don’t need to permanently see my printer’s ink level. A notification below 20% is perfectly sufficient.
Be Careful with Event-Based Automations
If you build automations based on events (for example, a Zigbee button press), make sure to handle states like unknown, unavailable, or none.
Otherwise, after restarts you may see “mysterious” behavior, such as lights turning on unexpectedly.
Example template:
{{ trigger.from_state is not none and
   trigger.from_state.state not in ['unknown', 'unavailable'] }}
Conclusion
These points may seem unspectacular. That’s exactly why they are often overlooked. For me, however, they were crucial in ensuring that Home Assistant doesn’t just work — but truly proves itself in everyday life.
In the next articles, I’ll share some of my more specific setups and automations. eInk Photo Frames from BLOOMIN8 and paperlesspaper is one of them.
메타데이터
- post_id
- c9133ea8a754
- slug
- valuable-basics-for-your-home-assistant-smart-home-c9133ea8a754
- url
- https://medium.com/@fwmone/valuable-basics-for-your-home-assistant-smart-home-c9133ea8a754
- canonical_url
- https://medium.com/@fwmone/valuable-basics-for-your-home-assistant-smart-home-c9133ea8a754
- author_url
- https://medium.com/@fwmone
- status
- ok
- fetched_at
- 2026-07-14 08:54:03