Bringing the VS Code Remote Experience to Neovim
If you’ve been a long-time Neovim user and often need to develop on remote machines, containers, or devcontainers, you’re probably familiar…
Bringing the VS Code Remote Experience to Neovim

If you’ve been a long-time Neovim user and often need to develop on remote machines, containers, or devcontainers, you’re probably familiar with this sense of fragmentation:
Your local Neovim is smooth, fully configured, and equipped with familiar plugins—but the actual code, dependencies, build environment, and test data live remotely. Running nvim directly over SSH can solve part of the problem, but the remote configuration quickly spirals out of control, requiring you to reinstall plugins and toolchains on every machine. Over time, each machine ends up with its own “Neovim environment from who knows where.”
remote-nvim.nvim aims to solve exactly this: let you keep using Neovim while enjoying a remote development experience close to that of VS Code Remote.
In a nutshell:
remote-nvim.nvimprepares and launches an isolated headless Neovim server on the remote side, while your local Neovim UI connects to it via SSH port forwarding. You see your familiar local Neovim interface, but all editing, LSP, plugins, and commands actually run in the remote project environment.
Project Address
github: https://github.com/fangpin/remote-nvim.nvim
Why You Might Need It
For many teams, the development environment is no longer a simple local directory:
- Deploy agents and development environments in the cloud, directing them to work for you 24/7 from your phone. lark-agent-bridge: https://github.com/fangpin/lark-agent-bridge
- Code lives on a remote large machine, and dependencies are too heavy to install locally.
- Compilation, testing, and data access can only be done on an intranet or a jump box.
- The project runs inside Docker / devcontainer, with the local machine serving only as an entry point.
- Remote machines change frequently, and you don’t want to reconfigure Neovim on each one.
- You want to keep a smooth local UI while having LSP, builds, and file searches close to the real runtime environment.
Traditionally, there are three approaches:
- Directly
ssh remote && nvim. - Mount the remote filesystem locally.
- Switch to VS Code Remote.
Each approach has its own issues. With direct SSH, you need to maintain a full Neovim configuration on the remote side. Mounting the remote filesystem often leads to instability in LSP and file watching. Switching to VS Code means abandoning your carefully honed Neovim workflow.
remote-nvim.nvim positions itself as a more natural choice for Neovim users: keep your editing experience in Neovim, while the runtime environment stays on the remote side.
What Benefits It Brings
▸ 1. Automatic Neovim Setup on the Remote
The remote side doesn’t require you to manually maintain a global Neovim configuration. Plugins can check the remote system and architecture, install or select the appropriate Neovim version, and place related files in their own workspace directory.
This means you can worry less about “Does this machine have nvim?”, “Is the version too old?”, or “Will the configuration affect someone else’s account?”
▸ 2. Local Configuration Can Be Synced to the Remote
You can choose to sync your local Neovim configuration to the remote workspace. The remote runs your Neovim configuration, but files, LSP, and build tools all execute in the remote environment.
For users accustomed to plugins like LazyVim, Telescope, fzf-lua, and nvim-lspconfig, this experience feels very close to “moving your local Neovim to the remote.”
▸ 3. Each Workspace Is Isolated
The plugin does not default to writing to the remote user's global ~/.config/nvim. Instead, it prepares independent XDG directories for each workspace:
~/.remote-nvim/workspaces/<workspace-id>/.config
~/.remote-nvim/workspaces/<workspace-id>/.local/share
~/.remote-nvim/workspaces/<workspace-id>/.local/state
~/.remote-nvim/workspaces/<workspace-id>/.cache
This way, you can safely use it on shared remote accounts, temporary machines, or containers without messing up your environment.
▸ 4. Supports SSH, Docker, Devpod, and Other Entry Points
remote-nvim.nvim is not just an SSH tool. It supports:
- SSH hosts
- Hosts in SSH config
- Docker images
- Docker containers
- Devpod / devcontainer
In other words, it aims to consolidate common remote development entry points into a single Neovim plugin.
▸ 5. Remembers Workspace Settings
Connected workspaces are saved. You can later reconnect by selecting a historical workspace, instead of re-entering the host, port, Neovim version, whether to copy config, and other options each time.
The workspace working directory supports saving the remote project directory. After entering the project root for the first time, subsequent remote Neovim sessions will start directly from this directory.
If the network experiences brief interruptions, you can enable basic auto-reconnect. After an SSH job exits abnormally, the plugin will restart the current workspace according to the configuration, avoiding the need to manually reconnect from scratch each time.
Quick Start Guide
After installing the plugin, you typically start it via the Telescope entry point:
:RemoteStartYou can choose:
- Select a remote host from SSH config.
- Manually enter an SSH connection string.
- Connect to an existing workspace.
- Create a Docker / Devpod / devcontainer workspace.
For SSH scenarios, the first connection will go through the following steps:
- Test the SSH connection.
- Determine the remote system and architecture.
- Select or install Neovim on the remote machine.
- Ask whether to copy the local Neovim configuration.
- Ask for the remote working directory, i.e., the project root.
- Start a headless Neovim on the remote machine.
- Start the local Neovim UI to connect to it.
If you are connecting to a Go project, it is recommended to fill in the project root when prompted, for example:
/home/user/go_repos/src/example.com/team/projectThis way, the remote Neovim will automatically start in the project root directory, and gopls will be more likely to correctly discover go.mod.
A Typical Workflow
Suppose you have a remote development machine called devbox, with the project located at:
/home/user/work/my-serviceYour workflow could be:
- Run
:RemoteStartin your local Neovim. - Select
devboxfrom the SSH config. - On the first connection, fill in the remote working directory:
/home/user/work/my-service. - Choose whether to copy your local Neovim configuration.
- The plugin starts the remote Neovim server and opens the local UI.
- Afterwards, reconnect directly each time via the saved workspace.
From the user's perspective, you are still working in Neovim; but everything closely related to the project, such as LSP, file search, terminal commands, and build tools, is already executed on the remote machine.
How is this different from direct SSH + nvim?
Just SSHing in and running nvim works, but remote-nvim.nvim is more like a workspace manager:
- It automatically prepares the remote Neovim.
- It isolates configuration and plugin data.
- It can copy local configurations.
- It saves workspace history.
- It attempts to auto-reconnect if the connection is unexpectedly interrupted.
- It connects to the remote server via a local UI.
- It unifies entry points for SSH, Docker, Devpod, and more.
More importantly, it reduces the long-term maintenance cost of the remote environment. You don’t need to configure every machine as a complete development environment; you just need the plugin to connect via SSH and have basic dependencies.
Who Is It For?
This plugin is especially suitable for users who:
- Primarily use Neovim, not VS Code.
- Frequently develop on remote Linux machines.
- Depend on remote intranet, data, compilation chains, or larger machine resources for their projects.
- Want isolated, cleanable, and reusable remote Neovim configurations.
- Need to switch between SSH, Docker, and devcontainers.
- Want LSP and toolchains to run in the real project environment.
If you only SSH in occasionally to edit a config file, just ssh && vim is enough. But if remote development is your daily workflow, remote-nvim.nvim is worth trying.
How It Works (In a Nutshell)
To understand the core of this plugin, just remember one sentence:
The local side handles the connection and UI display, while the remote side runs the actual Neovim server.
Here’s roughly how an SSH session starts.
▸ 1. Local Workspace Creation
The plugin records workspace configurations for each remote host, including host, connection options, workspace ID, remote Neovim directory, whether to copy configs, whether to auto-start the client, remote working directory, etc.
These configurations are persisted for reuse in future connections.
▸ 2. Remote Isolated Directory Setup
The plugin creates a dedicated workspace directory on the remote side and sets XDG variables:
XDG_CONFIG_HOME=...
XDG_DATA_HOME=...
XDG_STATE_HOME=...
XDG_CACHE_HOME=...
NVIM_APPNAME=nvim
This ensures the remote Neovim's configurations, plugins, cache, and state are all inside the workspace, without polluting the global environment.
▸ 3. Config Copy and Neovim Installation
The plugin transfers necessary files via rsync or compressed streams. For normal SSH transfers, it uses rsync, which supports incremental syncing and excludes metadata like .git.
If the remote side lacks a suitable Neovim, the plugin copies an installation script and downloads Neovim into the dedicated directory.
▸ 4. Starting the Headless Neovim Server
The remote side starts:
nvim --listen 0.0.0.0:<remote-port> --headlessIf the workspace saves a working directory, it also adds:
--cmd 'cd <working_dir>'This ensures LSP and project tools start from the project root.
▸ 5. SSH Port Forwarding + Local UI
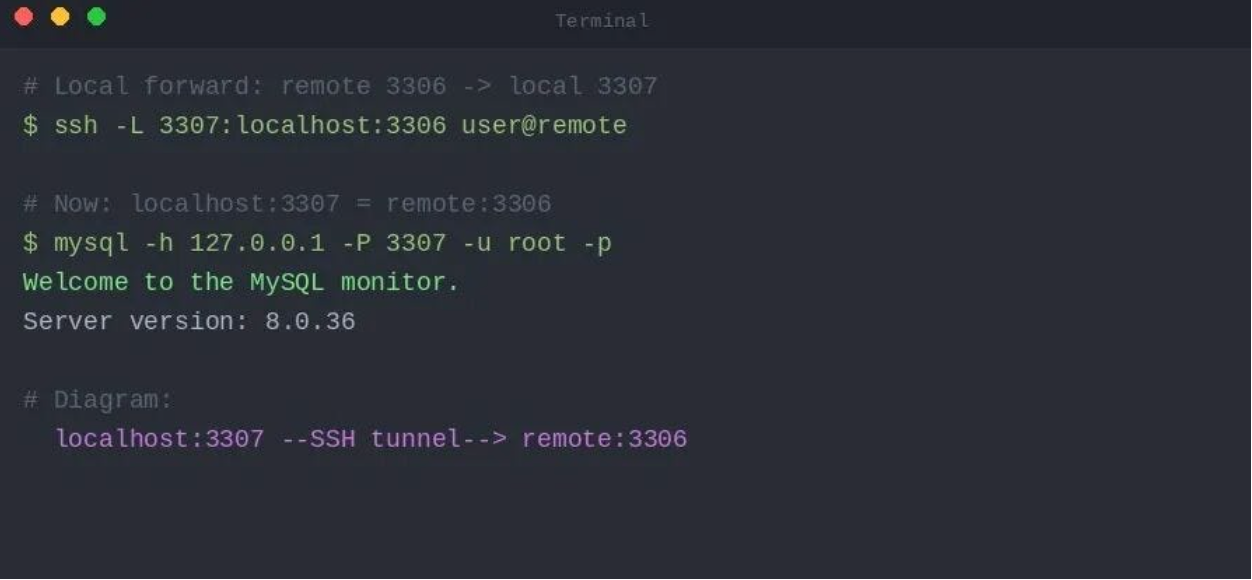
The plugin establishes port forwarding via SSH:
ssh -L <local-port>:localhost:<remote-port> remote-hostThen, it starts locally:
nvim --server localhost:<local-port> --remote-uiThe final effect: the UI is displayed locally, while Neovim and project tools run remotely.
Common Issues and Solutions
▸ 1. Why can’t fzf be found on the remote side?
A common reason is that you placed fzf initialization in ~/.zshrc, but SSH remote commands usually run in a non-interactive shell, which doesn’t load ~/.zshrc.
~/.zshrc is suitable for interactive configurations such as key bindings, completions, and prompts. Binary paths are best placed in locations accessible to non-interactive shells.
For zsh, you can put the following in ~/.zshenv:
export PATH="$HOME/.fzf/bin:$HOME/.local/bin:$PATH"Keep ~/.zshenv simple, quiet, and side-effect-free. Do not execute commands that might fail or produce output within it.
▸ 2. "could not import" in Go Projects
If you see something like:
could not import xxx
go.mod file not found in current directory or any parent directory
It may not necessarily be due to a dependency download failure. A more common reason is that the remote Neovim starts from $HOME instead of the project root directory.
Solution:
:cd /path/to/project
:LspRestart gopls
It is recommended to fill in the remote working directory when creating an SSH workspace. The plugin will save it and automatically enter the project root directory on the next startup.
▸ 3. goenv / asdf / mise Not Taking Effect
The remote headless Neovim inherits the SSH non-interactive environment. If you rely on a version manager, ensure that shims are at the front of the PATH.
Using goenv as an example:
export PATH="$HOME/.goenv/shims:$HOME/.goenv/bin:$PATH"After making changes, restart the remote-nvim session so that the remote Neovim and gopls inherit the new environment.
▸ 4. How to Verify the Remote Environment
You can test directly:
ssh remote-host 'echo "$SHELL"; echo "$PATH"; command -v fzf; command -v go; go env GOMOD GOPRIVATE GOPROXY'If tools are not found in this command, the remote Neovim started by remote-nvim will likely not find them either.
Summary
The value of remote-nvim.nvim lies not in "wrapping SSH with a plugin," but in systematizing the most troublesome aspects of remote development:
- Automatic preparation of remote Neovim.
- Persistence of workspace configurations.
- Isolation of configuration and plugin data.
- Local UI connecting to a remote server.
- Basic automatic reconnection after accidental disconnection.
- Unified entry point for SSH, Docker, and Devpod.
- Project working directory and remote toolchain closer to the actual runtime environment.
If you are a Neovim user who frequently works on remote machines or containers, this plugin is worth adding to your toolbox. It transforms remote development from "enduring a half-baked Neovim on a temporary machine" to bringing your familiar Neovim workflow to where the code actually runs.
Project Address
메타데이터
- post_id
- c9dee5177f89
- slug
- bringing-the-vs-code-remote-experience-to-neovim-c9dee5177f89
- url
- https://medium.com/@piedpay/bringing-the-vs-code-remote-experience-to-neovim-c9dee5177f89
- canonical_url
- https://medium.com/@piedpay/bringing-the-vs-code-remote-experience-to-neovim-c9dee5177f89
- author_url
- https://medium.com/@piedpay
- status
- ok
- fetched_at
- 2026-06-14 11:28:49