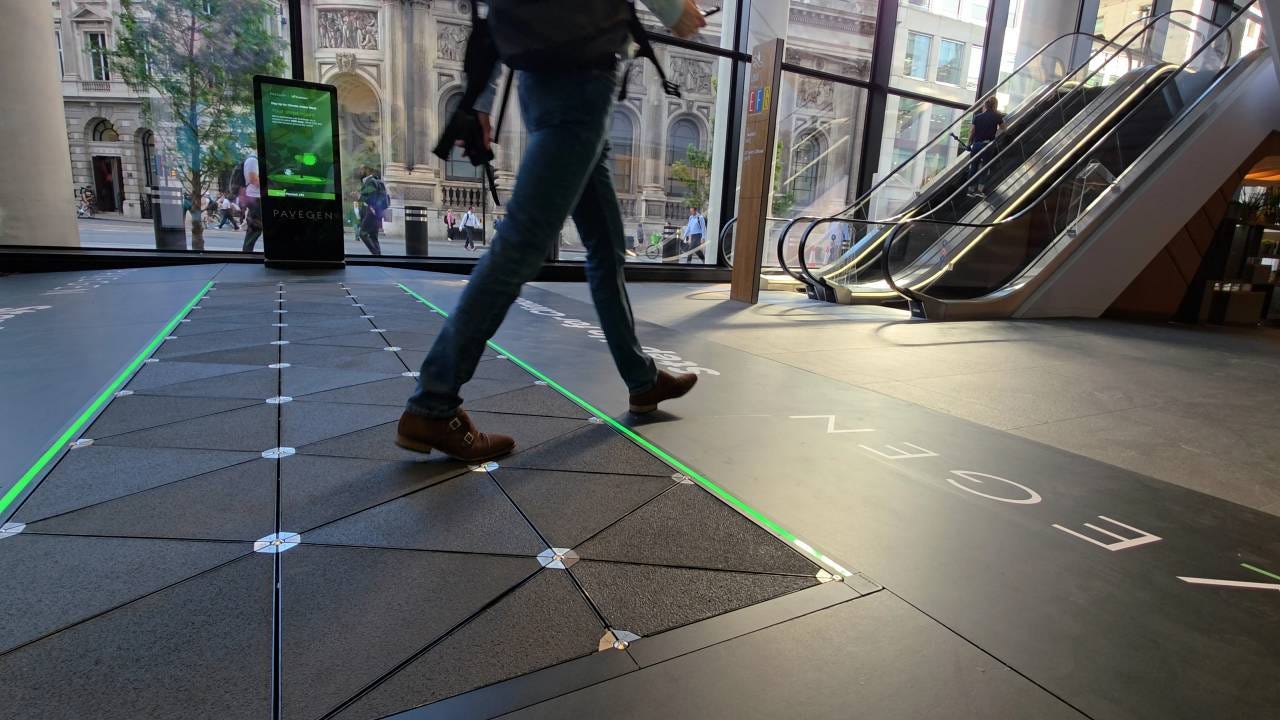
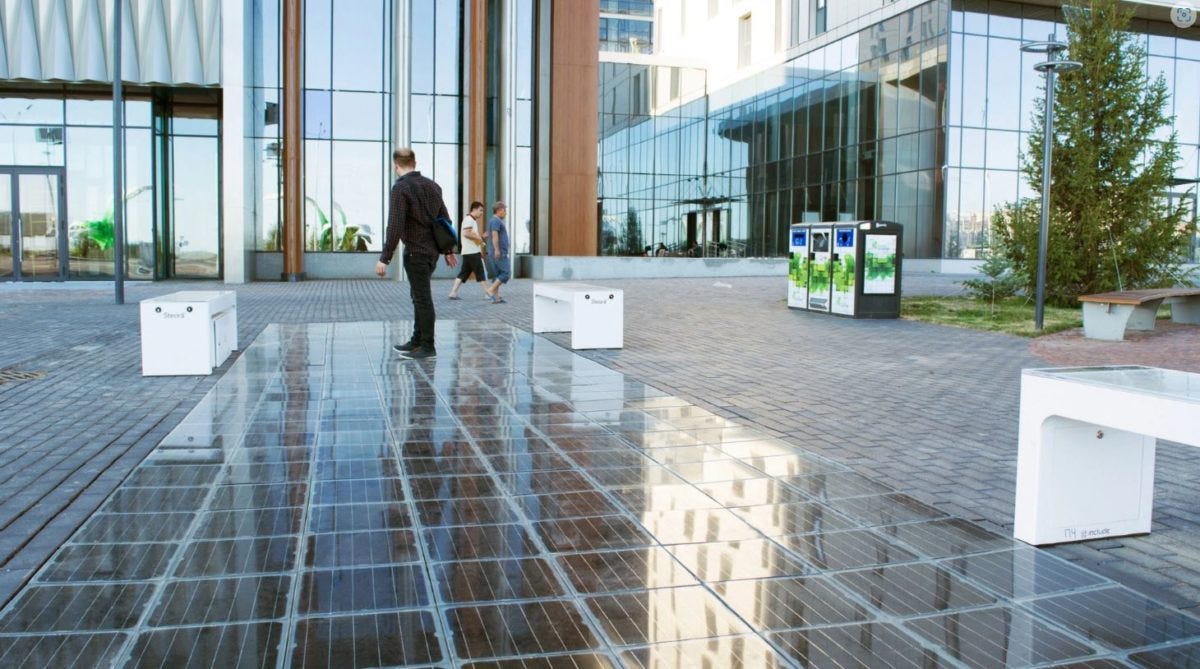
These Floor Tiles That Count People Without Cameras
From Fiction to Reality: Building a Piezo Tile From Scratch
These Floor Tiles Count People Without Cameras
From Fiction to Reality: Building a Piezo Tile From Scratch
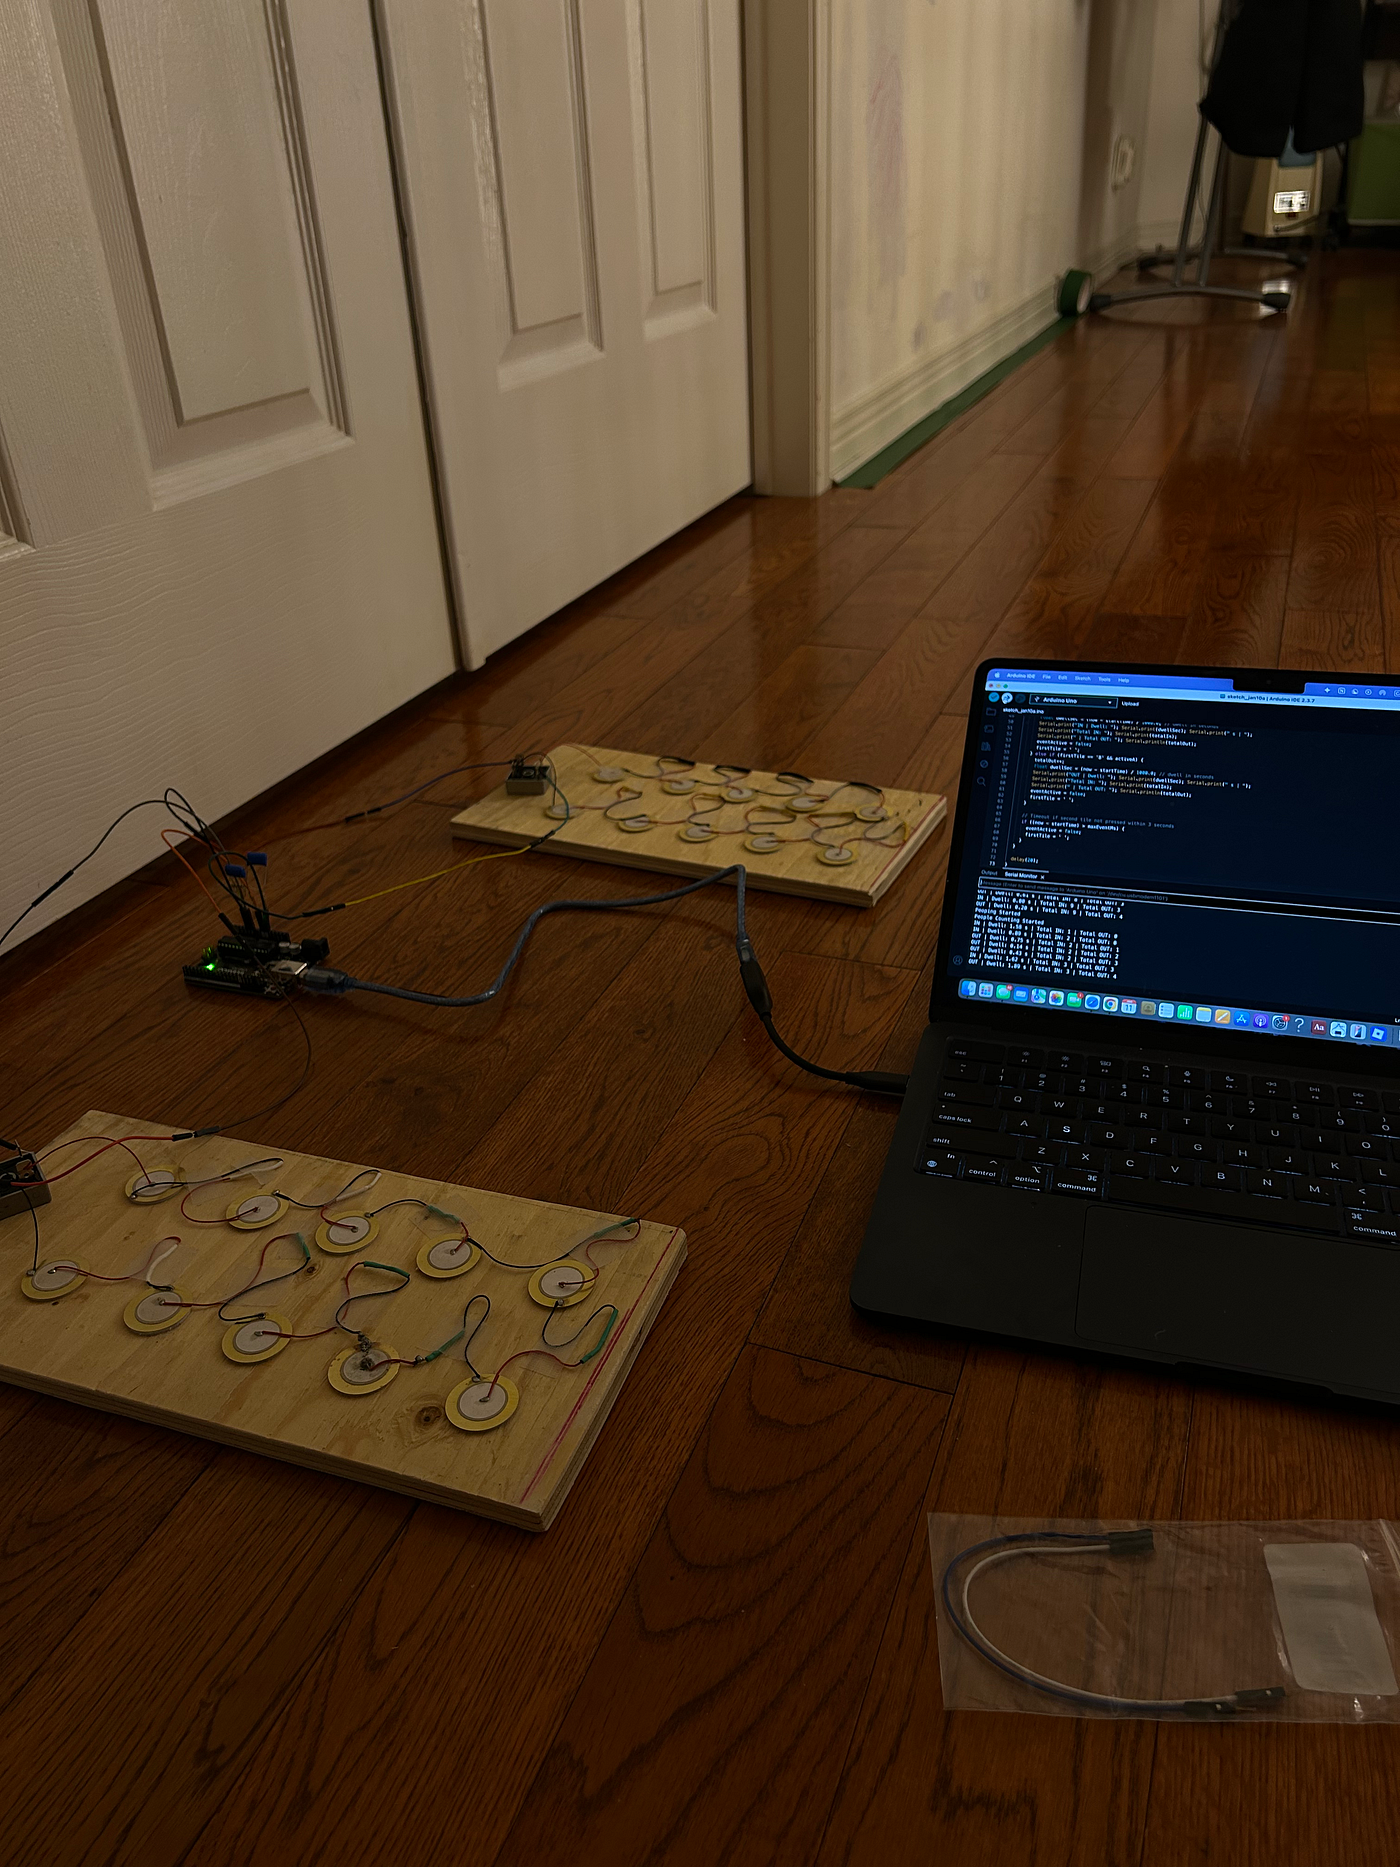
Figure 1.1 // Image by Daniel Fung // Process While Making the Piezo Tile Integrated with Data
From manual clickers to infrared beams to thermal cameras, POS systems have had its fair share in innovation. For years, simply counting people has evolved into technologies never heard of before, yet it has never evolved from the very thing being tracked: the footstep.
Now our footsteps are everywhere — from the moment you first wake up to leaving the house, you probably already used hundreds of footsteps. What happens if we capitalize on this to improve our current systems? Specifically how we can convert footsteps into usable data that can revolutionize different industries.
That all sounds nice on paper — but how does it exactly work? I’m not going to bore you with all the specifics and technicalities, but if you were wondering how it works down to the atom and how to wire piezos together:
Learning the Basics of Piezoelectricity and Real-Life Applications:
Learning Different Piezo Wiring Digitally on Tinkercad:
Validating the Issue:
Before we dive any deeper to how I built the system, it is important to actually validate why this tile is necessary in growing industries and for whom it provides value to.
In modern day society, most people counting systems solely rely on camera, infrared beams, Wi-Fi signals, and estimations from POS. According to a report done by **MarketsandMarkets in stated that the global PCS market was valued at 1.2 billion USD in 2024. It was projected to grow at a CAGR rate of 11.6% to 1.33 billion USD in 2025. **This is huge news because this growth in just a years difference highlights the increasing demand for tools that measure human movement.
While the traditional camera and thermal sensors can achieve high accuracy, they raise ethical and privacy concerns that often require complex licensing to operate. A research study done by **Pew Research Org showed how 81% of participating Americans felt that the potential risks that come with collecting data in companies outweigh the benefits. Majority of these companies use the traditional camera and thermal sensors to track data on consumer movements. So yes the risks are real** and it is a growing concern in society. It isn’t just something that we can dismiss or scrap entirely. This is why technology like the piezo tile can provide well thought out alternatives to these gaps.
So we come to the conclusion of this: First, demand for PCS systems is continuing to rise with a average 11% compound CAGR rate each year. Secondly, an increasing percentage of the population is beginning to fear the risks that come with traditional methods.
The piezo tile aims to address two real major gaps in current systems:
- Privacy Risks and Sales Conversion:
Unlike camera based systems, the piezo tile measures footsteps without identifying who exactly is walking. It identifies by pressure and voltage exerted by the piezos to determine if someone is coming in or out. This makes them suitable for more privacy sensitive environments where surveillance is more of a controversial topic. This could be at schools, hospitals, or local community centres. Now beyond sensitive environments, industries like retail can contribute to their Corporate Social Responsibility. In 2018 BlackRock (world’s largest asset manger, holding more than 12 trillion in assets) pushed for more CSR initiatives and incentivized companies to follow them. This was extremely important as BlackRock basically had the ability to stop funding towards a particular company if they did not follow a certain quota they put out. The piezo-tile can be considered as a CSR work as it improves both client morale and delivers real value to stakeholders. Improving PCS systems can lead to better optimized resource allocation therefore increasing revenue. For example, one case study done by **Retail Sensing showed that using footfall forecasts resulted in a 4.5% increase on sales conversions.** In the core values of all businesses they look economically where they can make the most profit. By increasing sales conversions while protecting privacy it meets many stakeholder’s values of CSR.
2. Cost and Scalability:
A basic camera or thermal setup can cost you upwards of $500 upfront. I’m not lying either. If you search up a PCS systems on Google you will see that many of them are around the price of $600. These systems also often require hours of maintenance in a fiscal year while in contrast, a tile system made from inexpensive electronics (eg. piezos, resistors, microcontrollers) can achieve meaningful accuracy for a fraction of the price of a traditional system. This can make widespread deployment in several different locations much more feasible where the traditional systems struggle in. A 2020 article in the **Journal of Retail Analytics also reported how in-store tracking systems like thermal cameras could exceed $5000 dollars per location** in both initial setup and maintenance upkeep.
This alternative is not just an option for companies to squeeze in extra cash by switching to the tile over traditional methods. It is so much bigger than that. Data can be used to improve the existing structure of stores and allow for more diverse promotions. IKEA and Walmart are amazing examples of this. Improving the location layout is heavily backed by data that it can improve sales, maintain stable customer traffic, and direct customers to certain “hotspots”. Another use of this data is deciding product placement in shelves. Under the same article by the **Journal of Retail Analytics it also stated how placing products in a certain spot can increase reexamination by 35%**. The data that is offered by the piezo is so vast and at a fraction of the price whilst providing customers with the comfort that they are not risking their privacy. The best of both worlds if you may say.
Hours of Work, Sweat, Tears: The Process of Trial and Error:
The process of building this tile has been an excoriating one to say the least. Hours of troubleshooting and frustrations eventually became moments of triumph that are a statement of pure work ethic. Luckily for you, I’ve done all the heavy lifting, so you don’t have to experience the same things I have. Always challenge yourself though. Don’t take shortcuts and really embrace the moment where you hate it because that’s where you’re gonna grow the most. This is my full thought process into this.
You have to really think about it. When I was researching into people counting sensors I found a huge gap where people criticized them for being too invasive, too expensive, or too inefficient. I clawed onto this gap and deeply thought about how piezoelectricity could help solve this issue. That’s when it clicked, an epiphany on a random Sunday on a train back from Downtown Toronto. What happens if the energy from the piezos once stepped on could indicate someone coming in or someone going out? Now the only issue with this methodology was how the piezos could differentiate from someone going in or out. Initially I thought that maybe it could be solved based on the direction of where the person came from. For example if someone stepped on the bottom piezos they would be registered as IN and opposite as OUT. After thinking it over, there was too many factors I couldn’t control and I was back to square one. My issue now wasn’t whether the piezo would work — it was how it would and once I knew that there was no stopping.
Now, I wasn’t wrong for thinking of direction if anything that brought me closer to the solution. Instead of thinking one tile with two separated sections, I drafted a plan where the two separated sections where actually separate tiles themselves. This solved the issue of unknowing accidental factors while increasing the overall accuracy of the data.
I knew from my previous digital Tinkercad model that piezos release Alternating Current rather than Direct Current which requires an extra step before connecting it to a microcontroller (Arduino UNO). The extra step was rectifying the current from AC to DC so that the Arduino could actually read the output of the piezos. The output energy also needs a place to dissipate after being measured as well. If the energy was stored in the Arduino, the built up energy could eventually internally short circuit the pins. This could easily be resolved with a pull down resistor and a capacitor for safety.
Now that we know what we need. We can start building it.
- 20x Piezos
- Arduino UNO
- 2x 4 Pin Bridge Rectifier OR 8x 1N4007 Diodes
- 12x Jumper Wires
- 2x 0.1 µF Capacitors
- 2x 1MΩ Resistors
- Wire Strippers
- High Reading / Low Reading Multimeter AM33D
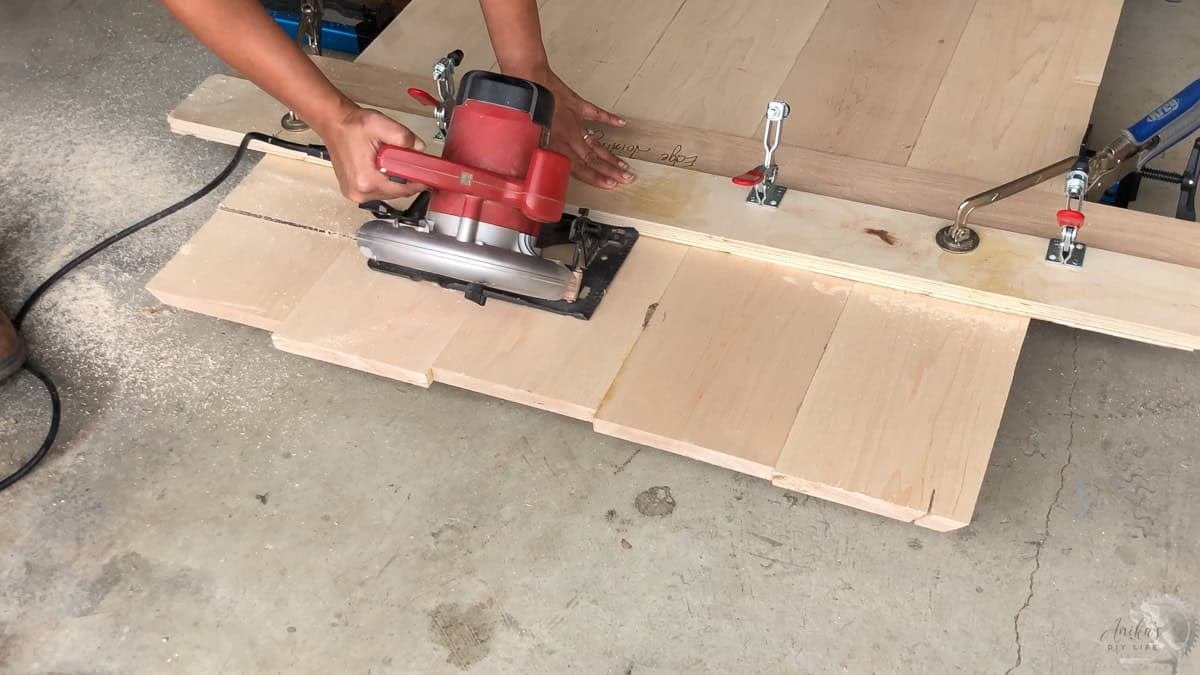
Figure 2.1 // Image by Anika’s DIY Life // Cutting Wood with a Table Saw
- First, I cut out a 30cm x 30cm square of Plywood with a table saw. Then cut the square in halves to create the two tiles needed. Sand off any extruding pieces to prevent splinters.
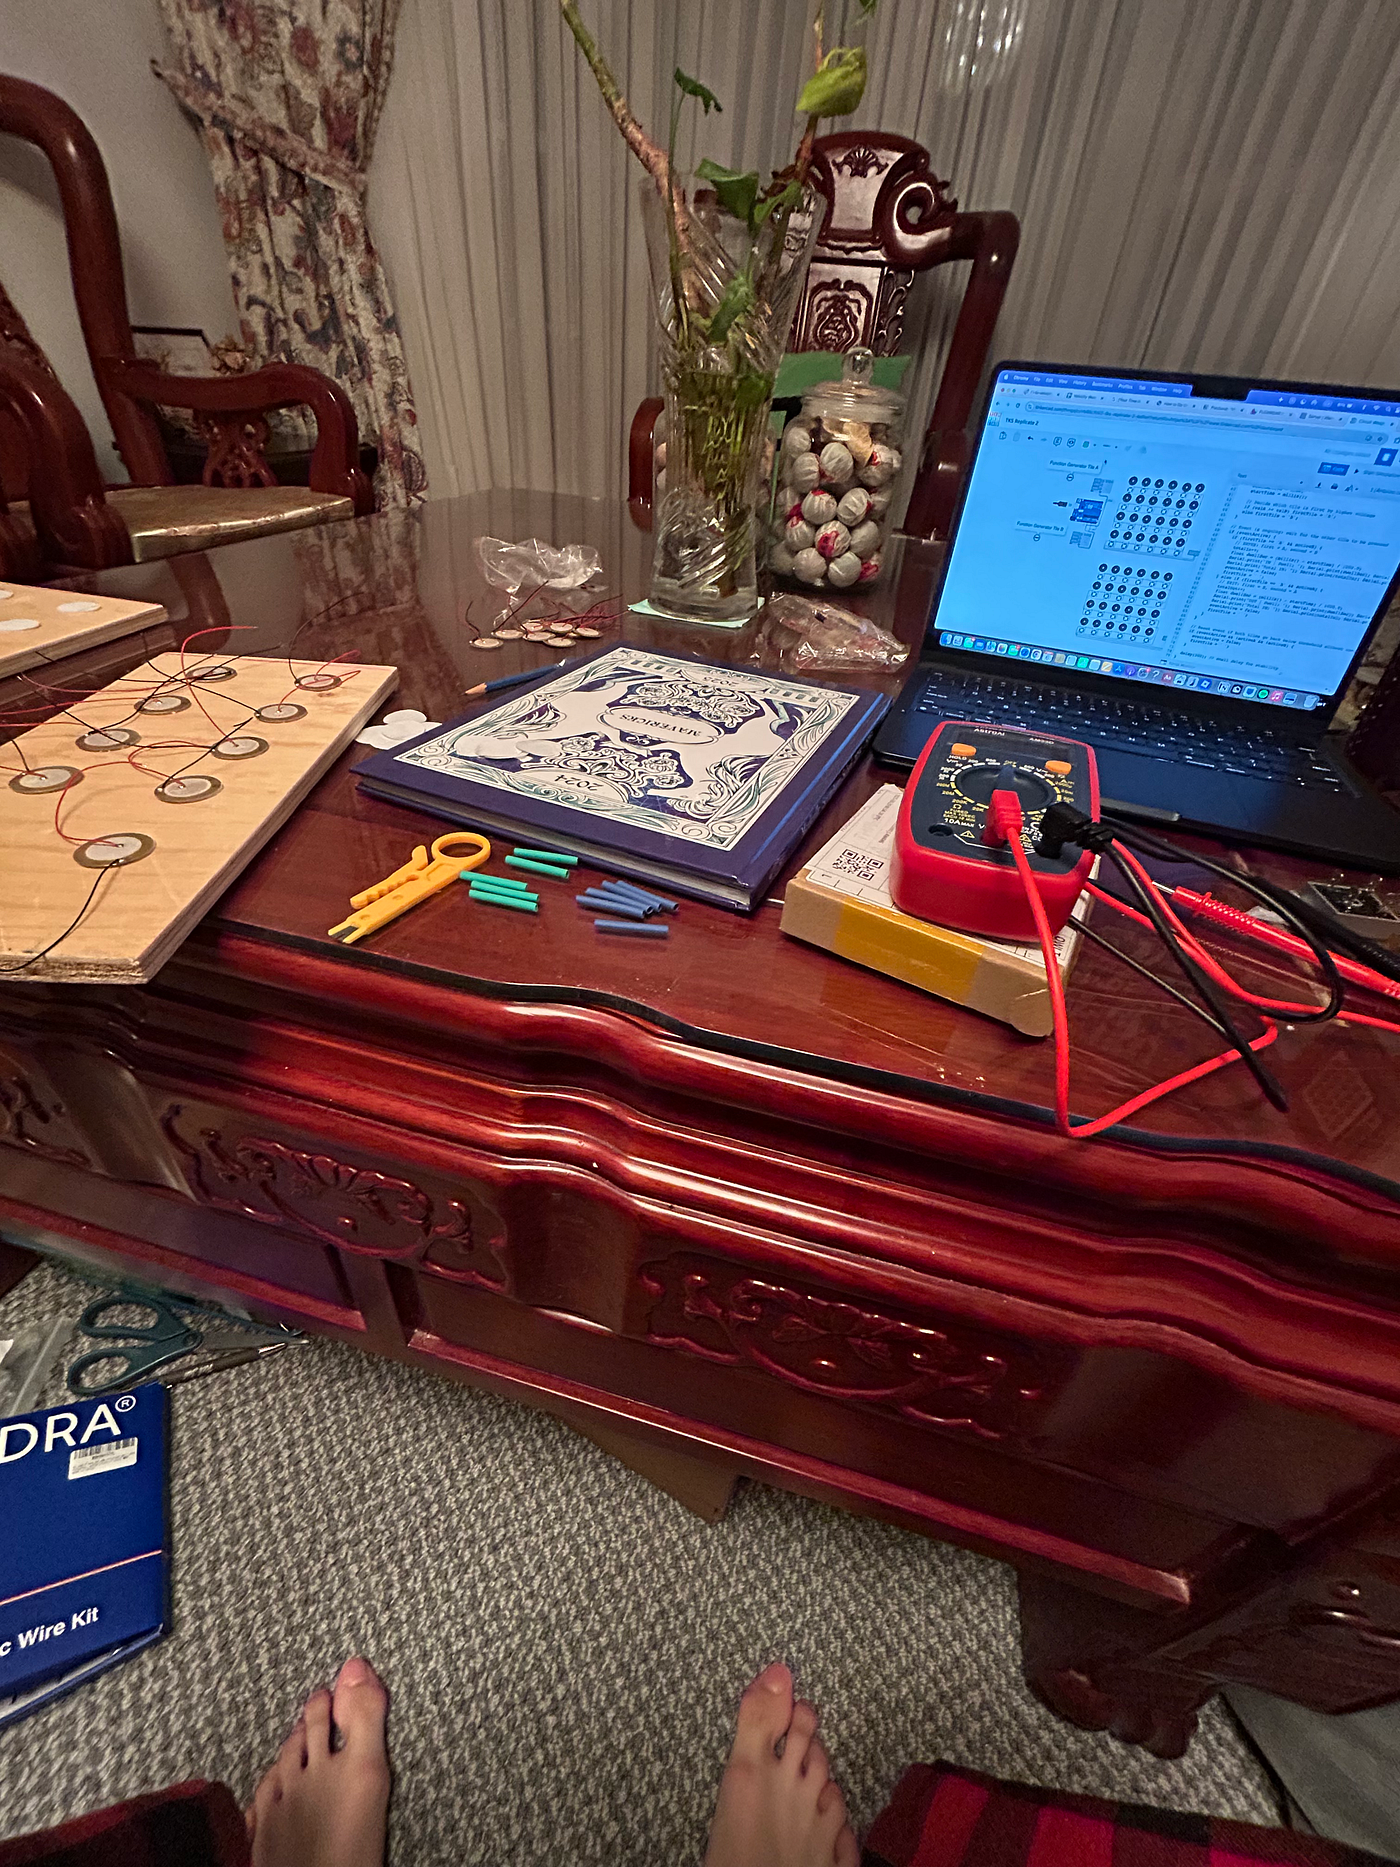
Figure 2.2 // Image by Daniel Fung // Sticking Piezo onto Adhesives
- Out of the 20 piezos in supply, section off 10 piezos for each tile. Each piezo should come with a circle shaped, double sided adhesive. Remove one side of protective film; place down the adhesive in an arrangement that works for your tile. Do the same for the second tile. Then add your piezo with the side with the positive and negative leads facing up.
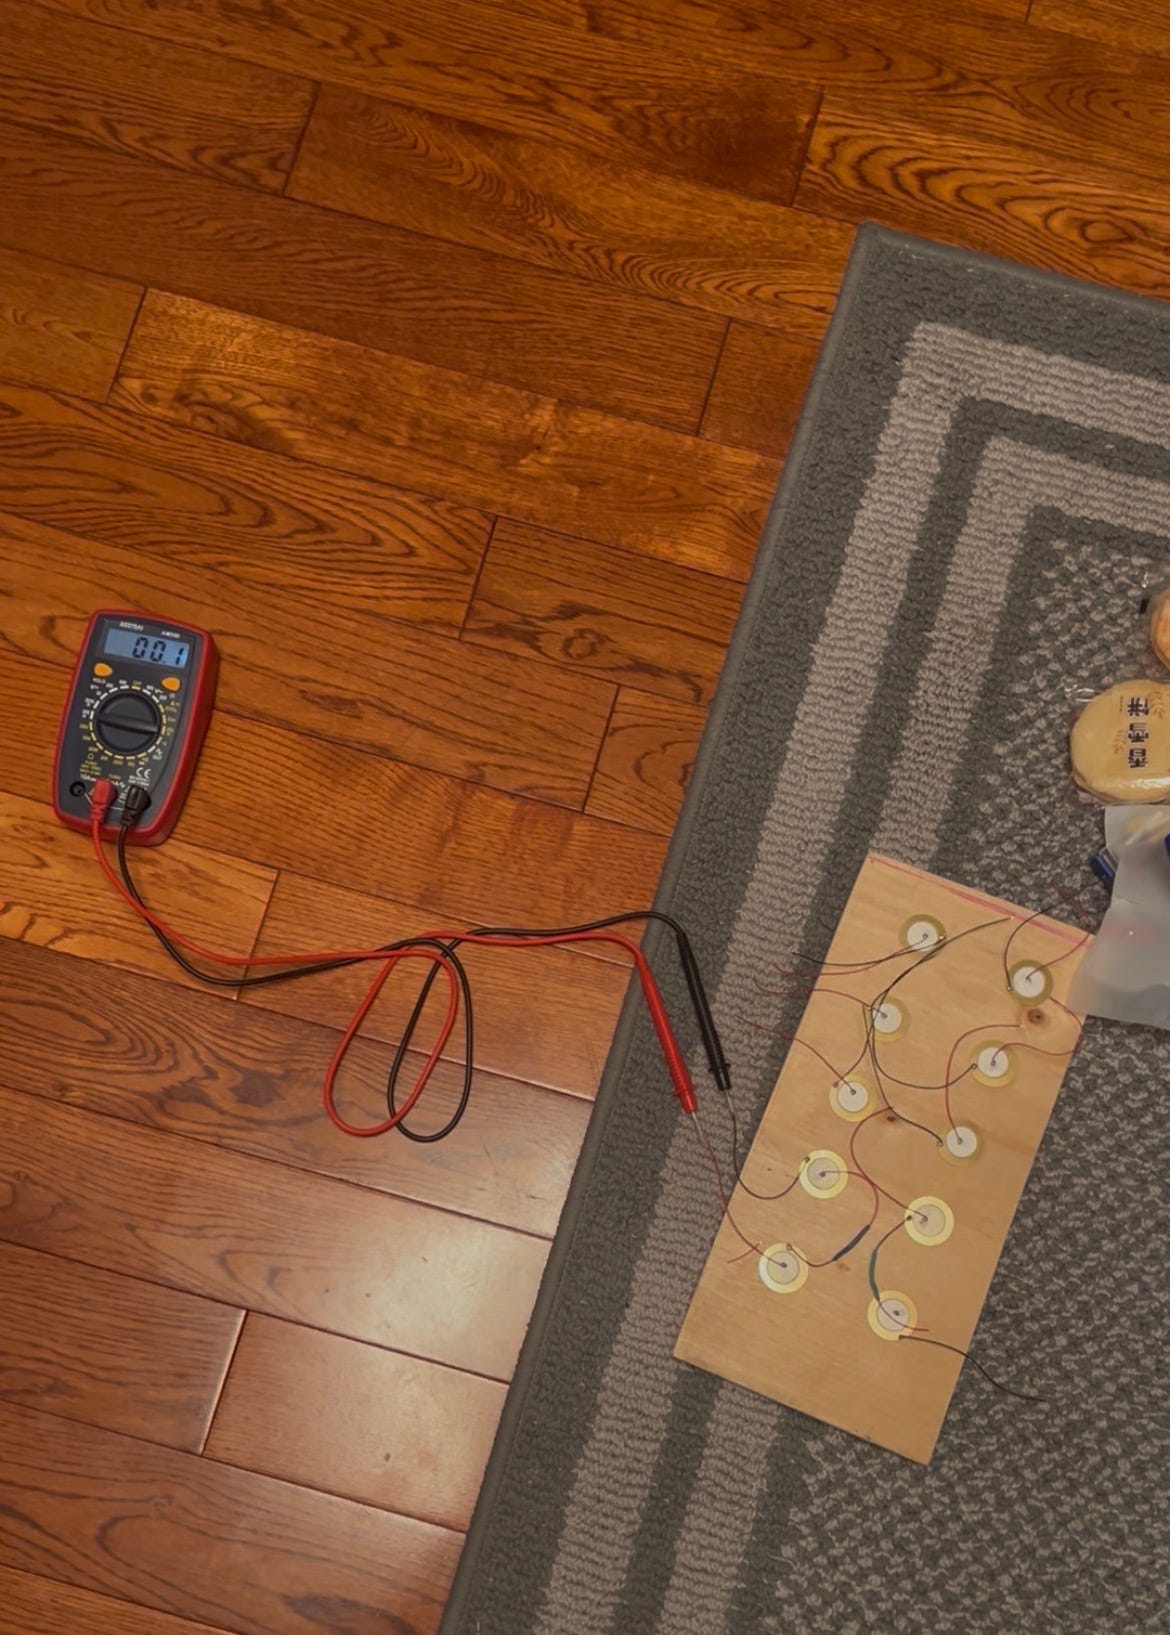
Figure 2.3 // Image by Daniel Fung // Two Piezos in Series Hooked Up to a Voltmeter
- Now piezo’s currents are extremely unstable. It’s a quick, sudden burst of current that often times the Arduino has issues reading. Lucky for me, we aren’t creating an energy harvesting system so wiring the piezos in series where we can increase the voltage instead of the current was possible. Now I started small then gradually connected them all since if this section isn’t done right, the whole project might as well as be scrap. Use a multimeter to test out the connection of two piezos, it should increase quick then dissipate.
Connecting in series is much simpler than it looks. Where the two end piezos are ensure one positive and one negative line is NOT connected to the rest. For the rest of the piezos connect a positive (RED) to negative (BLACK) and keep going until all of them are connected.
You want to strip some of the insulation to reveal more of the raw wire so you can twist both wires into one strong bonded line. This is the one of the most frustrating parts if you don’t have the right tools; make your life easier and get a wire stripper.
This section takes trial and error, don’t be clouded by multiple failures, all it takes is one breakthrough.
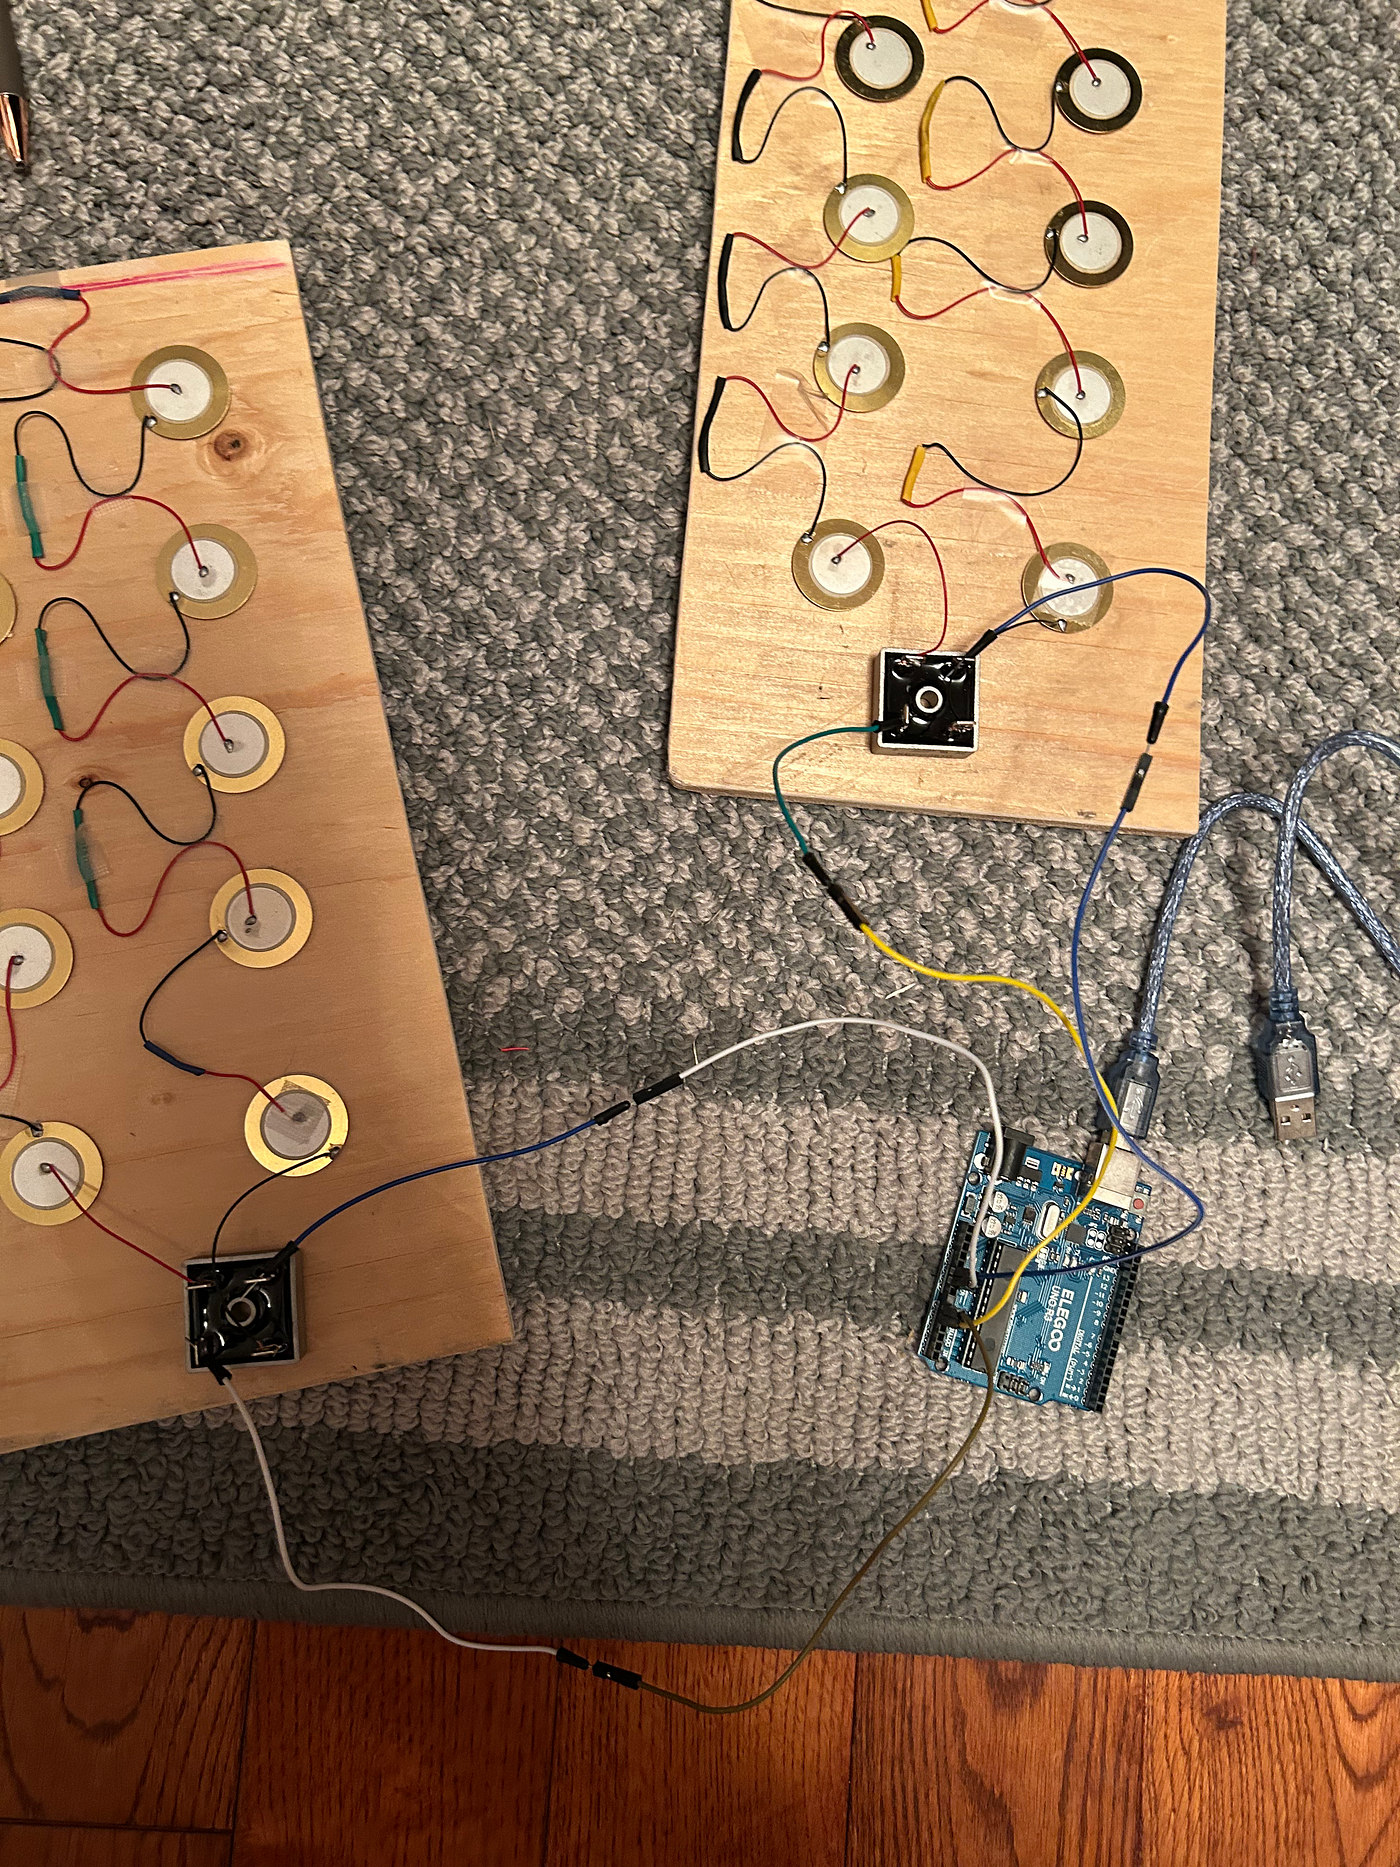
Figure 2.4 // Image by Daniel Fung // How the Wiring Should End Up Looking
As I mentioned before, the piezo releases its energy in AC form which is dangerous to the Arduino board. We need a bridge rectifier to convert it from AC to DC. You can either make one with 4 IN4007 Diodes in a diamond shape (see here) or simply buy a 4 pin rectifier that does the job for you. There will be a pin that is facing the opposite direction than the other three; that will be your DC+ while diagonally from DC+ will be your DC-. The remaining two are your AC pins which can be connected interchangeably.
AC+ is the positive (RED) line that is one end of the last piezo
AC- is the negative (BLACK) line that is also the other last piezo
DC+ is where you want to connect the Arduino’s analog pins to. Depending whether if it is Tile A or Tile B; Tile A’s DC+ should be connected to A0 on the Arduino while Tile B’s DC+ should be connected to A2.
You might be thinking, why not A1? Well, props to you for even pointing that out. The code has Tile B registered under A2 since my A1 pin got internally short circuited and does not read anymore.
Lastly for both negative DC-, put them into their own GND inlet.
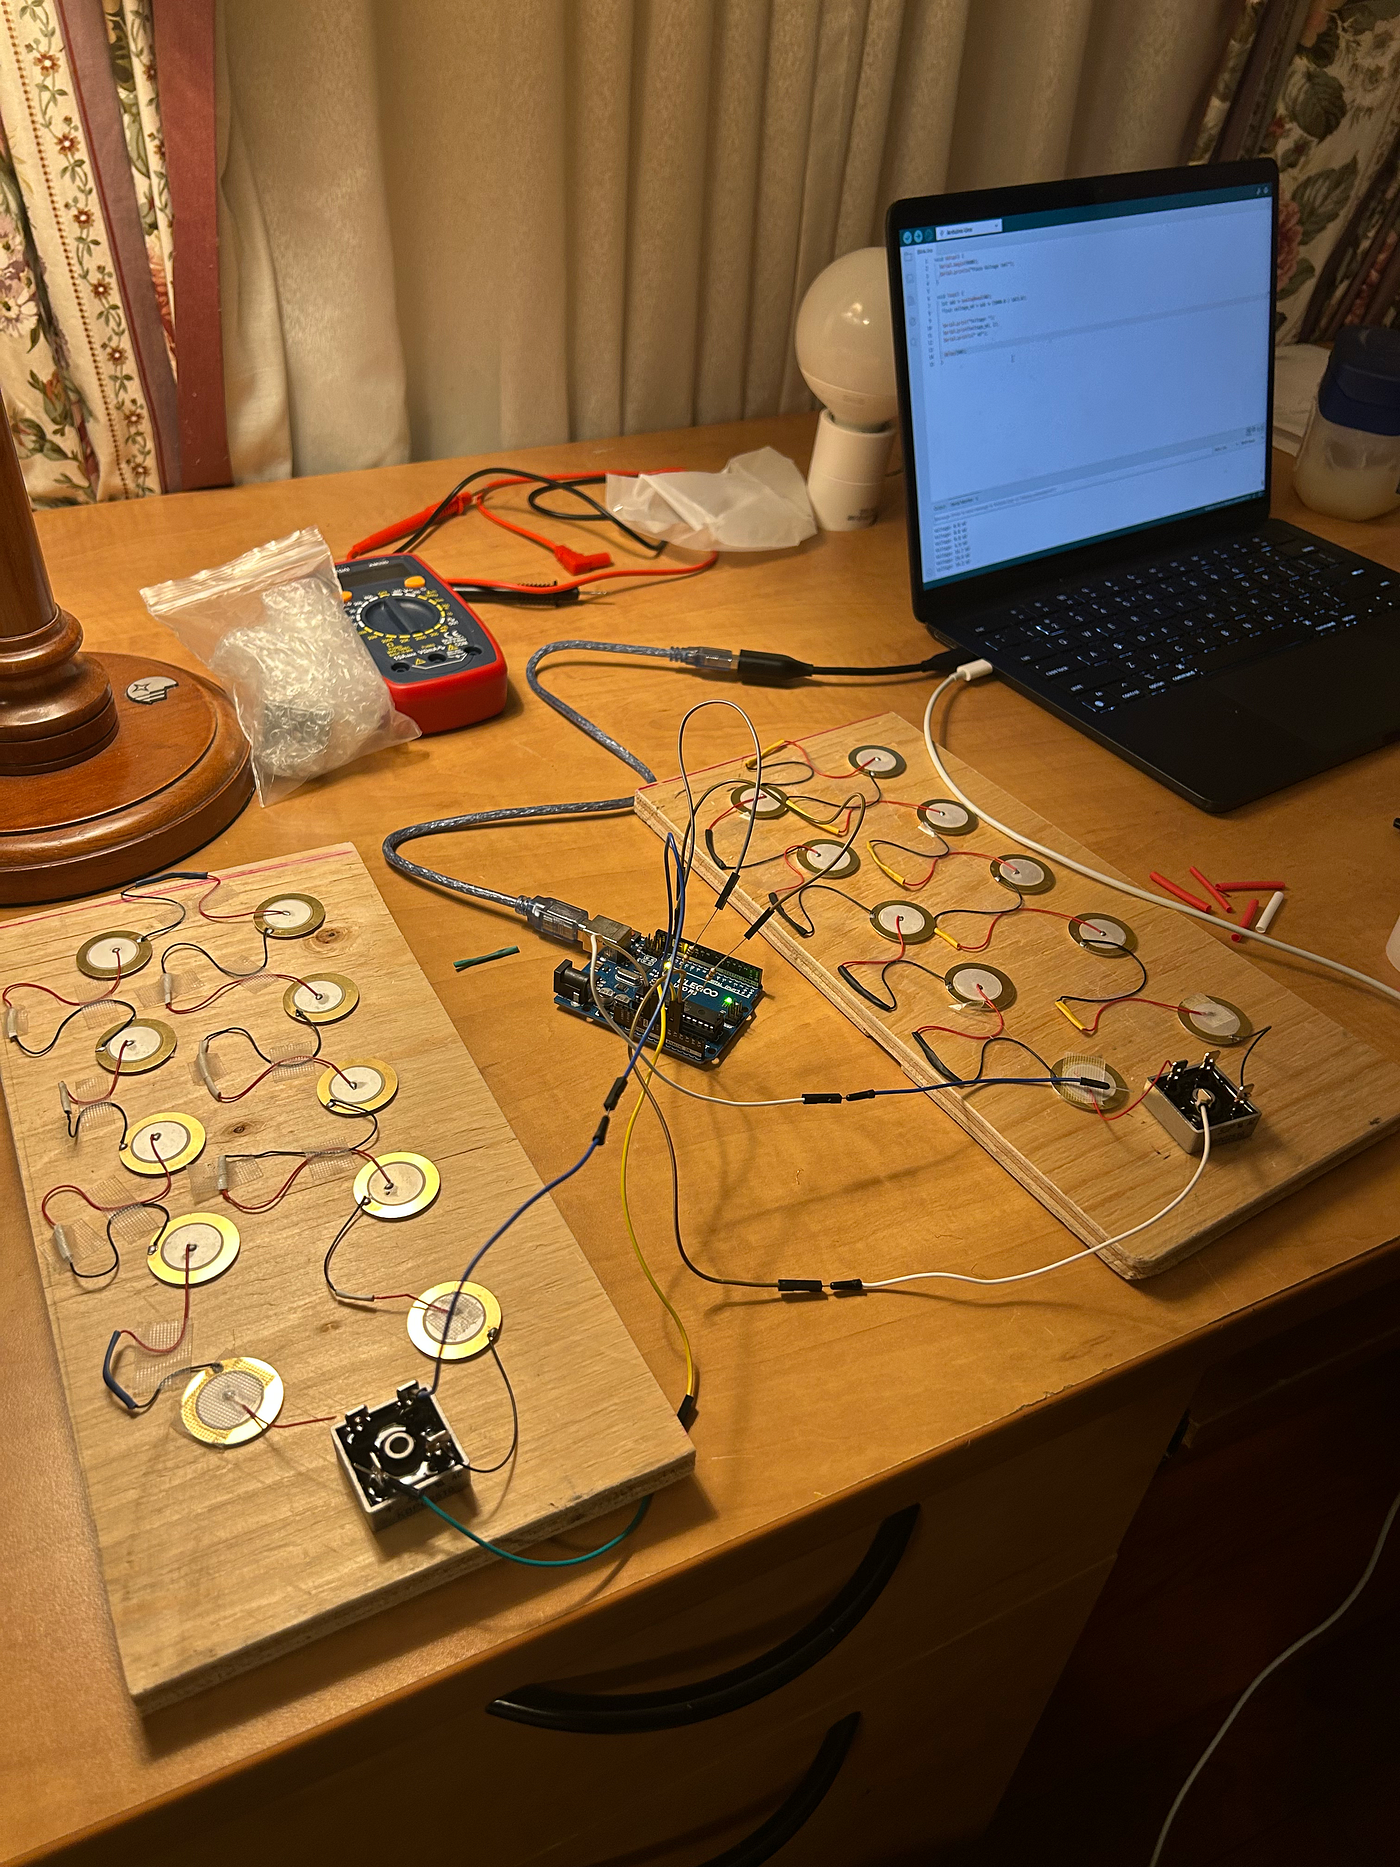
Figure 2.5 // Image by Daniel Fung // 4 Pin Rectifier Connection
- Now all of that is connected, we have to make sure that the Arduino has some safety measures so it doesn’t short circuit. Connect a 1MΩ resistor between A0 and GND and one more 1MΩ resistor to A2 and GND to act as a pull down. This will ensure that piezo readings are clear while ensuring that the Arduino isn’t overloaded.
To prevent spamming that often occurred when I was building this, add a 0.1 µF capacitor to A0 — GND and A2 — GND.
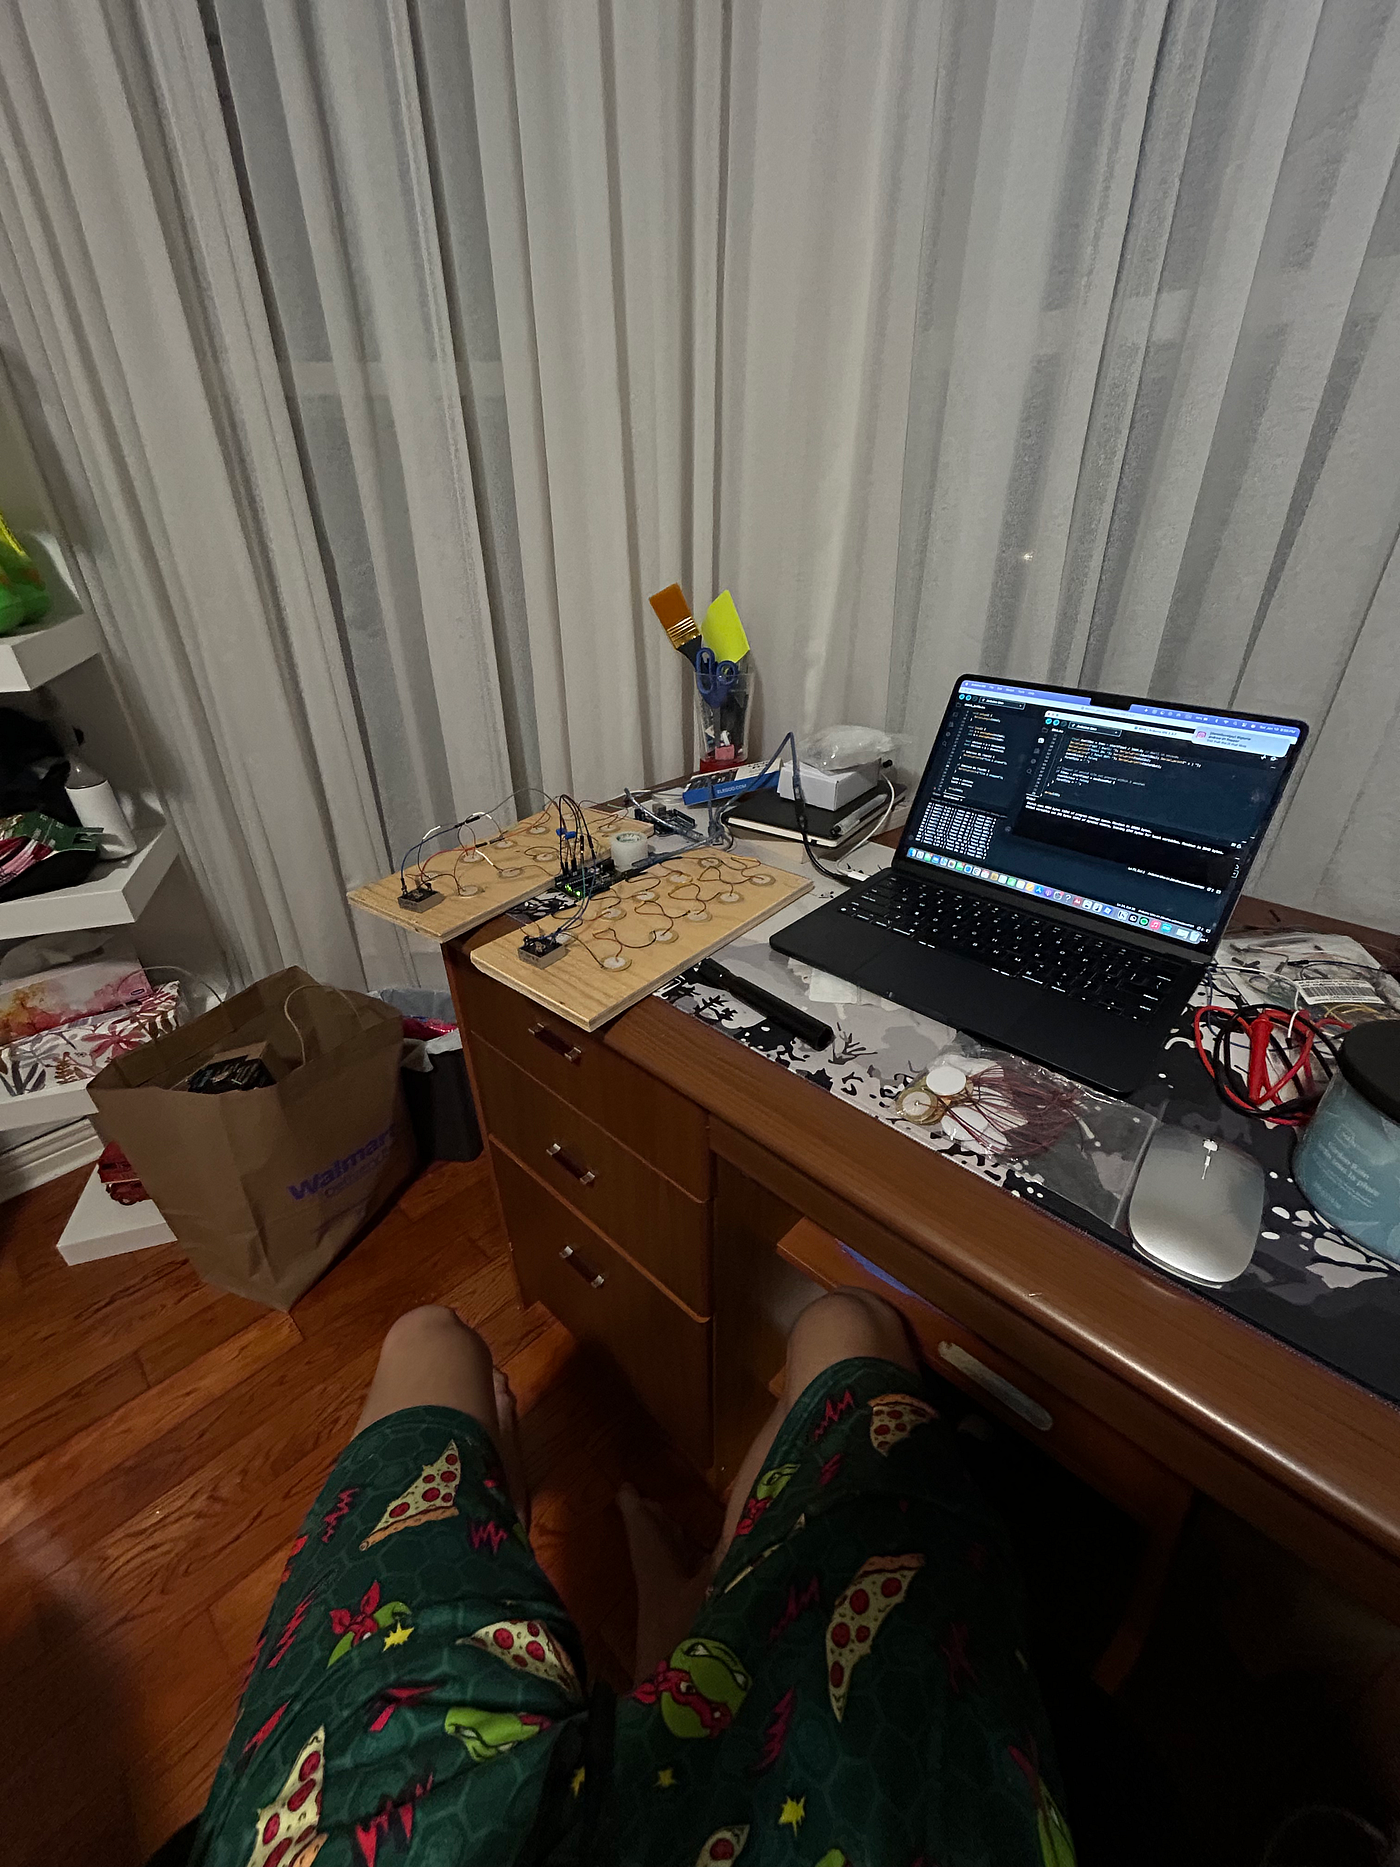
Figure 2.6 // Image by Daniel Fung // Overview of Both Piezo Tiles
Lastly for the easy part, paste your code in that will determine if it is someone coming in or out.
int tileA = A0;
int tileB = A2;

const float threshold = 0.04;       // volts
const unsigned long debounceMs = 200;
const unsigned long maxEventMs = 3000; // 3 seconds window

unsigned long lastStepA = 0;
unsigned long lastStepB = 0;

int totalIn = 0;
int totalOut = 0;

bool eventActive = false;
char firstTile = ' ';
unsigned long startTime = 0;

void setup() {
  Serial.begin(9600);
  Serial.println("People Counting Started");
}

void loop() {
  int rawA = analogRead(tileA);
  int rawB = analogRead(tileB);

  float voltA = (rawA * 5.0) / 1023.0;
  float voltB = (rawB * 5.0) / 1023.0;

  unsigned long now = millis();

  bool activeA = (voltA > threshold) && ((now - lastStepA) > debounceMs);
  bool activeB = (voltB > threshold) && ((now - lastStepB) > debounceMs);

  if (activeA) lastStepA = now;
  if (activeB) lastStepB = now;

  // Start event
  if (!eventActive && (activeA || activeB)) {
    eventActive = true;
    startTime = now;
    firstTile = activeA ? 'A' : 'B';
  }

  // Complete event if other tile pressed within maxEventMs
  if (eventActive) {
    if (firstTile == 'A' && activeB) {
      totalIn++;
      float dwellSec = (now - startTime) / 1000.0; // dwell in seconds
      Serial.print("IN | Dwell: "); Serial.print(dwellSec); Serial.print(" s | ");
      Serial.print("Total IN: "); Serial.print(totalIn);
      Serial.print(" | Total OUT: "); Serial.println(totalOut);
      eventActive = false;
      firstTile = ' ';
    } else if (firstTile == 'B' && activeA) {
      totalOut++;
      float dwellSec = (now - startTime) / 1000.0; // dwell in seconds
      Serial.print("OUT | Dwell: "); Serial.print(dwellSec); Serial.print(" s | ");
      Serial.print("Total IN: "); Serial.print(totalIn);
      Serial.print(" | Total OUT: "); Serial.println(totalOut);
      eventActive = false;
      firstTile = ' ';
    }

    // Timeout if second tile not pressed within 3 seconds
    if ((now - startTime) > maxEventMs) {
      eventActive = false;
      firstTile = ' ';
    }
  }

  delay(20);
}
This code will be the logic that will update the monitor. It works on the basis of if Tile A is stepped before Tile B or vice versa it will register as “IN” or “OUT” within a 3 second grace period.
Additionally, it will record the dwell time which measure how long someone has stayed on the tile before setting off the second tile.
The voltages of piezos can be best described as “unpredictable”. Piezos create energy pulses based on factors like sound, vibrations of tables, and how much pressure is put on it.
The reduce inaccuracies like setting off the grace period from a tiny bit of sound, I added a line of code that will only set the grace period based off a certain threshold that would be considered a human footstep. Voltages below 0.04 V will not be registered as it will be considered background sound. This eliminated a bunch of inaccuracies I saw during my trial and error and significantly reduced spamming.
const float threshold = 0.04;       // volts
const unsigned long debounceMs = 200;
const unsigned long maxEventMs = 3000; // 3 seconds window
You can also change the frequency that it prints out on the monitor depending if you want a quick, deep analysis make the “delay” time smaller if you want a general overview, make the number to something like 200.
}

  delay(20);
}
Now the system should be operational, see how it visually works below.
[embed]
From Prototype to Application:
“The new oil is data”. — Canadian Broadcasting Corporation
It proves true to this day. I mean let’s not be oblivious to the fact that half of the app we use on our phone track all of our movements. But why? Have you ever stopped and wondered why they even need the data in the first place?
Well mainly for two reasons:
- To Improve the Current System
- To Make More Money
Most of the corporations nowadays are probably out to get you. They aim to optimize their system to make the most profit off of you. Now this gives a bad reputation for the businesses that are genuinely trying to make their business better for their customers. While data is ultimately the future, it can also be the thing that leaves less optimized system in the past.
Now since I’m not a greedy corporation that wants to smuggle every bit of cash you have, I’m focusing on the improving current systems part.
When I took on this project I immediately thought of how it influence product placement. Traditionally how businesses decide where to put different products on their shelves is completely inaccurate without those expensive systems that constantly monitor the customers.
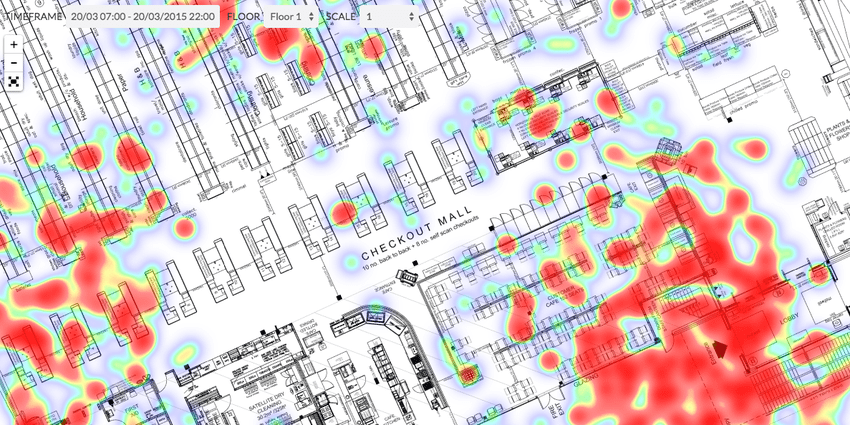
If I could determine how long someone stayed in a certain spot, it could indicate their interest on something in that particular section. This can also be applied store wide. Converting the data into a heat map can easily point out spots that are more popular and areas that attract less crowds. Now not only can this specifically target sections giving valuable data to the company’s marketers, it can help in deciding layouts that optimize crowd flow, attract attention to certain products, or even just make it easier to navigate.
The potential of this tile is huge, it can be applied in a bunch of cases other than retail. Here is some off the top of my head.
- High Schools and Universities
- Libraries
- Hospitals and Clinics
- Government Buildings like Community Centres
- Shopping Malls
- Grocery Stores
- Subway and Train Stations
- Airports
- Stadiums and Arenas
- Concert Venues
- Convention Centres
- Office Buildings
- Theme parks like Canada’s Wonderland
- Sidewalks and Crosswalks
You get the point. The possibilities are huge.
Now whether or not you believe that data is the new oil one thing is true; we need solutions to a growing issue in urban cities. People are worried about how invasive these data gathering techniques are being implemented. I’m with them on that note, it makes us humans to protect our privacy when it is threatened. While on the other hand, businesses are starting to worry that if they don’t make these costly investments they won’t make enough sales. We need solutions, now. With the growing frequency of systems that are expensive, invasive to the public, and hard to implement on a mass scale, will you be the one that waits or puts your foot down?
Hey! My name is Daniel and I’m a 15 year old TKS innovator interested in Mechanical Engineering! I love building and designing different possible solutions to problems we have. In the future, I hope to become an entrepreneur and start a business from inventions I make in my engineering background. If you found this interesting and have questions, don’t hesitate to reach out to me at danielfung0529@gmail.com or on LinkedIn. Thank you for reading and hope you enjoyed it!
Check Out More of My Work!
[embed]Daniel Fung Share your videos with friends, family, and the worldwww.youtube.com
메타데이터
- post_id
- cbbdf26b73b4
- slug
- these-floor-tiles-that-count-people-without-cameras-cbbdf26b73b4
- url
- https://medium.com/@daniel-fung/these-floor-tiles-that-count-people-without-cameras-cbbdf26b73b4
- canonical_url
- https://medium.com/@daniel-fung/these-floor-tiles-that-count-people-without-cameras-cbbdf26b73b4
- author_url
- https://medium.com/@daniel-fung
- status
- ok
- fetched_at
- 2026-06-28 10:39:35