Huevee Project - Database and Backend Setup
In this article, I wrote down step-by-step and detailed instructions for building a simple CRUD website called Huevee. This is my personal…
Huevee Project - Database and Backend Setup
In this article, I wrote down step-by-step and detailed instructions for building a simple CRUD website called Huevee. This is my personal web app project that allows users to create, view, edit, and delete palettes. Here’s the technology used

And here are the main features

Additionally, I will incorporate some extra features, such as likes, comments, and a favourite palette, in case the main feature is completed. I hope this project reminds me of a basic understanding of web development😆. Let’s start by mapping our database structure👇
Database Setup
In this project, I will use PostgreSQL to store users, palettes, and colors in hex. Let’s start by creating a new database in PostgreSQL by running this command in cmd/powershell/terminal :
-- Login to postgresql
psql -U postgres;

-- Create new database
CREATE DATABASE huevee_db;

-- List database to make sure it's created
\l

-- Connect to the new database
\c huevee_db
After creating a new database, called huevee_db, we will create tables inside the database. Each table will store different data and, of course, have relations to each other. Ok, let’s get into it👇
CREATE TABLE users (
  id SERIAL PRIMARY KEY,
  username VARCHAR(50) UNIQUE NOT NULL,
  email VARCHAR(100) UNIQUE NOT NULL,
  password_hash TEXT NOT NULL,
  created_at TIMESTAMP DEFAULT CURRENT_TIMESTAMP,
  role VARCHAR(20) DEFAULT 'user';
);
So, in the users table, we have an ID column that has an auto-increment type marked by SERIAL and will be used as the primary key in this table. Then we add username and email with character data type, and each has a maximum length of 50 and 100 characters. It must be unique and cannot be empty. And of course, the username must have a password. We add a password column with the TEXT data type, which can store longer character strings, because we will store the hashed password. Lastly, we add a created_at column to store the timestamp of the user's creation.
Primary key is a unique column in a table, usually used to create a relation to another table
CREATE TABLE palettes (
  id SERIAL PRIMARY KEY,
  user_id INTEGER REFERENCES users(id),
  title VARCHAR(100),
  theme VARCHAR(50),
  description TEXT,
  created_at TIMESTAMP DEFAULT CURRENT_TIMESTAMP
);
Next, the second table is for palette data. It’s a bit similar to the users table, but we add user_id, which is the foreign key of the primary key in the users table
A foreign key is a column in the table that represents a primary key from another table
CREATE TABLE colors (
  id SERIAL PRIMARY KEY,
  palette_id INTEGER REFERENCES palettes(id),
  hex_code CHAR(7) NOT NULL,
  position INTEGER
);
Third, we create a table for the color code of the palettes. The columns are id, palette_id, hex_code, and position to define the position of each color in a palette.
CREATE TABLE likes (
  id SERIAL PRIMARY KEY,
  user_id INTEGER REFERENCES users(id),
  palette_id INTEGER REFERENCES palettes(id),
  liked_at TIMESTAMP DEFAULT CURRENT_TIMESTAMP
);
So, all the comamnd will looks like this
CREATE TABLE users (
  id SERIAL PRIMARY KEY,
  username VARCHAR(50) UNIQUE NOT NULL,
  email VARCHAR(100) UNIQUE NOT NULL,
  password_hash TEXT NOT NULL,
  created_at TIMESTAMP DEFAULT CURRENT_TIMESTAMP
);

CREATE TABLE palettes (
  id SERIAL PRIMARY KEY,
  user_id INTEGER REFERENCES users(id),
  title VARCHAR(100),
  theme VARCHAR(50),
  description TEXT,
  created_at TIMESTAMP DEFAULT CURRENT_TIMESTAMP
);

CREATE TABLE colors (
  id SERIAL PRIMARY KEY,
  palette_id INTEGER REFERENCES palettes(id),
  hex_code CHAR(7) NOT NULL,
  position INTEGER
);

CREATE TABLE likes (
  id SERIAL PRIMARY KEY,
  user_id INTEGER REFERENCES users(id),
  palette_id INTEGER REFERENCES palettes(id),
  liked_at TIMESTAMP DEFAULT CURRENT_TIMESTAMP
);
Lastly, we have a likes table, which consists of user_id, palette_id, which are the foreign keys from the table users and palette, and we have liked_at, a timestamp when the like option was used. Now, run \dt to show tables that we just created

Alright, now we have completed the database setup using PostgreSQL. Next, we will set up our backend using Node.js and Express.js.
Backend Setup
Firstly, we create a folder to store all the configuration needed for the backend. Let’s make the folder called huevee-backend and initialize the project by running these commands:
// create new folder
mkdir huevee-backend

// get into the folder
cd huevee-backend

// initialize project
npm init -y
Then we install Express.js as a backend framework, PostgreSQL client to connect to our database that we already created before, dotenv to manage our environment variables, cors to allow access from the frontend, and nodemon to restart the server when changes happen automatically.
npm install express pg dotenv cors
npm install --save-dev nodemon
After that, we create a folder structure so we can develop tidily 😆. Run these commands in our CMD or easily create them inside our IDE, ex, Visual Studio Code.
// create folders explain each of them
mkdir controllers
mkdir models
mkdir routes
mkdir db
mkdir middleware

// create file
touch .env
touch server.js
So, our current project structure will look like this

project structure
Let’s start defining our environment .env
PORT=5000
DB_HOST=localhost
DB_PORT=5432
DB_USER=avee
DB_PASSWORD=mypass
DB_NAME=huevee_db
JWT_SECRET=yourjwtpass
Make sure that you have already created a user that is specifically used for this project. In this case, I created a user named avee
Next, let’s start coding our very first JavaScript file, server.js. This is the most important file that we use to run our server. First, we import some core libraries for our project
import express from 'express';
import cors from 'cors';
import dotenv from 'dotenv';
At the first line, we imported the Express.js framework to create a Node.js server with routing, middleware, etc. In the second line, we imported CORS (Cross-Origin Resource Sharing). This middleware allows the server to receive requests from other frontend domains, ex, React app at ***http://localhost:3000. ***Then we import dotenv, a package that reads our .env file. Then we start using the imported package and middleware by writing this code:
dotenv.config();This allows us to read all the variables inside the .env file using process.env
const app = express();Then we create our Express instance named app. This is the core of our server.
app.use(cors());After that, we add CORS middleware to the entire app, so the incoming request from another domain will be allowed.
app.use(express.json());This is a built-in middleware from Express to parse JSON from request body.
For example, if the frontend sent { “username”: “fikri” } the server can read it with req.body.username.
const PORT = process.env.PORT || 5000Define our port server from .env, or if there’s no variable PORT, it will fall back to the default 5000.
app.listen(PORT, () => {
  console.log(`Server is running on port ${PORT}`);
});
Run the server and listen to the port defined. If it works, then print Server is running on port 5000.
So our server.js file will be look like this:
import express from 'express';
import cors from 'cors';
import dotenv from 'dotenv';

dotenv.config();

const app = express();
app.use(cors());
app.use(express.json());

const PORT = process.env.PORT || 5000;
app.listen(PORT, () => {
    console.log(`Server is running on port ${PORT}`);
});
Now, try to run npm run dev. Then the backend server will be running.

Make sure we start the server using nodemon. To set it up, you can go inside your package.json -> “scripts” -> “dev” and type “nodemon server.js”. So the script will look like this

package.json file
Horray! Now we have built the server! But it still has zero functionality🤣. Before we start creating our controllers, we will set up a database connection so that our Node.js can communicate with the PostgreSQL database. Go to the db folder and create a new file named index.js.
const { Pool } = require('pg');
require('dotenv').config();
Start by importing the Pool library from the pg package. { Pool } is a class that is able to create a pool connection to the database. So we do not have to create a new connection every time we run a query. And also, we import dotenv to allow this file to read the .env file.
const pool = new Pool({
  host: process.env.DB_HOST,
  port: process.env.DB_PORT,
  user: process.env.DB_USER,
  password: process.env.DB_PASSWORD,
  database: process.env.DB_NAME,
});

module.exports = pool;
Then we create an instance Pool with the database configuration from .env variables.
Next up, we will start making our controllers. Controllers are the logic of every functionality in our web application. It’s kinda like an algorithm for doing tasks in our web app😁. In this part, we only need to create 2 controller files, the first one is for authentication, another one for CRUD. But for some CRUD functionality, like create, update, and delete, you will need authentication. So the public can only view the palettes.
Let’s start by creating our basic CRUD logic functionality in paletteController.js file.
import pool from '../db/index.js';First things first, we import pool. Of course, we need that because it provides a connection to our database. Then we create function for creating a new palette.
export async function createPalette(req, res) {
  const { title, theme, description, colors } = req.body;
  const userId = req.user.userId;

  try {
    const result = await pool.query(
      'INSERT INTO palettes (user_id, title, theme, description) VALUES ($1, $2, $3, $4) RETURNING id',
      [userId, title, theme, description]
    );
    const paletteId = result.rows[0].id;

    for (let i = 0; i < colors.length; i++) {
      await pool.query(
        'INSERT INTO colors (palette_id, hex_code, position) VALUES ($1, $2, $3)',
        [paletteId, colors[i], i]
      );
    }

    res.status(201).json({ message: 'Palette created!', paletteId });
  } catch (err) {
    console.error('Create palette error:', err);
    res.status(500).json({ error: 'Server error' });
  }
}
Step by step explanations:
- Initialize and export createPalette as Asynchronous Function with req and res as an objects from Express.
- Get input from req.body which contains title, theme, description, and colors.
- Get the userId from req.user object that is already filled by the middleware. This make sure current palette we are about to create is connected with the user.
- Run SQL query to store palette data in the palettes table using a parameterized query to avoid SQL Injection. Then return id from the new palette.
- Create a new variable paletteId that will be used to connect colors in the palette
- Start a loop to save every color in the array colors to the table colors in column palette_id, hex_code, and position with values
Next, we create a function to show all palettes
export async function getAllPalettes(req, res) {
  try {
    const result = await pool.query(
      `SELECT p.id, p.title, p.theme, p.description, p.created_at,
              json_agg(json_build_object('hex', c.hex_code, 'position', c.position) ORDER BY c.position) AS colors
       FROM palettes p
       LEFT JOIN colors c ON p.id = c.palette_id
       GROUP BY p.id`
    );
    res.json(result.rows);
  } catch (err) {
    console.error('Get all palettes error:', err);
    res.status(500).json({ error: 'Server error' });
  }
}
Because some of the explanations are the same as the previous one, I will just explain the SQL query from this function
- SELECT p.id, p.title, … means we take data from the table palettes alias p, which includes ID, title, theme, description, and created time.
- Then we combine all colors from one palette into a JSON array using json_agg(…). This makes the result tidy and easier to use in the frontend.
- ORDER BY c.position … Mengurutkan warna berdasarkan posisi agar tampil sesuai urutan yang ditentukan.
- Combines the palettes table with the colors table based on palette_id. LEFT JOIN makes sure that the palette will be displayed even doesn't have colors.
- GROUP BY p.id group result based on palette ID
Next, we create a function for showing the palette by ID
export async function getPaletteById(req, res) {
  const paletteId = req.params.id;
  try {
    const result = await pool.query(
      `SELECT p.id, p.title, p.theme, p.description, p.created_at,
              json_agg(json_build_object('hex', c.hex_code, 'position', c.position) ORDER BY c.position) AS colors
       FROM palettes p
       LEFT JOIN colors c ON p.id = c.palette_id
       WHERE p.id = $1
       GROUP BY p.id`,
      [paletteId]
    );

    if (result.rows.length === 0) {
      return res.status(404).json({ error: 'Palette not found' });
    }

    res.json(result.rows[0]);
  } catch (err) {
    console.error('Get palette detail error:', err);
    res.status(500).json({ error: 'Server error' });
  }
}- Taking ID from URL parameter
- Run SQL query using pool. query
- Get data from the palettes table, combine all the colors in a palette into an array JSON, then make sure the colours are arranged based on their position.
- Make sure the palettes appear even they have no colors.
- Filter based on paletteId
- if the function, if we detect that the length of the palette JSON is 0, it means the palette is not found. return 404 response with message Palette not found
- Otherwise, send the palette data as JSON to the client
- Catch an error when it happens while getting palette detail and send a response 500.
Now we create a function to update the palette.
export async function updatePalette(req, res) {
  const paletteId = req.params.id;
  const { title, theme, description, colors } = req.body;
  const userId = req.user.userId;

  try {
    const check = await pool.query('SELECT user_id FROM palettes WHERE id = $1', [paletteId]);
    if (check.rows.length === 0) return res.status(404).json({ error: 'Palette not found' });
    if (check.rows[0].user_id !== userId) return res.status(403).json({ error: 'Unauthorized' });

    await pool.query(
      'UPDATE palettes SET title = $1, theme = $2, description = $3 WHERE id = $4',
      [title, theme, description, paletteId]
    );

    await pool.query('DELETE FROM colors WHERE palette_id = $1', [paletteId]);

    for (let i = 0; i < colors.length; i++) {
      await pool.query(
        'INSERT INTO colors (palette_id, hex_code, position) VALUES ($1, $2, $3)',
        [paletteId, colors[i], i]
      );
    }

    res.json({ message: 'Palette updated successfully!' });
  } catch (err) {
    console.error('Update palette error:', err);
    res.status(500).json({ error: 'Server error' });
  }
}
Ok this one is pretty tough wkwkwk Let’s goo
- Create a paletteId variable from the URL
- Take new data from body
- Create a userId var from the current authenticated user (middleware)
- First, we check palette ownership by checking the user_id of the palette in the database
- If no palette found, return 404 not found
- If the palette belongs to a different user, return 403 unauthorized
- Updates the palette’s title, theme, and description
- Deletes all existing colors associated with the palette
- Insert a new colors for the palette, with its new hex code and position.
- Returns a success message to the client
- Error Handling
For the last one, we create a delete function
export async function deletePalette(req, res) {
  const paletteId = req.params.id;
  const userId = req.user.userId;

  try {
    const check = await pool.query('SELECT user_id FROM palettes WHERE id = $1', [paletteId]);
    if (check.rows.length === 0) return res.status(404).json({ error: 'Palette not found' });
    if (check.rows[0].user_id !== userId) return res.status(403).json({ error: 'Unauthorized' });

    await pool.query('DELETE FROM colors WHERE palette_id = $1', [paletteId]);
    await pool.query('DELETE FROM palettes WHERE id = $1', [paletteId]);

    res.json({ message: 'Palette deleted successfully!' });
  } catch (err) {
    console.error('Delete palette error:', err);
    res.status(500).json({ error: 'Server error' });
  }
}- Extract parameter from URL
- Get an authenticated user from middleware
- Find the owner of the palette
- If no palette is found or belongs to someone else, return 404 and 403
- Deletes all the colors associated with the palette to avoid orphaned records
- Deletes the palette
- Send a success response
So, our paletteController.js file will look like this
import pool from '../db/index.js';

// Create palette
export async function createPalette(req, res) {
  const { title, theme, description, colors } = req.body;
  const userId = req.user.userId;

  try {
    const result = await pool.query(
      'INSERT INTO palettes (user_id, title, theme, description) VALUES ($1, $2, $3, $4) RETURNING id',
      [userId, title, theme, description]
    );
    const paletteId = result.rows[0].id;

    for (let i = 0; i < colors.length; i++) {
      await pool.query(
        'INSERT INTO colors (palette_id, hex_code, position) VALUES ($1, $2, $3)',
        [paletteId, colors[i], i]
      );
    }

    res.status(201).json({ message: 'Palette created!', paletteId });
  } catch (err) {
    console.error('Create palette error:', err);
    res.status(500).json({ error: 'Server error' });
  }
}

// Get all palettes (public)
export async function getAllPalettes(req, res) {
  try {
    const result = await pool.query(
      `SELECT p.id, p.title, p.theme, p.description, p.created_at,
              json_agg(json_build_object('hex', c.hex_code, 'position', c.position) ORDER BY c.position) AS colors
       FROM palettes p
       LEFT JOIN colors c ON p.id = c.palette_id
       GROUP BY p.id`
    );
    res.json(result.rows);
  } catch (err) {
    console.error('Get all palettes error:', err);
    res.status(500).json({ error: 'Server error' });
  }
}

// Get palette by ID (public)
export async function getPaletteById(req, res) {
  const paletteId = req.params.id;
  try {
    const result = await pool.query(
      `SELECT p.id, p.title, p.theme, p.description, p.created_at,
              json_agg(json_build_object('hex', c.hex_code, 'position', c.position) ORDER BY c.position) AS colors
       FROM palettes p
       LEFT JOIN colors c ON p.id = c.palette_id
       WHERE p.id = $1
       GROUP BY p.id`,
      [paletteId]
    );

    if (result.rows.length === 0) {
      return res.status(404).json({ error: 'Palette not found' });
    }

    res.json(result.rows[0]);
  } catch (err) {
    console.error('Get palette detail error:', err);
    res.status(500).json({ error: 'Server error' });
  }
}

// Update palette (auth required)
export async function updatePalette(req, res) {
  const paletteId = req.params.id;
  const { title, theme, description, colors } = req.body;
  const userId = req.user.userId;

  try {
    const check = await pool.query('SELECT user_id FROM palettes WHERE id = $1', [paletteId]);
    if (check.rows.length === 0) return res.status(404).json({ error: 'Palette not found' });
    if (check.rows[0].user_id !== userId) return res.status(403).json({ error: 'Unauthorized' });

    await pool.query(
      'UPDATE palettes SET title = $1, theme = $2, description = $3 WHERE id = $4',
      [title, theme, description, paletteId]
    );

    await pool.query('DELETE FROM colors WHERE palette_id = $1', [paletteId]);

    for (let i = 0; i < colors.length; i++) {
      await pool.query(
        'INSERT INTO colors (palette_id, hex_code, position) VALUES ($1, $2, $3)',
        [paletteId, colors[i], i]
      );
    }

    res.json({ message: 'Palette updated successfully!' });
  } catch (err) {
    console.error('Update palette error:', err);
    res.status(500).json({ error: 'Server error' });
  }
}

// Delete palette (auth required)
export async function deletePalette(req, res) {
  const paletteId = req.params.id;
  const userId = req.user.userId;

  try {
    const check = await pool.query('SELECT user_id FROM palettes WHERE id = $1', [paletteId]);
    if (check.rows.length === 0) return res.status(404).json({ error: 'Palette not found' });
    if (check.rows[0].user_id !== userId) return res.status(403).json({ error: 'Unauthorized' });

    await pool.query('DELETE FROM colors WHERE palette_id = $1', [paletteId]);
    await pool.query('DELETE FROM palettes WHERE id = $1', [paletteId]);

    res.json({ message: 'Palette deleted successfully!' });
  } catch (err) {
    console.error('Delete palette error:', err);
    res.status(500).json({ error: 'Server error' });
  }
}
Ogheyy, now let’s create authController.js inside the controllers folder and import 3 libraries.
import pool from '../db/index.js';
import bcrypt from 'bcrypt';
import jwt from 'jsonwebtoken'
. pool is a class that we created before; it’s used to allow this controller to have a pool connection to PostgreSQL. Then we import the bcrypt library for password hashing. So the password will be stored securely in plain text. Lastly, we import jsonwebtoken (jwt) for authentication.
JSON Web Token (JWT), a digital identity that is given to a user after login. It consists of a long string of text, used to prove that the user has already verified.
Then, we create a register function
export async function register(req, res) {
  const { username, email, password } = req.body;
  try {
    const hash = await bcrypt.hash(password, 10);
    const result = await pool.query(
      'INSERT INTO users (username, email, password_hash) VALUES ($1, $2, $3) RETURNING id',
      [username, email, hash]
    );
    res.status(201).json({ userId: result.rows[0].id });
  } catch (err) {
    console.error('Register error:', err);
    res.status(500).json({ error: 'Register failed' });
  }
}
Step-by-step explanation:
- Initialize and export the register as an Asynchronous Function.
- req and res are objects for the request and response from Express.
- Get data from request -> username, email, password by destructing req.body object.
- Then we use try and catch blocks. This will catch the error if the process failed.
- Hash password -> bcrypt.hash(password, 10) 10 is a salt rounds (security level)
- Save data into the database using query ‘INSERT INTO users (username, email, password_hash) VALUES ($1, $2, $3) RETURNING id’ | $1, $2, $3 is a binding parameter to prevent SQL Injection | Returning id -> return user’s ID we just created.
- Sending a response to the client with status HTTP 201 Created indicates that the registration process completed successfully. Then return the userId that was just created.
- Catch an error if it occurs during the process of password hashing and database query. Then send an error to the console for debugging and a response to the client with status 500 Internal Server Error.
An Asynchronous Function is a JavaScript function that can run non-blocking code, which means a program can be executed without waiting for other programs. SO we can wait while the other part of the program is being executed.
export async function login(req, res) {
  const { email, password } = req.body;
  try {
    const result = await pool.query('SELECT * FROM users WHERE email = $1', [email]);
    const user = result.rows[0];
    if (!user || !(await bcrypt.compare(password, user.password_hash))) {
      return res.status(401).json({ error: 'Invalid credentials' });
    }
    const token = jwt.sign({ userId: user.id }, process.env.JWT_SECRET, { expiresIn: '1d' });
    res.json({ token });
  } catch (err) {
    console.error('Login error:', err);
    res.status(500).json({ error: 'Login failed' });
  }
}
Step-by-step explanation:
- Initialize and export login as an Asynchronous Function with req and res as the objects from Express
- Destructing req.body to get email and password
- Try and catch blocks. First, we try to find the user in the database using the email that we took from req.body
- Take the first line from the query, which contains the user’s data that we found.
- Check if the password match with hash in the database using bcrypt.compare.
- If the user is not found or invalid password, send error response with status 401 Unauthorized.
- If the login succeeds, create a JWT token for the user, which contains the userId and is signed with JWT_SECRET from .env. The token will expire in 1 day.
- Send the token to the client as a JSON response
- Catch an error if it occurs while the database query and password hashing, then show it to the console for debugging and send a response with status 500 Internal Server Error
Nowww, we have completed our authController.js. Here’s the full code of it.
import pool from '../db/index.js';
import bcrypt from 'bcrypt';
import jwt from 'jsonwebtoken';

export async function register(req, res) {
  const { username, email, password } = req.body;
  try {
    const hash = await bcrypt.hash(password, 10);
    const result = await pool.query(
      'INSERT INTO users (username, email, password_hash) VALUES ($1, $2, $3) RETURNING id',
      [username, email, hash]
    );
    res.status(201).json({ userId: result.rows[0].id });
  } catch (err) {
    console.error('Register error:', err);
    res.status(500).json({ error: 'Registration failed' });
  }
}

export async function login(req, res) {
  const { email, password } = req.body;
  try {
    const result = await pool.query('SELECT * FROM users WHERE email = $1', [email]);
    const user = result.rows[0];
    if (!user || !(await bcrypt.compare(password, user.password_hash))) {
      return res.status(401).json({ error: 'Invalid credentials' });
    }
    const token = jwt.sign({ userId: user.id }, process.env.JWT_SECRET, { expiresIn: '1d' });
    res.json({ token });
  } catch (err) {
    console.error('Login error:', err);
    res.status(500).json({ error: 'Login failed' });
  }
}
What’s nexxt?
- Middleware for auth
import jwt from 'jsonwebtoken';

export function authenticateToken(req, res, next) {
  const token = req.headers['authorization']?.split(' ')[1];
  if (!token) return res.sendStatus(401);

  jwt.verify(token, process.env.JWT_SECRET, (err, user) => {
    if (err) return res.sendStatus(403);
    req.user = user;
    next();
  });
}- import jwt from the jsonwebtoken library to handle and create token verification.
- Create and export authenticateToken function. The purpose of this function is to verify whether the the HTTP request has a valid token or not before continuing to the next handler.
- Get Authorization header from request | dividing two strings by space then take the second array (the token only)
- If the token not found, server will response 401 error code (Unauthorized)
- Verify token using secret key from our environment variable. If the token valid, callback will accept user data that embedded in the token.
- If the token not valid, ex: token expired or manipulated, server will response 403 forbidden.
- Lastly, save user’s data to req.user so we can use it on the next route.
- next(), calling a middleware or next handler to Express chain.
Okay, now have completed our middleware setup, next we will use it in our routes to provide security by applying authentication to our routes. Let’s start from Authentication routes auth.js.
import express from 'express';
import { register, login } from '../controllers/authController.js';

const router = express.Router();

router.post('/register', register);
router.post('/login', login);

export default router;- first, we import express and 2 logic functions for authentication, register and login from authController.js.
- then we create new router object from Express
- next, define routes by typing routes.method(‘/path’, function); | For this case we use post method because the client sends a request with login information such as username, password.
- Lastly, we export the router function so its available for other parts of the server.
Next we setup main functionality routes | palette.js
import express from 'express';
import {
    createPalette,
    getAllPalettes,
    getPaletteById,
    updatePalette,
    deletePalette
} from '../controllers/paletteController.js';
import { authenticateToken } from '../middleware/authenticateToken.js';

const router = express.Router();

router.post('/', authenticateToken, createPalette);
router.get('/', getAllPalettes);
router.get('/:id', getPaletteById);
router.put('/:id', authenticateToken, updatePalette);
router.delete('/:id', authenticateToken, deletePalette);

export default router;- Same like our previous route, we import express and then some functions from paletteController.js also authenticationToken from authenticationToken.js to enable authentication in some routes like create, update, and delete palette.
- then we add routes followed by the method, path, and function.
- add authenticatinToken function before the main one for request that require auth.
- and lastly we export it
and finally, we modify our server.js file. We add routes that already defined before
import express from 'express';
import cors from 'cors';
import dotenv from 'dotenv';
import authRoutes from './routes/auth.js';
import paletteRoutes from './routes/palettes.js';

dotenv.config();

const app = express();
app.use(cors());
app.use(express.json());

// Routes
app.use('/api/palettes', paletteRoutes);

app.use('/api/auth', authRoutes);

const PORT = process.env.PORT || 5000;
app.listen(PORT, () => {
    console.log(`Server is running on port ${PORT}`);
});- The only difference with our previous server.js file is just in the import and routes section. We import authRoutes and paletteRoutes functions and define the routes.
Now it’s all done for the backend. Try running the server and test the functionality in Postman!
To wrap up, here’s some functionality we have created before:

Let’s start by creating a Collection called Huevee, then we will add requests based on the table above

Now, start creating the first one, the request for Register. Using POST method.

Make sure to select body, choose raw, and JSON since we are about to input username, email, and password for registration using JSON. Then click Send.
After that, we got a response like this, showing that the user has been successfully created with the userID : 3.

Now, in the login request, input the JSON of the email and password of the account we just created, and click Send

We will get jwt token for login authentication. This token will be used for functionality that requires authentication. Make sure you copy it.

Let’s test the token authentication by creating a new palette! In the Headers section, click key, and select the Authorization, and for the Value type: Bearer [token]

So the Headers section will look like this:

Then move to the Body section and add JSON data of title, theme, description, and colors, then send it.

Then we will get a response like this:

Ok, after creating the palette, we will try to show all the palettes. Make sure to choose GET as the method. Then directly send it because for this method we are not using authentication, soo everyone can see it.

Then we will get all palette data in JSON like this:

We can also get palette data by ID by adding the ID of the palette in the end of the path like this

The ouput will be like this

Now, let’s move on to the request for modifying the palette

Make sure you add the token in Headers like the picture above☝️ and fill the new data in the body JSON. Then send it✈️

We will get a response that the palette has been successfully updated
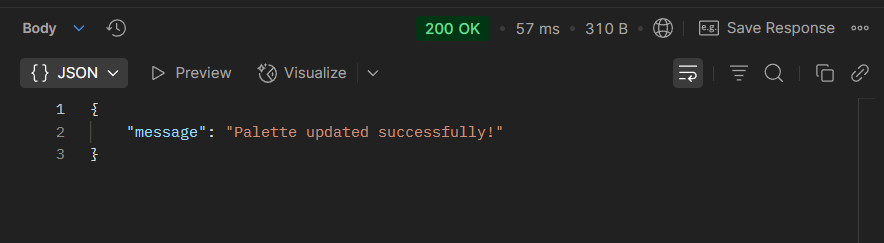
Try to resend get palette by ID to make sure that the palette actually modified

For the last one, we will try to delete api in our web app.

Since the delete function requires the user’s authentication, make sure you add the token in the Headers and then send it. We will get a response like this, which indicates that the palette with ID: 9 has been deleted successfully.

To make sure it actually deleted, try to run the Show All Palette request

And yeah… It’s gone like her :’(
For the next step, I will build the front end for this web app, stay tuned!
메타데이터
- post_id
- ced8a37e13b0
- slug
- huevee-project-database-and-backend-ced8a37e13b0
- url
- https://medium.com/@aafikrii/huevee-project-database-and-backend-ced8a37e13b0
- canonical_url
- https://medium.com/@aafikrii/huevee-project-database-and-backend-ced8a37e13b0
- author_url
- https://medium.com/@aafikrii
- status
- ok
- fetched_at
- 2026-06-16 19:09:56