How to Set Notifications Using UNUserNotificationCenter in iOS (Swift)
Notifications play a crucial role in keeping users engaged by reminding them about important events like birthdays, meetings, or reminders…
How to Set Notifications Using UNUserNotificationCenter in iOS (Swift)
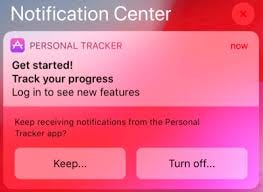
Notifications play a crucial role in keeping users engaged by reminding them about important events like birthdays, meetings, or reminders. In iOS, we use UNUserNotificationCenter to schedule and manage notifications. This article will guide you through setting up notifications in Swift, explaining each property, and providing a practical example of a birthday reminder.
1. Requesting Notification Permission
Before sending notifications, we must request the user’s permission. This is done using UNUserNotificationCenter.
import UserNotificationsfunc requestNotificationPermission() {
let center = UNUserNotificationCenter.current()
center.requestAuthorization(options: [.alert, .sound, .badge]) { granted, error in
if granted {
print("Permission granted")
} else {
print("Permission denied")
}
}
}.alert- Displays an alert when a notification arrives..sound- Plays a sound along with the notification..badge- Updates the app's badge number on the home screen.
Call requestNotificationPermission() in your AppDelegate or ViewController when launching the app.
2. Scheduling a Birthday Reminder Notification
Once permission is granted, we can schedule notifications.
func scheduleBirthdayReminder(name: String, day: Int, month: Int) {
    let content = UNMutableNotificationContent()
    content.title = "🎉 Birthday Reminder!"
    content.body = "Don't forget to wish \(name) a Happy Birthday! 🎂"
    content.sound = .default
var dateComponents = DateComponents()
dateComponents.day = day
dateComponents.month = month
dateComponents.hour = 9 // Reminder at 9 AM let trigger = UNCalendarNotificationTrigger(dateMatching: dateComponents, repeats: true)
let request = UNNotificationRequest(identifier: "birthday_\(name)", content: content, trigger: trigger) UNUserNotificationCenter.current().add(request) { error in
if let error = error {
print("Error scheduling notification: \(error.localizedDescription)")
}
}
}Breakdown of Key Properties:
**UNMutableNotificationContent**title: The title of the notification.body: The message shown in the notification.sound: The sound to play when the notification appears.**DateComponents**- Defines the specific date and time for the notification.
**UNCalendarNotificationTrigger**- Triggers notifications on a specific date and time.
repeats: trueensures it repeats every year.**UNNotificationRequest**- Creates a request to schedule a notification.
**UNUserNotificationCenter.current().add(request)**- Adds the notification to the system.
Call this function with a name and date:
scheduleBirthdayReminder(name: "Kirit", day: 15, month: 5) // May 15th3. Handling Notifications When the App is Open
By default, notifications won’t show when the app is in the foreground. To handle this, conform to UNUserNotificationCenterDelegate and implement the following method:
extension AppDelegate: UNUserNotificationCenterDelegate {
    func userNotificationCenter(
        _ center: UNUserNotificationCenter,
        willPresent notification: UNNotification,
        withCompletionHandler completionHandler: @escaping (UNNotificationPresentationOptions) -> Void
    ) {
        completionHandler([.banner, .sound])
    }
}.banner- Displays the notification as a banner..sound- Plays the notification sound.
Set UNUserNotificationCenter.delegate = self in didFinishLaunchingWithOptions.
4. Listing and Removing Notifications
Listing Pending Notifications:
func listPendingNotifications() {
    UNUserNotificationCenter.current().getPendingNotificationRequests { requests in
        for request in requests {
            print("Pending Notification: \(request.identifier)")
        }
    }
}
Removing a Scheduled Notification:
func removeNotification(identifier: String) {
    UNUserNotificationCenter.current().removePendingNotificationRequests(withIdentifiers: [identifier])
}
Conclusion
Using UNUserNotificationCenter, you can efficiently schedule, manage, and customize notifications in your iOS apps. Whether it's a birthday reminder, a daily task notification, or a special event alert, notifications enhance user engagement and improve the app experience.
About the Author
Kirit Gareja is a mobile app developer specializing in iOS and Android development. With expertise in SwiftUI and custom UI components, he builds visually appealing and user-friendly applications. Connect with him on LinkedIn: Kirit Gareja, or reach out via email: garejakirit@gmail.com.
Humor Message
“I set a reminder to exercise every morning. Now, every morning, my phone reminds me how good I am at ignoring notifications!” 😂📱
메타데이터
- post_id
- cffff3b22de2
- slug
- how-to-set-notifications-using-unusernotificationcenter-in-ios-swift-cffff3b22de2
- url
- https://medium.com/@garejakirit/how-to-set-notifications-using-unusernotificationcenter-in-ios-swift-cffff3b22de2
- canonical_url
- https://medium.com/@garejakirit/how-to-set-notifications-using-unusernotificationcenter-in-ios-swift-cffff3b22de2
- author_url
- https://medium.com/@garejakirit
- status
- ok
- fetched_at
- 2026-07-15 17:35:12






