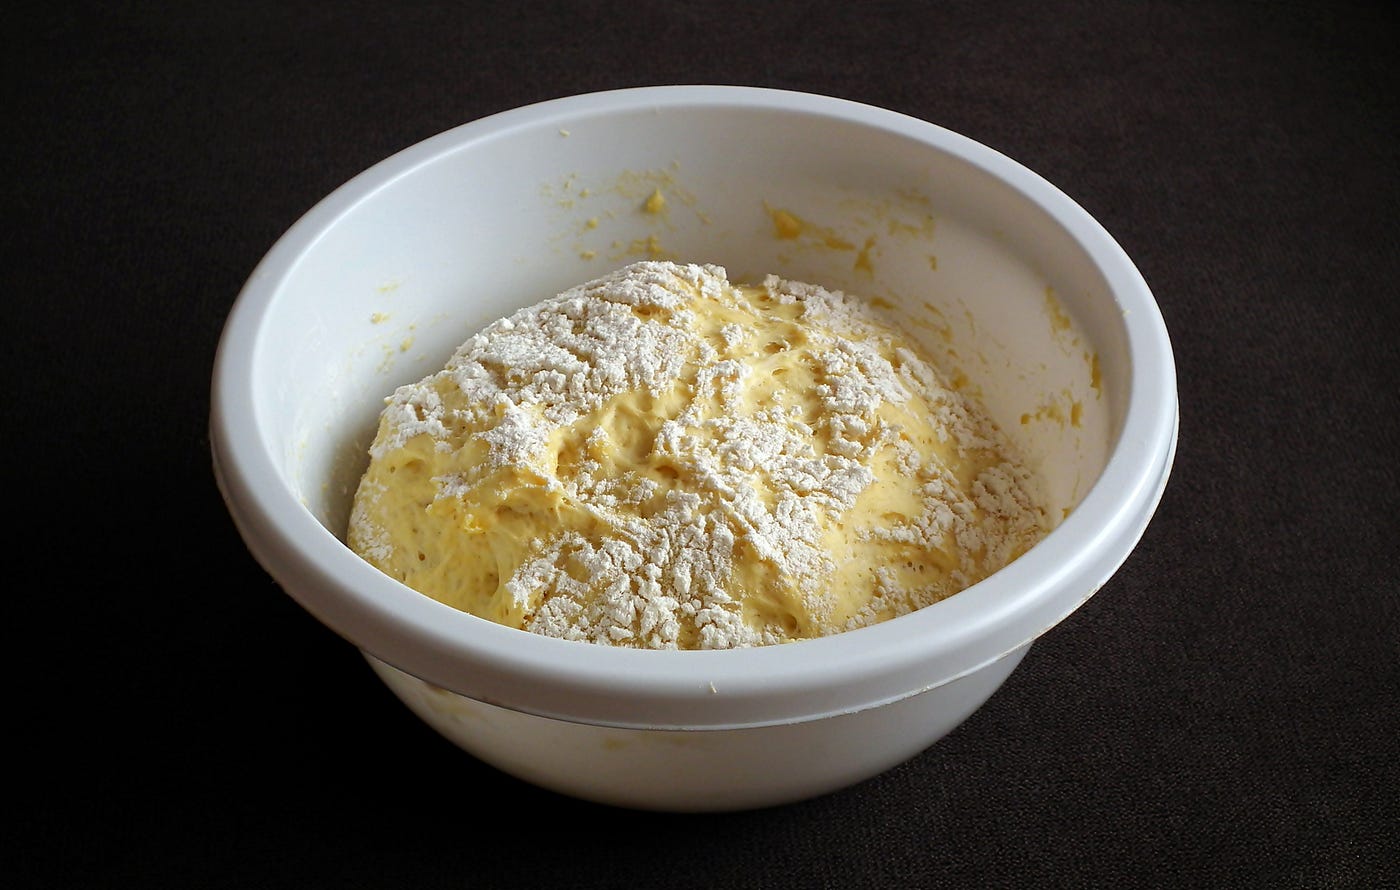
Kitchen Confidence #2: Yeast Dough
Fermentation, gluten development, shaping & proofing
Kitchen Confidence #2: Yeast Dough
Fermentation, gluten development, shaping & proofing
Graphic created by the author via Microsoft CoPilot
Welcome back to “Kitchen Confidence,” Tastyble’s series of multiple‑choice kitchen questions that sharpen your instincts and teach you something useful in just a few minutes. If you missed the previous installment, you can find it below:
There are foods remarkable for their complexity — layers of flavor and texture, intricate blends of herbs and spices. Think of a French cassoulet, a rich Italian Bolognese, or a Latin American mole sauce. Each is bold, elaborate, and unforgettable when done right.
And then there’s homemade bread — exquisite in its pure simplicity: water, flour, yeast, salt. That’s it. Simple, inexpensive, and unpretentious. Yet in my Mom’s skilled hands, those humble ingredients became proof that the whole is greater than the sum of its parts.
How the Ingredients Work Together
Flour forms the foundation; its proteins — gluten — create the web that traps carbon dioxide. When heated, starch firms up and supports those delicate strands. Water activates the gluten and carries sugars to the yeast, fueling fermentation. Salt strengthens the gluten and reins in the yeast’s enthusiasm, ensuring the dough rises at the right pace.
Yeast — the living magic. Its enzymes break down starch into sugar, consume it, and release carbon dioxide. Those bubbles, caught in the gluten web, transform a sticky mass into a loaf with life, flavor, and structure.
Bread may be simple, but it isn’t passive. The moment flour meets water, a subtle transformation begins — proteins link, starches swell, and yeast awakens. What looks like an unremarkable lump of dough is actually a living, changing structure, shaped by time, temperature, and your hands. Understanding why dough behaves the way it does will help demystify yeast dough and make it a pleasure.
What Makes Dough “Dough-y” (A Brief Science Lesson)
Bread begins with four ingredients, but each one plays a distinct, essential role. Once you understand what they do — and how they interact — you can read dough the way a gardener reads soil or a quilter reads fabric. You stop hoping for a good loaf and start creating one.
Flour: The Foundation
Flour is the backbone of every loaf. Its proteins — glutenin and gliadin — link together when hydrated to form gluten, a stretchy, elastic network that traps gas. Under a microscope, gluten looks like a delicate spider web. In the oven, that web expands, sets, and becomes the crumb structure of your bread. Starch plays its part too: as the dough heats, starches gelatinize, firming up and supporting the gluten network so the loaf holds its shape.
Water: The Activator
Water is the spark that starts everything. It hydrates the proteins so gluten can form, it dissolves the salt, and it carries sugars to the yeast. The amount of water is also crucial — hydration (the ratio of water to flour) determines dough texture. More water means a looser, more open crumb; less water yields a tighter, denser structure. Hydration isn’t just a number — it gives each bread its distinct personality. A 75% hydration dough behaves differently from a 60% one, and learning to feel that difference is part of becoming confident with yeast dough.
Salt: The Strengthener
Salt does far more than season the loaf. It tightens the gluten network, giving the dough strength and elasticity. It also moderates yeast activity, preventing the dough from rising too quickly. Without salt, dough balloons before the gluten is ready to support it … and it collapses just as easily. With salt, fermentation slows to a steady, controlled pace, allowing flavor and structure to develop in harmony.
Yeast: The Living Engine
Yeast is a living microorganism, and fermentation is its life’s work. When yeast consumes sugar, it produces carbon dioxide and a host of flavorful byproducts. Those bubbles inflate the gluten network, giving the dough its rise.
Temperature, time, and dough composition all influence yeast behavior. Warmth speeds it up; coolness slows it down. Enriched doughs — those with butter, eggs, or sugar — require more patience because fat and sugar make yeast work harder.
Once you understand yeast as a living partner rather than a mysterious powder, the whole process becomes less intimidating and far more intuitive.
Common Problems With Yeast Dough (and What They Mean)
Even experienced bakers run into dough that tears or refuses to rise. But there’s good news. Yeast dough is wonderfully open and honest. It tells you exactly what’s wrong — once you know how to read the language.
My dough didn’t rise.
This usually means the yeast wasn’t active enough or the environment was too cold. Cold dough = slow fermentation. Yeast works sluggishly below 70°F. That’s always my first guess, but there could be other culprits at hand.
Look at the jar or envelope — it should have a date stamp, a “Best if used by.” Old yeast = weak fermentation. If it’s been open for months, it may be tired.
Another consideration is precise measurement. Salt is essential for flavor and gluten strength, but too much of it — or salt that isn’t evenly dispersed — can slow yeast to a crawl. If your dough is still dense and heavy after an hour, salt may be the culprit.
When dough does rise, but too quickly, a different set of problems appears.
My dough rose fast and then collapsed.
A collapsing loaf is almost always a sign that the dough’s structure couldn’t support the gas the yeast produced. Think of gluten as the scaffolding of the bread: if it’s weak, overstretched, or underdeveloped, the whole thing sinks. Here are the most common reasons:
Overproofing: This is the number‑one culprit. When dough rises too long, the gluten network stretches past its limit. It becomes thin, fragile, and unable to hold the gas it’s built. The dough looks beautifully puffy … right up until you touch it or put it in the oven, and then it deflates like a balloon.
Under‑kneading or under‑developed gluten: If the dough never developed enough strength in the first place, it can’t support the rise. Under‑kneaded dough tears easily and collapses because the internal “webbing” simply isn’t there.
If you’re a visual learner, this quick clip beautifully shows the kneading rhythm.
[embed]
Too much yeast or too much water: Excess yeast makes the dough rise too fast, before the gluten has time to strengthen. Too much water weakens the structure, making the dough spread and sink instead of lifting.
Oven temperature issues: If the oven is too cool, the dough expands before the heat can set the structure. That early expansion tears the gluten and causes the loaf to fall. (A preheated oven is non‑negotiable.)
Under‑baking: If the loaf comes out before the interior is fully set, the crumb collapses as it cools. The outside may look done, but the inside hasn’t firmed enough to hold itself up.
Water that’s too hot: If the liquid added to the yeast is above 120°F, it can kill the yeast outright. It’s a frequent culprit, especially for beginning bakers.
My bread is dense.
Density comes from one of three culprits:
- Underproofing: not enough gas in the dough
- Weak gluten: the dough can’t hold the gas it has
- Low hydration: the dough is too stiff to expand. If the crumb looks tight and heavy, the dough needed more time, more water, or more strength.
Dense bread is almost always a sign that the dough didn’t trap enough gas, or couldn’t hold onto the gas it made. One simple way to check proofing (has the dough risen enough?) is the poke test.
Gently press a floured finger into the dough. If the indentation springs back quickly, the dough is still underproofed — it hasn’t built enough gas or elasticity yet. If it springs back slowly and leaves a slight impression, it’s ready. If it doesn’t spring back at all, it’s likely overproofed. This quick cue helps you judge whether the dough has developed enough strength and gas to bake up light instead of dense.
[embed]
My enriched dough barely rose.
Butter, eggs, and sugar dramatically slow the work of yeast. Fat coats gluten strands, making it more difficult to build structure, and cold butter can cool the dough. Sugar is hygroscopic — it grabs water like a toddler with a lollipop. This process keeps baked goods moist, but there’s also a downside. Sugar competes with the yeast for water, and sugar always wins.
Enriched doughs need patience — long, slow fermentation and a warm environment. Many bakers give enriched dough a longer first rise to let the gluten catch up.
My loaf has no flavor
Flavor comes from time. A fast rise produces volume but not complexity. A slow, cool fermentation allows yeast to create organic acids and alcohols that deepen flavor. If your bread tastes bland, it’s asking for a longer, slower rise.
Now that you know what can sabotage a good rise, let’s find out how much of it you can diagnose on sight. Take the quiz and see where your instincts land.
Kitchen Confidence #2 — Yeast Dough Quiz
Question 1:
Why didn’t my dough rise during the first proof?
A. The dough was too cold for the yeast to work B. The gluten became too strong too early C. The oven was preheated too long
Question 2:
Why does my dough collapse after rising?
A. The dough needed more salt to activate the yeast B. It was overproofed, and the gluten network weakened C. The oven was preheated too long
Question 3:
Why is my enriched dough (with butter, eggs, or sugar) rising so slowly?
A. The gluten network is underdeveloped B. Fat and sugar slow down yeast activity C. The dough is too light and keeps floating away (humorous option)
Question 4:
Why does my dough resist stretching during shaping?
A. The dough is over‑hydrated and slipping apart B. The yeast is working too hard and holding the dough rigid C. The gluten is tense and needs time to relax
Answer Key — (No peeking until you’ve guessed!)
**A — The dough was too cold for the yeast to work. **Summary: Cold temperatures slow yeast dramatically, so fermentation barely begins.
*B— It was overproofed, and the gluten network weakened. Summary: *When dough rises too long, the gluten can’t support the gas, and the structure collapses.
**A — Fat and sugar slow down yeast activity. **Summary: Enriched doughs ferment slowly because fat and sugar make yeast work harder.
C — The gluten needs time to relax Summary: Dough that fights back during shaping has gluten that’s tightened up. A short rest (10–20 minutes) lets the gluten relax so the dough becomes smooth and workable.
Detailed Explanations — Kitchen Confidence #2: Yeast Dough
Question 1 — Why didn’t my dough rise?
A. When dough refuses to rise, it’s almost always a temperature story. Yeast is a living organism, and like all living things, it slows down when it’s cold. Below about 70 degrees F. (21 degrees C.), fermentation crawls; below 60 degrees F. (15 degrees C.), it’s practically napping.
A bowl of dough sitting on a chilly countertop may look inert, but the yeast is simply waiting for warmth. Once the dough reaches a comfortable temperature, the yeast wakes up, begins feeding on sugars, and fermentation takes off. This is why professional bakers treat temperature as an ingredient — not an afterthought.
Question 2 — Why did my dough collapse after rising?
B. A collapsing dough is the classic signature of overproofing. During fermentation, yeast produces gas that inflates the gluten network. However, if the dough rises too long, the gluten stretches past its limit and loses its ability to hold that gas.
The dough becomes fragile, puffy, and unstable — like a balloon that’s been overinflated. When you touch it, score it, or move it to the oven, it deflates because the structure can’t support the pressure anymore. The solution isn’t more kneading; it’s better timing and cooler temperatures.
Question 3— Why is my enriched dough rising so slowly?
A. Enriched doughs — the luxurious ones with butter, eggs, or sugar — are delicious but demanding. Fat coats gluten strands, making it harder for them to link and build strength. Sugar competes with yeast for water, slowing fermentation even further.
And if the butter or eggs are cold, they cool the dough and slow the yeast down even more. The result is a dough that rises at a leisurely pace, even when everything is going right. This isn’t a flaw — it’s the nature of enriched dough. Patience is the secret ingredient.
Question 4 — Why does my dough resist stretching?
C. When dough feels tight, springs back, and fights you during shaping, it’s not being “stubborn” — the gluten is simply too tense. Gluten strands form a stretchy network as you mix and knead. That network gives bread its structure, but it also tightens up when it’s worked a lot, just like a muscle after exercise.
Right after kneading, or if you’ve handled the dough vigorously, the gluten is pulled taut. If you try to stretch or roll it immediately, it resists and snaps back into place. Forcing it at this stage can lead to uneven shaping and a tight crumb.
The fix isn’t more kneading — it’s rest. Cover the dough and let it sit for 10–20 minutes. During this time, the gluten relaxes and lengthens on its own. When you come back to it, the dough will feel more supple, stretch more easily, and cooperate during shaping.
Yeast dough can feel mysterious when you’re first learning, but the truth is beautifully simple: it wants to rise. It wants to become bread. Your job is not to force it into perfection but to guide it — with your hands, your senses, and your understanding of what’s happening beneath the surface.
The more you work with dough, the more you’ll recognize its moods: when it needs warmth, when it needs rest, when it’s ready to stretch, and when it’s asking for patience. These aren’t magic tricks; they’re skills you build loaf by loaf, just like my mom did in her kitchen, turning four humble ingredients into something far greater than the sum of their parts.
And here’s the best part — every batch teaches you something. Every loaf — even the imperfect ones — builds your confidence. You’re not just making bread. You’re learning to read a living, changing system with your own hands.
Next month, we’ll shift from living dough to living heat — exploring how pans, temperature, and browning shape flavor and texture. But for now, enjoy the magic of yeast dough.
Did you like what you read? If you wish to read my future writings, subscribe to my email list, and you’ll be notified every time I publish a new story.

메타데이터
- post_id
- d27a5726f8d4
- slug
- kitchen-confidence-2-yeast-dough-d27a5726f8d4
- url
- https://medium.tastyble.com/kitchen-confidence-2-yeast-dough-d27a5726f8d4
- canonical_url
- https://medium.tastyble.com/kitchen-confidence-2-yeast-dough-d27a5726f8d4
- author_url
- https://medium.com/@lindalum_2779
- status
- ok
- fetched_at
- 2026-06-10 12:26:30