Running any LLM on Mainframes (s390x)
In this guide, I will break down all the steps of compiling your llama.cpp and GGUFv3 big-endian models into simple, easy-to-follow…
Running any LLM on Mainframes (s390x)
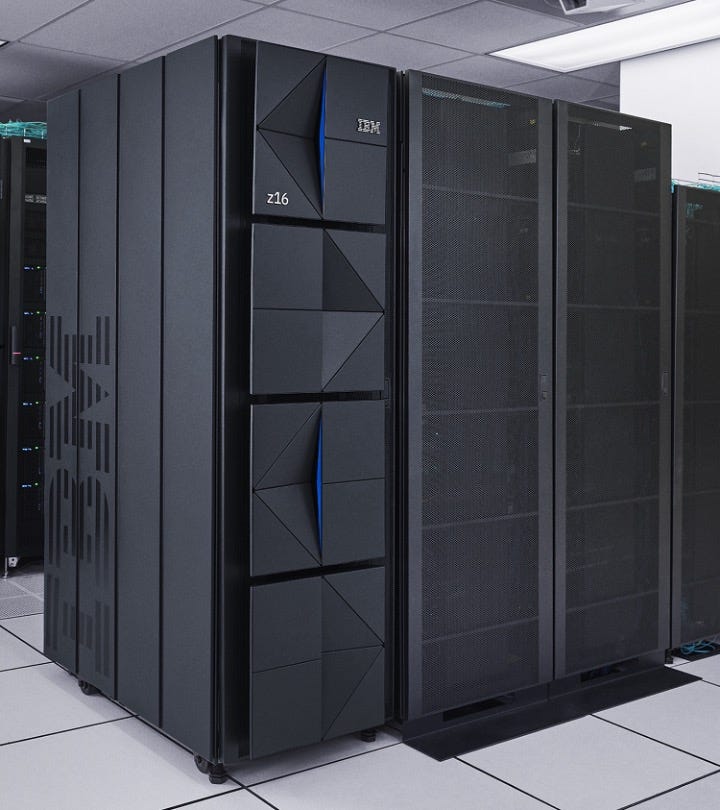
IBM z16 Mainframe
In this guide, I will break down all the steps of compiling your llama.cpp and GGUFv3 big-endian models into simple, easy-to-follow instructions. This includes steps for downloading and installing the necessary tools required for the process.
I will be using an IBM z15 Mainframe with 24 cores, 72 GB of RAM, 100 GB of storage, and an Ubuntu 24.04 LTS server for this guide. But you are free to use your distribution of Linux as the process is similar.
I hope this guide will be helpful to everyone, especially the IBM Z & LinuxONE community, who may be having difficulties getting it to run on their mainframes.
Prerequisites
- IBM Z & LinuxONE Mainframe
- Ubuntu 24.04 LTS server (fresh install preferred)
- More than 50 GB of storage
Before we start, here are some things to take note of
- IBM Z & LinuxONE mainframes run on a completely different architecture as compared to commodity hardware, which means we will have to compile almost everything from source.
- Commodity hardware uses AMD64 architecture and little-endian byte ordering, while mainframe uses the s390x architecture and big-endian byte ordering, both of which are incompatible to one another.
- Pre-quantised GGUFv2/3 binaries found on HuggingFace are compiled using little-endian byte-ordering, which will not work on IBM mainframes. You will need to either compile locally or use binaries in repositories with “BE” (big-endian) such as taronaeo/Granite-3.0–1B-A400M-Instruct-BE-GGUF.
Step 1: Update and Upgrade Repository Packages (For fresh install)
Assuming that you are running a fresh install of Ubuntu server, we will need to get all the repository packages updated and upgraded. We can do it using the following commands:
sudo apt update -y
sudo apt upgrade -y
Step 2: Install Required Tools
sudo apt install wget git htop -y
sudo apt install cmake build-essential -ywget— to download installation script from Anaconda’s websitegit— to downloadllama.cppsource code and compilehtop— to monitor system performance in a graphical terminalcmake— build tool essential for building packages from sourcebuild-essential— essential packages and libraries for build tools
Step 3: Install Anaconda
As Anaconda is a Python distribution manager, we can save valuable time away from compiling from source and instead, use a pre-compiled version available.
We will download the installation script into the /opt directory for ease. As of this writing, the latest version is 2024.10–1 and you can check the latest version here, but make sure to only download the s390x architecture.
# Current directory is /opt
/opt# wget https://repo.anaconda.com/archive/Anaconda3-2024.10-1-Linux-s390x.sh
Next, we make the downloaded installation script executable, and run it.
# Current directory is /opt
/opt# chmod +x Anaconda3-2024.10-1-Linux-s390x.sh
/opt# ./Anaconda3-2024.10-1-Linux-s390x.sh
You will be prompted to review the license agreement by pressing ENTER . Scroll all the way down and accept the license terms.
Next, you will be prompted on the location to install Anaconda. I will be using /opt/anaconda3 for conciseness. Like so:
Anaconda3 will now be installed into this location:
/root/anaconda3

  - Press ENTER to confirm the location
  - Press CTRL-C to abort the installation
  - Or specify a different location below

[/root/anaconda3] >>> /opt/anaconda3
When prompted if you would like to update your shell profile, unless your $SHELL environment variable is set, put “no”.
Do you wish to update your shell profile to automatically initialize conda?
This will activate conda on startup and change the command prompt when activated.
If you'd prefer that conda's base environment not be activated on startup,
   run the following command when conda is activated:

conda config --set auto_activate_base false

You can undo this by running `conda init --reverse $SHELL`? [yes|no]
[no] >>> no
Step 4: Create and Activate Anaconda Environment
At the very end of the installation script, you will be given an eval command to use for activating the base environment. Use that to activate the base environment:
# Current directory is /opt
/opt# eval "$(/opt/anaconda3/bin/conda shell.bash hook)"

# Run this command if you want to add `conda` to PATH
# A shell restart may be necessary
/opt# conda init
Next, we can create an environment for installing llama.cpp pip packages. As of this writing, llama.cpp supports up to Python 3.10 and I will initialise the environment using that constraint.
# Current directory is /opt

# Create the environment
# Replace python=3.10.11 with any version that is compatible
/opt# conda create --name llama.cpp python=3.10.11

# Activate the new environment
/opt# conda activate llama.cpp
Step 5: Install Required Python Packages
As of this writing, IBM has announced the Telum II processor that has an AI accelerator that comes with the IBM z16 mainframes. However, I am using a z15 mainframe and as such, will be limited to non-accelerated speeds.
Llama.cpp uses the pytorch library to compile and write GGUF models. We can install that and transformers package by running the following commands:
# Current directory is /opt
/opt# conda install pytorch cpuonly -c pytorch
/opt# conda install transformers
/opt# conda install 'transformers[torch]'
Step 6: Clone Llama.cpp and Compile Source Code
We can clone the latest llama.cpp code using the following command:
# Current directory is /opt
/opt# git clone https://github.com/ggml-org/ggml

# Move into the llama.cpp directory
cd llama.cpp
Next, we can generate the executable binaries by compiling the source code using the following command:
# NOTE: As of #10514, Make is deprecated in favour of CMake.
#       And as such, this article has been updated to use CMake.
# See more: https://github.com/ggml-org/llama.cpp/pull/10514

# Current directory is /opt/llama.cpp
# We will configure the build using the following command
/opt/llama.cpp# cmake -B build -DCMAKE_BUILD_TYPE=Release -DGGML_BLAS=ON -DGGML_BLAS_VENDOR=OpenBLAS

# Next, we will build the binaries using the following command
# Binaries will be built into the /opt/llama.cpp/build/bin directory
/opt/llama.cpp# cmake --build build/ --config Release -j $(nproc)
If the compilation is successful, you should see a few binaries generated including but not limited to llama-cli binary as shown below:
# Current directory is /opt/llama.cpp/build/bin
/opt/llama.cpp/build/bin# ls -la
...
-rwxr-xr-x.  1 root root 40422504 Nov  3 15:35 llama-cli
-rwxr-xr-x.  1 root root 40286824 Nov  3 15:35 llama-quantize
...
We now have the llama.cpp binaries required for running our GGUF models locally and as a server.
Step 7: Install Llama.cpp pip Packages for GGUF Quantisation
Note: If you intend on running pre-quantised GGUF models with the correct big-endian format (like taronaeo/Granite-3.0–1B-A400M-Instruct-BE-GGUF), you can skip this and jump straight to Step 10.
Before we install the llama.cpp pip packages, we need to edit the requirements.txt file to ignore pytorch as we have already installed it via Anaconda earlier. Otherwise, pip install will fail as pytorch does not distribute for the s390x architecture.
Edit the /opt/llama.cpp/requirements.txt file to comment out installing packages from requirements-convert_hf_to_gguf.txt , requirements-convert_hf_to_gguf_update.txt , requirements-convert_llama_ggml_to_gguf.txt , requirements-convert_lora_to_gguf.txt as shown below:
# Current directory /opt/llama.cpp
# Change "nvim" to any editor you prefer
/opt/llama.cpp# nvim requirements.txt

...
# These requirements include all dependencies for all top-level python scripts
# for llama.cpp. Avoid adding packages here directly.
#
# Package versions must stay compatible across all top-level python scripts.
#

-r ./requirements/requirements-convert_legacy_llama.txt

# -r ./requirements/requirements-convert_hf_to_gguf.txt
# -r ./requirements/requirements-convert_hf_to_gguf_update.txt
# -r ./requirements/requirements-convert_llama_ggml_to_gguf.txt
# -r ./requirements/requirements-convert_lora_to_gguf.txt
...
Save and exit. Next, we can install the missing pip packages using the pip install -r requirements.txt command:
# Current directory is /opt/llama.cpp
/opt/llama.cpp# pip install -r requirements.txt
Step 8: Quantise Raw Model to GGUF
Note: If you intend on running pre-quantised GGUF models with the correct big-endian format (like taronaeo/Granite-3.0–1B-A400M-Instruct-BE-GGUF), you can skip this and jump straight to Step 10.
We will first need to choose an LLM model to compile. For this guide, I will be using the recently released IBM Granite 3.0 1B A400M Instruct model.
To download the raw model, we can use Python and the following script to download to our current folder:
# Filename: hf_download.py

#!/usr/bin/env python3
from huggingface_hub import login, snapshot_download

# Change model_id to whichever model you wish to download
model_id = "ibm-granite/granite-3.0-1b-a400m-instruct"

# If you are downloading a gated model such as Llama
login(token="CHANGEME")

# Start the download process, creating a new directory for the raw model
# Change local_dir to whichever directory you wish to use or create
# Parameter force_download is used to override cache bugs
snapshot_download(repo_id=model_id, local_dir="granite-3.0-1b-a400m-instruct", force_download=True)
We can run this script by running the following command:
# Current directory is /opt
/opt# python3 hf_download.py

added_tokens.json: 100%|__________| 87.0/87.0 [00:00<00:00, 670kB/s]
special_tokens_map.json: 100%|____| 701/701 [00:00<00:00, 6.27MB/s]
generation_config.json: 100%|_____| 137/137 [00:00<00:00, 1.94MB/s]
.gitattributes: 100%|_____________| 1.52k/1.52k [00:00<00:00, 18.5MB/s]
config.json: 100%|________________| 888/888 [00:00<00:00, 7.96MB/s]
README.md: 100%|__________________| 10.9k/10.9k [00:00<00:00, 73.2MB/s]
merges.txt: 100%|_________________| 442k/442k [00:00<00:00, 1.14MB/s]
tokenizer_config.json: 100%|______| 5.64k/5.64k [00:00<00:00, 36.9MB/s]
vocab.json: 100%|_________________| 777k/777k [00:00<00:00, 4.36MB/s]
tokenizer.json: 100%|_____________| 3.48M/3.48M [00:00<00:00, 8.82MB/s]
model.safetensors: 100%|__________| 2.67G/2.67G [01:03<00:00, 42.1MB/s]
Fetching 11 files: 100%|__________| 11/11 [01:04<00:00,  5.82s/it]
'/opt/granite-3.0-1b-a400m-instruct'
Now, we can use the llama.cpp/convert_hf_to_gguf.py tool to quantise the raw model into a GGUFv3 binary as follows:
# Current directory is /opt
/opt# python3 llama.cpp/convert_hf_to_gguf.py --outfile granite-3.0-1b-a400m-instruct-be.gguf --bigendian --model-name granite-3.0-1b-a400m-instruct-be granite-3.0-1b-a400m-instruct/
Notice the following flags set to the quantisation process:
--bigendian— force quantisation to use big-endian byte-ordering instead of the conventional little-endian byte-ordering.--outfile granite-3.0-1b-a400m-instruct-be.gguf— the quantised binary is named with a “BE” at the very end, signifying that it is a big-endian byte-order model.granite-3.0-1b-a400m-instruct/— specify the raw model directory to quantise intoGGUFv3from.
This process will take awhile to complete and may fail because torch is unable to find GLIBCXX_X.X.X. If your quantisation process has succeeded, skip Step 9. Otherwise, continue reading for the fix.
Step 9: Fixing “GLIBCXX_X.X.X” Not Found By Torch
If you encountered the error below while trying to quantise a raw model, continue reading this step. Otherwise, skip this step.
/opt# python3 llama.cpp/convert_hf_to_gguf.py --outfile granite-3.0-1b-a400m-instruct-be.gguf --bigendian --model-name granite-3.0-1b-a400m-instruct-be granite-3.0-1b-a400m-instruct/

Traceback (most recent call last):
  File "/opt/llama.cpp/convert_hf_to_gguf.py", line 29, in <module>
    import gguf
  File "/opt/llama.cpp/gguf-py/gguf/__init__.py", line 7, in <module>
    from .vocab import *
  File "/opt/llama.cpp/gguf-py/gguf/vocab.py", line 10, in <module>
    from sentencepiece import SentencePieceProcessor
  File "/opt/anaconda3/envs/llama.cpp/lib/python3.10/site-packages/sentencepiece/__init__.py", line 10, in <module>
    from . import _sentencepiece
ImportError: /opt/anaconda3/envs/llama.cpp/lib/python3.10/site-packages/torch/lib/../../../../libstdc++.so.6: version `GLIBCXX_3.4.32' not found (required by /opt/anaconda3/envs/llama.cpp/lib/python3.10/site-packages/sentencepiece/_sentencepiece.cpython-310-s390x-linux-gnu.so)
What happened? Torch is using library libstdc++.so.6 found in /opt/anaconda3/envs/llama.cpp/lib/libstdc++.so.6.0.29, which does not contain the expected GLIBCXX_3.4.32 version.
How can we verify that it is not there? You can run strings /opt/anaconda3/envs/llama.cpp/lib/libstdc++.so.6.0.29 | grep -o GLIBCXX_3.4.32 and notice that there is no output.
The fix:
# Current directory is /opt/llama.cpp
# Find libstdc++.so files in the system
/opt/llama.cpp# find / -name "libstdc++.so*" 2>/dev/null

/opt/anaconda3/pkgs/libstdcxx-ng-11.2.0-h1234567_1/lib/libstdc++.so
/opt/anaconda3/pkgs/libstdcxx-ng-11.2.0-h1234567_1/lib/libstdc++.so.6.0.29
/opt/anaconda3/pkgs/libstdcxx-ng-11.2.0-h1234567_1/lib/libstdc++.so.6
/opt/anaconda3/lib/libstdc++.so
/opt/anaconda3/lib/libstdc++.so.6
/opt/anaconda3/lib/libstdc++.so.6.0.29
/opt/anaconda3/envs/llama.cpp/lib/libstdc++.so
/opt/anaconda3/envs/llama.cpp/lib/libstdc++.so.6
/opt/anaconda3/envs/llama.cpp/lib/libstdc++.so.6.0.29
/usr/lib/s390x-linux-gnu/libstdc++.so.6
/usr/lib/s390x-linux-gnu/libstdc++.so.6.0.33
/usr/lib/gcc/s390x-linux-gnu/13/libstdc++.so
/usr/share/gdb/auto-load/usr/lib/s390x-linux-gnu/libstdc++.so.6.0.33-gdb.py
To breakdown the command, we are finding any filenames matching the pattern "libstdc++.so" from the / (root) directory and piping any errors found to /dev/null to redirect errors away from cluttering the terminal.
From the output, you should notice the system’s libstdc++.so library located in the /usr/lib/s390x-linux-gnu directory. That library contains the correct GLIBCXX version. We can verify by running the following command and notice that grep returns a hit:
# Current directory is /opt
/opt# strings /usr/lib/s390x-linux-gnu/libstdc++.so.6.0.33 | grep -o "GLIBCXX_3.4.32"

GLIBCXX_3.4.32
Next, we are going to symbolic-link the correct library to the affected location described in the build error logs.
# Current directory /opt

# Change "libstdc++.so.6.0.33" to whatever you have in your system
# Change "/opt/anaconda3/envs/llama.cpp" to whatever was reported in the error
/opt# ln -sf /opt/anaconda3/envs/llama.cpp/lib/libstdc++.so.6.0.33 /opt/anaconda3/envs/llama.cpp/lib/libstdc++.so
/opt# ln -sf /opt/anaconda3/envs/llama.cpp/lib/libstdc++.so.6.0.33 /opt/anaconda3/envs/llama.cpp/lib/libstdc++.so.6
Try re-running the llama.cpp quantisation tool again and it should now succeed.
# Current directory is /opt
/opt# python3 llama.cpp/convert_hf_to_gguf.py --outfile granite-3.0-1b-a400m-instruct-be.gguf --bigendian --model-name granite-3.0-1b-a400m-instruct-be granite-3.0-1b-a400m-instruct/

...
INFO:hf-to-gguf:Set model quantization version
INFO:gguf.gguf_writer:Writing the following files:
INFO:gguf.gguf_writer:granite-3.0-1b-a400m-instruct-be.gguf: n_tensors = 242, total_size = 2.7G
Writing: 100%|___________________________________________| 2.67G/2.67G [00:17<00:00, 156Mbyte/s]
INFO:hf-to-gguf:Model successfully exported to granite-3.0-1b-a400m-instruct-be.gguf
Step 10: Run the Quantised Model
Finally! Using the previously compiled llama-cli executable, we can try the model and see how it performs using the following command:
# Current directory is /opt
/opt# llama.cpp/build/bin/llama-cli -t 8 -n 50 -m granite-3.0-1b-a400m-instruct-be.gguf -p "List me ideas to start a dog walking business 1."

...
sampler seed: 2064000822
sampler params:
        repeat_last_n = 64, repeat_penalty = 1.000, frequency_penalty = 0.000, presence_penalty = 0.000
        dry_multiplier = 0.000, dry_base = 1.750, dry_allowed_length = 2, dry_penalty_last_n = -1
        top_k = 40, top_p = 0.950, min_p = 0.050, xtc_probability = 0.000, xtc_threshold = 0.100, typical_p = 1.000, temp = 0.800
        mirostat = 0, mirostat_lr = 0.100, mirostat_ent = 5.000
sampler chain: logits -> logit-bias -> penalties -> dry -> top-k -> typical -> top-p -> min-p -> xtc -> temp-ext -> dist
generate: n_ctx = 4096, n_batch = 2048, n_predict = 50, n_keep = 0

List me ideas to start a dog walking business 1. Start a dog walking service.
2. Offer dog walking workshops or training sessions.
3. Create a dog walking app or online platform.
4. Partner with local dog owners to offer discounts or promotions.
...
To breakdown the command:
-t 8— sets the number of threads to 8. Set this equivalent to the number of cores available in your system.-n 50— sets the number of tokens to predict to 50 for testing purposes. Remove this flag if you want to run until the context is filled.-p "..."— sets the prompt to ask the model.
Viola! You can now run any LLM models on your mainframe!
Statistics
It is interesting to see how mainframes can run LLMs using only the CPU and have decent inference speeds without any on-processor accelerator or GPU. Running the prompt in Step 10 had the following performance metrics:
llama_perf_sampler_print:    sampling time =       3.29 ms /    62 runs   (    0.05 ms per token, 18856.45 tokens per second)
llama_perf_context_print:        load time =    3004.86 ms
llama_perf_context_print: prompt eval time =    5650.03 ms /    12 tokens (  470.84 ms per token,     2.12 tokens per second)
llama_perf_context_print:        eval time =  114924.67 ms /    49 runs   ( 2345.40 ms per token,     0.43 tokens per second)
llama_perf_context_print:       total time =  120596.28 ms /    61 tokens
At 2.12 tokens per second, I think it is not horrendously slow and at least decent at showing a Proof-of-Concept that LLMs do in fact, run on mainframes. With the new IBM Telum II processor, I would like to see the performance metrics with the on-processor accelerator and how it fairs against GPU-accelerated hardware.
Connect with me
I’m currently a Year 3 Nanyang Polytechnic student studying Cybersecurity & Digital Forensics, and also an IBM Security Solutions Engineer for IBM Z & LinuxONE. If you enjoy my work, let’s connect on LinkedIn at in/taronaeo!
메타데이터
- post_id
- d5acc56ea649
- slug
- running-any-llm-on-mainframes-s390x-d5acc56ea649
- url
- https://medium.com/@taronaeo/running-any-llm-on-mainframes-s390x-d5acc56ea649
- canonical_url
- https://medium.com/@taronaeo/running-any-llm-on-mainframes-s390x-d5acc56ea649
- author_url
- https://medium.com/@taronaeo
- status
- ok
- fetched_at
- 2026-07-22 07:45:57