5 Ways I Get a Cinematic Look in Lumion 2026 Without Touching Photoshop
Most “cinematic” archviz renders are fixed in post. These five settings get you most of the way there inside Lumion itself, before you ever…
5 Ways I Get a Cinematic Look in Lumion 2026 Without Touching Photoshop
Most “cinematic” archviz renders are fixed in post. These five settings get you most of the way there inside Lumion itself, before you ever export. No After Effects, no color grading pass afterward.
By iRender Team · Last Updated: May 2026
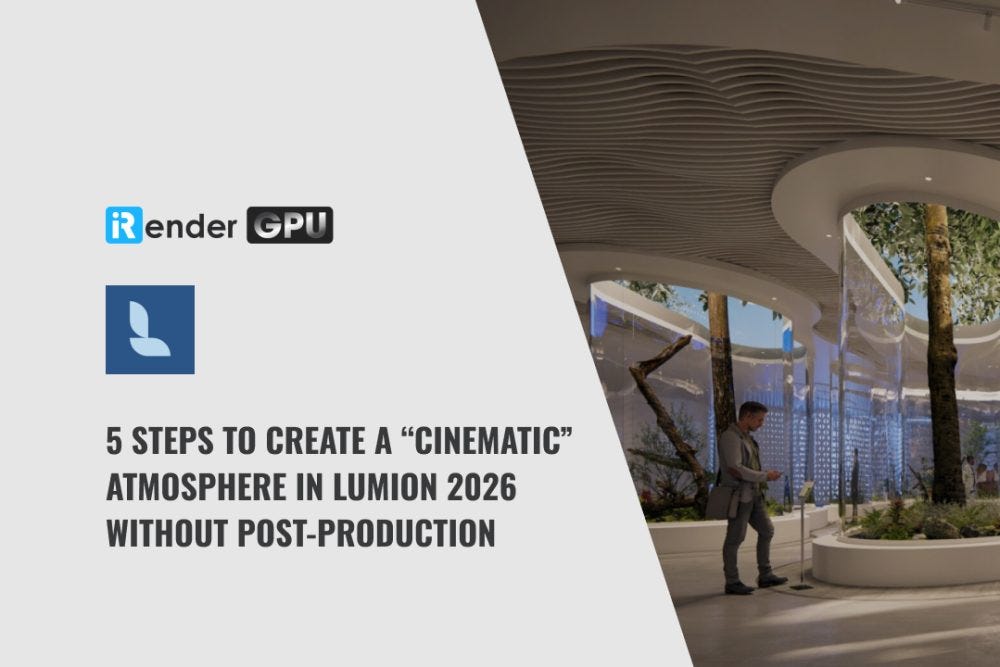
To get a cinematic atmosphere in Lumion 2026 without post-production, work inside the renderer using five techniques: pick a directional Real Sky for strong natural light (low-angle sun reads as cinematic), turn on the Ray Tracing Effect for physically accurate shadows and reflections, add volumetric fog so light becomes visible as shafts through windows and trees, layer atmospheric haze and particles for depth, and finish with PBR materials plus Lumion’s effect stack (color correction, bloom, depth of field). For final stills, the upgraded AI Upscaler (new 4X mode, up to 16K) sharpens output without a separate edit. Lumion 2026 uses the same ray tracing pipeline as 2025, so these settings carry over between both versions.
Step 1: Let the Sky Do the Lighting
The fastest way to make a render feel like a film frame is to stop over-lighting it.
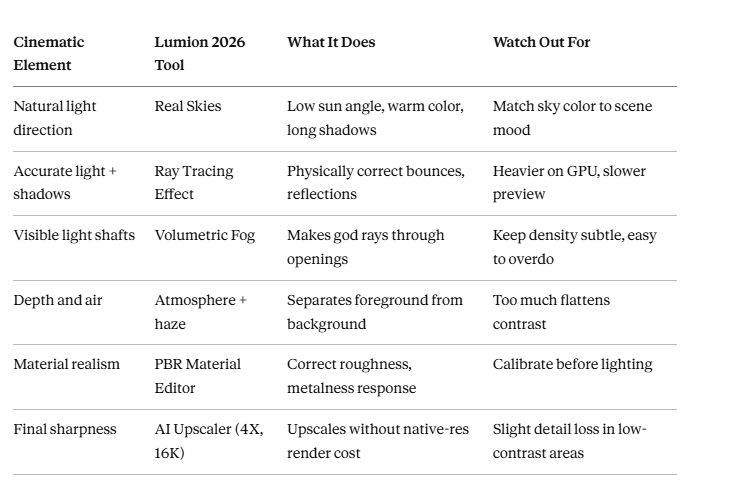
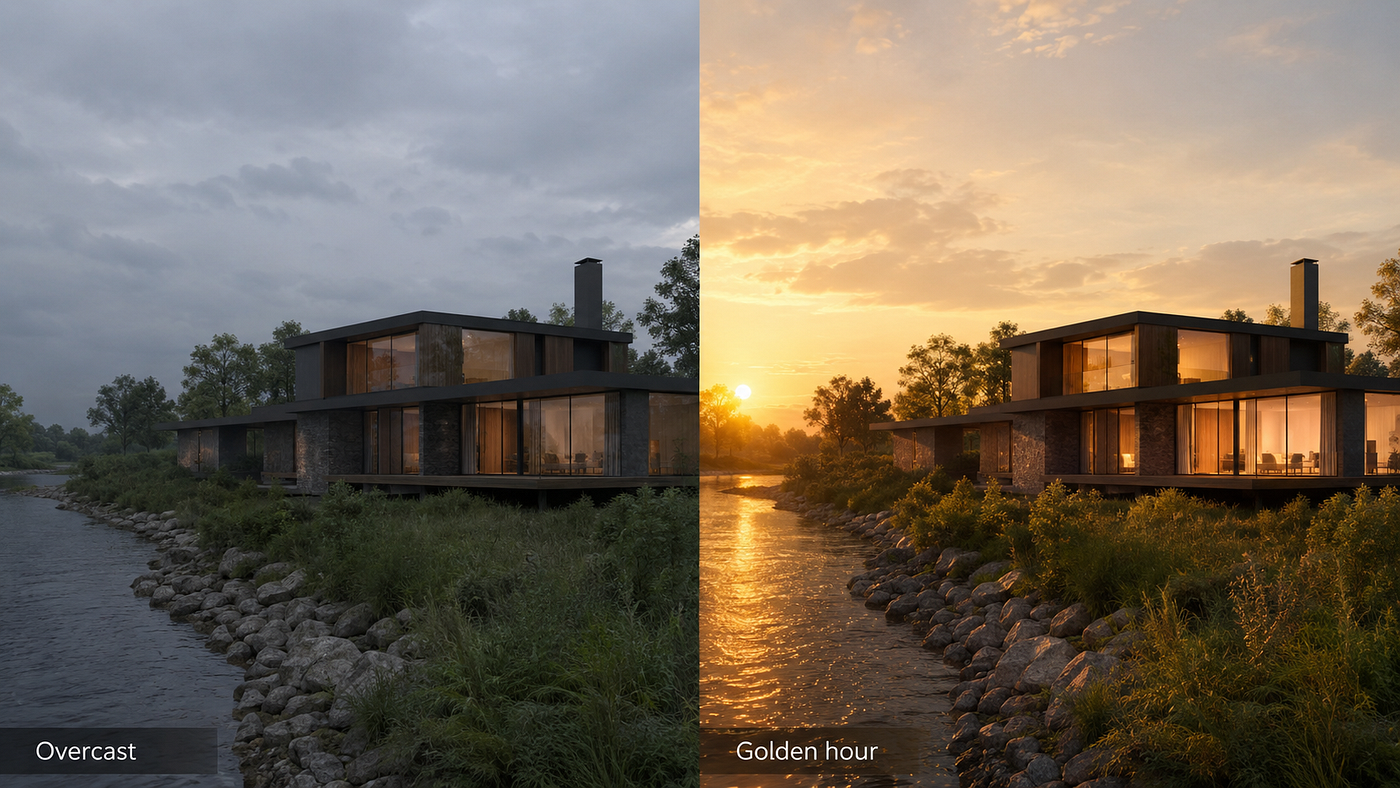
Early on I used to drop spotlights everywhere trying to force a mood. The result always looked staged. What actually works is leaning on Lumion’s Real Skies and picking a strong directional light. A low sun, the kind you get an hour after sunrise or before sunset, throws long shadows and warm tones that the eye reads as cinematic without you doing anything else.
In Lumion 2026, the Real Sky you choose drives the whole color story of the scene. A cool overcast sky feels somber. A golden low sun feels warm and nostalgic. Set this first, before you touch anything else, because every material and shadow in the scene responds to it.
Step 2: Turn On Ray Tracing for Honest Light
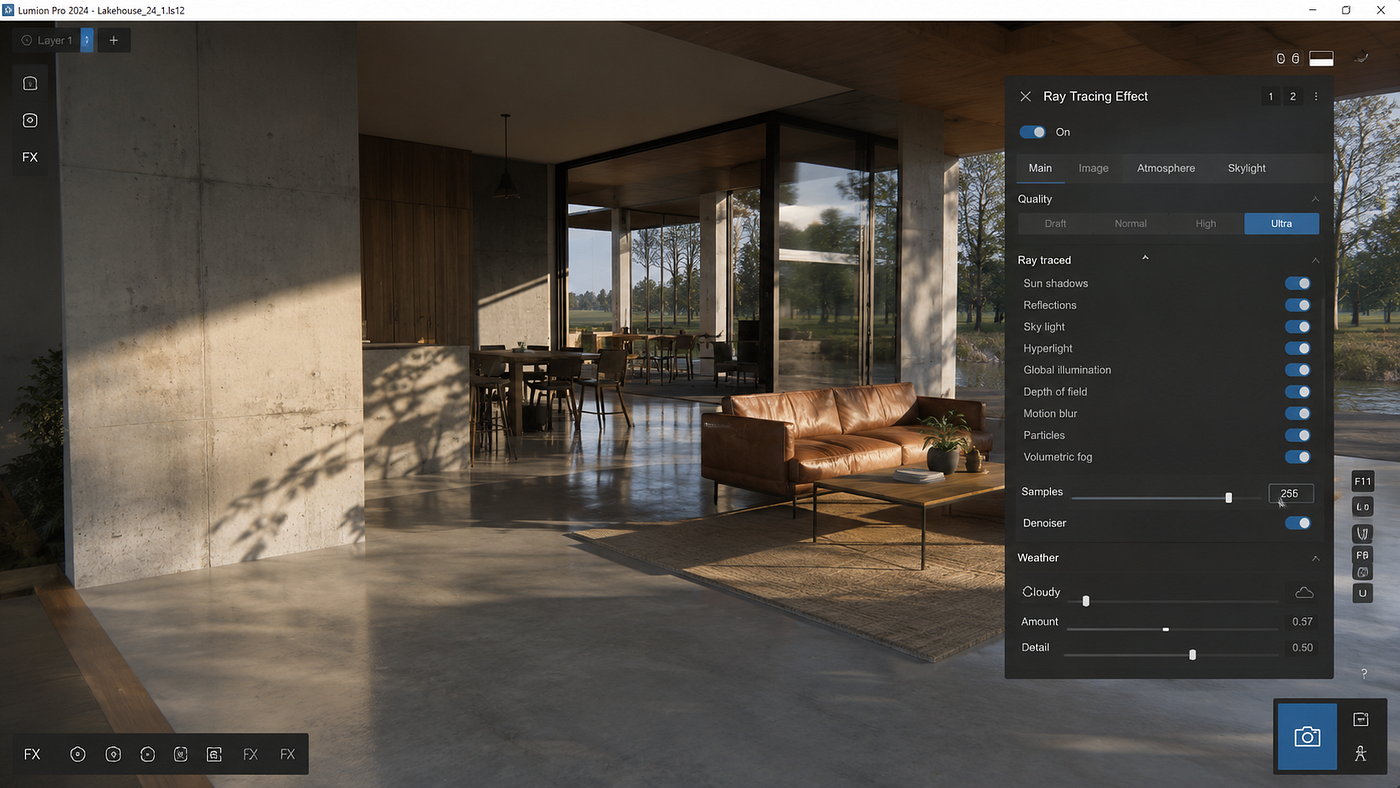
Lumion runs in rasterization mode by default, which is fast but takes shortcuts with bounced light and reflections. For a cinematic result, switch on the Ray Tracing Effect.
Ray tracing changes how light interacts with surfaces. Shadows get softer and more accurate near contact points. Reflections actually reflect the room instead of approximating it. Glass behaves like glass. In Lumion 2024 and 2025 the ray traced pipeline expanded to cover nature, glass, grass, water, and volumetric fog, and 2026 keeps that same pipeline.
One thing worth knowing: ray tracing leans hard on your GPU. The real-time preview slows down, and final frames take longer, especially at higher sample counts. Around 256 samples clears up most visible noise, and Lumion’s built-in denoiser handles the rest. If your machine starts crawling here, that’s usually the moment people look at renting a stronger GPU instead of upgrading their whole workstation.
Step 3: Make the Light Visible With Volumetric Fog
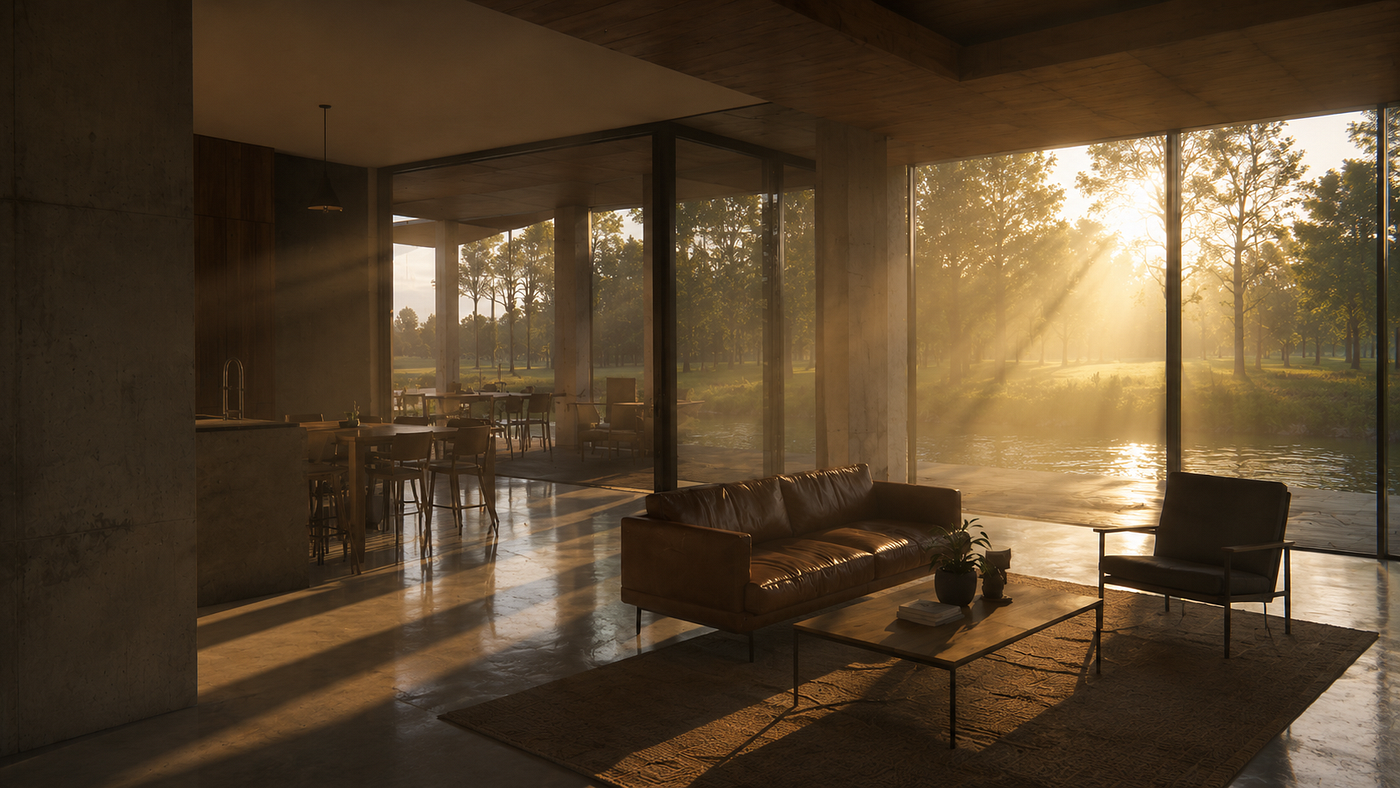
This is the trick that reads as “cinematic” more than any other. Light you can see.
When sunlight passes through a window, between trees, or across a dusty interior, it forms visible beams. Those shafts of light are what give a frame atmosphere and a sense of time. In Lumion 2026, the Volumetric Fog effect (ray traced since 2025) creates this. You add a thin layer of fog, position your light to rake across an opening, and the beams appear naturally.
Keep the density low. A common mistake is cranking fog until the whole scene goes milky. You want just enough so the light has something to catch on. Think early morning haze, not a smoke machine.
Step 4: Add Air and Depth
A flat render has everything in the same focal plane. A cinematic one has layers.
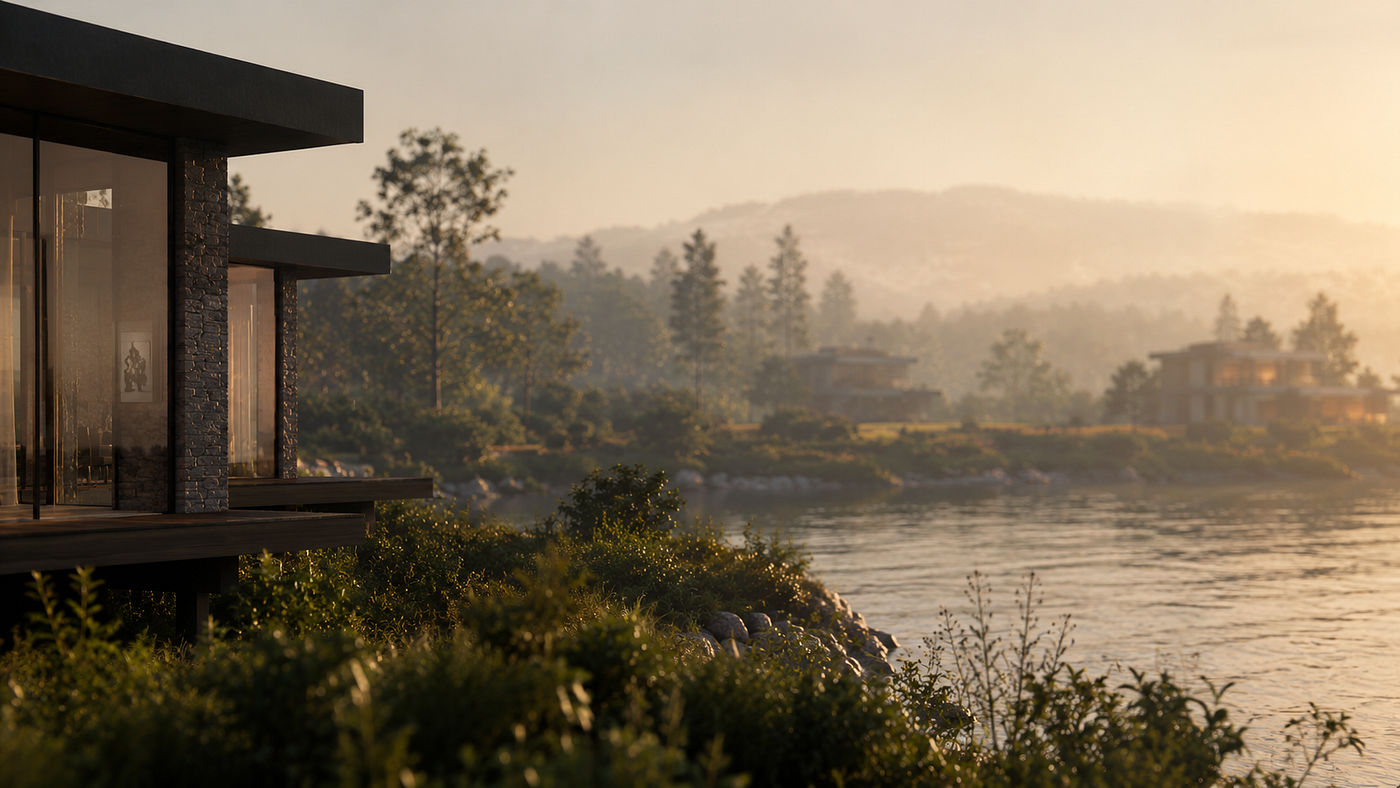
Lumion’s atmosphere controls let you add subtle haze that sits between objects, so distant elements fade slightly compared to foreground ones. This separation is how real cameras and real air behave, and your brain trusts it instantly. Combine that with a touch of depth of field, focusing on your subject and softening the background, and a static archviz shot starts to feel like a frame pulled from a movie.
The human eye reads small natural imperfections as real. Perfectly clean, perfectly sharp, edge-to-edge renders are the ones that look fake. A little haze and a soft background do more for believability than another hour of modeling detail.
Step 5: Dial In Materials, Then Grade Inside Lumion
None of the lighting matters if your materials don’t respond to it correctly. Lumion’s Material Editor uses a full PBR workflow with metalness and roughness, so a worn wood floor scatters light differently from polished marble. Calibrate these before you finalize lighting, not after.
Once materials and light are right, use Lumion’s effect stack to grade the image without leaving the software. Color correction shifts the overall tone. A light bloom softens highlights. Vignetting pulls the eye toward the center. This is the color grading pass that most people do in Photoshop, except you’re doing it live, inside the scene, where you can see it against the real lighting.
For final output, the upgraded AI Upscaler in 2026 (now with a 4X mode reaching 16K) lets you render at a lower resolution and scale up, keeping the original for comparison. It saves real time on high-res stills, though fine detail in low-contrast areas can soften a little, so check those zones.

Where iRender Fits In
Everything above asks more of your GPU, ray tracing especially. Lumion uses a single GPU, so stacking cards won’t help, but a faster single card changes everything. This is where a lot of archviz freelancers get stuck. Their laptop or older desktop handles modeling fine, then chokes the moment ray tracing and volumetric fog turn on.
iRender rents you a real remote workstation with a single RTX 4090 (24GB VRAM), 256GB RAM, and fast NVMe storage. You install your own copy of Lumion, open your own project, and work like you’re sitting at a much faster machine. Because it runs under an IaaS model, nothing is locked down. You control the version, the settings, the output. That’s the whole idea behind iRender’s approach: Your renders, your rules.
A few things make it easy to try right now:
- 100% First Deposit Bonus. Your first top-up doubles. Put in $100, render with $200, and the bonus points don’t expire.
- Credit Back every session. You get 10% back during standard hours, 12% during Happy Hours (weekdays 9 AM to 7 PM GMT+7), and 20% during Golden Hours (all weekend). The more you render, the lower your real cost drops.
- Stacked discounts. A new user combining the deposit bonus, Credit Back, and weekend timing can bring the effective rate down by as much as 60% off list price.
There’s a free trial, so you can load your own Lumion scene onto an RTX 4090 and watch how fast ray traced frames come out before spending anything.
Frequently Asked Questions
Can you really get a cinematic look in Lumion without post-production?
Yes, for most archviz work. Lumion 2026 includes the lighting, atmosphere, material, and color grading tools needed to finish a frame inside the software. Real Skies handle natural light, the Ray Tracing Effect handles accurate shadows and reflections, Volumetric Fog creates visible light beams, and the effect stack covers color correction, bloom, and depth of field. The AI Upscaler sharpens final output. You won’t need Photoshop or After Effects for a strong result. For extreme stylization or compositing multiple renders, post still helps, but the baseline cinematic look comes straight out of Lumion.
Does Lumion 2026 have new ray tracing compared to 2025?
Not in the core pipeline. According to Lumion’s own documentation, the 2026 release uses the same ray tracing pipeline and effects stack as Lumion 2025. The render settings and quality are equivalent between the two versions. What 2026 added sits elsewhere: an upgraded AI Upscaler with a new 4X mode reaching 16K, an Area Placement tool for populating outdoor spaces, new and revamped library trees including photogrammetry models, and LiveSync support for real-time PBR materials. If you’re on 2025, your ray traced renders already match 2026’s quality.
What GPU do I need to run ray tracing smoothly in Lumion?
Ray tracing in Lumion is GPU-heavy, and VRAM matters as much as raw speed. A card with at least 12GB VRAM is a practical minimum for ray traced scenes at decent quality. For complex interiors with volumetric fog, high sample counts, and large textures, an RTX 4090 with 24GB handles it comfortably. Lumion’s AI Upscaler specifically helps machines with under 12GB VRAM by rendering at lower resolution and scaling up. If your current card struggles once ray tracing turns on, renting a remote RTX 4090 is usually cheaper than buying one outright, especially with current shortages pushing prices up.
메타데이터
- post_id
- d7883b446e83
- slug
- 5-ways-i-get-a-cinematic-look-in-lumion-2026-without-touching-photoshop-d7883b446e83
- url
- https://medium.com/@irenderofficial/5-ways-i-get-a-cinematic-look-in-lumion-2026-without-touching-photoshop-d7883b446e83
- canonical_url
- https://medium.com/@irenderofficial/5-ways-i-get-a-cinematic-look-in-lumion-2026-without-touching-photoshop-d7883b446e83
- author_url
- https://medium.com/@irenderofficial
- status
- ok
- fetched_at
- 2026-06-10 22:59:55