Create a Twist and Spin animation in Cavalry
Motion Design Starter Series
Create a Twist and Spin animation in Cavalry
Motion Design Starter Series

In this tutorial, we are going to set up a simple animation step by step to understand the basic building blocks. While Cavalry has far more advanced tools, we will keep it “old school” and simple to help understand some of the underlying features and functionality, which you can adapt to your own designs.
PART ONE: basic setup
Step 1
- Set up your composition to a desired canvas size, and set the background to transparent (Background Alpha ‘A’ value to zero) as shown below:

Step 2
- Now add a basic rectangle shape. Alt-click on the rectangle tool and set its dimensions to 650 x 180:

Step 3
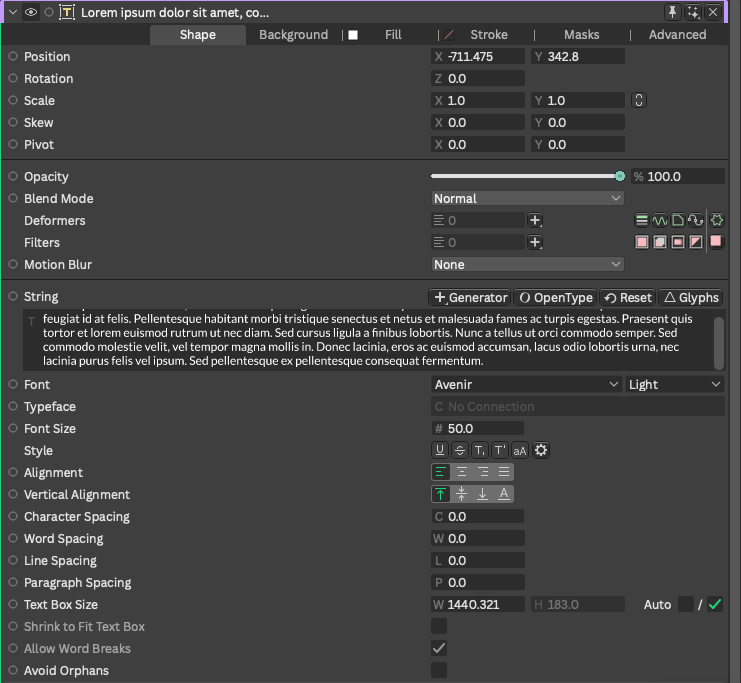
- Alt-click on the Text tool. Then, over in the Attributes Panel, adjust the font size, alignment and input string (a word or two will be best for this demo). I have chosen the font Inter Bold, at a size of 100, with centred alignment:


Step 3
- In the Scene window, make the text a child of the rectangle shape, and enable the 2.5D (isometric cube icons) for these layers:

For this tutorial, we envisage a rectangular block that rotates on itself with a 3D effect. To do this, we need to ‘trick’ the eye by working with a pseudo-3D arrangement.
- Use Cmd-. (or search in the ‘+’ library) to find Camera, and add that as a layer:

You should now have this:

Step 4
If your text seems to have disappeared momentarily, do the following:
- With your text layer selected, change the Position Z-value in the Attributes editor to 1.0 to move it “above” (i.e. in fromt of) the black rectangle:

Step 5
- With the rectangle shape selected (and therefore the Text layer contained within it), duplicate the layer 3 times (Cmd-D) to create copies:


You can now rename these as Front, Top, Bottom and Back as shown above. These are essentially the 4 sides of our rectangular block.
Step 6
We now need to position these four faces relative to each other (i.e. create each of the four faces of our “3D rectangular block”.
- With the FRONT layer selected, adjust the Position Z value to +90:

- With the TOP layer selected, adjust the Position Y value to +90 and the rotation X value to 90:

- With the BOTTOM layer selected, set the Y Position to -90, and the X rotation to -90:

- And finally, for the back face, with the BACK layer selected, set the Z Position value to -90, and the X rotation value to -180.

Step 6
At this point, we can introduce a “Null” which is a shape or control that does not render, but which can be used to drive the behaviour of other objects in the scene.
It is commonly used in rigging, but has many other applications when designing motion and animations in Cavalry. We’ll revisit it in future tutorials. Here we will keep it fairly simple to demonstrate how it works:
- Add a Null from the ‘+’ library in the scene window (or press Cmd-. to bring up the library).

- Double-click to add it as a layer. Then, drag the rectangle faces layers onto the Null to make them children of the Null layer:

NOTE:
In our case, we will use the Null to control objects in the 2.5D space. You therefore also need to enable the 2.5D functionality of the Null layer by clicking on the isometric cube icon in the scene window.
This adds the additional “3D” fields in the Attribute Editor. If you compare the screenshots below, when we enable the 2.5D functionality, we now have fields for Z Position, and Y and Z Rotation available for the Null layer:


Step 7
Let’s test a quick animated version of our design.
Position the playhead at Frame 0 in the timeline, select the Null layer, and add a keyframe for the X Rotation. Advance the playhead in the timeline to say, 60 frames, and enter a value of 360 in the Null’s X Rotation field to set a second keyframe:


This makes our rectangular block rotate once completely over 60 frames.
We can also select the keyframes and add easing or magic easing (right click after selecting both keyframes) to smooth the animation:

At this point, you should have something like this:

PART TWO: adding to the base design
With this composition completed and saved, start a new scene and bring your composition into it as a layer:

Here, I have dragged the composition we made earlier in this tutorial from the Asset window to the Scene Window. I then right-clicked on the composition layer and grouped it. This might seem like an odd thing to do (grouping what appears to be just a single item), but it helps us when applying new items or functions to that entire “group”.
For instance:
STEP 2.1
- Alt-click on the rectangle tool and create a rectangle with a width of 4 px and a height of 500 px. Select the layer and rename it to Mask.
With your “Group” layer selected, go to the Mask tab in the Attribute Editor:

- Drag the MASK layer from your scene window onto the Track Matte area of the Attribute Editor:

Step 2.2
- Next, select your Group again in the Scene Window and alt-click on the Duplicator in the shelf (or call up a Duplicator from the ‘+’ library).
- Select the Duplicator layer in the scene window and head over to the Attribute Editor to change the Distribution to “Point”, and the count to 220:

At this point, the process seems a bit weird because there doesn’t seem to be anything going on in the viewport, but basically, what we need to do now is distribute our “mask” across the composition group.
So, select the MASK layer in the scene window.
- On the Position attribute, right-click and add the behaviour: “Stagger”, to the X value:

- You can then make the Stagger a child of the MASK layer, and select it.

- With the Stagger selected, go to the Attribute Editor and set the Minimum value to -400 and the Maximum value to +400:
This should now render the following:

Note: I am using a GIF export for the purposes of publishing the render on Medium, so there are some minor artefacts showing up. These are less noticeable when exporting videos and other formats from Cavalry.
You may also like:
[embed]Easy string-stretch effect in Cavalry Motion Design Starter Seriesmedium.com
[embed]Build and animate a complex shape quickly in Cavalry Motion Design Starter Seriesmedium.com
[embed]Simple 2.5 Text Animation in Cavalry Motion Design Starter Seriesmedium.com
메타데이터
- post_id
- d7a525627805
- slug
- create-a-twist-and-spin-animation-in-cavalry-d7a525627805
- url
- https://medium.com/brandmanagementdesign/create-a-twist-and-spin-animation-in-cavalry-d7a525627805
- canonical_url
- https://medium.com/brandmanagementdesign/create-a-twist-and-spin-animation-in-cavalry-d7a525627805
- author_url
- https://medium.com/@nigel_reyes
- status
- ok
- fetched_at
- 2026-06-14 16:15:44