From Zero to MERN: Episode 11: HTTP Requests and Responses: Making Your Node.js
Part 11 of the MERN Stack from Zero series. Read Part 10 — Your First Node.js Server here
From Zero to MERN: Episode 11: HTTP Requests and Responses: Making Your Node.js Server Actually Do Something
Part 11 of the MERN Stack from Zero series. Read Part 10 — Your First Node.js Server here
In Part 10, you built a server that detected requests and logged “Request made” to the terminal. The browser tab spun forever waiting for a response that never came.
That’s not a server. That’s a server-shaped dead end.
A real server does two things: it reads what the client is asking for, and it sends something meaningful back. In this post, we’ll cover both sides completely — the req object, the res object, plain text responses, HTML responses, and the right way to structure all of it.
By the end, your server will actually respond. The browser tab will stop spinning.
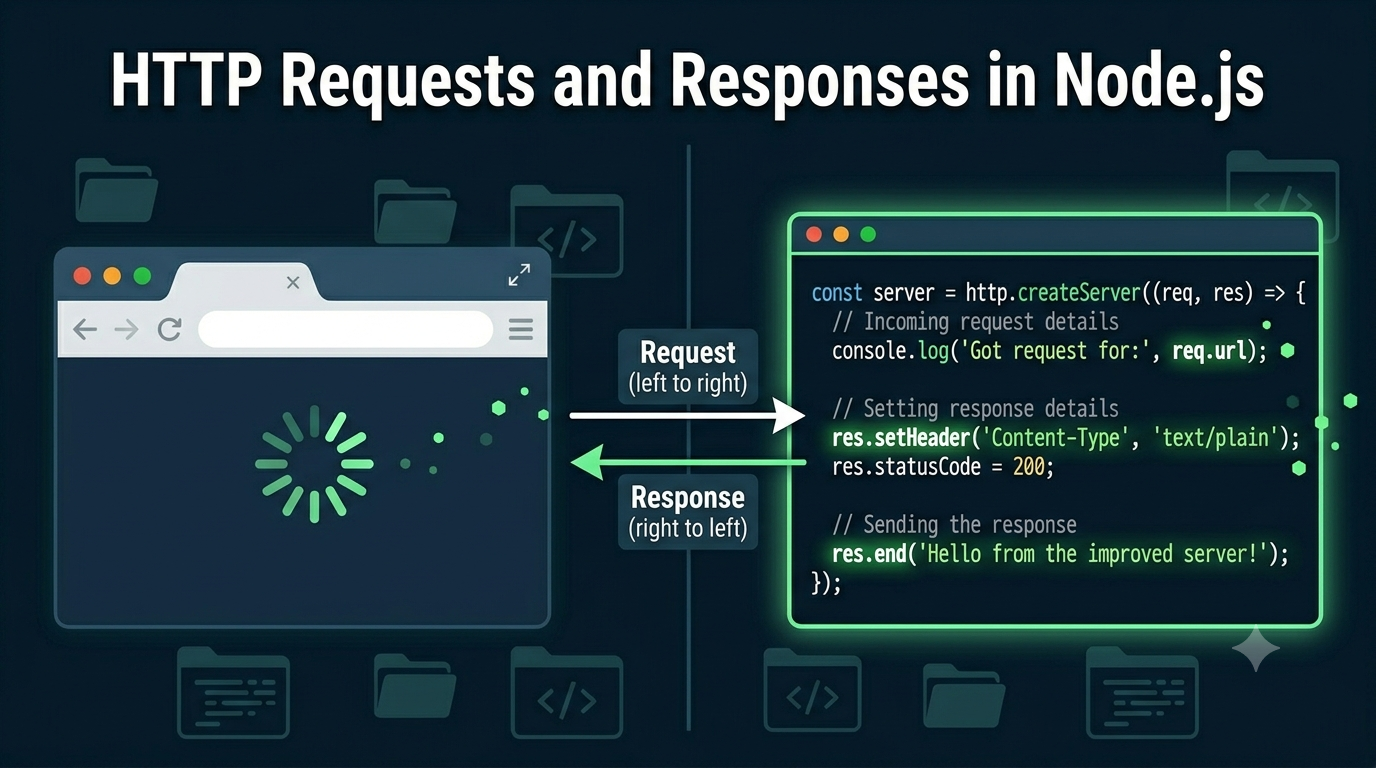
1. Where We Left Off — The Server That Never Responds
Here’s our starting point from Part 10:
// server.js
const http = require('http');

const server = http.createServer((req, res) => {
  console.log('Request made');
});

server.listen(3000, 'localhost', () => {
  console.log('Server is listening on port 3000');
});
Start it, visit localhost:3000 in Chrome, and you'll see two things:
- Terminal:
Request made✅ — the server detects the request - Browser: Spinning indefinitely ❌ — because we never sent a response
The server received the request. It just ignored it. This post fixes that — but first, let’s understand exactly what’s inside that request.
2. The req Object — Everything the Client Sends You
The callback inside createServer receives two arguments: req (the incoming request) and res (the outgoing response). Log the entire req object to see what's in it:
const server = http.createServer((req, res) => {
  console.log(req);   // Print the full request object
});
Important: After any change to your server code, you must stop and restart the server (Ctrl + C, then node server again). Changes don't apply automatically to a running process.
When you restart and refresh the browser, your terminal floods with properties — dozens of internal tracking fields, socket details, state flags. Most of it you’ll never touch. But two properties are used in almost every backend you’ll ever write.
3. req.url — What the Client Is Asking For
const server = http.createServer((req, res) => {
  console.log(req.url);
});
Restart and visit localhost:3000:
/Visit localhost:3000/home:
/homeVisit localhost:3000/join:
/joinNode.js automatically strips the http://localhost:3000 part and gives you only the relative path — the part after the host. This is exactly what your backend needs to route requests.
Think of
req.urllike the specific page a visitor is asking for inside your building. The building address (IP + port) gets you to the server. The URL path tells you which room they want.
This is the foundation of routing — sending different responses based on which URL was requested. A GET to /users should return user data. A GET to /products should return product data. req.url is how you know which is which. We'll build full routing shortly.
4. req.method — What the Client Wants to Do
const server = http.createServer((req, res) => {
  console.log(req.url, req.method);
});
Restart and visit localhost:3000/join:
/join GETreq.method tells you the type of HTTP request:

When a browser types a URL and presses Enter, it sends a GET request. This is the most common type. But when a form submits or a React app calls your API to create data, it sends a POST. Your server needs to know the difference to respond correctly.
5. The res Object — Sending Something Back
Now the other side. The res object is how you reply. Three steps, every time:
- Set a header — tell the browser what type of content is coming
- Write the content — the actual payload
- End the response — signal that you’re done sending
const server = http.createServer((req, res) => {
  // Step 1: Set the Content-Type header
  res.setHeader('Content-Type', 'text/plain');

  // Step 2: Write the response body
  res.write('Subscribe to MERN');

  // Step 3: End the response — this sends it to the browser
  res.end();
});
Restart and refresh localhost:3000:
The browser tab stops spinning. You see: Subscribe to Code IO
That’s your first real response. The server received a request and sent data back. The full request-response cycle is now complete.
6. Why res.setHeader() Matters
The Content-Type header tells the browser how to interpret the bytes it receives. Without it, the browser guesses — and gets it wrong.
// ❌ No header — browser guesses what this is
res.write('Hello World');
res.end();

// ✅ Header set — browser knows exactly what to do with this
res.setHeader('Content-Type', 'text/plain');
res.write('Hello World');
res.end();
Open Chrome DevTools → Network tab → refresh the page → click the request → scroll to Response Headers:
Content-Type: text/plain
Connection: keep-alive
You’ll see Content-Type: text/plain exactly as you set it. This is what the browser reads before it even looks at the body. Change the content type and the browser changes how it renders your response completely.
The three content types you’ll use constantly:
// Plain text — raw string output
res.setHeader('Content-Type', 'text/plain');

// HTML — the browser renders it as a web page
res.setHeader('Content-Type', 'text/html');

// JSON — for API responses that React will consume
res.setHeader('Content-Type', 'application/json');
7. Multiple .write() Calls — Building a Response in Parts
You can call .write() multiple times before .end():
res.setHeader('Content-Type', 'text/plain');
res.write('Subscribe to MERN ');
res.write('please do');
res.end();
Browser output: Subscribe to MERN please do
Both strings arrive as a single stream. They join on the same line because there’s no newline character between them. Add \n between writes if you need line breaks in plain text:
res.write('Subscribe to MERN IO\n');
res.write('please do');
res.end();
8. Sending an HTML Response — Real Browser Rendering
Plain text is a string. HTML is a rendered web page. Change the Content-Type and the response body:
// ❌ Plain text — browser treats this as a raw string, displays the tags literally
res.setHeader('Content-Type', 'text/plain');
res.write('<h1>Subscribe to Code IO</h1>');

// ✅ HTML — browser renders the tags properly
res.setHeader('Content-Type', 'text/html');
res.write('<h1>Subscribe to Code IO</h1>');
res.write('<h4>please do</h4>');
res.end();
Restart and refresh:
The browser tab switches from dark mode to white — because it’s now rendering an HTML page, not displaying raw text. The text is large and bold (it’s an <h1> tag). The second line is smaller (<h4>). Browser default margins and padding apply automatically.
What the browser adds automatically:
Even though you only sent <h1> and <h4> tags, right-click → View Page Source and you'll see the browser wrapped your content in default <html>, <head>, and <body> tags. It adds them when you don't provide them.
Overriding the defaults:
You can write the full structure yourself:
res.setHeader('Content-Type', 'text/html');
res.write('<head><title>Code IO Server</title></head>');
res.write('<body>');
res.write('<h1>Subscribe to Code IO</h1>');
res.write('<h4>please do</h4>');
res.write('</body>');
res.end();
Now check the browser tab — it shows “Code IO Server” as the page title, because you set it explicitly. Whatever you provide overrides the browser defaults.
9. The Problem With Inline HTML — Why This Doesn’t Scale
Here’s what the approach above looks like for a real page:
// ❌ Trying to build a real page with res.write()
res.setHeader('Content-Type', 'text/html');
res.write('<!DOCTYPE html>');
res.write('<html>');
res.write('<head>');
res.write('<meta charset="UTF-8">');
res.write('<meta name="viewport" content="width=device-width">');
res.write('<title>My App</title>');
res.write('<link rel="stylesheet" href="styles.css">');
res.write('</head>');
res.write('<body>');
res.write('<nav class="navbar">...');
// ... 400 more lines of HTML
res.write('</body>');
res.write('</html>');
res.end();
This is unmanageable. A real HTML page has hundreds of lines — navigation, content sections, forms, footers, scripts. Packing all of that into res.write() strings inside a JavaScript file is unmaintainable and unreadable.
The right approach: keep HTML in .html files, read them with the fs module, and stream the file directly as the response. That's exactly what the next post covers.
10. Putting It All Together — A Server That Reads and Responds
Here’s the complete server from this post — reads the request, logs what it needs, and sends back an HTML response:
// server.js
const http = require('http');

const server = http.createServer((req, res) => {
  // Read the request
  console.log('URL:', req.url);
  console.log('Method:', req.method);

  // Send the response
  res.setHeader('Content-Type', 'text/html');
  res.write('<head><title>Code IO</title></head>');
  res.write('<body>');
  res.write('<h1>Subscribe to Code IO</h1>');
  res.write('<h4>Your server is working.</h4>');
  res.write('</body>');
  res.end();
});

server.listen(3000, 'localhost', () => {
  console.log('Server is listening on port 3000');
});
Run it, visit localhost:3000, visit localhost:3000/about, visit localhost:3000/anything — you'll get the same HTML response for every URL. That's fine for now. In the next post, we'll use req.url to send different responses based on which path was requested — that's routing, and it's what makes a backend API actually functional.
Key Takeaways
1. req.url gives you the relative path the client is requesting. localhost:3000/home → /home. localhost:3000/api/users → /api/users. This is how your backend knows what the client wants.
2. req.method tells you what the client wants to do. GET = read data. POST = create data. PUT = update. DELETE = remove. Route handling depends on both URL and method.
3. Three steps to send a response: setHeader() → write() → end(). Skip end() and the browser waits forever. Skip setHeader() and the browser guesses the content type and often gets it wrong.
4. Content-Type must match what you're sending. text/plain for strings. text/html for web pages. application/json for API data. The browser reads this before it reads a single byte of your body.
5. You can call .write() multiple times. Each call adds to the response stream. They all combine into one payload when .end() is called.
6. Inline HTML in res.write() doesn't scale. Two or three tags is fine for demonstration. A real page needs its own .html file — read with fs, streamed as the response. That's the next post.
7. Restart the server after every code change. Node.js doesn’t hot-reload automatically. Ctrl + C → node server → refresh the browser. (We'll fix this with nodemon later in the series.)
To stay informed on the latest technical insights and tutorials, connect with me on Medium and LinkedIn. For professional inquiries or technical discussions, please contact me via email. I welcome the opportunity to engage with fellow professionals and address any questions you may have.
메타데이터
- post_id
- d80f0e054f66
- slug
- from-zero-to-mern-episode-11-http-requests-and-responses-making-your-node-js-d80f0e054f66
- url
- https://medium.com/@issackpaul95/from-zero-to-mern-episode-11-http-requests-and-responses-making-your-node-js-d80f0e054f66
- canonical_url
- https://medium.com/@issackpaul95/from-zero-to-mern-episode-11-http-requests-and-responses-making-your-node-js-d80f0e054f66
- author_url
- https://medium.com/@issackpaul95
- status
- ok
- fetched_at
- 2026-07-07 04:24:22





