Creating Assembly Manuals for 3D Printers at Prusa Research
What it takes to write guides people genuinely enjoy, even while tightening bolts and saving the last Haribo for the hardest step.
Creating Assembly Manuals for 3D Printers at Prusa Research
What it takes to write assembly manuals people actually enjoy using.
Hi, I’m Vojta. I work at Prusa Research, where I create detailed assembly manuals that help users build their Prusa 3D printer kits from start to finish. If you’re looking for specific manuals, you can find them in our knowledge base.
Why I’m writing this Over the years, quite a few users have asked what it actually takes to write our assembly manuals and whether it’s really that difficult. The short answer? Yes. So I decided to give you a peek behind the scenes. Also, consider this article my semi-official alibi: yes, we know there’s the occasional leftover typo or outdated photo. We do our best to fix them quickly, but sometimes one slips through the cracks 😬.
I joined Prusa Research in 2018 and started as a final tester on the production line, testing up to 100 printers a day. Over time, I moved into process engineering, improving how we built our products and making the process easier and more reliable. Eventually, I found myself in a perfect-fit role: writing user manuals that guide people through assembling their own machines, step by step.
What I didn’t expect? That writing manuals would put me between two worlds: handling top-secret prototypes before almost anyone else, and being one of the last people to decide whether a kit is ready to ship.
Here’s how the magic (and the chaos) happens.

Behind the scenes of CORE One installation… or a surgery?
From Testing Printers to Writing Manuals
After about a year of testing, I started optimizing how operators assembled the printers, looking for ways to make the process easier, faster, and more reliable. That caught the attention of the process engineering team, and I joined them to focus on production improvements. At first, I worked on simplifying assembly workflows directly; later, I began creating internal instructions to help standardize those improvements on the production floor.
After some time, a new role opened up within the company: writing official user manuals for our 3D printers (and other products). It was a perfect blend of engineering, attention to detail, and user-first thinking. I didn’t have a formal background in documentation, but I had experience writing internal guides — and even before Prusa, I’d created assembly manuals for sports equipment. Back in high school, I wrote how-to guides for SolidCAM, SolidWorks, and even Linux Ubuntu, mostly just to help classmates (or future me).
So I jumped in.
How a Manual is Born
Of course, all the high-quality content at Prusa Research is created by Josef Prusa himself 😉. Anyway…
At Prusa, the manual creation process starts the moment a new product (still very top secret) is officially added to the production roadmap. The product team makes the announcement internally, usually to a small group of employees and shortly after, I get involved. Depending on the state of the project, I receive either a provisional kit or just a list of parts and I gather those parts myself around the company to build the first working prototype. I assemble it from scratch, often using a rough internal photo guide from the development team. In many cases, I need to figure out the assembly process entirely on my own. During this phase, I’m not just assembling, I’m stress-testing. I push the machine’s limits, test its print performance under heavy load, and sometimes even explore how (and how easily) it can break – To Prusa: they are almost indestructible. This hands-on time gives me a deep understanding of the printer’s character, quirks, and potential pain points for users.
At this stage, I pay special attention to:
- The number of parts: with no strict constraints during design, the dev team sometimes leans toward over-engineering. My job is to spot where fewer parts could do the same job.
- Whether any precise tuning or calibration is needed. Fine-tuning steps often create unnecessary stress for users, even when perfect accuracy isn’t critical.
- How complex the assembly is overall: ideally, it should feel intuitive and follow a natural “bottom-up” structure, where the printer gradually grows as you go.
- The number of different fasteners: I always try to minimize confusion by reducing the number of nearly identical screws.
I intentionally simulate incorrect or risky assembly steps to see where users might go wrong. Even though our printers are generally “foolproof,” this helps me identify where added clarity, warnings, or smarter part design can prevent mistakes.
Once the feedback has been incorporated and we have a debugged prototype, I begin working on the first draft of the assembly manual.
I start by laying out all the kit parts on the floor and mentally dividing them into chapters. I don’t shoot prep photos for every single item up front, that would be overwhelming. Instead, I group them by sub-assemblies and only show what’s needed per section.
For example, in Chapter 6, “Nextruder assembly,” there might be a subsection focused on the heatsink fan. It begins with a dedicated “parts preparation” step for just that component, listing what you’ll need for the next few steps, no more, no less.
Each step is limited to a maximum of three photos and eight bullet points, that’s our internal rule of thumb to keep things clean and digestible.
The first draft is raw-punk: rough photos (but still around 600–1000 photos), quick notes, and full of TODOs and placeholders. It’s not pretty, but it’s honest, and it lets us iterate quickly.

We then test this draft internally. Colleagues who haven’t been involved with the product try assembling it from scratch according to the punk instructions. Their feedback is pure gold. They highlight confusing steps, unclear images, mismatched parts, or any discrepancies between what’s in the kit and what’s in the guide. I gather all this feedback and revise the manual accordingly.
Then comes the second round of testing (sometimes with external beta testers) and a close collaboration with the product team to lock down the final contents of the kit.
Once everything is finalized, I re-shoot the entire assembly (yes, again – 600 to 1000 photos), this time on a neutral white background with 6500K lighting for consistent results and easier post-processing.
Dark components and shadowed areas are often overexposed on purpose to make hidden details visible. If that still doesn’t work, I render the part in Blender instead.
I rewrite the instructions in a clean, user-friendly tone, rename components to match the packaging, and polish the overall flow.
In an ideal world, creating a manual takes a couple of months. But sometimes, when deadlines loom, we need to condense the whole process into just a few weeks…caffeine helps.
My goal is clarity, especially for users in countries where English isn’t their native language. I keep the language simple, explain terms when I introduce them, and cut unnecessary fluff.
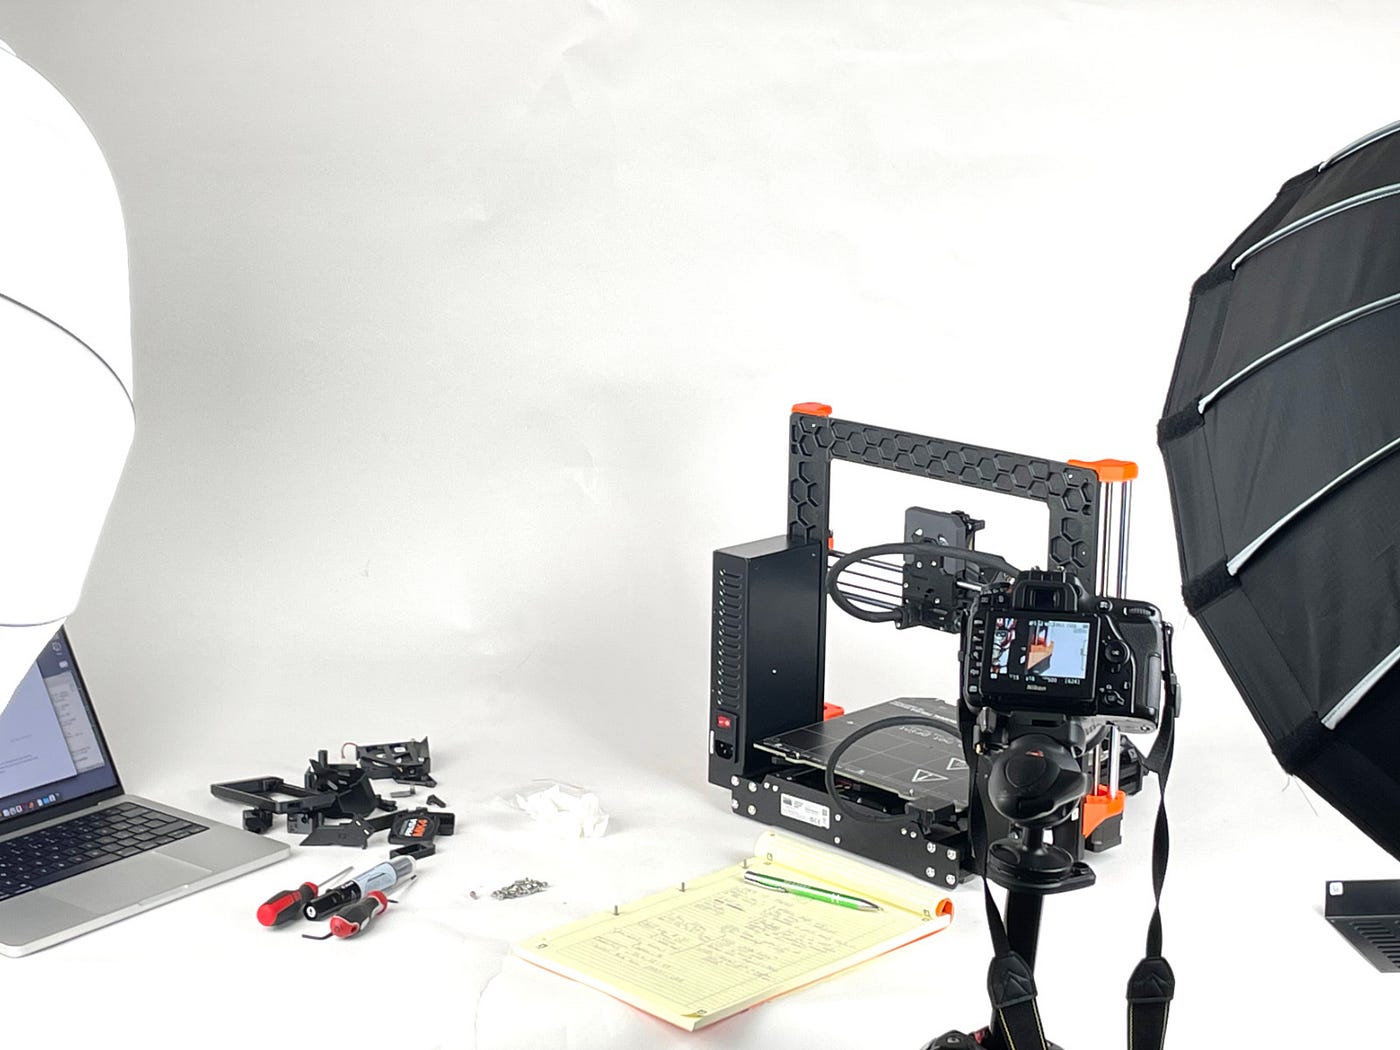
Content in progress…and a bit of a mess.
We also intentionally simplify part names. Some experts criticize our terminology, but our focus is clarity over textbook precision. We don’t mind calling a hex key a “potato” if it’s clearly labeled and shown in a photo and users will still know what to reach for.
And yes, this is the part where we add the famous Haribo gummy bear steps.
The Tools Required
To produce everything, I use a mix of software:
- Affinity Photo & Affinity Designer -My go-to tools for editing images and creating infographics. Fast, clean, and without a subscription model. https://affinity.serif.com/
- Vivaldi Browser – I live in tabs, often across multiple workspaces, and this setup handles it without slowing me down. https://vivaldi.com
- Mistral (AI) – Occasionally useful for proofreading and clarity checks. https://mistral.ai
- Blender – When photos aren’t enough, especially for dark or complex internal parts. https://blender.org
- Our in-house WYSIWYG editor – A simple WYSIWYG tool with strict limits (3 images / 8 bullet points per step), which keeps everything consistent and readable. help.prusa3d.com.
- Our internal translation system – Used to localize manuals into multiple languages with consistent structure and terminology.
I also take care of our knowledge base platform help.prusa3d.com which has also very interesting behind the scenes, but that’s a story for another article.
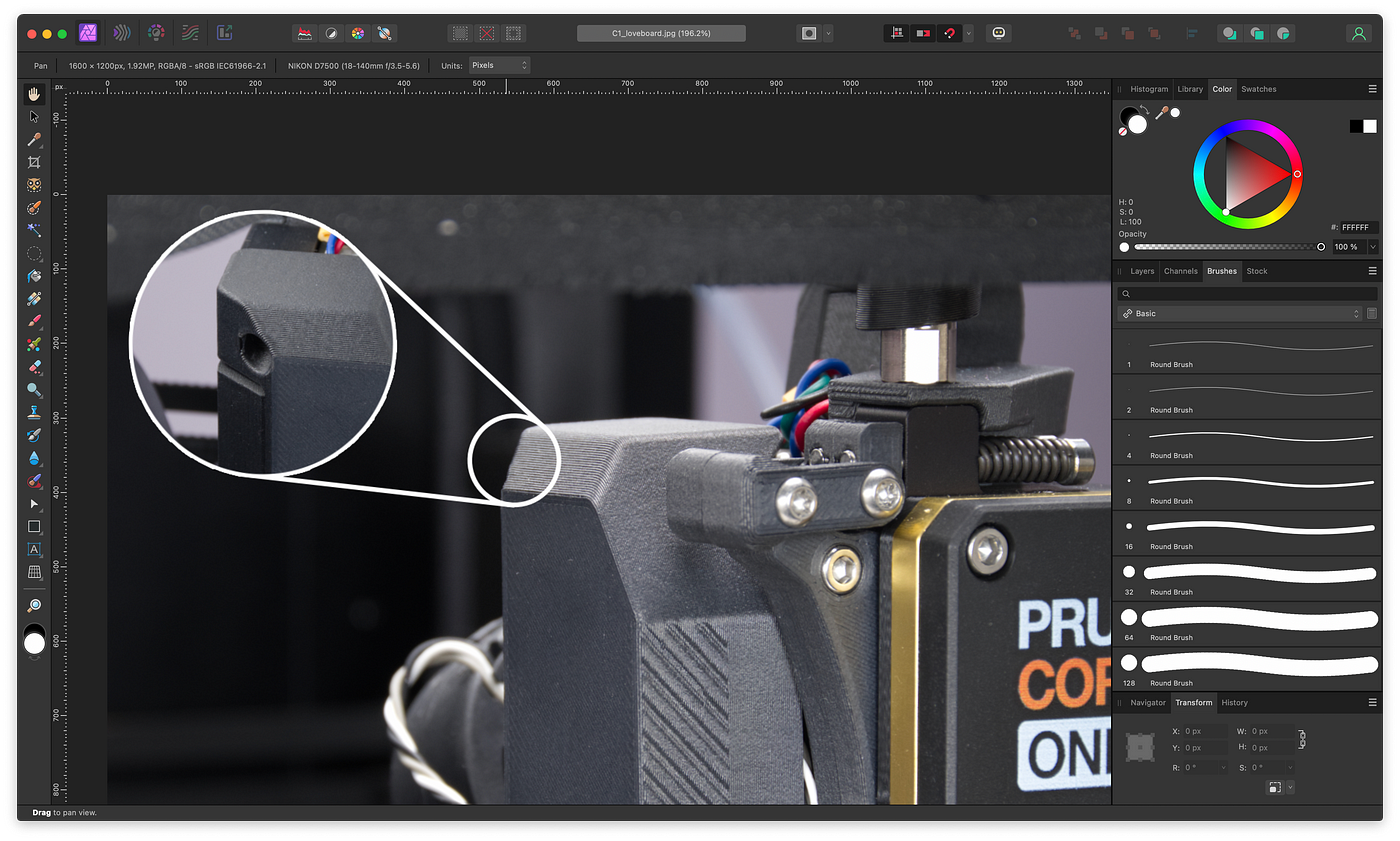
Affinity Photo
Why It Works
The best assembly manuals don’t just explain — they anticipate. Every instruction is a chance to reduce doubt, friction, or the temptation to skip ahead.
That’s why I always try to see the product from the perspective of someone assembling it for the first time.
We also obsess over visual clarity. We stick to a clean 3-picture / 8-bullet-point structure per step, and every photo is shot on a neutral white background with consistent lighting.
And then comes feedback. Users can comment under every step, and I read those daily. Sometimes I tweak a single word that caused confusion; sometimes I rewrite entire sections.
We’ve also earned a bit of a reputation: the gummy bear step. It’s a small treat in the middle of the manual, often saved for a tougher part. People actually mention it in reviews. Manuals can be fun. Even a little human.

Better than lego… Personally, I wouldn’t compare, but thanks.
We’re not only writing for experts, we’re writing for whoever opens the box. Our audience spans from DIY dads to space engineers, and yes, sometimes even grandmas. So we make it friendly, precise, and readable, because no one builds better when they’re frustrated.
Conclusion: The Art of Crafting a Manual
Creating assembly manuals is much more than writing down steps and snapping photos. It’s about understanding the person on the other side, anticipating where they might hesitate and making the process as clear and simple as possible.
Through every prototype, test, and iteration, the goal stays the same: help people succeed, and make the process feel intuitive, not frustrating.
And, of course, keep it a little fun along the way. Because if someone enjoys following the manual, you’ve done something right.
So next time you build a Prusa printer, remember: behind every step is a lot of thought, testing, and care, but also a bit of joy.
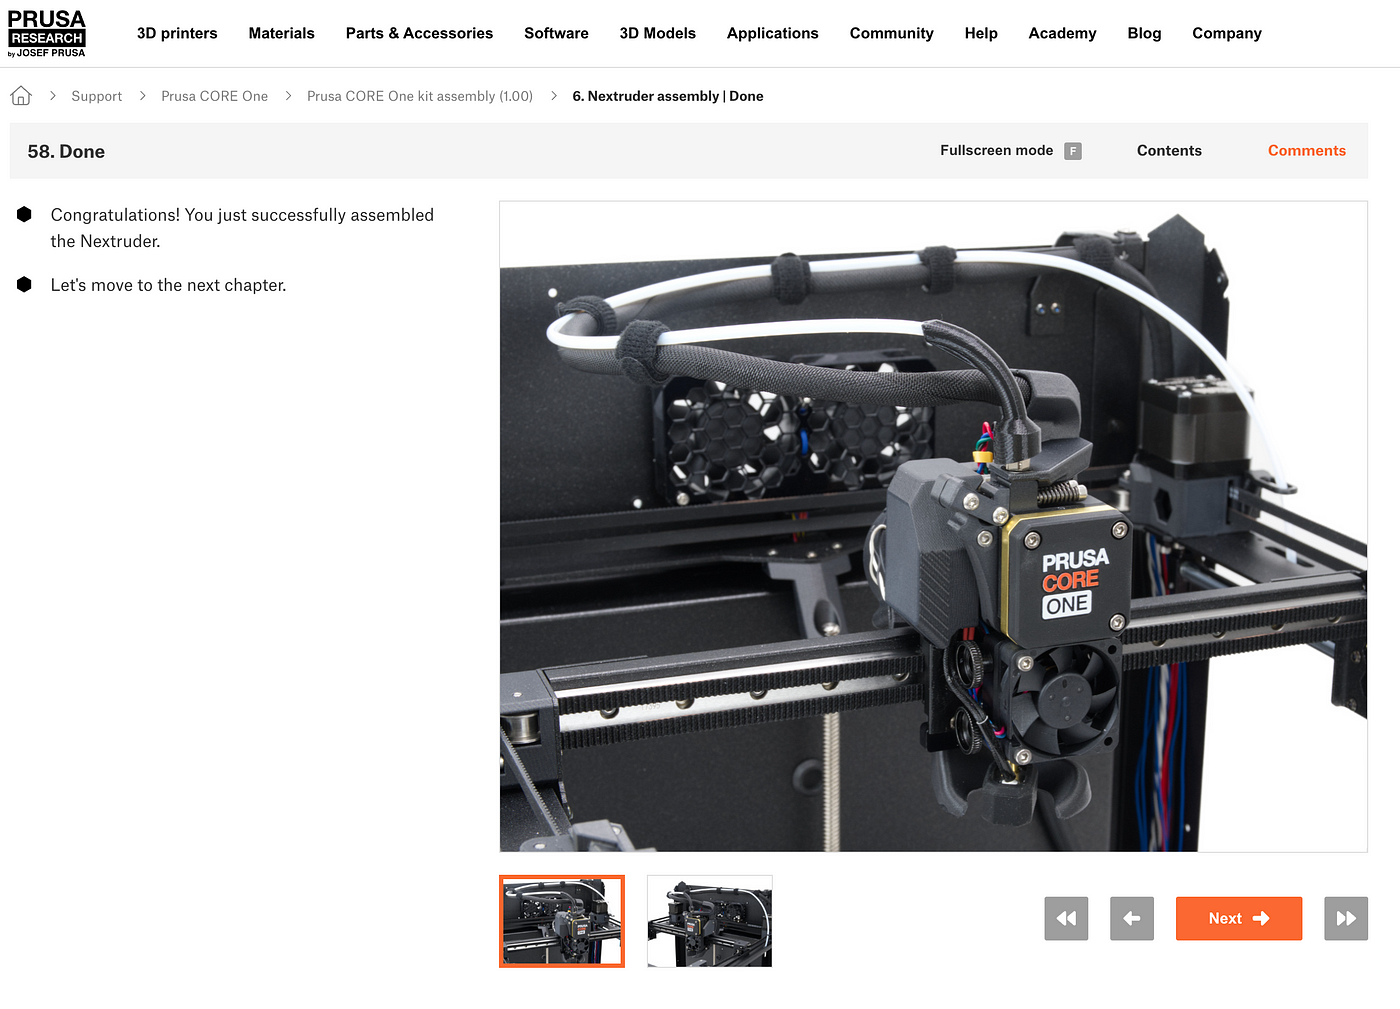
Assembly manual
메타데이터
- post_id
- dce3fb83e5ab
- slug
- creating-assembly-manuals-for-3d-printers-at-prusa-research-dce3fb83e5ab
- url
- https://medium.com/@moonfin762/creating-assembly-manuals-for-3d-printers-at-prusa-research-dce3fb83e5ab
- canonical_url
- https://medium.com/@moonfin762/creating-assembly-manuals-for-3d-printers-at-prusa-research-dce3fb83e5ab
- author_url
- https://medium.com/@moonfin762
- status
- ok
- fetched_at
- 2026-07-19 22:17:22


