Remote installation of openSUSE
PROBLEM
Remote installation of openSUSE
PROBLEM
You are familiar with Linux and for a year you have been telling your friend how good it is, so that he will install it too.
You happen to have a job that is far from your place of residence (either in the same country or in another).
After you have your life sorted out, you receive a phone call from your friend asking you to install a Linux distribution for him on his computer. Now my friend it’s too late….
We will show how one can install openSUSE on a remote computer.
WHAT YOU WILL NEED
- Computer (host) where the installation will take place
- Download the openSUSE installation DVD (either Leap or Tumbleweed)
- An 8GB+ USB flash drive
- Computer (remote)
- Clear the space to be installed beforehand (if dual boot then make space inside Windows. It can also be from Linux but it needs to be defragmented first)
- Port forward on the router
PREPARATION
- Download the openSUSE installation DVD (either Leap or Tumbleweed).
- Since the DVD is about 4.5GB you will need a stick of 8GB or more. You can pass the ISO to the USB in 2 ways. One is by using Etcher, while the other is by using Ventoy. I prefer Ventoy because I can put other distributions on the stick. No wasted space. You guys choose whatever works for you.
- If you have BIOS, ignore this step. Disable Secure Boot while you can leave UEFI on.
- If you are not installing dual boot (Windows and Linux), then ignore this. You need to create the partitions in Windows. Open Disk Management and select the disk where you will install Linux. There you need to shrink the partition and make a new partition.
- Boot the computer from USB. Select Installation.
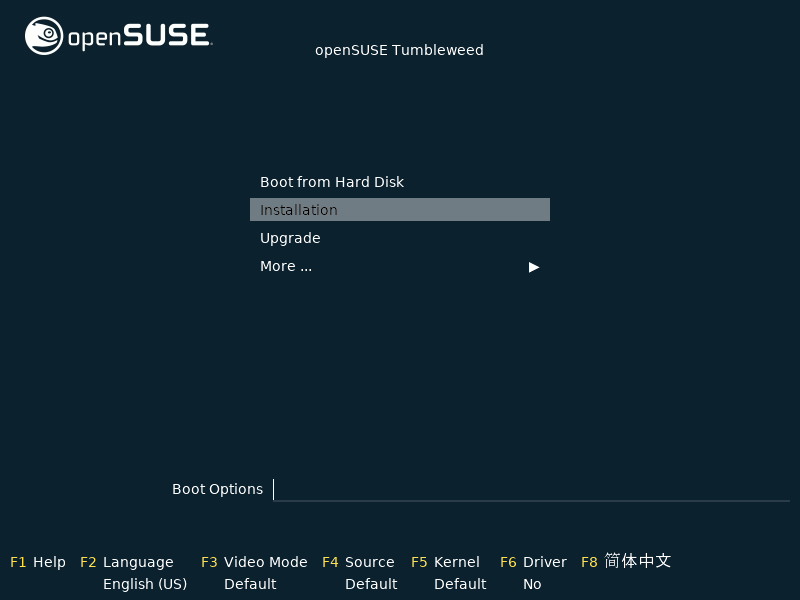
- There you should write the following:
netsetup=1 vnc=1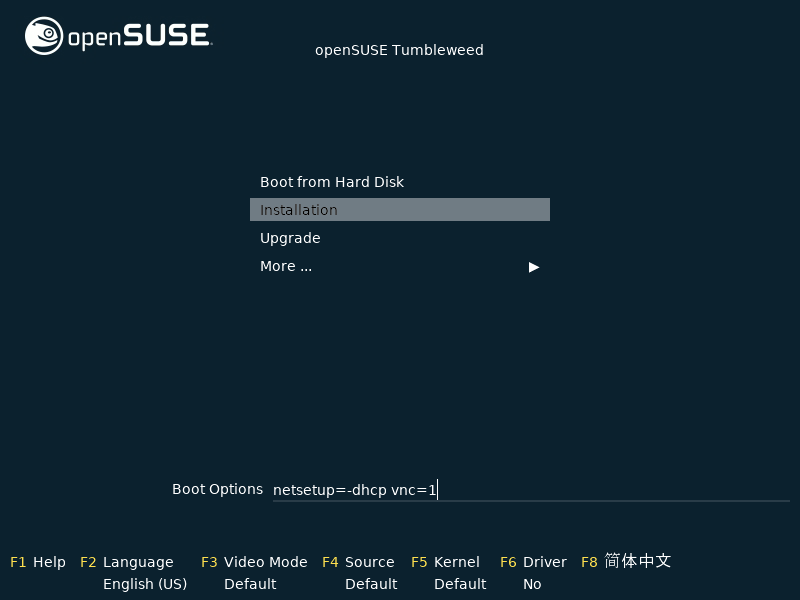
Let’s analyse the above picture.
NETWORK
netsetup=valueThis is essentially enabling the network in the installation. With a value of 1, we simply tell it that we want to turn it on. Next, it will ask us if we want DHCP to be configured automatically.
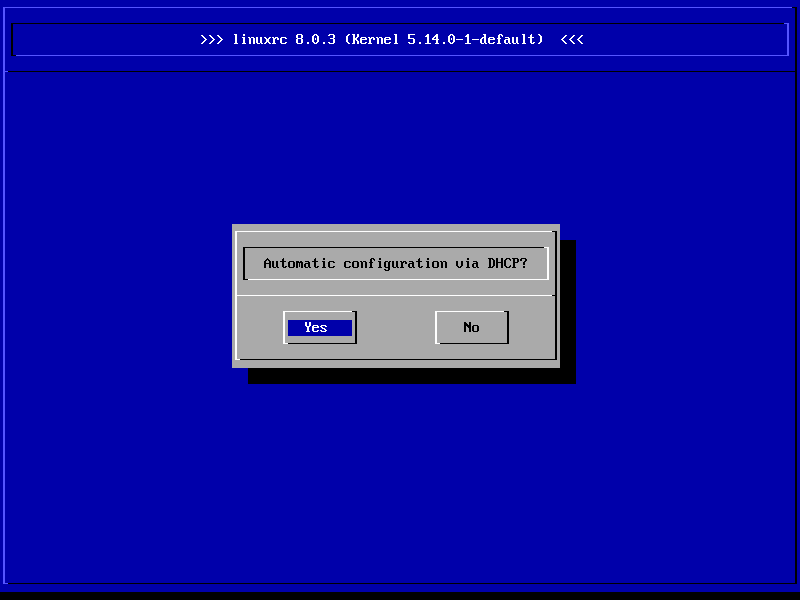
Other values are:
- netsetup=dhcp: Here we want it to automatically receive info via DHCP. The following screen will appear, and the process will continue.
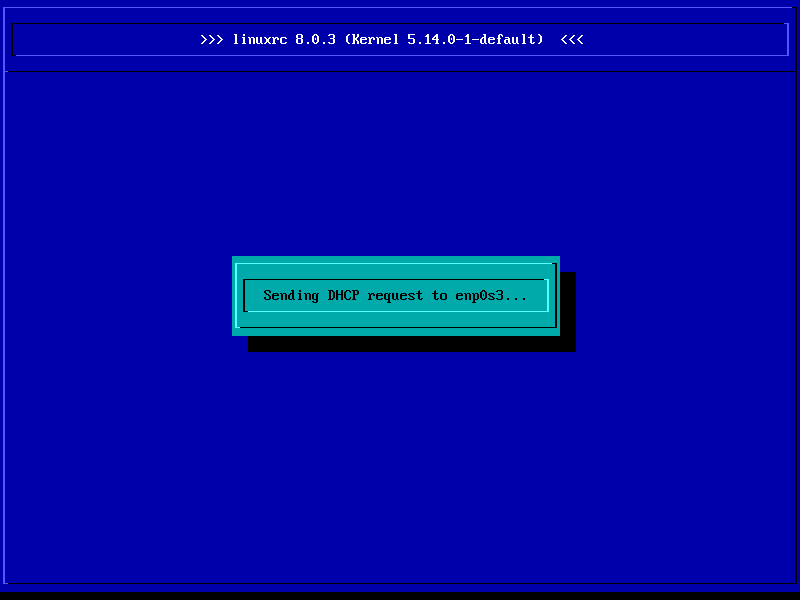
- netsetup=-dhcp: Here we want to enter the network settings manually. The following screen will appear, and the process will continue.
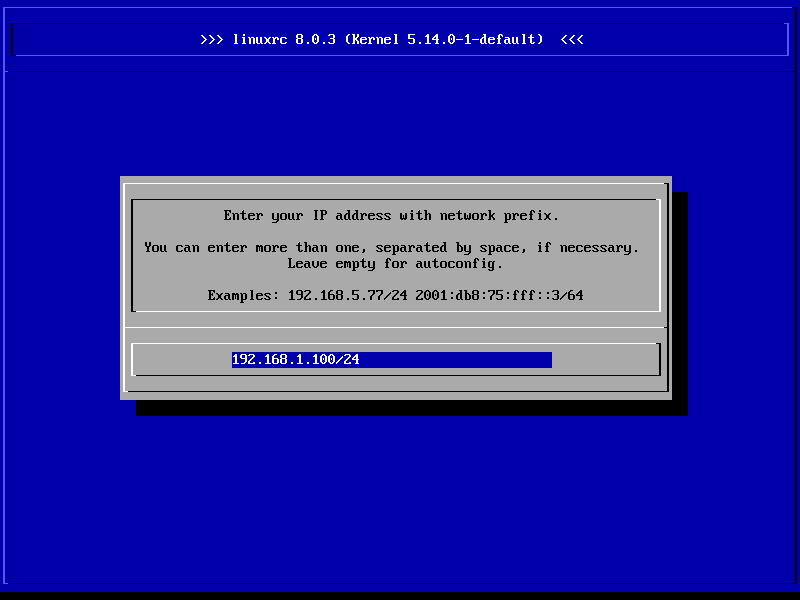
In addition to the IP, it will also ask you for the geteway address, name server.
VNC
vnc=1This is basically enabling the VNC server during installation. We will be presented with a screen to enter the password.
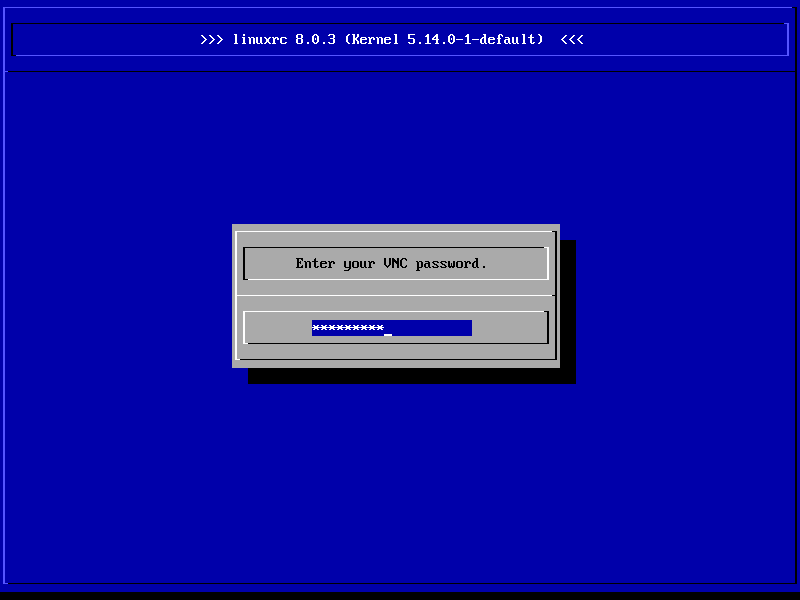
This may not appear if you enter the password (e.g. opensuse) at the beginning. That is, if you enter the command:
vnc=1 vncpassword=opensuseEventually, you will end up on the following screen.
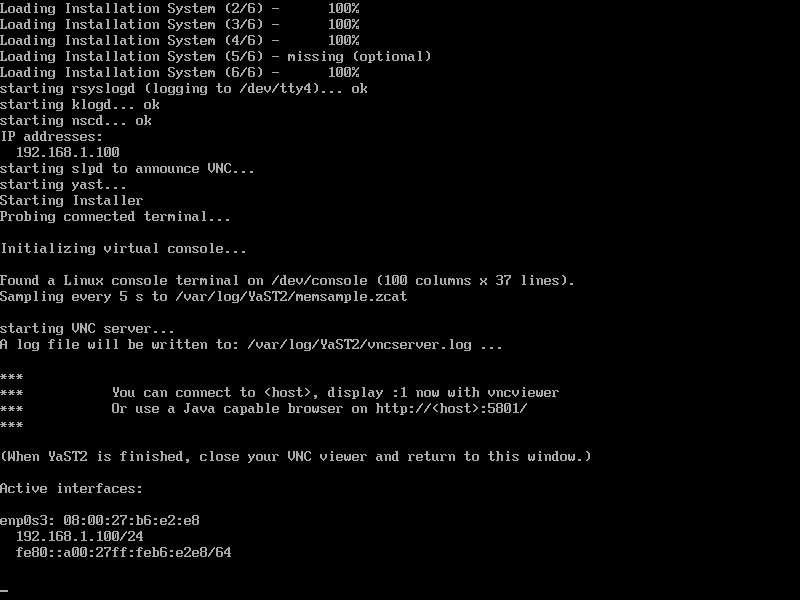
- Port foward on your Router. Which ports should be opened? For starters, you need to open TCP 5901 and TCP 5801 for the browser interface. As you can see in the picture above, it says that TCP port 5801 will be used. If you don’t want to send your external IP (not recommended), it’s a good idea to set up a ddns and give that to your friend.
After you give your friend your external IP (or ddns), the code you entered in the vnc, then he starts the action.
There are three options:
- The first option is to use vnc from a terminal. If the remote computer is ubuntu, a program must be installed:
sudo apt install gvncviewerAfter opening the terminal and it will give (if the IP is 192.168.1.100 as set above):
**Ubuntu:**
gvncviewer 192.168.1.100:1

**openSUSE:**
vncviewer 192.168.1.100:1
The above port is 5801.
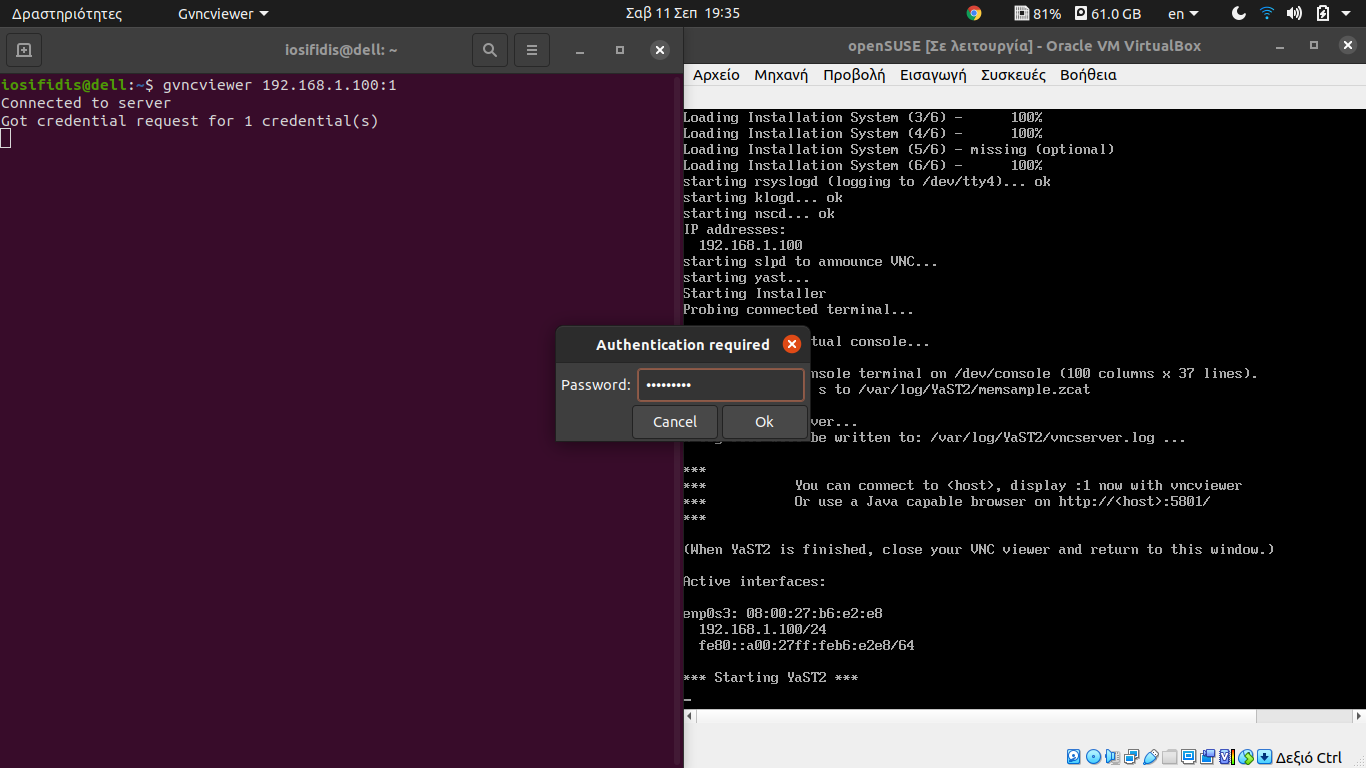
After entering the password set at the beginning on the host system, then it waits for the connection to be made and will show the following image.
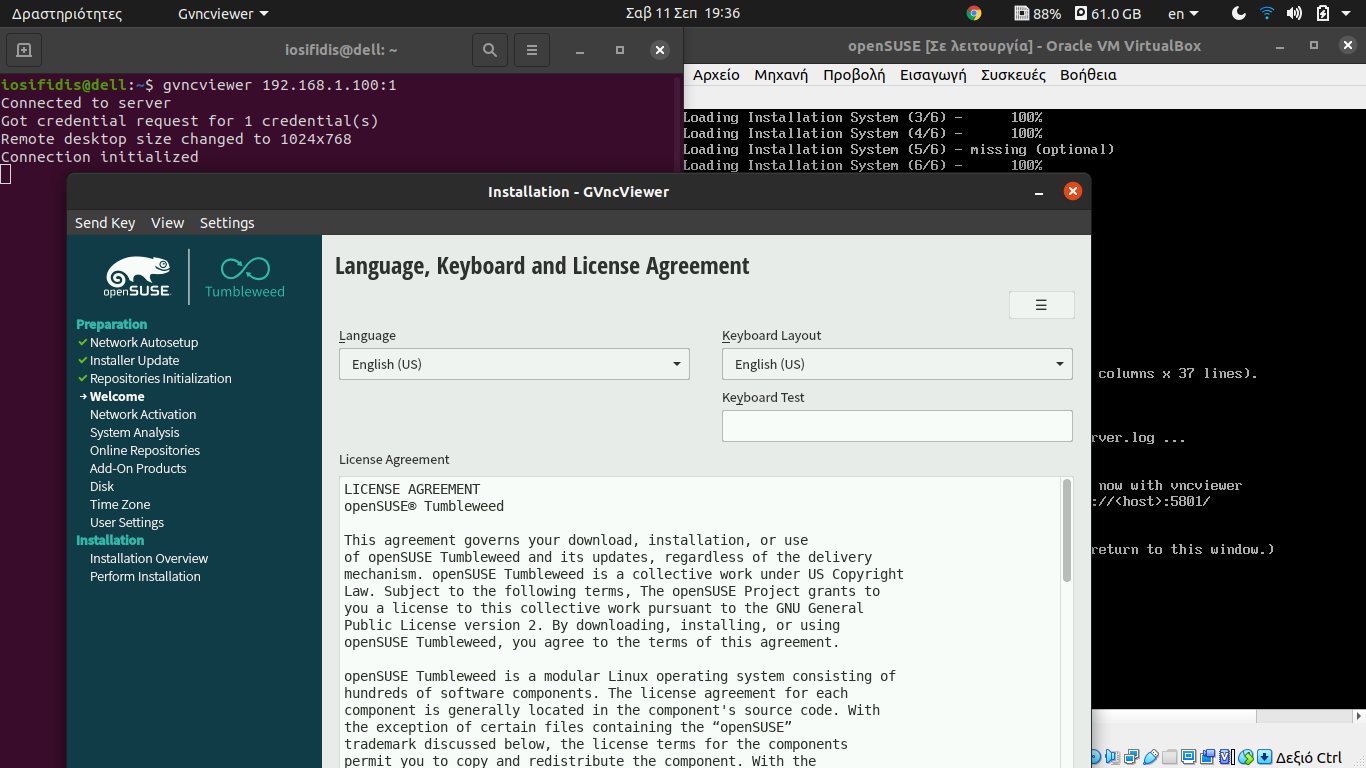
Here we see on the right the remote system (it’s in VirtualBox for testing to write the article), on the left is the terminal of the remote computer and in the center is what the remote user sees to proceed with the installation.
- Similarly, you can open Gnome-boxes and create a new connection to the remote computer. In the window that opens, type:
vnc://192.168.1.100:5901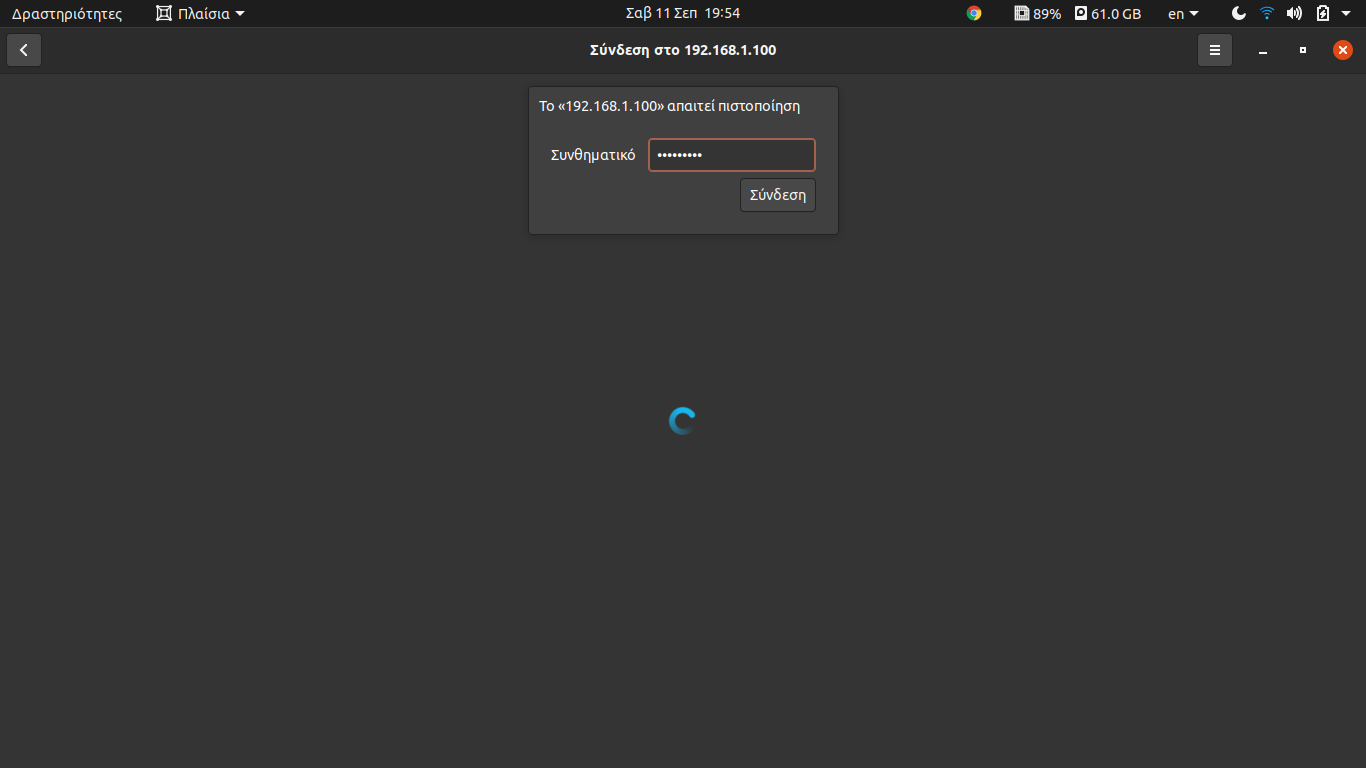
And after entering the host’s vnc password, then it will connect.
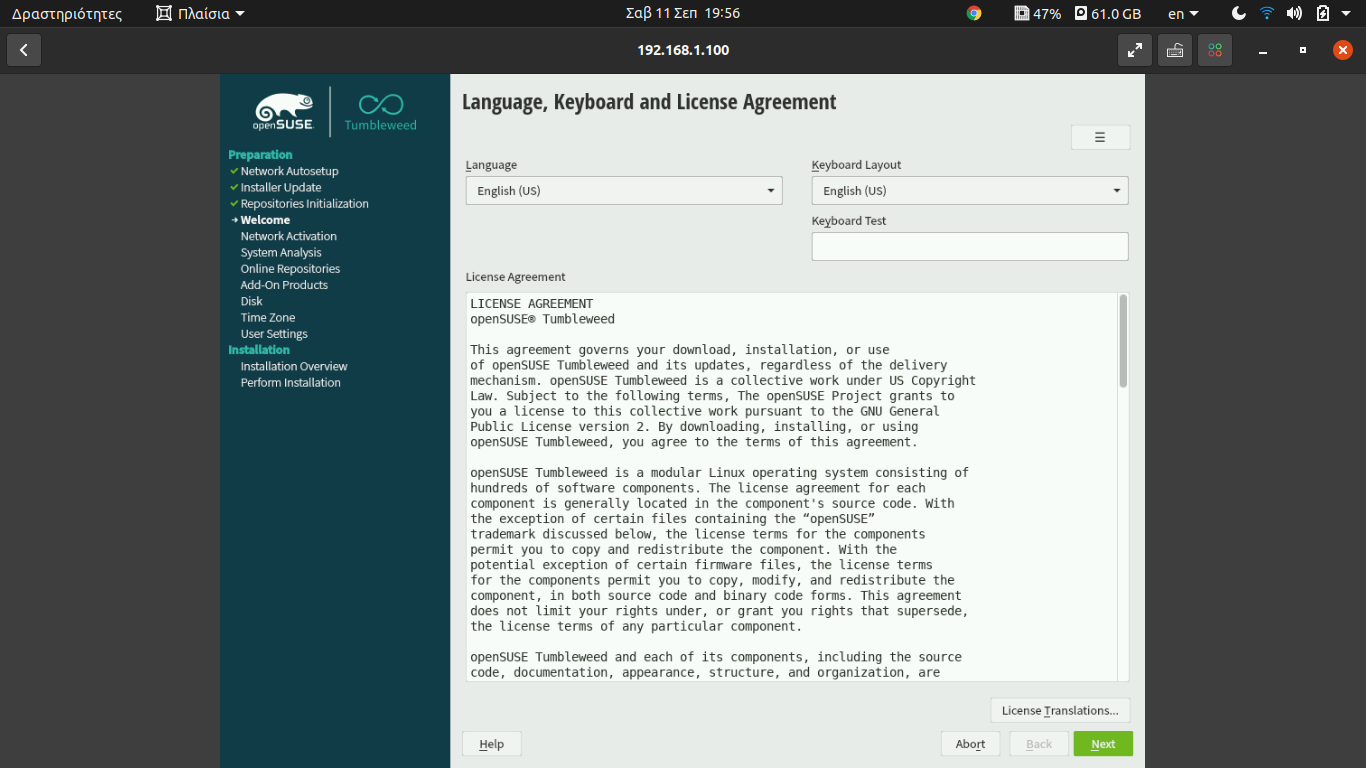
- Most beautiful is via browser. As told above, it must be able to run Java programs. Here it must use the IP address you provided when setting up DHCP (192.168.1.100):
192.168.1.100:5801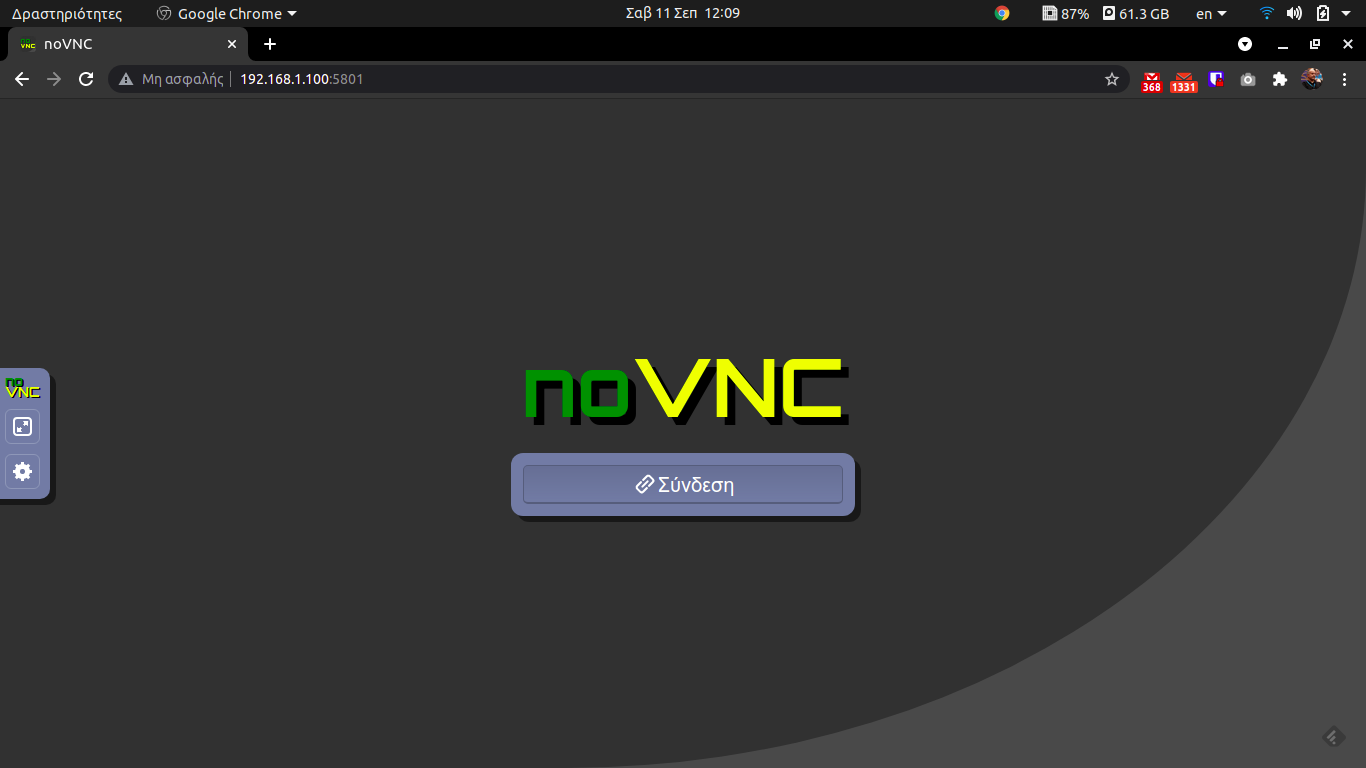
Click login and you will be asked for a password.
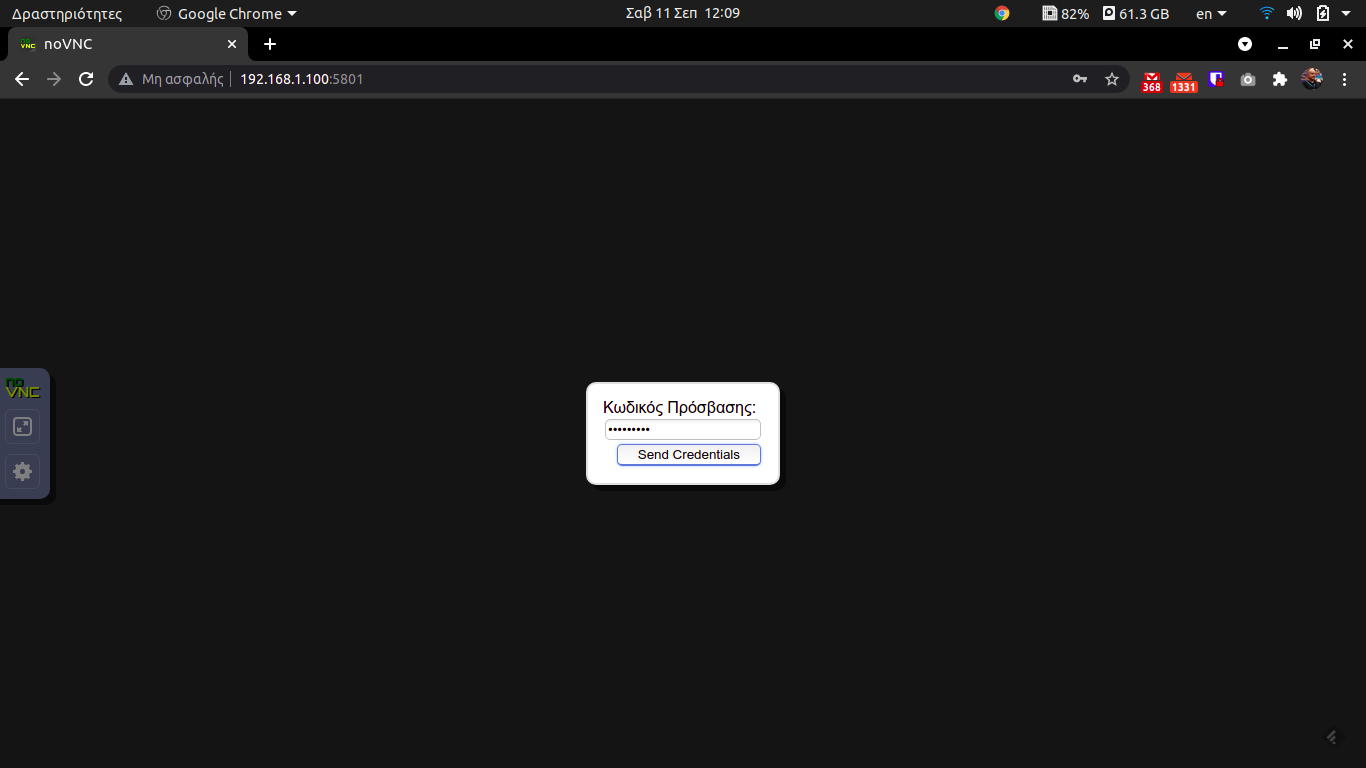
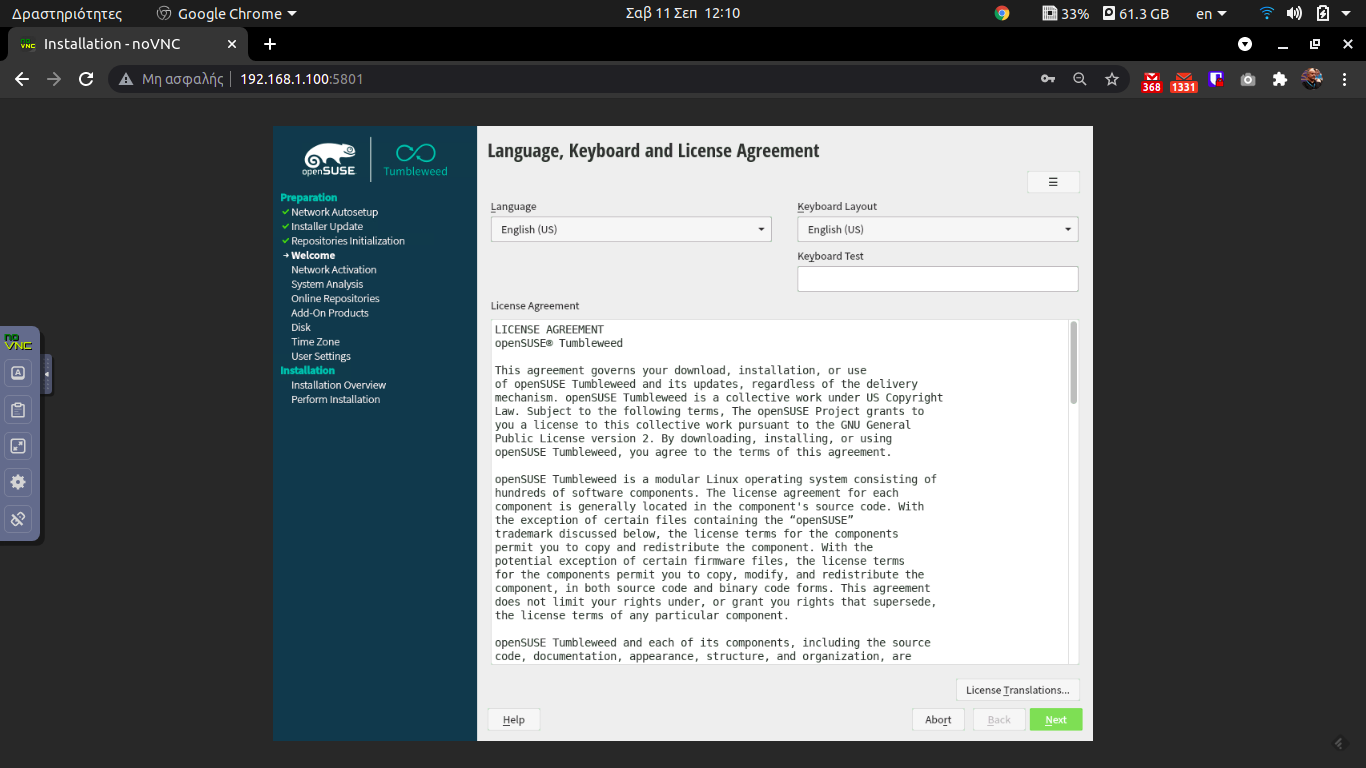
And we come up with the image to start the installation.
BONUS ssh
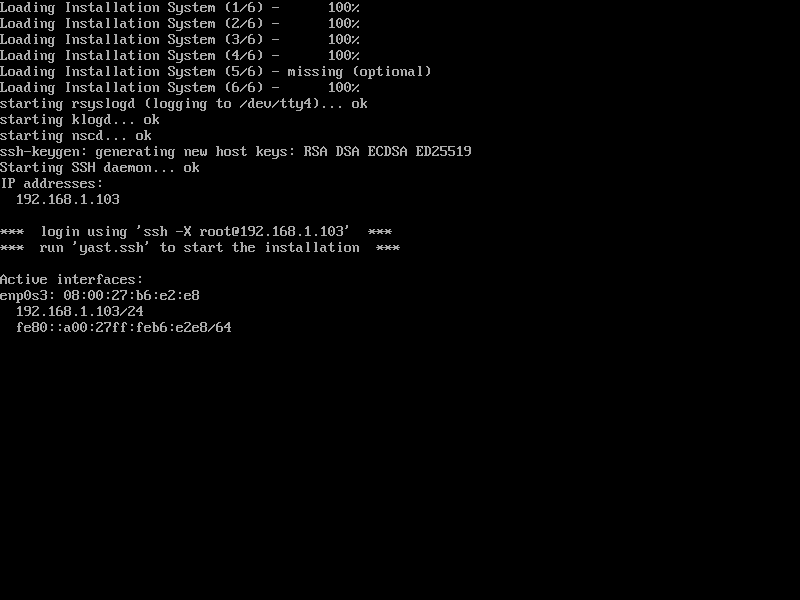
The installation can also be done via ssh. It is preferable via ssh because it is a more secure environment. How is this done? Essentially it is the same assumption. At startup, you provide the following:
netsetup=1 ssh=1 ssh.password=opensuse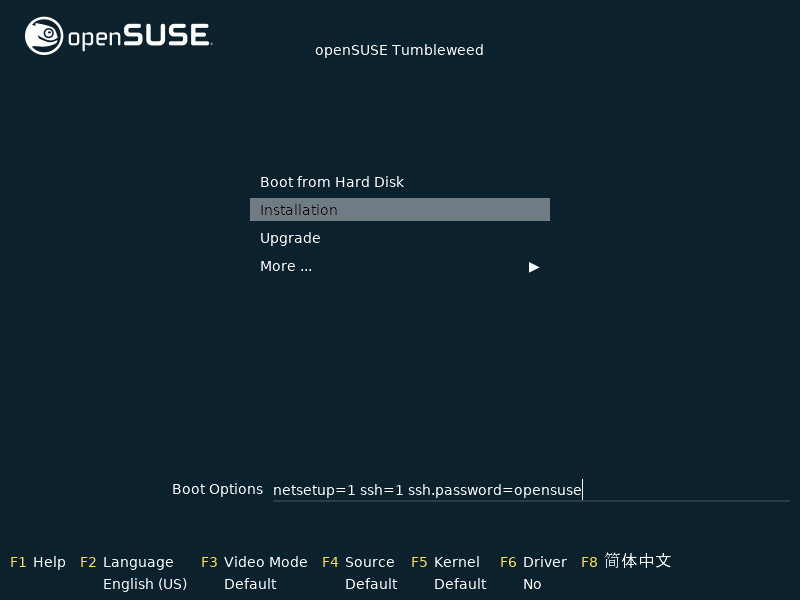
Using the same logic for netsetup. I’ve tried it without netsetup and it works fine.
- ssh=1: Enables installation via ssh.
- ssh.password=code: Specifies the root user’s SSH password for the installation.
메타데이터
- post_id
- dea8d4366cbc
- slug
- remote-installation-of-opensuse-dea8d4366cbc
- url
- https://medium.com/@iosifidis/remote-installation-of-opensuse-dea8d4366cbc
- canonical_url
- https://medium.com/@iosifidis/remote-installation-of-opensuse-dea8d4366cbc
- author_url
- https://medium.com/@iosifidis
- status
- ok
- fetched_at
- 2026-06-21 19:25:17