Noobies Guide to Git Practices and Branching Techniques, Peer Reviewing, and Pair Programming
As a developer with four years of corporate experience, I’ve found that Git practices and code reviews have become an integral part of our…
Noobies Guide to Git Practices and Branching Techniques, Peer Reviewing, and Pair Programming
As a developer with four years of corporate experience, I’ve found that Git practices and code reviews have become an integral part of our everyday life. In this blog, I’ll share my research and experiences using Git practices and branching corporate standard mechanisms, discuss commonly used Git commands, and how pair programming works and delve into the process of PR reviews.
What is Git?
Git is the most commonly used version control system1. It tracks the changes you make to files, so you have a record of what has been done, and you can revert to specific versions should you ever need to1. Git also makes collaboration easier, allowing changes by multiple people to all be merged into one source
Here are some key reasons why Git is necessary for code management whether it’s an organisation or personal project:
- Revision History: Git repositories store all project files along with their comprehensive change history, simplifying the process of change tracking.
- Collaboration: Platforms like GitHub or Bitbucket provide remote repositories that act as central hubs for pushing and pulling changes, thereby promoting seamless collaboration among developers.
- Simultaneous Development: Git’s branching and merging features enable developers to work on various parts of a project at the same time without interfering with the primary codebase.
- Undo Changes: Git provides the capability to undo modifications and return to a previous version of the code.
Git is a valuable resource for everyone from web to app developers, and anyone in between who codes or requires file change tracking. It’s an influential instrument for overseeing project files and keeping track of their modifications. Regardless of whether you’re an individual developer or part of a larger team, Git proves to be beneficial.
Let’s take a simple example, I will try to explain it assuming I am explaining it to a 5-year-old kid:
Imagine you’re drawing pictures with your friends. You all are drawing on the same big piece of paper. Now, you want to draw a house, but your friend wants to draw a tree. You both can’t draw at the same place, right?
So, you take a small piece of the same paper (we call this a “branch” in Git), and start drawing your house there. Your friend does the same and starts drawing a tree on another piece. When both of you are done, you stick your pieces back on the big paper (this is called “merging”). Now, you have a house and a tree on your big paper!
Also, imagine you drew a cat, but you didn’t like it. Because you were using Git, you can go back in time to when the cat wasn’t there (this is called “reverting”). It’s like having a magic eraser!
So, Git is like this magic paper that lets everyone draw together without messing up each other’s work, and even erase things as if they were never there!
Repository in Git:
Before moving any further, Let’s first understand the most important concept of Git, Repository. GitHub defines Repository as:
It’s a place where you can store your code, your files, and each file’s revision history. Repositories can have multiple collaborators and can be either public or private.
A Git repository, or repo, is a directory that Git tracks changes in. It contains a collection of files of various different versions of a project. These files are imported from the repository into the local server of the user for further updates and modifications. A Version Control System (VCS) is used to create these versions and store them in a specific place termed a repository.
Simply speaking, Git repository is like a folder for your project that Git keeps track of. It contains all the project files and the history of each file.
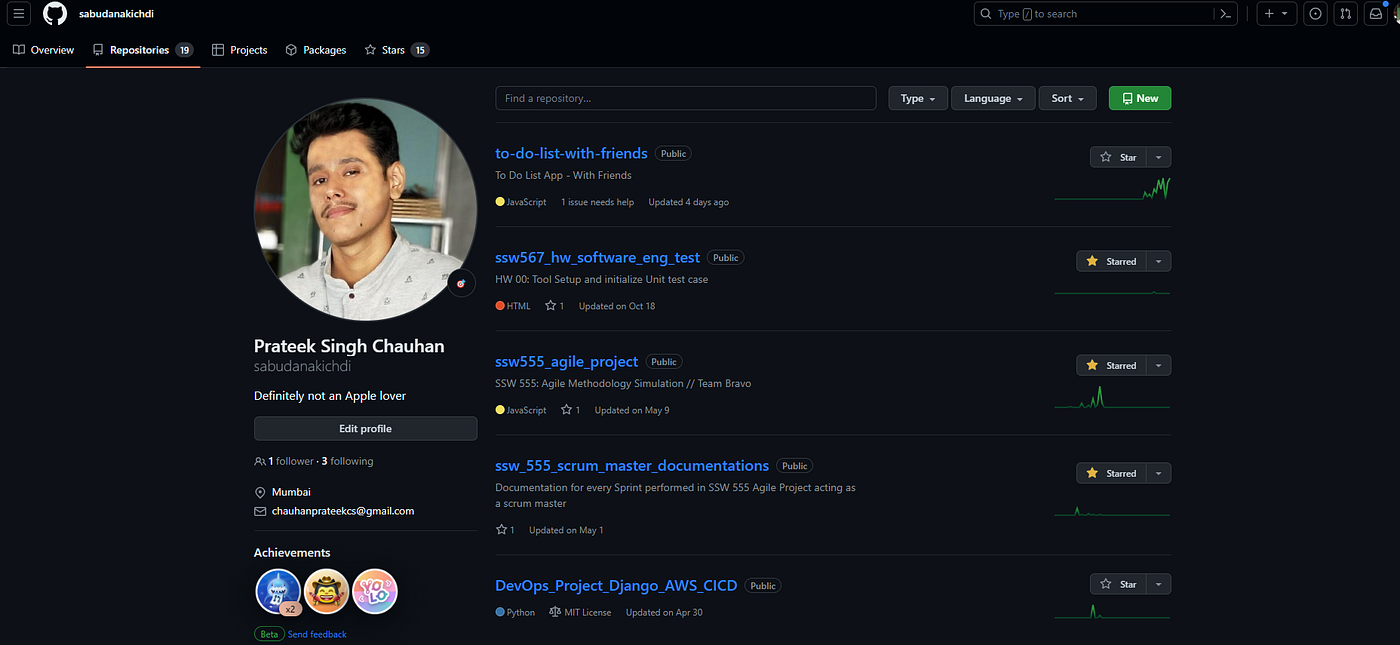
My repositories in my GitHub account
In Git, there are two kinds of repositories: local and remote:
- Local Repository: This is the version of your project that resides on your personal computer. You make and track changes here. It’s like a personal workspace where you can modify files, save them, and track their history. Each local repository operates independently, so changes in one do not impact others.
- Remote Repository: This is the version of your project that is stored on a server, often somewhere on the internet. It’s a shared workspace where multiple team members can exchange and synchronize changes.
The key difference between local and remote repositories is their location and purpose. A local repository is your personal workspace on your own machine where you do most of your work, like saving changes and creating branches. A remote repository, typically hosted on a server, is a shared space where teams can exchange changes. Simplified explanation using an example:
Let’s imagine you’re playing with a box of Lego blocks:
Your local repository is like your own box of Lego blocks at home. You can build anything you want with them, take them apart, and rebuild them in a different way. No one else can touch your blocks or see what you’re building unless you show them.
Your remote repository is like a box of Lego blocks at school that you share with your classmates. Everyone can add their own creations to this box or take a look at what others have built.
So, when you build something cool at home (local repository), you can bring it to school (remote repository) and show it to your friends. And if your friends have built something cool, you can bring it home and add it to your own box. Even if you can’t go to school (like when you’re offline), you can still play with your blocks at home and show your friends what you’ve built when you go back to school (when you’re online again).
One important thing to remember is that Git is a distributed version control system. This means that your local repository is a fully-featured Git repository in its own right. You can make changes, create branches, and modify your local repository even when you’re offline. Once you’re back online, you can share your changes with any other Git repository you have access to.
Commonly Used Git Commands
Now that you understand Git, Let’s jump to commonly used commands:
git clone <repository>: Clones a repository into a new directory.git pull: Fetches from and integrates with another repository or a local branch.git push: Updates remote refs along with associated objects.git branch: Lists, creates or deletes branches.git checkout: Switches branches or restores working tree files.
Branching in Git:
In Git, branches play a pivotal role in the development workflow. They essentially serve as a reference to a snapshot of your modifications. Here’s how they function:
- Establishing a New Environment: Branches enable you to set up distinct environments where you can experiment or concurrently develop multiple concepts without jeopardizing the main codebase. If alterations are made on one branch, they won’t affect the other branches unless you merge or incorporate the changes.
- Segregating Modifications: Developers utilize branches to interact with a replica of the code without altering the current version. Branches are created to segregate your code modifications, which are tested prior to merging with the main branch.
- Efficient and Quick: Git’s branching mechanism is remarkably efficient and swift. It even allows you to toggle between branches and work on disparate projects without any interference.
- Integration: Once the work on a branch is finalized, it can be integrated with the main project. This facilitates the inclusion of the modifications made in the branch into the primary codebase.
Normally, you will always have a main/master branch, which holds your final code that will be used. Let’s say you are trying a new thing that needs to be implemented but are not sure whether it should be included in new code or multiple people are working on different ideas, then you create a child branch of the main/master branch which is also called a feature branch and once you are done with development of your feature, you will merge into main/master code. This can be easily explained using a simple example:
Let’s imagine you’re playing with your favorite set of building blocks. You’ve built a beautiful castle and you’re very proud of it. But now, you want to add a tower to your castle.
But there’s a problem — what if the tower doesn’t look good? You don’t want to mess up your beautiful castle. So, what do you do?
Here’s where Git branches come in. Imagine you could make an exact copy of your castle to play with. You build your tower on the copied castle. If it looks good, you can add it to your original castle. If it doesn’t, no worries! Your original castle is still safe and untouched.
In Git, your original castle is the
mainbranch. The copy where you try new things (like the tower) is a new branch. When you’re happy with your changes, youmergethe new branch back into themainbranch. And that’s how branches in Git work!
What is Git merge and how to merge the code?
Git merge is a command that allows you to join two or more development histories together.
Consider the following diagram:
A---B---C feature
     /
D---E---F---G master
If we are on the feature branch and we want to incorporate changes from the master branch which has 3 new commits E, F, and G, we can use git merge master. This creates a new commit H in the feature branch that has a history of both branches.
D---B---C---H feature
     /       /
D---E---F---G master
Here, H is the new commit, which contains all the code committed in E, F, and G merged from the master.
Merging Code Using Git:
- Checkout the branch (git checkout) you want to merge into: This is typically the main branch. You can switch to the branch using the command git checkout <branch-name>.
- Merge the branch: Use the command git merge <other-branch-name> to bring the changes from the other branch into the current branch12. This will combine multiple sequences of commits into one unified history.
- Resolve conflicts if any: If Git encounters a piece of data that is changed in both histories, it will be unable to automatically combine them. This scenario is a version control conflict and Git will need user intervention to continue. You can resolve the conflicts by editing the affected files and then commit them.
Few Additional features provided by Git Merge:
-
Creating a New Branch: You can create a new branch and switch to it simultaneously using the git checkout command with the -b switch1. For example, to create a new branch named iss53, you would use the command git checkout -b iss53.
-
Working on the New Branch: After creating the new branch, you can make changes and commit them. This moves the new branch forward.
-
Switching Back to the Master Branch: If you need to make a critical hotfix, you can switch back to your master branch1. It’s important to note that Git resets your working directory to look like it did the last time you committed on that branch.
-
Creating a Hotfix Branch: You can create a hotfix branch, make the necessary changes, and commit them.
-
Merging the Hotfix: After testing the hotfix, you can merge the hotfix branch into the master branch1. This is done using the git merge command2. For example, if you’re on the master branch and want to merge changes from a branch named hotfix, you would use the command git merge hotfix.
-
Resolving Merge Conflicts: Sometimes, a merge can fail due to conflicts between the versions of the files in the different branches2. In such cases, you need to resolve these conflicts manually. Git will mark the areas in your file where conflicts occurred, and you can decide which changes to keep.
-
Deleting the Branch: After the merge, if the branch is no longer needed, you can delete it using the git branch -d command followed by the branch name.
Here’s how branches look in VS code tool ‘Git Graph’ where multiple people are working in the repository:

https://github.com/sabudanakichdi/to-do-list-with-friends
Resolving Merge Conflicts:
Resolving merge conflicts in Git involves a few steps:
- Identify the conflicted files: Use git status to list the files affected by the merge conflict1.
git status- Open the conflicted files: Open your favorite text editor and navigate to the file that has merge conflicts1. The beginning of the merge conflict in your file is marked by <<<<<<<. Changes from the HEAD or base branch are shown after the line <<<<<<< HEAD. Next, you’ll see =======, which divides your changes from the changes in the other branch, followed by >>>>>>> BRANCH-NAME1.
- Resolve the conflicts: Decide if you want to keep only your branch’s changes, keep only the other branch’s changes, or make a brand new change, which may incorporate changes from both branches1. Delete the conflict markers <<<<<<<, =======, >>>>>>> and make the changes you want in the final merge1.
- Mark the conflict as resolved: After editing the file, use the git add command to stage the new merged content2.
git add <file>- Commit the resolved conflict: The final step is to create a new commit with the help of the git commit command2.
git commit -m "Resolved merge conflict"
For complex conflicts, you can use a merge tool like vimdiff3, vs code or resolve conflicts in the GitLab interface. Remember, regular merging can help mitigate most merge conflicts
One of the tutorial videos for resolving Git Merge Conflicts using VS Code by CoderOne:
[embed]
Peer Review and Pull Requests (PRs):
Now that we understand repositories, branches, code management, and bugs (problems in your code that will cause failure), we learn about the peer review process in Git using Pull Requests.
Peer review in Git is a process where your team members look at your code changes before they are added to the project. Based on the requirement or feature that your building, the reviewer will either approve or reject the code. If approved, the code gets merged into the master branch and if not, code changes need to be made by the developer based on the reviewer’s comment.
This is done to ensure the quality of the code, catch any bugs, and learn from each other.
It’s like having your friends check your homework before you hand it to your teacher. To understand this, Let's take an example:
Imagine you’re playing with building blocks and you’ve built a cool tower. Now, you want to add a new block to your tower (this is like making a change in your code). But, you’re not sure if the block will fit well or if it might make your tower unstable. So, you ask your friend (this is like asking a team member in Git) to check if the block fits well.
Your friend looks at the block and the tower (this is the peer review), and then gives you advice on whether it’s a good idea to add the block or not (Peer Review Comments).
If your friend thinks it’s a good idea (Approves Changes), you add the block to the tower (this is like merging your changes into the project).
If not (Rejects Changes), you try to find a better block (this is like making improvements in your code based on review comments).
In Git, this process is often done through a feature called “Pull Requests” on platforms like GitHub. When you make a change in your code, you create a pull request. Your team members can then review your changes, leave comments, and finally approve the changes or request for more changes before the pull request is merged.
Involvement of Pull Requests (PRs) in Merging Pull Requests (PRs) are a feature of platforms like GitHub that facilitate code reviews and discussions about code changes before they are merged into a branch.
There are two parties involved in PR: Developer, and Reviewer. The developer is responsible for ensuring that their code is functional, well-documented, and follows the project’s coding standards. The reviewer, on the other hand, is responsible for understanding the changes, providing constructive feedback, and ultimately approving the PR for merging.
Here’s how they are involved in the merging process:
- Propose changes: In a PR, you propose that changes you’ve made on a head branch should be merged into a base branch.
- Review and discuss changes: Team members can review the changes, discuss potential modifications, and even push follow-up commits if necessary.
- Merge the PR: Once the changes are approved, anyone with push access to the repository can merge the PR. The changes from the head branch (feature branch) are then merged into the base branch (master branch).
- Close the PR: If you decide you don’t want the changes in the branch to be merged with the upstream branch, you can close the PR without merging
This is how my team and I have been using PRs to perform code refactor and resolve bugs and issues before being merged into the master branch:

https://github.com/sabudanakichdi/to-do-list-with-friends
The most important benefit of following Peer review and Pull Request process is that it allows developers to resolve known issues, check coding standards followed by the developer, and test out all requirements of the features before merging into the master code.
Apart from code review, Github also allows you to configure more automated code checks. For example, code coverages and code smell identifier tools such as sonarcloud, codacy to check the quality of the code or configure code build using automation tools such CircleCI.

https://github.com/sabudanakichdi/to-do-list-with-friends
Well, in the above picture, you can see the code was approved even though none of the checks passed, that completely depends on the reviewer and what changes are present in that specific Pull Request (PR).
Responsibilities of the Reviewer:
In Peer Review Process, we understand the job of the developer, but there are certain responsibilities that the reviewer has while reviewing code. If a reviewer makes a mistake while reviewing it can lead to significant bugs or even application failure. Here are the few responsibilities of the code reviewer:
Code Quality and Standards: Reviewers ensure that the code adheres to the team’s coding standards, style guidelines, and best practices.
Functional Correctness: Reviewers verify that the code accomplishes its intended functionality and meets the requirements outlined in the design or user stories.
Performance and Efficiency: Reviewers examine the code for performance bottlenecks and inefficient algorithms.
Testing and Testability: Reviewers ensure that the code has appropriate unit tests and integration tests.
Documentation and Comments: Reviewers check whether the code is well-documented and includes sufficient comments to explain complex sections, algorithms, or any non-obvious decisions made during development
Constructive Feedback: Reviewers provide feedback to the author of the code constructively and respectfully.
Assuming we’ve grasped the concepts of Peer Reviewing and Pull Requests, let’s proceed to our next topic:
Pair Programming
Pair programming is a technique where two programmers work together at one workstation. One, the driver, writes code while the other, the observer or navigator, reviews each line of code as it is typed in. The two programmers switch roles frequently.
Generated by Bing Chat using DALL E 3
This is one of the best scenarios, I can think of to explain in simple words:
Imagine you and your brother are playing a racing game. You control the speed and braking of the car, and your brother controls the direction. Both of you need to work together to win the race, right?
Pair programming is just like that! It’s when two programmers work together on the same code. One person is the driver who writes the code, just like you controlling the speed and braking. The other person is the navigator who helps guide what to do next, just like your brother controlling the direction. They need to work together to write the best code and “win the race” in making a great program! 🏎️💻
This is one of the most common development practices used in corporate organizations, where drivers can be a developer and observers are your Senior Developers/ Mentors. In my previous organization, it was called ‘Buddy System’ especially if you were a new joiner in the existing team. Now that we understand Pair Programming, we will learn how is it used in development.
Let’s take two scenarios, Pair Programming in API Integration and Pair Programming in UI Development:
Pair Programming in API Integration:
When working on API integrations, pair programming can be particularly beneficial. The driver can focus on writing the code to call the API and handle the response, while the navigator can review the API documentation, ensure the correct endpoints are being hit, and that the data is being handled correctly. This can lead to fewer mistakes and a better understanding of the API.
Pair Programming in UI Development:
In UI development, one programmer could focus on the layout and styling (CSS), while the other could focus on the functionality (JavaScript). They can discuss and make decisions together, leading to a more cohesive and well-thought-out user interface.
How does the Git Branching and Peer Review take place in Peer Programming?
In pair programming, Git branching works the same way as it does when programming solo. However, the process of reviewing and merging PRs can be more streamlined, since the reviewer was also part of the feature development. Following steps takes place in the process of branching and review in pair programming:
- Create a new branch: The pair creates a new branch for the specific feature they are working on.
git checkout -b feature_branch2. Work on the feature: The pair works on the feature, with one person driving and the other navigating. They make commits as necessary.
git add .
git commit -m "Commit message"
3. Push the branch: Once the feature is complete, they push the branch to the remote repository.
git push origin feature_branch4. Open a PR: They then open a PR for the branch. Because both programmers have been involved in writing the code, they can both contribute to the PR description and list of changes.
5. Review the PR: Even though they worked on the code together, it’s still important to review the PR. They can do this together, with one person driving the review and the other navigating.
6. Merge the PR: Once they’re satisfied with the code and the PR has been approved, they can merge the PR.
Pair programming can make the PR process more efficient, as both programmers are already familiar with the code and can contribute to the review process. It also encourages knowledge sharing and can lead to higher code quality.
Conclusion
In conclusion, mastering Git practices and branching strategies, peer reviewing, and pair programming are essential skills for any newcomer in the world of programming. These practices not only enhance code quality and efficiency but also foster a collaborative and learning-oriented environment.
Remember, Git is not just a tool but a philosophy that encourages incremental and collaborative development. Branching strategies provide a structured way of managing code changes, making the development process smoother and more manageable.
Peer reviewing acts as a safety net, catching potential bugs and logical errors before they make their way into the production code. It’s also a great way to learn from your peers and improve your coding skills.
Pair programming, on the other hand, is a fantastic way to share knowledge, reduce mistakes, and produce higher-quality code. It’s a practice that embodies the saying, “Two heads are better than one.”
As you embark on your coding journey, remember that these practices are your allies. They will guide you, help you grow, and ensure that you contribute effectively to your team’s success. So, keep practicing, stay curious, and happy coding!
메타데이터
- post_id
- df095e6a6d05
- slug
- noobies-guide-to-git-practices-and-branching-techniques-peer-reviewing-and-pair-programming-df095e6a6d05
- url
- https://medium.com/@chauhanprateeksinghcs/noobies-guide-to-git-practices-and-branching-techniques-peer-reviewing-and-pair-programming-df095e6a6d05
- canonical_url
- https://medium.com/@chauhanprateeksinghcs/noobies-guide-to-git-practices-and-branching-techniques-peer-reviewing-and-pair-programming-df095e6a6d05
- author_url
- https://medium.com/@chauhanprateeksinghcs
- status
- ok
- fetched_at
- 2026-07-16 21:41:59




