Using a Send Mail Task to Send out Notifications in SSIS
You can configure the Send Mail task to send notifications whether a package is successful or it fails. Configuration is really simple…
Using a Send Mail Task to Send out Notifications in SSIS

You can configure the Send Mail task to send notifications whether a package is successful or it fails. Configuration is really simple. Let’s take it step by step.
Send Mail Task for Simple Notifications
Step 1 — Drag a Send Mail Task onto the SSIS Canvas and name it appropriately. I right clicked on the task itself to rename it, but you can also double click on it to open it’s editor and provide the name.
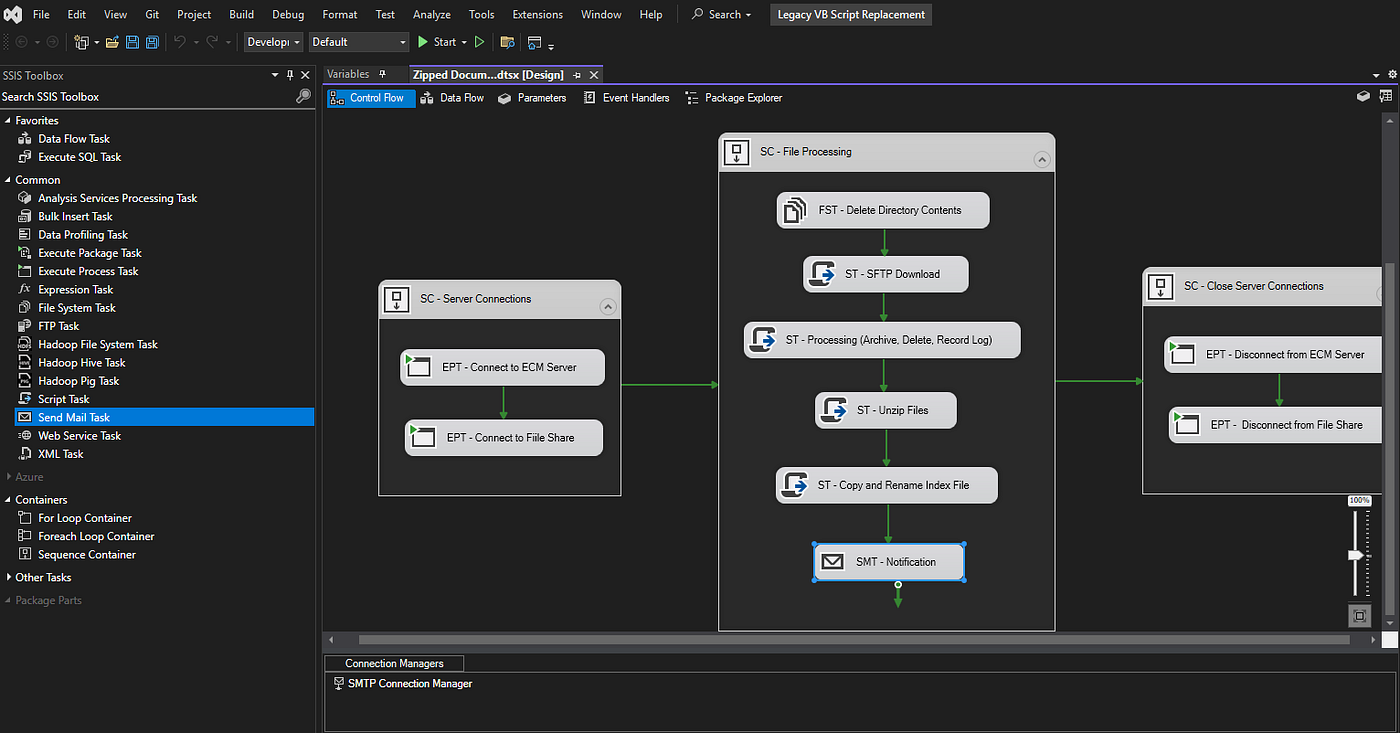
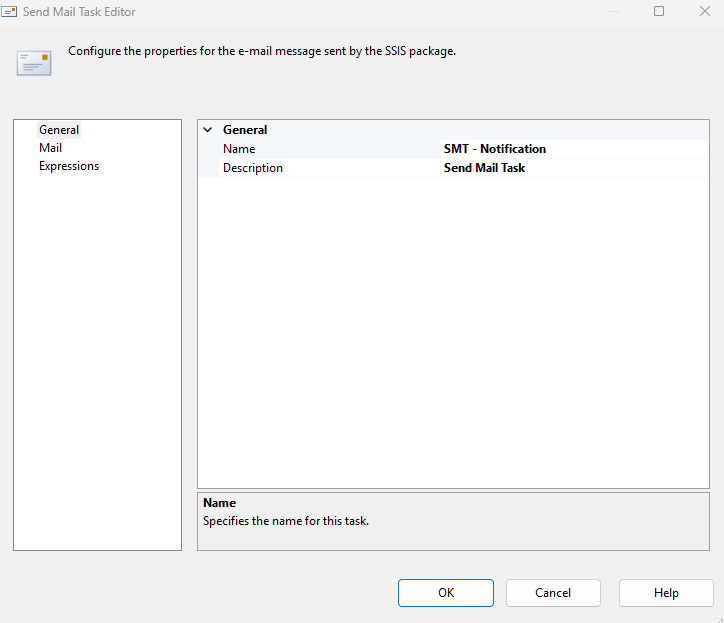
Step 2 — Double-click the Send Mail Task to open its editor. Provide a custom name on the General tab if needed.
Step 3— Click on the Mail tab on the left side of the editor.
- Under SMTP Connection, click the drop-down menu and select “New Connection”. This will open the SMTP Connection Manager Editor.
- Configure the following in the SMTP Connection Manager Editor

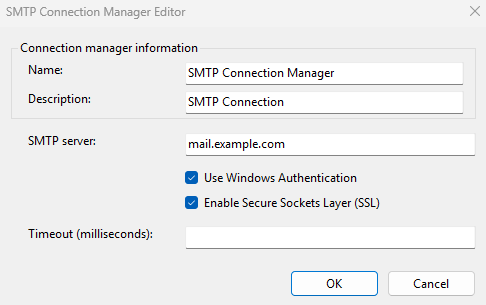
- Click OK to save the connection.
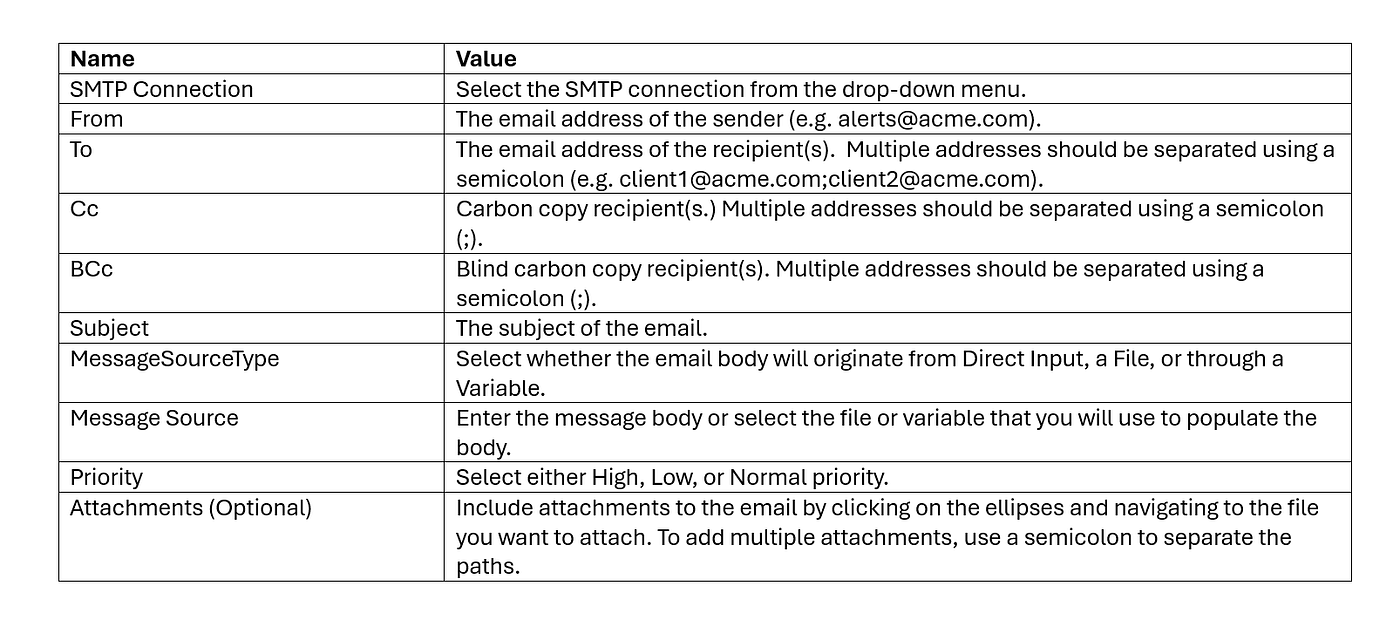
Step 4 — Configure the Email Settings
- Back in the Send Mail Task Editor, complete the following fields:
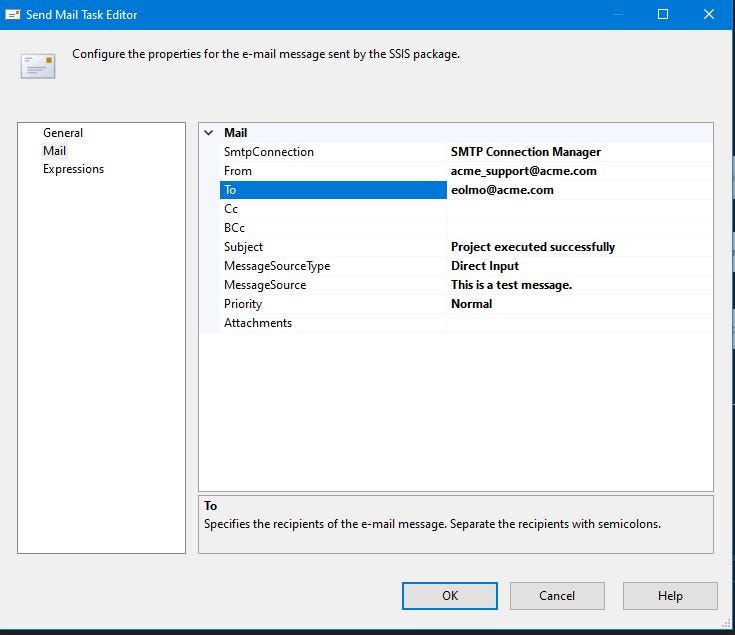
Step 5: Test the Configuration
- Click OK to close the editor.
- Execute the task to test the Send Mail Task.
- Check your inbox to confirm the email was sent successfully.
If you did everything correctly, you should have an email waiting for you in the inbox of the email address you entered.
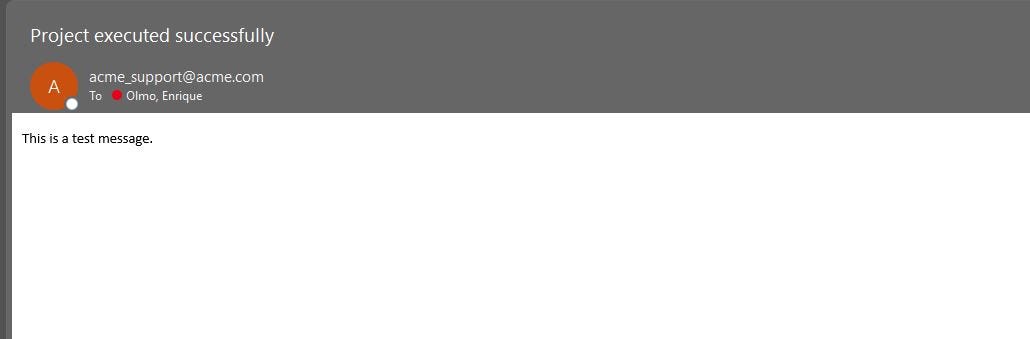
Troubleshooting
- If the email fails to send:
- Verify the SMTP server address, port, and credentials.
- Check if SSL/TLS is required and ensure it’s enabled if necessary.
- Ensure the firewall allows traffic on the specified SMTP port.
- Verify that the sender’s email account has permission to send emails via the SMTP server.
Send Mail Task for Error Notifications
The steps for setting up a Send Mail task for error notifications is very similar to that of your standard task. The major difference is using system variables to capture the error and report it to the recipient (most likely YOU or someone on your team). The notification will alert you that an error has occurred and the identify the root cause. Isn’t that cool?
Grasshopper, this is how we do it.
Step 1:Click on an empty area in your package. You do not want to click on any tasks or other containers. This will place the focus on the incorrect target. Then click on the Event Handler tab.
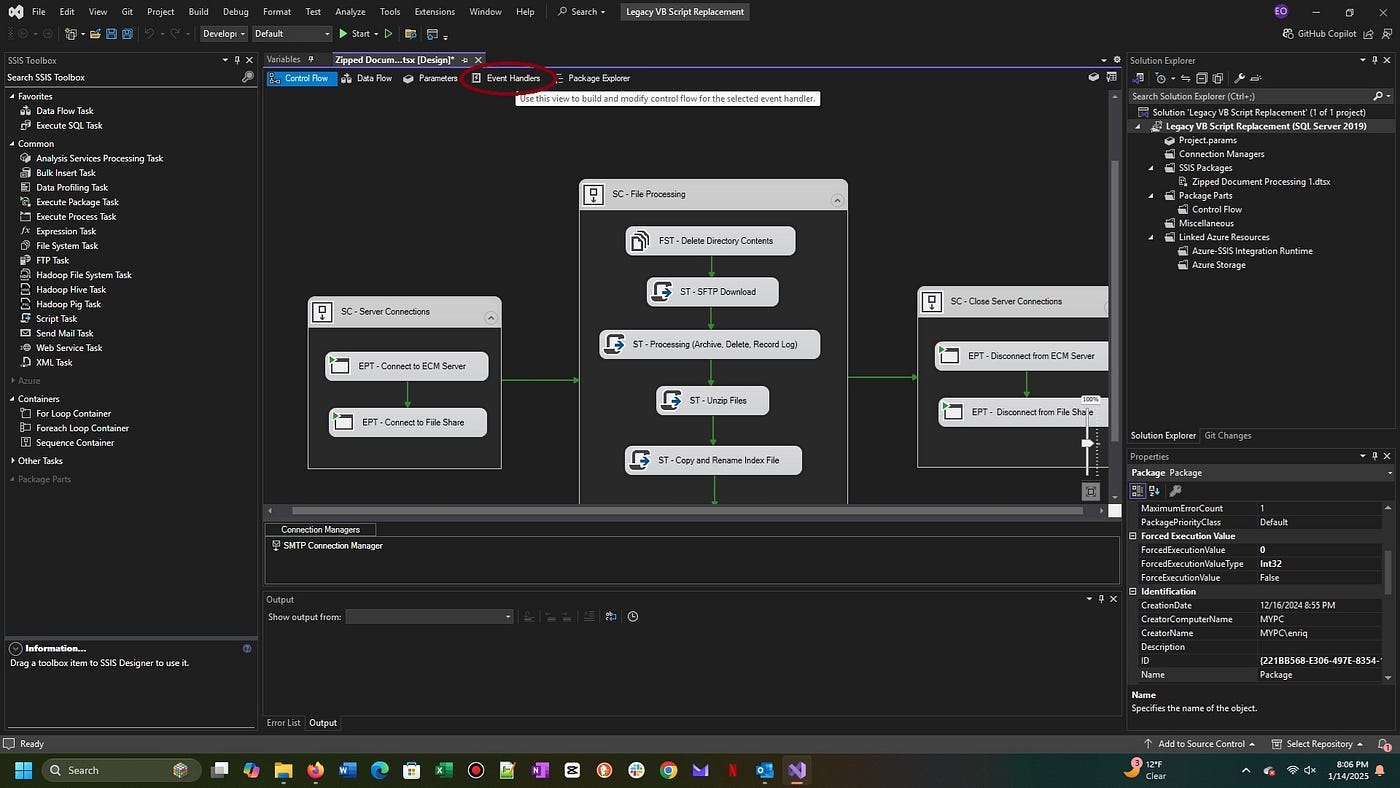
Step 2: This will take you to the next screen. You will need to click on the link that says “Click here to create an ‘OnError’ event handler for executable ‘Package x’ ”. This will present you with the canvas for the Event Handler.
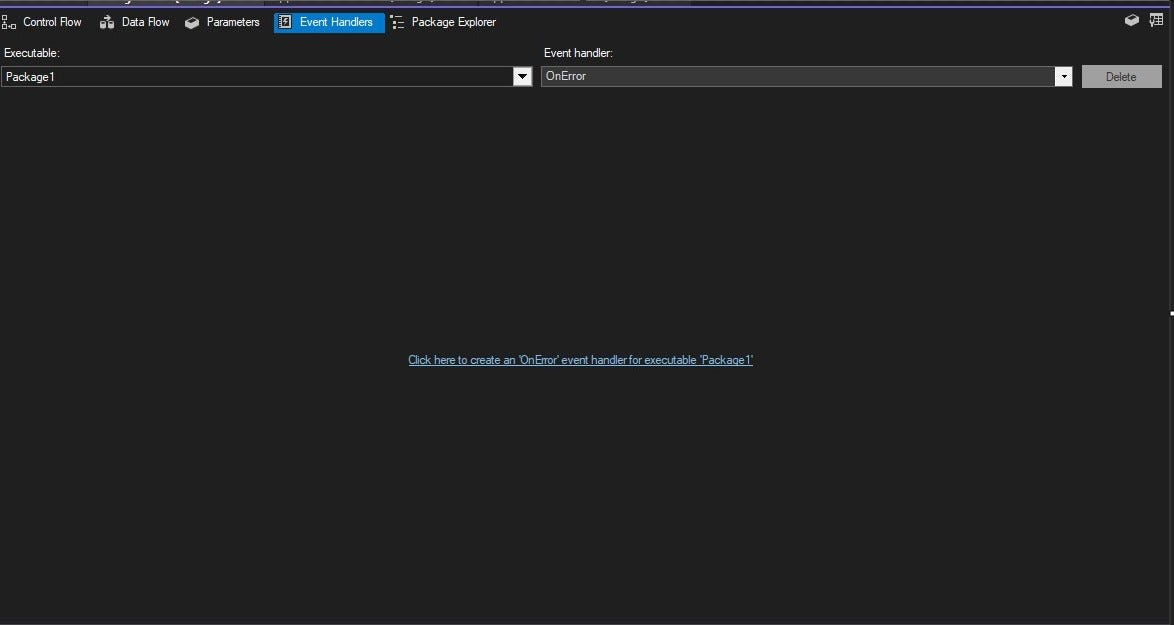
Step 3: Drag a Send Mail task onto the canvas and name it appropriately. I right clicked on the task itself to rename it, but you can also double click on it to open it’s editor and provide the name.
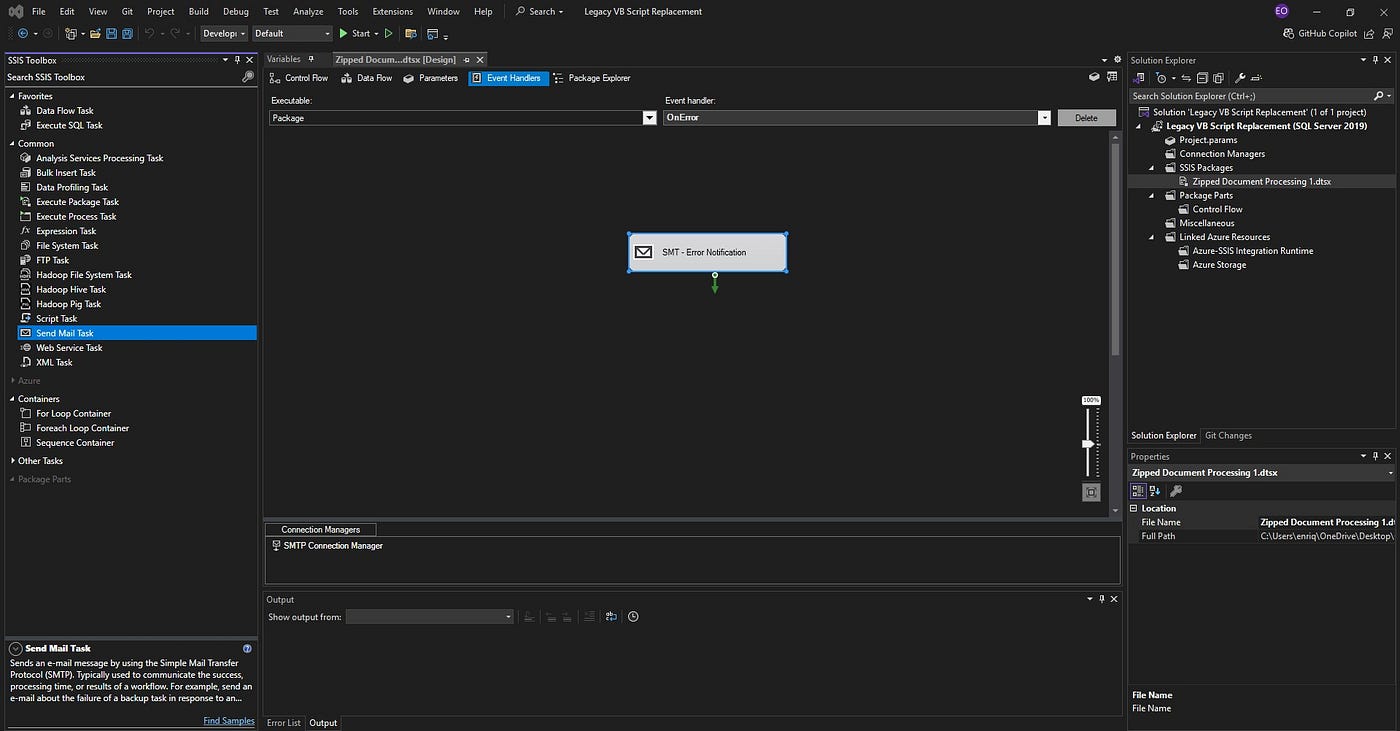
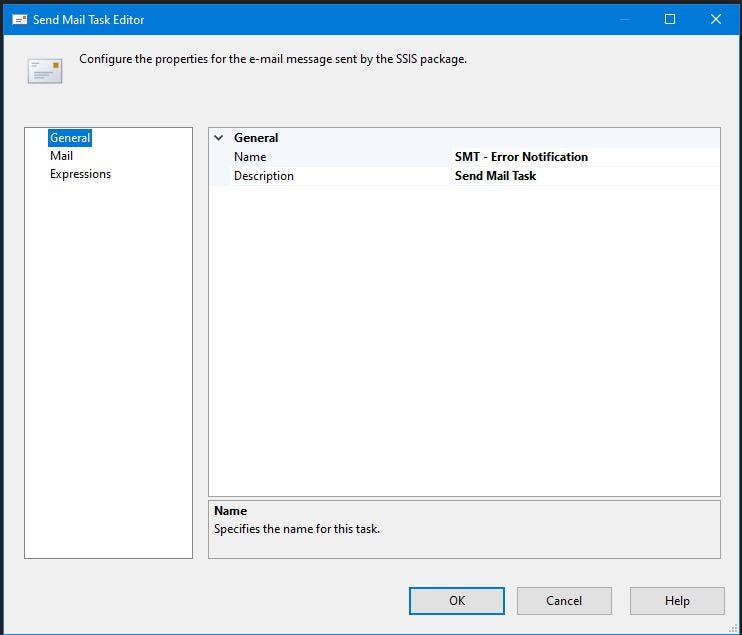
Step 4: Click on the task and configure each element. You can also define the name of the task on the General tab. Sound familiar?
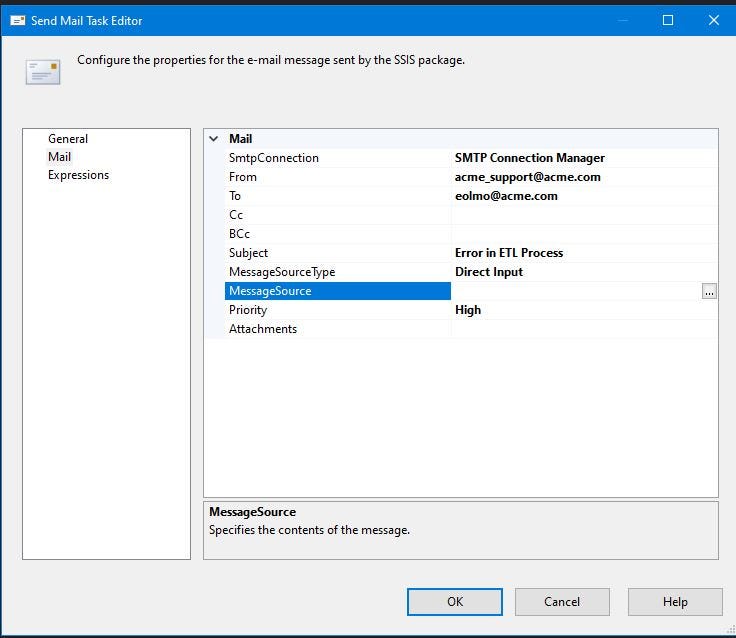
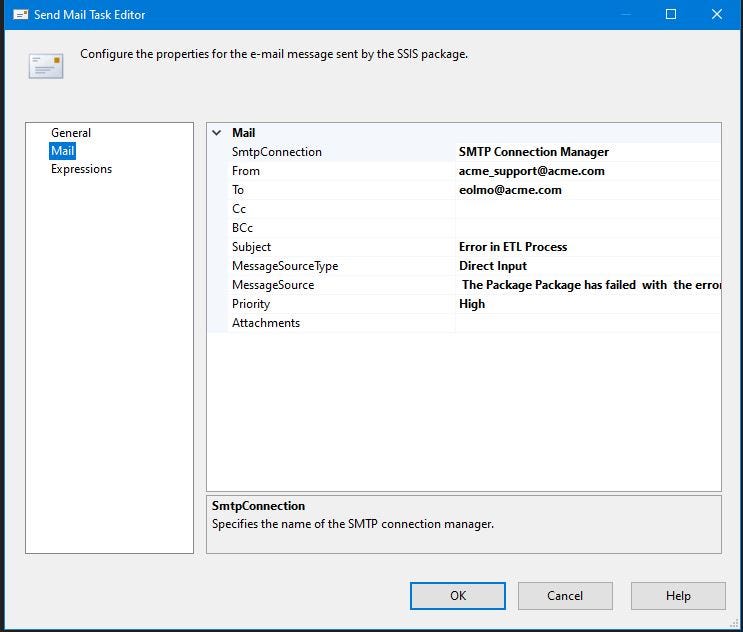
Step 5: Configure the Email Settings
- In the Send Mail Task editor, complete the following fields:
Step 6: We will use an expression to populate the message. Click on the Expressions tab on the left side of the window and then the ellipses to select the property and to enter the expression.
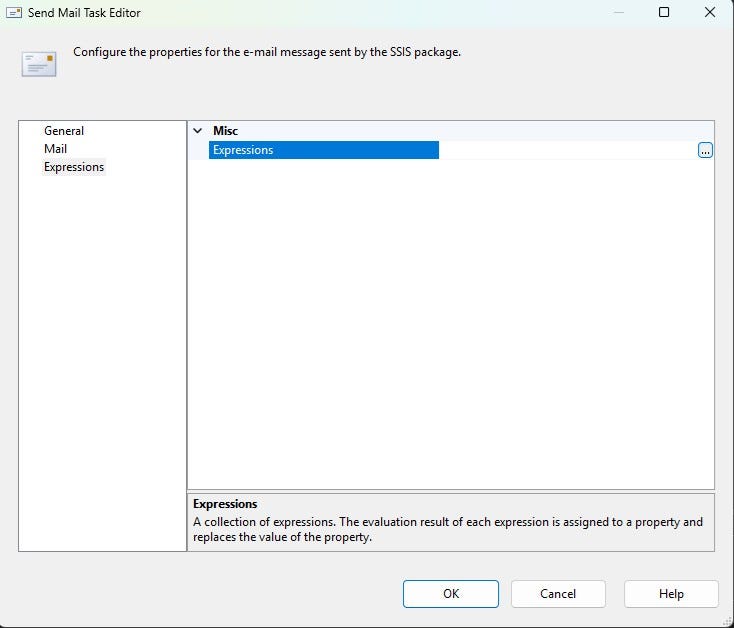
Step 7: Select Message Source as your property and click on the ellipses under expression. This will open your Expression Builder.
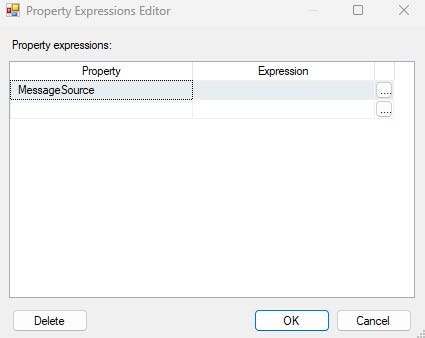
Step 8: With the Expression Builder open, copy and paste the expression below.
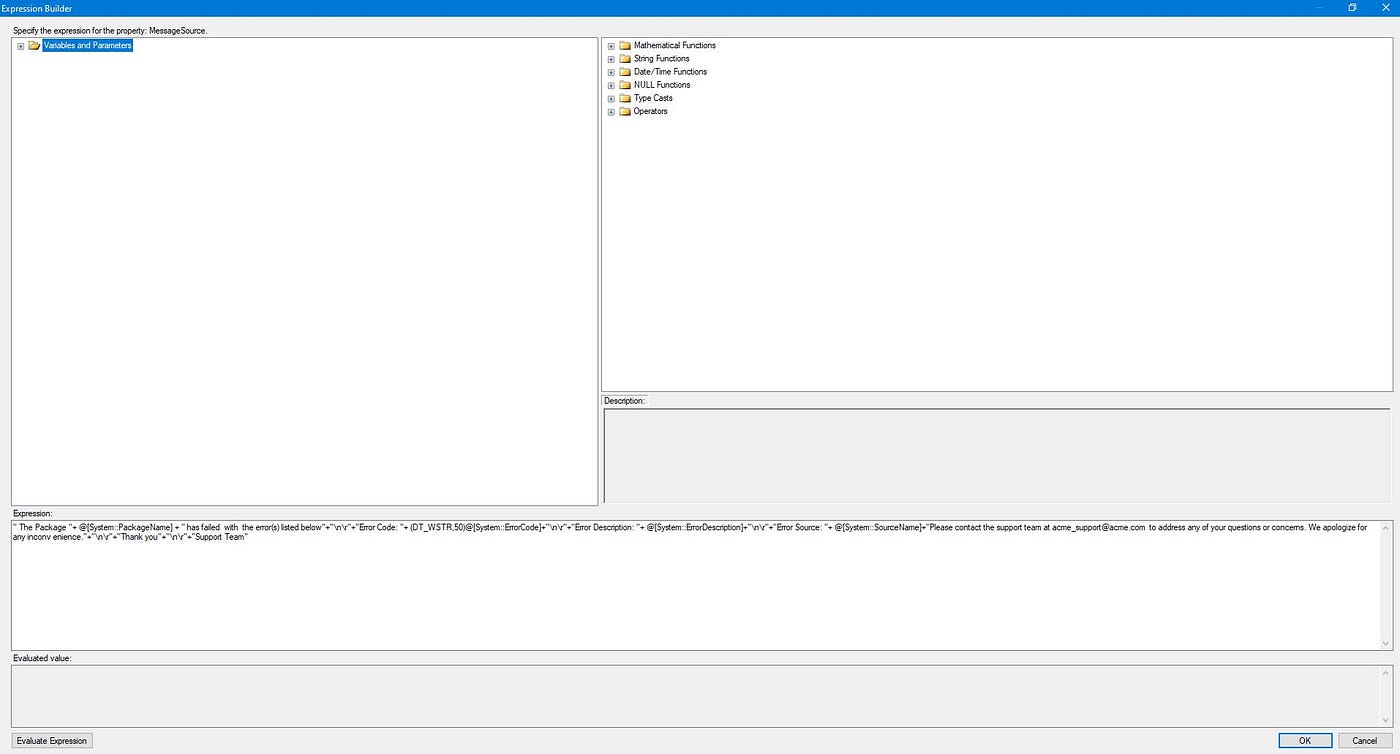
Yes, I can’t see it either. But here is the expression.
" The Package "+ @[System::PackageName] + " has failed  with  the error(s) listed below"+"\n\r"+"
Error Code: "+ (DT_WSTR,50)@[System::ErrorCode]+"\n\r"+"
Error Description: "+ @[System::ErrorDescription]+"\n\r"+"
Error Source: "+ @[System::SourceName]+"

Please contact the support team at acme_support@acme.com  to address any of your questions or concerns. We apologize for any inconv enience.
"+"\n\r"+"Thank you
"+"\n\r"+"Support Team"
Expression Explanation
I am sure you know exactly what this is doing. Allow me to explain.
A. “The Package “+ @[System::PackageName] + “ has failed with the error(s) listed below”: This part of the script is saying that a specific package has failed, and it will then show the name of the package that failed by pulling that information from the system variable @[System::PackageName].
B. “Error Code: “+ (DT_WSTR,50)@[System::ErrorCode]: This shows the error code associated with the failure. It is pulled from the system variable and converted into a string format.
C. “Error Description: “+ @[System::ErrorDescription]: This part provides a description of the error that happened, which is also pulled from the system variable.
D. “Error Source: “+ @[System::SourceName]: This part identifies the source or origin of the error, which is also pulled from the system variable. The value is the task name. It tells you exactly which task the error occurred in.
E. “Please contact the support team at acme_support@acme.com to address any of your questions or concerns. We apologize for any inconvenience.”: This message advises the person seeing the error to contact the support team for help and apologizes for any trouble caused by the failure.
“Thank you”: This is the boilerplate closing message from the support team. That is you or your team!
F. “\n\r”: These characters are used to create line breaks, making the error message easier to read.
Other system variables can be found by expanding the Variables and Parameters in the expression builder. Drag and drop to customize your message.
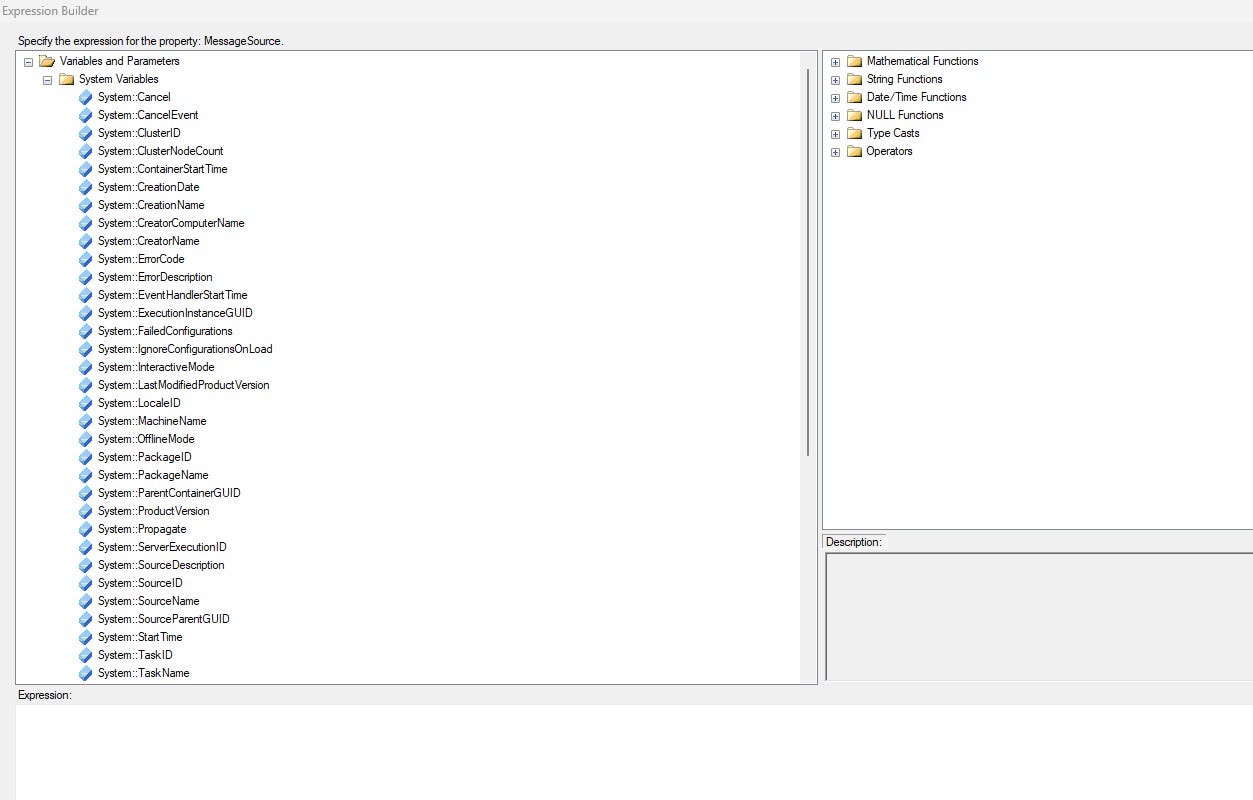
Variable window
Once your message is complete, click on the Evaluate Expression button to see a preview of your message . Then click the ‘OK’ button on both the Expression Builder window and the Send Mail Task editor.
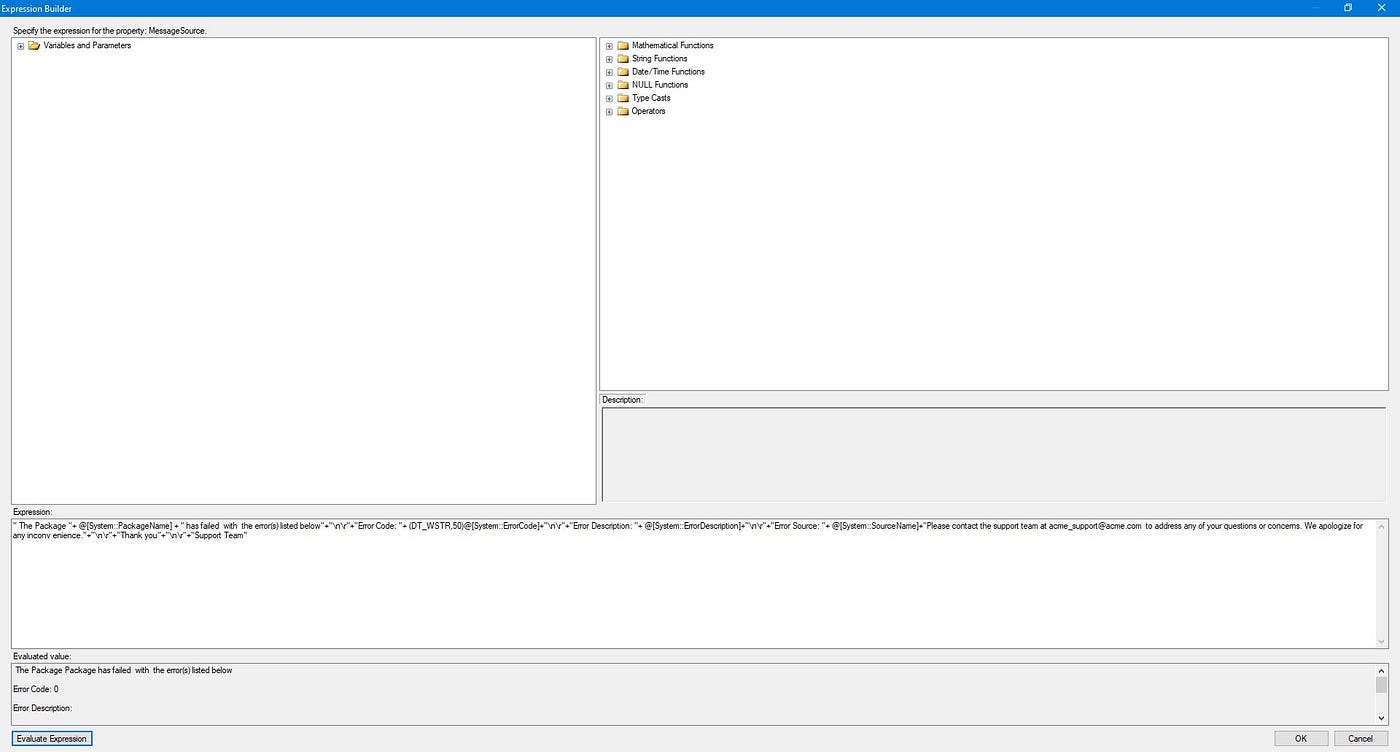
Expression Builder
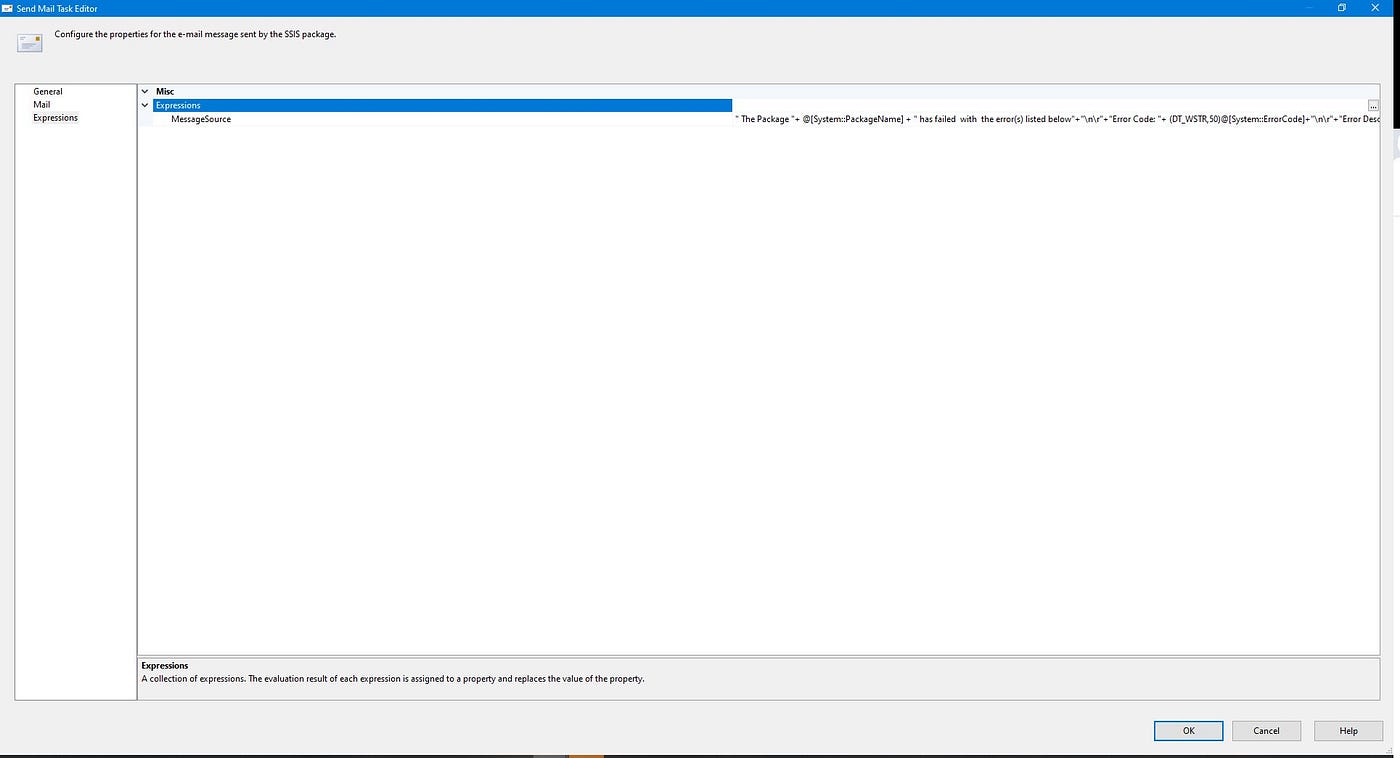
Step 9: Close out the Send Mail Task Editor after completing the configuration.
Step 10: Click on the Control Flow tab and run the package. Right click the package on the left and select Execute Package.
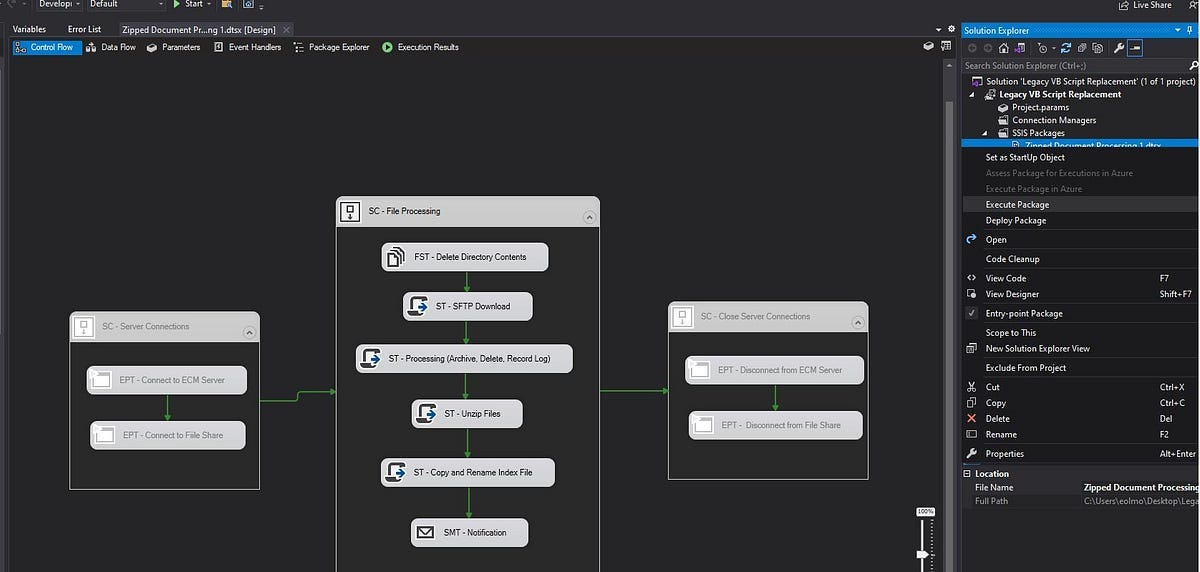
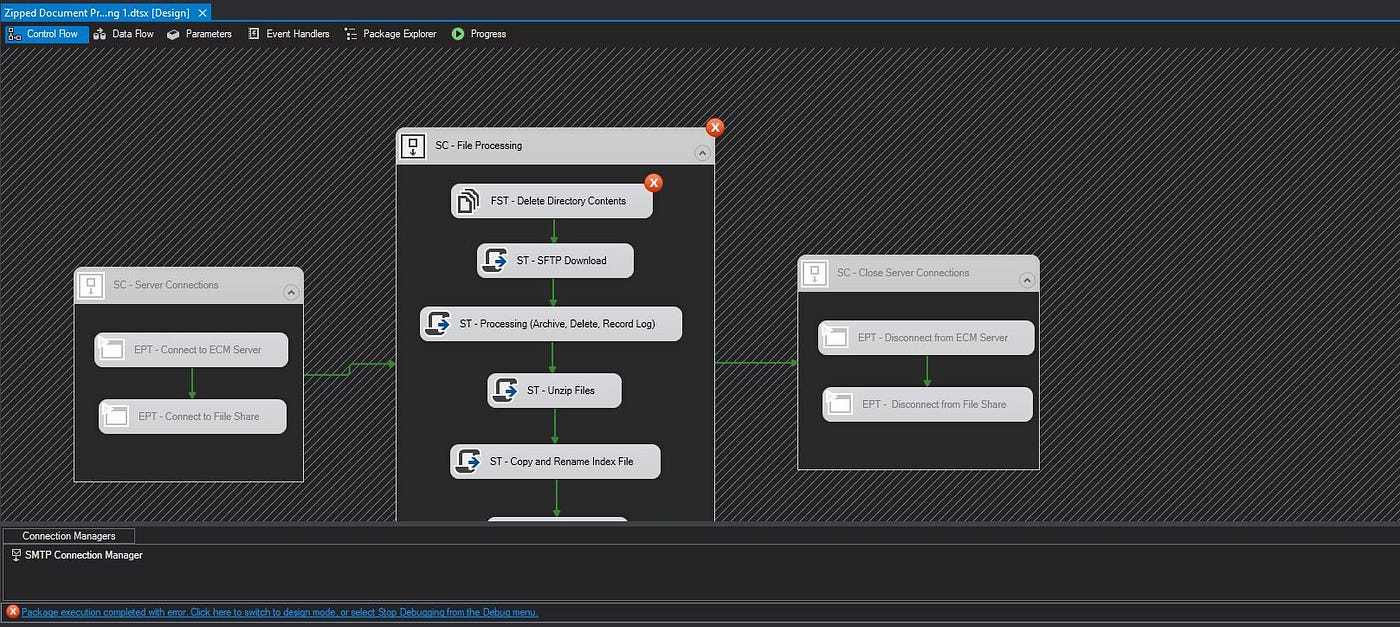
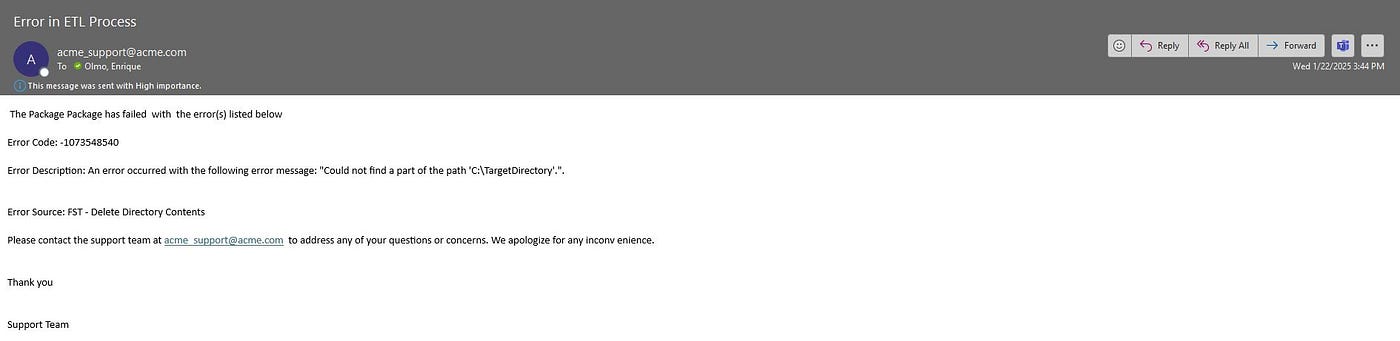
Note: I disabled the sequence container with the execute process tasks that connect and disconnect from the server and the file share. My user account already has access to each of these. There is no need to execute them. I also deleted the C:\TargetDirectory\ directory to trigger an error. I know what you are thinking. Shouldn’t we have verified that the directory existed before running the task? Yes you are absolutely correct. You can use a File System Task to create the directory at runtime. You can also configure it so that it uses the directory if it already exists. I simply wanted to trigger an error at runtime. This would trigger an error since the directory does not exist. See the method to my madness?
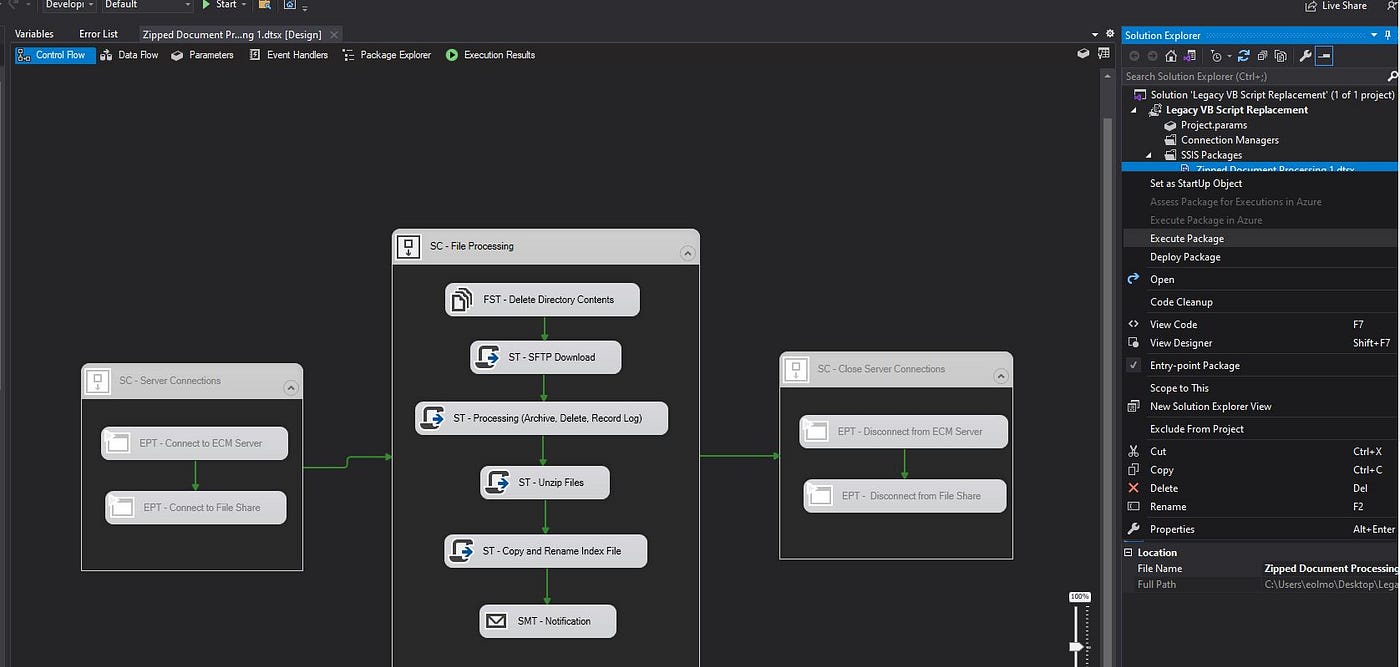
Running the package will trigger an error.
Step 10: You should now see that an email was delivered to the account you entered. The message will notify the user that an error occurred and provide the root cause of the error.
Takeaway
This article provides an introduction to setting up email notifications in SSIS. It explains the steps for creating both simple email notifications for successful executions and detailed error notifications when a package fails. The error notifications automatically capture error information (such as error code, description, and source) and send it to the recipient, providing insights into why the project failed.
메타데이터
- post_id
- dfea2da956e4
- slug
- using-a-send-mail-task-to-send-out-notifications-in-ssis-dfea2da956e4
- url
- https://medium.com/@olmo.enrique/using-a-send-mail-task-to-send-out-notifications-in-ssis-dfea2da956e4
- canonical_url
- https://medium.com/@olmo.enrique/using-a-send-mail-task-to-send-out-notifications-in-ssis-dfea2da956e4
- author_url
- https://medium.com/@olmo.enrique
- status
- ok
- fetched_at
- 2026-08-21 23:18:53